Table of Contents
Advertisement
Quick Links
Advertisement
Table of Contents

Related Manuals for Smeg UKC7172NP


Summary of Contents for Smeg UKC7172NP
- Page 1 Istruzioni per User Manual l’uso Fridge Frigo-Con‐ Freezer gelatore UKC7172NP...
-
Page 2: Table Of Contents
CONTENTS Safety information Hints and tips Safety instructions Care and cleaning Operation Troubleshooting First use Installation Daily use Technical information Subject to change without notice. SAFETY INFORMATION Before the installation and use of the appliance, carefully read the supplied instructions. The manufacturer is not responsible if an incorrect installation and use causes injuries and damages. -
Page 3: Safety Instructions
Do not use mechanical devices or other means to accelerate • the defrosting process, other than those recommended by the manufacturer. Do not damage the refrigerant circuit. • Do not use electrical appliances inside the food storage • compartments of the appliance, unless they are of the type recommended by the manufacturer. - Page 4 electrician to change the electrical • Do not freeze again food that has been components. thawed. • The mains cable must stay below the • Obey the storage instructions on the level of the mains plug. packaging of frozen food. •...
-
Page 5: Operation
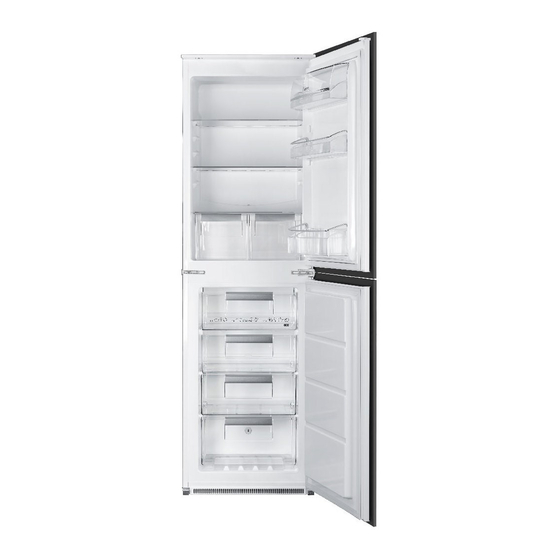
OPERATION Control panel Temperature indicator LED FastFreeze indicator FastFreeze button Temperature regulator ON/OFF button Switching on However, the exact setting should be chosen keeping in mind that the 1. Insert the plug into the wall socket. temperature inside the appliance depends 2. -
Page 6: First Use
FIRST USE Cleaning the interior CAUTION! Do not use detergents or abrasive powders, Before using the appliance for the first time, as these will damage the finish. the interior and all internal accessories should be washed with lukewarm water and some neutral soap to remove the typical smell of a brand-new product, then dried thoroughly. -
Page 7: Hints And Tips
Do not move the glass shelf above the vegetable drawer and Ice-cube production the bottle shelf to ensure correct air circulation. This appliance is equipped with one or more trays for the production of ice-cubes. Positioning the door shelves Do not use metallic instruments To permit storage of food packages of to remove the trays from the various sizes, the door shelves can be... -
Page 8: Care And Cleaning
wrapped in aluminium foil or polythene avoiding a rise in temperature of the bags to exclude as much air as possible. latter; • Bottles: these need a cap and should be • lean foods store better and longer than stored on the door bottle shelf, or (if fatty ones;... -
Page 9: Troubleshooting
Defrosting the freezer The equipment has to be cleaned regularly: 1. Clean the inside and accessories with The freezer compartment is frost free. This lukewarm water and some neutral soap. means that there is no build up of frost 2. Regularly check the door seals and when it is in operation, neither on the wipe clean to ensure they are clean and internal walls nor on the foods. - Page 10 What to do if... Problem Possible cause Solution The appliance does not oper- The appliance is switched off. Switch on the appliance. ate. The mains plug is not con- Connect the mains plug to nected to the mains socket the mains socket correctly. correctly.
- Page 11 Problem Possible cause Solution Water flows into the refrigera- The water outlet is clogged. Clean the water outlet. tor. Food products prevent that Make sure that food prod- water flows into the water ucts do not touch the rear collector. plate.
-
Page 12: Installation
Closing the door 3. If necessary, replace the defective door gaskets. Contact the Authorised 1. Clean the door gaskets. Service Centre. 2. If necessary, adjust the door. Refer to "Installation". INSTALLATION Positioning WARNING! This appliance must be earthed. This appliance can be installed in a dry, well The manufacturer declines any ventilated indoor where the ambient liability should these safety... - Page 13 1. Loosen and remove the upper pin and symbol or coloured green and the spacer. yellow. 2. Connect the wire coloured blue to the terminal either marked with the letter “N“ or coloured black. 3. Connect the wire coloured brown to the terminal either marked with the “L“...
- Page 14 Do a final check to make sure that: • All screws are tightened. • The magnetic seal adheres to the cabinet. • The door opens and closes correctly. If the ambient temperature is cold (i.e. in Winter), the gasket may not fit perfectly to the cabinet.
- Page 15 4 mm 44 mm 9. Attach the covers (C, D) to the lugs and the hinge holes. 7. Attach the appliance to the niche with 4 screws. 10. Install the vent grille (B). 11. Attach the hinge covers (E) to the hinge. 8.
- Page 16 ca. 50 mm 8 mm 90° 21 mm 90° ca. 50 mm 21 mm 15. Push the part (Hc) on the part (Ha). 20. Place the small square on the guide again and fix it with the screws supplied. 21. Align the kitchen furniture door and the appliance door by adjusting the part (Hb).
-
Page 17: Technical Information
TECHNICAL INFORMATION Technical data Dimensions of the recess Height 1780 Width Depth Rising time Hours Voltage Volts 230 - 240 Frequency The technical information are situated in the rating plate, on the external or internal side of the appliance and in the energy label. ENVIRONMENT CONCERNS dispose appliances marked with the symbol Recycle the materials with the symbol...
Need help?
Do you have a question about the UKC7172NP and is the answer not in the manual?
Questions and answers