Table of Contents
Advertisement
Quick Links
Advertisement
Table of Contents

Related Manuals for Verizon Salute


Summary of Contents for Verizon Salute
- Page 1 User Guide...
- Page 2 Verizon Wireless Salute CDMA 1X Digital Mobile Phone User Manual...
-
Page 3: All Rights Reserved
Copyright © 2010 ZTE Corporation All rights reserved No part of this publication may be excerpted, reproduced, translated or utilized in any form or by any means, electronic or mechanical, including photocopying and microfilm, without the prior written permission of ZTE Corporation. -
Page 4: Table Of Contents
Introduction ... 10 Overview ...10 What’s Included ...10 Technical Specifications ...11 Phone Overview ...12 Key Definitions...13 Idle Mode...15 Main Display Icons ...16 Get Started With Your Phone... 21 Battery ...21 Install the Battery ...21 Charge the Battery...22 Remove the Battery ...23 Power On/Off Your Phone...23 Lock/Unlock the Keypad...24 Connect to the Network ...25... - Page 5 Use the Last Number Dialed ... 35 Use the Number from the Call History... 35 Make an International Call... 36 Caller ID Function... 36 Wait/Pause Feature... 36 Use Speed Dials... 37 Answer Voice Calls ... 38 In-Call Features ... 38 Three-Way Call ...
- Page 6 How to Send a Picture Message...59 How to Send a Voice Message...61 Inbox...63 Sent ...66 Drafts...68 Voicemail...68 Email ...69 Chat...70 Change Message Settings ...70 Erase Messages...74 Recent Calls... 75 Missed ...75 Received ...75 Dialed ...75 All ...75 View Timers...76 Media Center... 77 Search ...77 Tunes &...
- Page 7 11. Bluetooth... 89 Turn Bluetooth On/Off... 89 Add New Device ... 90 Bluetooth Settings... 93 12. Settings & Tools... 94 My Verizon... 94 Master Volume... 95 Tools ... 95 Voice Commands ... 95 Calculator ... 101 Ez Tip Calculator ... 102 Calendar...
- Page 8 Bluetooth Menu ...107 Sounds Settings ...107 Easy Set-up ...107 Call Sounds ...107 Alert Sounds ...108 Keypad Volume...109 Digit Dial Readout ...109 Service Alerts...110 Power On/Off ...110 Display Settings...111 Easy Set-up ...111 Banner ...112 Backlight ...112 Wallpaper...113 Display Themes ...113 Main Menu Settings ...114 Dial Fonts...115 Menu Font Type...115 Menu Font Size...116...
- Page 9 Location... 120 Current Country... 120 Security ... 121 System Select ... 123 NAM Select ... 124 Auto Key Lock ... 124 Call Settings... 125 Answer Options ... 125 Auto Retry ... 126 TTY Mode ... 126 One Touch Dial ... 127 Voice Privacy...
- Page 10 Third Party Equipment...138 Efficient Use ...138 Radio Frequency (RF) Energy...138 Emergency Services...140 FCC Compliance ...140 Use Your Phone with a Hearing Aid Device 142 Turn on the HAC Setting ...143 Copyright Notice ...144 14. Glossary ... 145 15. Troubleshooting ... 146 16.
-
Page 11: Introduction
Your phone contains the most up to date information. What’s Included Your Verizon Wireless Salute contains the following components. Check the box carefully to ensure all items are present. Salute... -
Page 12: Technical Specifications
Handset Type Dimensions (L x W x H) Weight Continuous Standby Time Continuous Talk Time Salute 102 × 51 × 14 mm (4.0 × 2.0 × 0.55 in.) approximately 100 g (3.53 oz) including battery 220 hours (subject to the... -
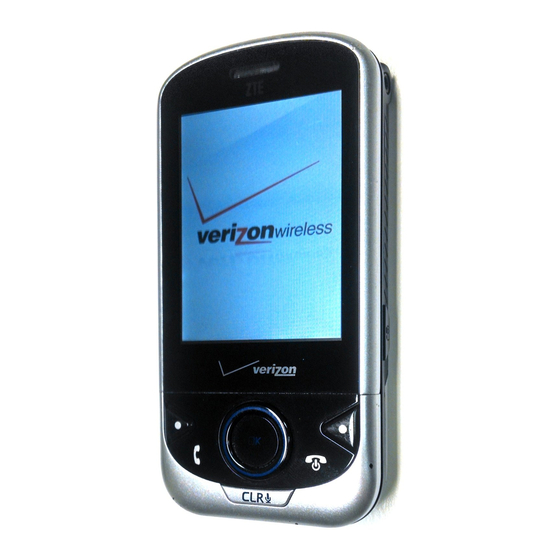
Page 13: Phone Overview
Phone Overview Earpiece LCD Screen Directional Key Left Soft Key Send Key CLR/Voice Commands Key Voicemail Key Wrist Strap Eyelet OK Key Right Soft Key End Key Vibration Mode Key Microphone 2.5mm Headset Jack Camera Key... -
Page 14: Key Definitions
Volume Keys Speakerphone Key Accessory/ USB Charger Port Key Definitions Directional Key – The Directional Key allows you to scroll through phone menu options and provides a shortcut to phone functions from idle mode. OK Key – Allows you to access the menu screen. - Page 15 Send Key – Press to make or receive a call. From idle mode, press to access the All Calls list. CLR/Voice Commands Key – Delete characters or entire words during text entry mode. Press to return to the previous menu or screen. Press and hold to launch Voice Commands from idle mode.
-
Page 16: Idle Mode
Idle Mode The start screen indicates that your device is in Idle Mode. 1. Signal strength — The strength of the signal received by the device is indicated by the number of bars displayed. 2. Message — Press the Left Soft Key to select this option. 3. -
Page 17: Main Display Icons
5. Battery strength — Four bars indicate a fully charged battery. 6. Location — Location information sharing mode. Your phone can be customized via the menu. Each function can be accessed by scrolling with the Directional Key or by pressing the number that corresponds with the menu item. - Page 18 Airplane Mode: Indicates Airplane Mode is on. Roaming: Indicates the phone is outside your home network and roaming. SSL: Indicates the secure socket layer (SSL) is transmitting encrypted data over the internet. Voice Privacy: Indicates voice privacy feature is on. Data Call: Indicates a data call is in progress.
- Page 19 Bluetooth Active: Indicates your phone is connected to another Bluetooth device and sending or receiving data. Battery Level: Indicates the battery level. More bars indicate stronger battery power. Bottom Display Icons All Sounds Off: Indicates all sounds are silenced including incoming call ringtone, message alert, alarm sound and other alert sounds.
-
Page 20: Other Display Icons
Other Display Icons Dialed Call Received Call Missed Call Mobile 1 Mobile 2 Home Work Email 1 Email 2 Group Picture Ringtone Speed Dial Voice Dial New/Unread Message Opened/Read Message Message Delivered Incomplete Delivery... - Page 21 Sent Message, Delivery Failed Message Locked Text Message Draft Multimedia Message Draft Priority Corrupt Message Pending Message Send Unread MMS Read MMS Sent Message Unread WAP PUSH Read WAP PUSH Multiple Message Delivered Multiple Message Failed Multiple Message Incomplete Multiple Message Pending Multiple Message Sent Note: To view the icon glossary, please slide the phone up and press the OK Key [MENU]→Settings &...
-
Page 22: Get Started With Your Phone
2. Get Started With Your Phone This chapter outlines the steps required to set up your phone, power on and activate on your service provider’s network. Follow the procedure below step-by-step to get started. Battery Install the Battery... -
Page 23: Charge The Battery
1. Insert the battery by aligning the contacts (1) and then gently press it down until it clicks into place (2). 2. Replace the battery cover and snap it into place (3). Charge the Battery Your phone is powered by a rechargeable battery. The battery is not fully charged when you purchase your phone, but there may be enough power in the battery to turn the phone on. -
Page 24: Remove The Battery
2. Plug the USB data cable into the phone's USB Charger Port (as shown in the above illustration) and the wall adapter end into an electrical outlet. Remove the Battery If you need to remove your phone’s battery, please follow the procedure indicated below: 1. -
Page 25: Lock/Unlock The Keypad
Once you have activated your handset, the default lock code will be the last 4 digits of your phone number. It is also possible that the lock code has been updated by the user. If the updated lock code is lost or forgotten, please contact your service provider. -
Page 26: Connect To The Network
Connect to the Network After your phone is powered on, it will automatically search for the network. Activate Your Phone Please contact your service provider for more information. Menu Outline Contacts 1. New Contact 2. Contact List 3. Backup Assistant 4. - Page 27 3. Sent 4. Drafts 5. Voicemail 6. Email 1. Mobile Email 2. Mobile Web Email 7. Chat Recent Calls 1. Missed 2. Received 3. Dialed 4. All 5. View Timers Search Media Center 1. Search 2. Tunes & Tones 1. Get New Ringtones 1.
- Page 28 3. My Sounds 1. Record New 3. Pictures 1. Get New Pictures 1. Get New Applications 2. My Pictures 3. Take Picture 4. Online Album 4. Games 1. Get New Applications 5. Mobile Web 6. Browse & Download 1. Get New Applications 7.
- Page 29 Settings & Tools 1. My Verizon 2. Master Volume 3. Tools 1. Voice Commands 2. Calculator 3. Ez Tip Calculator 4. Calendar 5. Alarm Clock 6. Stop Watch 7. World Clock 8. Notepad 4. Bluetooth Menu 1. Add New Device 5.
- Page 30 1. Tone 1. Get New Ringtones 1. Get New Applications 2. Vibrate 3. Reminder 2. Multimedia Message 1. Tone 1. Get New Ringtones 1. Get New Applications 2. Vibrate 3. Reminder 3. Voicemail 1. Tone 1. Get New Ringtones 1. Get New Applications 2.
- Page 31 5. Digit Dial Readout 6. Service Alerts 1. ERI 2. Minute Beep 3. Call Connect 4. Software Update 7. Power On/Off 1. Power On 2. Power Off 6. Display Settings 1. Easy Set-up 2. Banner 1. Personal Banner 2. ERI Banner 3.
- Page 32 4. Reset Menu Settings 1. Menu Layout 2. Menu Items 3. Item Positions 4. All 7. Dial Fonts 8. Menu Font Type 9. Menu Font Size 0. Clock Format 7. Phone Settings 1. Airplane Mode 2. Set Shortcuts 1. Set My Shortcuts 1.
- Page 33 1. Adapt Voice 4. Prompts 1. Mode 2. Audio playback 5. About 4. Language 5. Location 6. Current Country 7. Security 1. Edit Codes 1. Phone Only 2. Calls & Services 2. Restrictions 1. Location Setting 3. Phone Lock Setting 4.
- Page 34 5. Voice Privacy 6. DTMF Tones 7. Assisted Dialing 8. Hearing Aid Mode 9. Phone Memory 1. Memory Usage 2. My Pictures 3. My Ringtones 4. My Sounds 5. My Contacts 0. Phone Info 1. My Number 2. SW/HW Version 3.
-
Page 35: Basic Operations
3. Basic Operations Make Voice Calls Use the Keypad 1. Slide the phone up and enter a phone number including full area code by using the alphanumeric keypad. If an incorrect character is entered, use the CLR Key to delete the digit. Press and hold the CLR Key to erase all digits. -
Page 36: Use The Last Number Dialed
make a call. Note: Selecting the Contact entry and then pressing the Send Key will dial the Default Number of the Contact entry automatically. If multiple numbers are saved in the Contact List, select the Contact entry, then select the phone number you want to dial. -
Page 37: Make An International Call
Make an International Call 1. Slide the phone up, then press and hold the * Key. The + required for international calls will be displayed. 2. Enter the country code, area code, and phone number then press the Send Key. 3. -
Page 38: Use Speed Dials
95, 96, 97, 98 and 99: Speed Dial entries 95(#Warranty Center), 96(#DATA), 97(#BAL), 98(#MIN) and 99(#PMT) are already assigned to Verizon Wireless Account Information. Three-Touch Dialing: 100-999: Slide the phone up and press the first and second... -
Page 39: Answer Voice Calls
411: Speed Dial entry 411 (Directory Assistance) is already assigned. Note: If you have not already assigned a Speed Dial to the selected key, the phone will prompt that no Speed Dial has been assigned. For more information on using Speed Dials, please refer to Section 5: Contacts-Speed Dials in this manual. - Page 40 Speakerphone Your phone has a speakerphone function that allows you to talk hands-free with the phone’s speaker. 1. During a call, press the Speakerphone Key on the left side of your phone to activate or deactivate speakerphone. Advanced Features Press the Right Soft Key [Options] during a call to enter the advanced in-call features.
-
Page 41: Three-Way Call
2. To disable Vibration Mode, press and hold the # Key again. "PHONE SET TO NORMAL" appears on the display. Three-Way Call Your phone has a three-way calling feature, which enables you to have conference calls with two parties. You can activate this function by following the procedure below: 1. - Page 42 Note: When the End Key is pressed, both the active and holding user will be disconnected. If the holding user remains on the call, your phone will ring again. You may accept or reject the call. Note: The three-way call and call waiting features require network support and may result in additional charges.
-
Page 43: Enter Text
4. Enter Text Text Input Key Functions Function Left Soft Key Directional * Key # Key Description Press to select text entry mode. Move the cursor up and down, left and right during text editing. Press to switch among lowercase, standard and uppercase entry mode. -
Page 44: Text Input Modes
Text Input Modes During text entry, the current input mode is indicated above the Left Soft Key (Abc is the default). Press the Left Soft Key to select the input mode. Press the Left Soft Key and select Symbols or Quick Text to enter the symbols or add pre-stored quick texts. - Page 45 Display Symbol English Standard Word predictive mode English Uppercase Word predictive mode English Lowercase Word predictive mode Standard Alphabetic mode Uppercase Alphabetic mode Lowercase Alphabetic mode Numeric mode Enter Text Using Word Mode Word mode allows you to input messages or text quickly with the built-in predictive dictionary.
- Page 46 In Spanish word mode, the text entering is the same as in English word mode. Enter Text Using Alphabetic Mode In Alphabetic mode, the alphanumeric keys are used to enter letters and numbers. 1. In the text input field, press the Left Soft Key and select Abc or ABC, then press the OK Key.
- Page 47 Symbol Mode Allows you to enter symbols. 1. From the text entry screen, press the Left Soft Key and select Symbols, then press the OK Key. 2. Select the symbol you wish to enter by highlighting it using the Directional Key and pressing the OK Key to select.
-
Page 48: Contacts
This menu allows you to save and manage contact information. To access Contacts from idle mode, slide the phone up and press the OK Key [MENU]→Contacts. Shortcut: To quickly access the contact list, slide the phone up and press the Right Soft Key [Contacts]. New Contact 1. -
Page 49: Edit Contact Entries
1. Slide the phone up and press the Right Soft Key [Contacts] and select the contact you would like to edit. 2. Press the Left Soft Key [Edit]. 3. Edit the information and press the OK Key [SAVE] to save. Edit contact entries Add a phone number from idle mode 1. -
Page 50: Default Numbers
Default numbers Change the default number 1. Slide the phone up and press the Right Soft Key [Contacts] and select the contact you would like to edit. 2. Press the Left Soft Key [Edit]. 3. Highlight the number you would like to set as the default and press the Right Soft Key [Options]. -
Page 51: Contact List
3. Select the desired number type and press the CLR Key to delete the stored phone number. Press the OK Key [SAVE] to save. Delete a contact entry 1. Slide the phone up and press the Right Soft Key [Contacts] and select the contact you would like to delete. -
Page 52: Backup Assistant
New Picture Message: Send a picture message to the contact. New Voice Message: Send a voice message to the contact. Set As ICE Contact: Set the contact as an ICE (In Case of Emergency) contact. Call: Make a call to the contact (Default number). Manage Contacts: You can mark the desired contacts in the list to erase, lock or unlock. -
Page 53: Groups
2. Follow the on-screen directions to continue. Groups This menu allows you to add contacts to the groups. You can add, rename, delete the groups or send a message to each contact in the selected group. 1. Slide the phone up and press the Right Soft Key [Contacts], then select the Contact you want to add to a group. -
Page 54: In Case Of Emergency
2. Press the Left Soft Key [Edit]. 3. Select the phone number you want to add to Speed Dial and press the Right Soft Key [Options]. 4. Select Set Speed Dial and press the OK Key, choose a Speed Dial location then press the OK Key [SET]. 5. - Page 55 Add an ICE Contact 1. Slide the phone up and press the OK Key [MENU], select Contacts and press the OK Key. Select In Case of Emergency and press the OK Key. 2. Select Contact 1, Contact 2 or Contact 3 and press the OK Key [ADD].
- Page 56 Re-assign emergency contacts 1. Slide the phone up and press the OK Key [MENU], select Contacts and press the OK Key. Select In Case of Emergency then press the OK Key. 2. Select the contact you want to re-assign and press the Right Soft Key [Options].
-
Page 57: My Name Card
3. Select a desired note and press the Right Soft Key [Erase]. Select Yes and press the OK Key to delete the note. 4. Select a desired note and press the OK Key [VIEW] to view the entry details. 5. Press the OK Key [EDIT] to make adjustments and press the OK Key [SAVE] to save after editing. - Page 58 3. Complete the remaining message fields as desired and press the OK Key [SEND] to send the message. Send My Name Card with Voice Message 1. Slide the phone up and press the OK Key [MENU], select Contacts and press the OK Key. Select My Name Card then press the OK Key.
-
Page 59: Messaging
6. Messaging Your phone is able to send text, picture and voice messages. To access Messaging, slide the phone up and press the OK Key [MENU]→Messaging. Shortcut: To quickly access Messaging, slide the phone up and press the Left Soft Key [Message] in idle mode. New Message How to Send a Text Message 1. -
Page 60: How To Send A Picture Message
Recent Calls: Add the recipient from the recent calls list. Groups: Add the recipient from the group list. To Contacts: If a phone number or email address is entered in the field, add it to a new contact, or update an existing contact with it. - Page 61 2. In the To field, enter the phone number or email address of the recipient and press the OK Key. 3. Press the Directional Key down and enter the message in the Text field. 4. Press the Directional Key down to highlight the Picture field, press the Left Soft Key [My Pics] to select a picture from the MY PICTURES folder, and then press the OK Key to add a picture.
-
Page 62: How To Send A Voice Message
Insert Quick Text: Insert already written sentences into the message (available for the Text and Subject fields). Add Slide: Add a slide to the message. Add Signature: Add the signature to the message (available for the Text and Subject fields). Priority Level: Set the priority level of the message to High or Normal. - Page 63 3. Enter the phone number or email address of the recipient and press the OK Key. Or press the Right Soft Key [Add] to access the following options. From Contacts: Search for a phone number which is stored in the contacts list. Recent Calls: Search for a phone number which is stored in the recent calls list.
-
Page 64: Inbox
Priority Level: Set the level of the priority to High or Normal. Remove Recording: Remove inserted recorded voice memo in the Voice field. Remove Name Card: Remove inserted name card in the Name Card field. Cancel Message: Cancel the message editing and go back to the previous menu. - Page 65 3. When viewing the message, press the Right Soft Key [Options] to display the pop-up menu. This menu may differ according to TXT message, Picture message and Voice message. Please refer to the actual menu on the phone. Play Again: Play a received Voice message or Picture message with audio attachment(s).
- Page 66 Save Quick Text: Save the first 100 characters in the message to Quick Text. Lock/Unlock: Lock or unlock the message to prevent accidental deletion. Add to Contacts: Save the contact number or email address of the received message to the contact list or add to an existing contact.
-
Page 67: Sent
4. Press the Right Soft Key [Options] to display the pop-up menu. Erase: Erase the messages grouped by the highlighted contact. Add To Contacts: Save the contact number or email address of the received message to the Contact List or add to an existing contact. Manage Messages: Mark the desired message(s) or all messages in the Messages folder to erase them, lock/unlock them or mark them as... - Page 68 2. Press the Directional Key up or down to highlight the desired message. 3. Press the OK Key [OPEN] and view the message. 4. When viewing the message, press the Right Soft Key [Options] to display the pop-up menu. Play Again: Play a sent Voice message or Picture message with audio attachment(s).
-
Page 69: Drafts
Drafts The Drafts folder contains unfinished text messages, picture messages and voice messages. In this folder you can complete and send your messages. 1. Slide the phone up and press the Left Soft Key [Message], select Drafts and press the OK Key. Note: You can also press the OK Key [MENU]→... -
Page 70: Email
You should set up your voice mailbox and personal greeting as soon as your phone is activated. For more information, contact your service provider. Check your voicemail box 1. To dial your voicemail box directly, slide the phone up and enter *86 and then press the Send Key. Shortcut: In idle mode, press and hold 1 to access Voicemail. -
Page 71: Chat
1. Slide the phone up and press the Left Soft Key [Message], select Email and press the OK Key. 2. Select one of the following options and press the OK Key. Mobile Email: To connect Brew Smartlink. Mobile Web Mail: To connect WAP Browser. 3. - Page 72 2. Select one of the settings below and press the OK Key to select it. Inbox View Set to sort the messages in your inbox by Time or Contact. Choose the desired setting and press the OK Key. Inbox view by Time: The received and sent messages are separated into Inbox and Sent folders.
- Page 73 Off: The phone will prompt that the memory is full and you need to delete unwanted messages when the Inbox is full and a new message arrives. Messaging Font Size Select Normal or Large and press the OK Key. TXT Auto View Select On or Off and press the OK Key.
-
Page 74: Delivery Receipt
the OK Key [SAVE]. 3. To move the saved quick text, press the Right Soft Key [Options], select Move and press the OK Key. Select the desired location and press the OK Key [SAVE]. 4. To erase a saved quick text, press the Left Soft Key [Erase]. -
Page 75: Erase Messages
2. If On is selected and the sent message is received by the recipient successfully, the icon for the sent message in the Sent box changes and the delivery time is added into the sent message information. Erase Messages You can delete the messages in Inbox, Sent or Drafts folders. -
Page 76: Recent Calls
7. Recent Calls Your phone has a call history feature that automatically stores information about missed, received and dialed calls. You may press the Send Key as a shortcut to access the ALL CALLS list from idle mode. Slide the phone up and press the OK Key [MENU], select Recent Calls and press the OK Key. -
Page 77: View Timers
Press the Left Soft Key [Message] and select New TXT Message/New Picture Message/New Voice Message, then press the OK Key. Messages will be sent to the highlighted number. Press the Right Soft Key [Options] and select: Save To Contacts: Add the highlighted entry to the contact list. -
Page 78: Media Center
8. Media Center Media Center function allows you to record and play sounds, take and view pictures and use Mobile Web to access news, sports, weather, etc. It also allows you to download ringtones, pictures, games and other various applications on your phone. Slide the phone up and press the OK Key [MENU] →Media Center to access the Media Center menu. -
Page 79: Tunes & Tones
Tunes & Tones Get New Ringtones 1. Slide the phone up and press the OK Key [MENU]→ Media Center→Tunes & Tones. 2. Press the OK Key [Get New Ringtones]. 3. Press the OK Key [Get New Applications] to download various ringtones. My Ringtones To play and use the ringtones 1. -
Page 80: My Sounds
4. Press the Left Soft Key [Set As] and you can set the sound as a Ringtone, Contact ID or Alert Sounds (for All Messages, TXT Message, Multimedia Message or Voicemail) by pressing the OK Key. My Sounds To record a new sound 1. -
Page 81: Pictures
To Online Album: Upload the selected sound to Online Album. Rename: Rename the sound file. Lock/Unlock: Lock or unlock the sound file. Erase: Delete the highlighted sound file. Erase All: Delete all unlocked sound files. File Info: Displays information for the selected sound. -
Page 82: Take Picture
2. Highlight a picture, press the OK Key [VIEW] to view 3. Highlight a picture, press the Left Soft Key [Erase], select Yes and press the OK Key to delete the picture. 4. Press the Right Soft Key [Options] to display the pop-up menu: Send: Send the picture via Picture Message, To Online Album, or Via Bluetooth. - Page 83 Shortcut: Slide the phone up and press the Camera Key to turn on the camera. 2. Press the Directional Key up or down to adjust the brightness. Press the Directional Key left or right to zoom in and out (except for the 1280X960 resolution mode).
-
Page 84: Online Album
7. Press the OK Key [SEND] to send it via picture message. Note: Please hold the phone sideways when you take pictures, so that the taken pictures saved in your phone are shown in the vertical orientation. Online Album 1. Slide the phone up and press the OK Key [MENU]→ Media Center→Pictures. -
Page 85: Mobile Web
Remove downloaded games 1. While in the Games menu, highlight the game you want to remove. 2. Press the Right Soft Key [Options], select Erase and press the OK Key. Select Yes and press the OK Key to delete the game. Mobile Web Mobile Web feature allows you to access weather, sports updates, breaking news, and other information on your... -
Page 86: Browse & Download
Press the CLR Key to clear the last number, letter, or symbol you entered or return to the previous screen. Press and hold it to completely clear the input field. Press the number keys to select the items in a menu if they are numbered. -
Page 87: Extras
Extras 1. Slide the phone up and press the OK Key [MENU]→ Media Center. 2. Highlight Extras, and press the OK Key. 3. Press the OK Key [Get New Applications]. 4. Choose the application which you want to download from the list displayed on the screen and follow the prompts. -
Page 88: My Pictures
9. My Pictures The My Pictures feature allows you to view, manage pictures on your phone, and use them as Wallpaper or Picture ID. You can also take pictures and send them via Picture Message or Via Bluetooth. Slide the phone up and press the OK Key [MENU]→My Pictures to access My Pictures. -
Page 89: Vz Navigator
10. VZ Navigator ® The VZ Navigator allows you to get directions to locations when you're out and about. Using audible turn-by-turn directions, you can locate nearly fourteen million points of interest in the U.S.A. such as landmarks, restaurants and ATMs. VZ Navigator uses GPS positioning to tell you where you are, what's near you and to give you directions to places, quickly and easily. -
Page 90: 11. Bluetooth
Your phone is capable of connecting to a variety of Bluetooth wireless accessories. It allows you to transfer data between Bluetooth devices, talk with a Bluetooth wireless earphone, etc. You may create and store 25 pairings within the phone and connect to one device at a time. -
Page 91: Add New Device
Add New Device To add and pair with a new device 1. Slide the phone up and press the OK Key [MENU]→ Bluetooth→Add New Device to find a new compatible device. 2. If Bluetooth is off, you will be prompted to enable Bluetooth. - Page 92 When pairing with devices that do not have a predefined passkey, you can input 1 to 16 characters for the passkey. It is recommended that at least 8 characters be used for the passkey. To transfer Name Card to a paired Bluetooth device 1.
- Page 93 To transfer Pictures/Sounds to a paired Bluetooth device 1. When a Bluetooth device is paired with your phone, highlight it in the Bluetooth menu and press the Right Soft Key [Options] to display the pop-up menu. 2. Select Send Pictures/Sounds Via Bluetooth and press the OK Key.
-
Page 94: Bluetooth Settings
Select Device Info and press the OK Key to view the detailed information of the paired device. Note: Send Name Card Via Bluetooth, Send V-calendar Via Bluetooth, Send Pictures Via Bluetooth and Send Sounds Via Bluetooth are only available for Bluetooth enabled car kit, phone, computers and PDA devices. -
Page 95: 12. Settings & Tools
OK Key [MENU]→Settings & Tools to access the menu. My Verizon The My Verizon menu allows you to connect to the Verizon Wireless Mobile Web. You can check your subscription information ranging from your payment plan to your software upgrade or other available services. -
Page 96: Master Volume
Chg Vmail Pswd: Resetting your voicemail password. Find Store: Information about stores near you. Mobile2Mobile: Information about gift card options. FAQs: Frequently asked questions. Master Volume This feature allows you to set master volume of the phone. 1. Slide the phone up and press the OK Key [MENU]→ Settings &... - Page 97 1. Slide the phone up and press the OK Key [MENU]→ Settings & Tools→Tools→Voice Commands to access the function. Shortcut: Press and hold the CLR/Voice Commands Key to access the function. 2. The phone displays the Voice Commands menu and prompts you to say the following name of the command you want to use.
- Page 98 When using the Send command, speak clearly and say the name, number, or group exactly as it is entered in your contact list. Go To <Shortcut > To access a menu within the phone, say “Go to” command. For example, “Go to Calendar”. If no menu option is stated, a list of options will be provided.
-
Page 99: Confirm Choices
Redial To make a call to the last number that you called, say “Redial”. My Verizon The “My Verizon” command allows you to check out the detailed information about your Verizon Wireless account. Help The “Help” command allows you to view a general guideline about using Voice Commands. - Page 100 Automatic: The voice commands system will display a list only when there are alternative matches. Always Confirm: The voice commands system will always present you with a best match list of names or numbers. When multiple matches are found, the system will prompt you to choose from a list of matches.
- Page 101 1. Select Adapt Voice or Reset Voice and press the OK Key. Adapt Voice: Requires that you make recordings of your voice to customize the voice recognitions system. It will take a few minutes. Reset Voice: Once you finish the adaptation process, you can reset the adaptation to the factory default settings.
-
Page 102: Calculator
the same time. ♦ Read Out: Read out prompts, dialing digits and menus. ♦ Tones Only: Prompts you with a tone only. Audio playback: Allows audio playback to play through the speakerphone or through the earpiece. Select Speakerphone or Earpiece and press the OK Key. -
Page 103: Ez Tip Calculator
Ez Tip Calculator Ez tip calculator allows you to calculate the tip amount based on the tip rate and bill quickly and easily. 1. Slide the phone up and press the OK Key [MENU]→ Settings & Tools→Tools→Ez Tip Calculator. 2. From the Total bill field, enter the amount of the total bill. - Page 104 2. Press the Directional Key up, down, left or right to highlight the date of the event. 3. Press the Left Soft Key [Add] to add a new event. 4. Enter the subject, scroll down and press the Left Soft Key [Set] to set other event settings including Start &...
-
Page 105: Alarm Clock
Calendar options From the calendar view, press the Right Soft Key [Options] to access the calendar options pop-up menu: Weekly View/Monthly View: Choose to display the calendar in weekly view or monthly view. Go To Date: Select a date and press the OK Key to jump to the specified calendar date. -
Page 106: Stop Watch
3. From the Turn On/Off field press the Left Soft Key [Set] to turn the alarm On or Off. Scroll down to adjust the remaining settings, including Set Time, Repeat and Ringtone. 4. Press the OK Key [SAVE] to save the alarm. Alarm clock options From the Alarm Clock menu, highlight an existing alarm and press the Right Soft Key [Options] to display the... -
Page 107: World Clock
World Clock World clock displays the time in different time zones around the world, together with one or more cities, states, regions or countries in each time zone. 1. Slide the phone up and press the OK Key [MENU] →Settings & Tools→Tools→World Clock. 2. -
Page 108: Bluetooth Menu
Bluetooth Menu Please refer to Section 11: Bluetooth for detailed information. Sounds Settings Sounds Settings allow you to customize the sound properties of your phone. Easy Set-up This option allows you to set the Sounds Settings easily. 1. Slide the phone up and press the OK Key [MENU] →Settings &... -
Page 109: Alert Sounds
Call Ringtone: Choose a ringtone from the list for incoming calls by pressing the OK Key [SET], or select Get New Ringtones and press the OK Key to download new ringtones. Press the Left Soft Key [Play] to listen to the ringtone. Call Vibrate: Select On or Off and press the OK Key [SET] to set the vibration for incoming calls. -
Page 110: Keypad Volume
Alert: The phone will play the emergency tone for emergency dialing except when the master volume setting is set to Vibrate Only or All Sounds Off. Vibrate: The phone will vibrate for emergency dialing instead of playing the emergency tone. Off: The phone will disable the emergency tone and vibration. -
Page 111: Service Alerts
Service Alerts This option allows you to set the service alerts. 1. Slide the phone up and press the OK Key [MENU] →Settings & Tools→Sounds Settings→Service Alerts. 2. You can turn the alerts for the following options On or Off by pressing the OK Key [SET]. ERI: The phone will sound an alert when you go into service coverage areas if this option is set On. -
Page 112: Display Settings
1. Slide the phone up and press the OK Key [MENU]→Settings & Tools→Sounds Settings→Power On/Off. 2. Select Power On or Power Off and press the OK Key. 3. Select On or Off and press the OK Key [SET]. Note: When the master volume is set to Alarm Only or All Sounds Off, the phone will not sound when it is powered on or off. -
Page 113: Banner
Banner This option allows you to add your own personalized greeting that displays on your phone's screen in idle mode. 1. Slide the phone up and press the OK Key [MENU] →Settings & Tools→Display Settings→Banner. 2. Select from the following options and press the OK Key. -
Page 114: Wallpaper
On or Always Off. Highlight the desired setting and press the OK Key [SET]. Note: Setting the backlight to Always On may drain the battery life. Wallpaper This option allows you to choose the background image displayed in idle mode. 1. -
Page 115: Main Menu Settings
2. Press the Right Soft Key [Help] to view the help information. Press the Left Soft Key [Preview] to preview the highlighted display theme. 3. In the preview interface, press the Directional Key left or right to change the themes. Press the Left Soft Key [List] to go back to the theme list. -
Page 116: Dial Fonts
2. Then select the item in the list you want to replace it with, and press the OK Key [SET]. 3. Press the Left Soft Key [Done] to complete the setting. Position Menu Items 1. Select the item you want to move and press the OK Key [MOVE]. -
Page 117: Menu Font Size
2. Select VZW Fonts, Nadianne, or Zemke and press the OK Key [SET] to confirm. The default menu font type is VZW Fonts. Menu Font Size This option allows you to set the menu font size. 1. Slide the phone up and press the OK Key [MENU] →Settings &... -
Page 118: Phone Settings
Phone Settings You can edit phone settings to customize how to use your phone. Slide the phone up and press the OK Key [MENU] →Settings & Tools→Phone Settings. Airplane Mode When Airplane Mode is turned on, all wireless communications are disabled. You cannot use your phone to place or receive calls. - Page 119 To personalize the MY SHORTCUTS menu 1. Slide the phone up and press the OK Key [MENU] →Settings & Tools→Phone Settings→Set Shortcuts→Set My Shortcuts. 2. Select the shortcut you want to change, and press the OK Key [SET] to enter the available applications list.
-
Page 120: Voice Commands Settings
Set Directional Keys This option allows you to set shortcuts to assign applications to the up, down and left Directional Keys. 1. Slide the phone up and press the OK Key [MENU]→ Settings & Tools→Phone Settings→Set Shortcuts →Set Directional Keys. 2. -
Page 121: Location
Location On: GPS location function is on wherever the feature is available. E911 Only: GPS location function is on only when you dial 911. Note: This feature is only available on the Verizon Wireless network. Current Country This option allows you to select your current location. -
Page 122: Security
Note: To assure that your phone works properly while you travel to a different country, please verify the country of your current location so the correct Country Code can be applied. Security The Security menu allows you to lock your phone, set restrictions and other security options. -
Page 123: Phone Lock Setting
2. Enter the lock code and press the OK Key. 3. Select Restrictions and press the OK Key. 4. Enter the lock code and press the OK Key. 5. Select Location Setting and press the OK Key, and then select Unlock Setting or Lock Setting and press the OK Key [SET]. -
Page 124: System Select
2. Enter the lock code and press the OK Key. 3. Select Lock Phone Now and press the OK Key. Your phone will be locked immediately. To unlock your phone, from idle mode, press the Right Soft Key [Unlock], enter the lock code and press the OK Key. Note: When the phone is locked, you can only dial emergency calls. -
Page 125: Nam Select
1. Slide the phone up and press the OK Key [MENU] →Settings & Tools→Phone Settings→System Select. 2. Select one of the following options and press the OK Key [SET]. Home Only: Your phone is available for normal operation only in the home network. Automatic: You can use your phone in the home or roaming network. -
Page 126: Call Settings
the phone is closed, the keypad will be locked automatically when the backlight goes off. Call Settings Call Settings allows you to change the answering feature, set TTY mode, one touch dial, voice privacy, etc. Slide the phone up and press the OK Key [MENU]→Settings &... -
Page 127: Auto Retry
Auto Retry Auto Retry feature will automatically redial voice calls after a preset period of time. 1. Slide the phone up and press the OK Key [MENU] →Settings & Tools→Call Settings→Auto Retry. 2. Select 10, 30, 60 Seconds or Off and press the OK Key [SET]. -
Page 128: One Touch Dial
One Touch Dial This feature allows you to enable or disable the speed dial feature. 1. Slide the phone up and press the OK Key [MENU]→ Settings & Tools→Call Settings→One Touch Dial. 2. Select On or Off and press the OK Key [SET] to confirm. -
Page 129: Hearing Aid Mode
1. Slide the phone up and press the OK Key [MENU]→ Settings & Tools→Call Settings→Assisted Dialing. 2. Highlight Assisted Dialing, and press the Directional Key left or right to select On or Off. 3. Highlight Reference Country by pressing the Directional Key down, then press the Left Soft Key [Set] and choose a country from a list of countries that support assisted dialing. -
Page 130: Phone Memory
Phone Memory This menu allows you to check your internal phone memory usage. 1. Slide the phone up and press the OK Key [MENU]→ Settings & Tools→Phone Memory. 2. Select Memory Usage, My Pictures, My Ringtones, My Sounds or My Contacts and press the OK Key to check the total and separate memory usage information. -
Page 131: Set-Up Wizard
4. Select Icon Glossary and press the OK Key to view the list of icons with a brief description. 5. Select Software Update and press the OK Key. Select one of the following options and press the OK Key. Status: Check the status of your phone’s software. Check New: Check for new software updates that you can download for your phone. -
Page 132: 13. For Your Safety
13. For Your Safety General Care Your handset contains delicate electronic circuitry, magnets and battery systems. You should treat it with care and give particular attention to the following points: Do not allow the handset, battery or accessories to come into contact with liquids or moisture at any time. Do not immerse it in any liquid. - Page 133 Do not disassemble or crush, bend or deform, puncture, or shred. Do not modify or remanufacture, attempt to insert foreign objects into the battery, immerse or expose to water or other liquids, expose to fire, explosion or other hazard. Only use the battery for the system for which it is specified.
- Page 134 The phone shall only be connected to products that bear the USB-IF logo or have completed the USB-IF compliance program. Do not put a battery into a microwave oven, dryer or high-pressure container. Use only authorized chargers. Do not puncture the battery with a sharp object such as a needle.
-
Page 135: Aircraft Safety
Use a damp or anti-static cloth to clean the handset. Do not use an ordinary dry cloth or electrostatic cloth. Do not use chemical or abrasive cleaners as these could damage the casing. Third party equipment: The use of third party equipment, cables, or accessories, not made or authorized by ZTE, may invalidate the warranty of your phone and also adversely affect the phone’s safety and operation. -
Page 136: Hospital Safety
In the airplane mode, you are prohibited from making or receiving calls. Hospital Safety Switch off your phone and remove its battery in areas where handset use is prohibited. Follow the instructions given by any respective medical facility regarding the use of cellular handsets on their premises. -
Page 137: Road Safety
If you have a heart condition, be careful with the setting of call vibration or tone volume. This phone is capable of producing loud noises which may damage your hearing. Turn down the volume before using headphones, Bluetooth stereo headsets or other audio devices. -
Page 138: Vehicles Equipped With An Airbag
Pull off the road and park before making or answering a call, if driving conditions require so. Check if local laws and/or regulations restrict the use of cellular phones while driving. You must not stop on the hard shoulder of a motorway to answer or make a call, except in emergency situations. -
Page 139: Third Party Equipment
Third Party Equipment The use of third party equipment, cables or accessories, not made or authorized by ZTE, may invalidate the warranty of the handset and also adversely affect the handset’s operation. For example, use only the ZTE charger supplied with the handset. Efficient Use For optimum performance with minimum power consumption, do not cover the antenna area (It’s on the... - Page 140 highest certified power level, the actual SAR level of the phone while operating can be well below the maximum value. This is because the phone is designed to operate at multiple power levels so as to use only the power required to reach the network.
-
Page 141: Emergency Services
Emergency Services To make an emergency call in any country: 1. Ensure your handset is ON and in service. 2. Slide the phone up and press the End Key as many times as needed to clear the display and ready the device for calls. - Page 142 NOTE: This equipment has been tested and found to comply with the limits for a Class B digital device, pursuant to part 15 of the FCC Rules. These limits are designed to provide reasonable protection against harmful interference in a residential installation. This equipment generates, uses and can radiate radio frequency energy and, if not installed and used in accordance with the instructions, may cause harmful interference to radio...
-
Page 143: Use Your Phone With A Hearing Aid Device
Not all phones have been rated. Phones that have been rated have a label on the box. Salute has been tested for hearing aid device compatibility and has an M4 and/or T3 rating. -
Page 144: Turn On The Hac Setting
Turn on the HAC Setting When the HAC setting is on, your Salute sends the audio from your phone calls to the telecoil rather than to the microphone of your hearing aid. You are likely to hear calls much better because volume is increased and background noise and feedback are diminished. -
Page 145: Copyright Notice
CAUTION: Do not turn on the HAC setting unless you use a hearing aid with a telecoil. Using this setting without a hearing aid or with a hearing aid without a telecoil may be harmful to your hearing. Copyright Notice The audio recordings you make or download are protected by copyright laws. -
Page 146: 14. Glossary
14. Glossary Abbreviation CDMA DTMF Description Alternating Current Code Division Multiple Access Daylight Saving Time Dual Tone Multi Frequency Hearing Aid Compatibility Global Positioning System Number Assignment Module Personal Computer Radio Frequency Secure Sockets Layer Teletypewriter Universal Serial Bus... -
Page 147: 15. Troubleshooting
15. Troubleshooting Fail to power on the phone Check whether the battery has adequate capacity to power on. The phone has powered off automatically The battery capacity is quite low, please charge the battery. No key tone when pressing the keys Check whether the keypad tone has been disabled. - Page 148 To dial an emergency call You can still dial an emergency call, even if the keypad is locked. Slide the phone up and dial the number directly and press the Send Key. Can not connect to the network Check whether the phone is in the CDMA network service area or move to other places to try again.
-
Page 149: 16. Index
Activate Your Phone. 25 Aircraft Safety... 134 Airplane Mode ... 117 All Calls ... 75 Answer Voice Calls .. 38 Backup Assistant... 51 Basic Operations... 34 Battery Charge the Battery ... 22 Install the Battery 21 Remove the Battery ... 23 Bluetooth Add New Device. - Page 150 Master Volume ...95 Media Center...77 Messaging ...58 Missed Calls ...75 Mobile Web ...84 My Name Card ...56 My Pictures...87 My Verizon ...94 New Contact...47 New Message...58 Phone Info ...129 Phone Memory ...129 Phone Overview... 12 Phone Settings... 117 Pictures ... 80 Power On/Off Your Phone...
- Page 151 Calendar ... 102 Ez Tip Calculator ... 102 Notepad ... 106 Stop Watch... 105 Voice Commands ... 95 World Clock... 106 Troubleshooting ... 146 TTY Mode ... 126 Tunes & Tones... 78 Turn on the HAC Setting... 143 Use Speed Dials ... 37 Use the Contact List to Make Calls ...
-
Page 152: Consumer Limited Warranty
Consumer Limited Warranty ZTE ("Seller") offers you a limited warranty that the enclosed product or products (the "Product") will be free from defects in material and workmanship for a period that expires one year from the date of sale of the Product to you, provided that you are the original end-user purchaser of the Product and provided that your purchase was made from a supplier authorized by the Seller. - Page 153 This limited warranty does not cover and is void with respect to the following: (i) any Product which has been improperly installed, repaired, maintained or modified; (ii) any Product which has been subjected to misuse (including any Product used in conjunction with hardware electrically or mechanically incompatible or used with accessories not approved by Seller), abuse, accident, physical damage, abnormal operation, improper handling, neglect, exposure...
- Page 154 OF THE POSSIBILITY OF SUCH DAMAGES, WHETHER FORESEEABLE OR UNFORESEEABLE OF ANY KIND WHATSOEVER, INCLUDING BUT NOT LIMITED TO LOSS OF PROFITS, UNANTICIPATED BENEFITS OR REVENUE, ANTICIPATED PROFITS ARISING OUT OF USE OF OR INABILITY TO USE ANY PRODUCT (FOR EXAMPLE, WASTED AIRTIME CHARGES DUE TO THE MALFUNCTION OF A PRODUCT) OR CONTRIBUTION OR INDEMNITY IN RESPECT OF ANY CLAIM RELATED...
- Page 155 Some jurisdictions do not allow the exclusion or limitation of incidental or consequential damages, or allow limitations on how long an implied warranty lasts, so the above limitations or exclusions may not apply to you. This limited warranty gives you specific legal rights, and you may also have other rights which vary from jurisdiction to jurisdiction.
Need help?
Do you have a question about the Salute and is the answer not in the manual?
Questions and answers