Table of Contents
Advertisement
Quick Links
Advertisement
Table of Contents

Related Manuals for Diamond P42/XVM


Summary of Contents for Diamond P42/XVM
- Page 1 05/2016 Mod: P42/XVM Production code: P05MO25001...
- Page 2 P42/XVM – M42A P32/X – RM32A P42/X – RM42A P42/XV – P42TA Manuale di istruzione Notice d'utilisation Manual de instruções Руководство по эксплуатации Instruction manual Handleiding Manual de instrucciones Instrukcja obsługi Gebrauchsanweisungen...
- Page 3 October 2004 on materials and articles intended to come into contact with food. Type of appliance / Machine DILAMINATRICI Trademark DIAMOND P42/XVM-P32/X-P42/X-P42/XV Model M42A-RM32A-RM42A-RM42TA Manufacturer PIZZA GROUP SRL The harmonised standards or technical specifications (designations) that have been applied in...
-
Page 4: Legal Warranty
LEGAL WARRANTY The period of warranty is in agreement with the European community standards and starts from the date of the invoice issued at the time of purchase. Within such period all components that have unequivocal and well ascertained manufacturing flaws will be replaced or repaired free of charge exclusively by our plant. The guarantee does not include electrical components and those subject to wear and tear. - Page 5 respect the instructions and warnings displayed on the machine labels. The labels are accident prevention devices and must therefore always be perfectly legible. Should they be damaged and illegible, it is mandatory to replace them requesting replacements from the Manufacturer. ...
- Page 6 DANGER Make sure that children do not play with the packaging materials (for example, plastic film and styrofoam). Suffocation danger! PREPARATION OF THE INSTALLATION AREA SAFETY PRECAUTIONS Responsibility for operations executed in the room where the machine is installed is and remains of the user.
-
Page 7: Installation
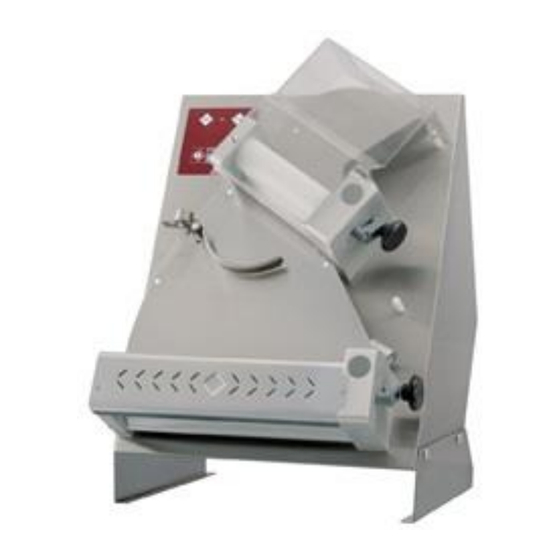
INSTALLATION Installation must be executed by qualified personnel in compliance with local, national and European regulations. 5.3 MACHINE POSITIONING Ensure that the machine is put on a flat stand with a suitable carrying capacity. After unpacking the rolling machine, put it in the prepared location, keeping in mind the minimum distances (see point 4.2) to be respected. - Page 8 MACHINE START UP AND USE CONTROL BOARD DESCRIPTION Our rolling machines are provided with an electronic start/stop circuit board with control treadle. The picture below shows the board’s control buttons. START – start rollers STOP – stop rollers PILOT LIGHT - moving rollers When the treadle lies on the floor you can also simply press and release the control treadle to start and stop the rollers.
- Page 9 To meet individual requirements, the machine can be regulated to various dough thickness values by turning the two levers (A and B) into position Min to Max. To release the levers pull the black knob. The thickness varies according to the lever direction: minimum thickness ( - ) turn clockwise.
- Page 10 After each adjustment tighten the screw again to lock the counterweight. At this point, if necessary, regulate the equalizer’s counterweight (C): Changing the equalizer’s counterweight position, and hence the equalizer’s sensitivity according to its position, requires loosening the locking screw. Top sensitivity: move the counterweight towards the inside;...
- Page 11 Position the dough ball so that it passes smoothly through the top rollers (shape one side like a wedge to simplify the operation). Passing through the top rollers the dough is shaped like a disc and gets the thickness (S) chosen by the operator. Coming out of the top rollers, the dough slides onto the equalizer which drives it (turning it about 90°) towards the bottom rollers.
-
Page 12: Maintenance And Cleaning
Models with parallel rollers (rectangle shaping) Put a clean baking-tin under the rolling machine. It should be big enough to adapt to the steel feet. Press the control treadle to set the machine rollers going (for models without treadle push the START button on the circuit board to start the machine and the STOP button to stop it.) Position the dough ball so that it passes smoothly through the top rollers (shape one side like a wedge to simplify the operation). - Page 13 rough or abrasive instruments, such as steel wool or sponges or any other item which could damage the machine surface, especially those which could jeopardize health safety. Using a suitable brush, perform a first removal of flour and dough remainders. ...
- Page 14 Superior chutes Superior Protection Inferior Inferior chutes Protection Dough Scrapers Springs of dough scrapers MAINTENANCE ADDRESSED TO QUALIFIED Shafts and rollers must be lubricated once a year. Remove protections, chutes, springs and dough scrapers. Remove the back A (loosen the locking screws). ...
- Page 15 Support Roller Roller Shafts Joint DEMOLITION AND DISPOSAL INFORMATION Demolition and disposal of the machine are the sole responsibility of the owner, who must perform these tasks in compliance with the currently safety and environmental protection rules enforced in the Country where the machine is installed. Disassembly and disposal can also be performed by a third party, as long as it is an authorized company for the recovery and demolition of the materials in question.
-
Page 16: User Information
WARNING: Abandoning the machine in accessible areas seriously jeopardizes people and animals. Responsibility for possible damage to people and animals falls exclusively on the owner. USER INFORMATION This appliance is to be disposed of in compliance with the European directive 2002/96/EC, stating that this product must be disposed of separately from normal house waste.
Need help?
Do you have a question about the P42/XVM and is the answer not in the manual?
Questions and answers