Table of Contents
Advertisement
Quick Links
Advertisement
Table of Contents

Related Manuals for USA Measurements US-M6+


Summary of Contents for USA Measurements US-M6+
- Page 1 US-M6+ Smart Weighing Indicator Service Manual V1.0 1...
- Page 2 Thank you for choosing USA Measurements “We Out Measure the Competition”. USA Measurements is an American Scale brand providing scales for the weighing industry. We are located out of Las Vegas, NV and we ship worldwide. USA Measurements provides R&D for developing software, hardware, and weighing products.
-
Page 4: Chapter 1 M6+ Functions And Specifications
CHAPTER 1 M6+ FUNCTIONS AND SPECIFICATIONS 1. Main Functions: a. Data Transfer: Wired or Wireless. From weighing scale to indicator data transfer methods are optional. The wire would be offered by scale and connector will be offered with this indicator. The wireless is using RFID to identify each scale. -
Page 5: Printing Tickets
3. Sample Picture: 4. Printing Tickets: Printing ticket sample for Auto-Dynamic Weighing Department: Manual input. Blank information will not be printed. Serial No: Generated by indicator. Date and Time: Set in the system. Truck: Vehicle License Number. Manual input. Operator: For signature purpose. Driver: For Signature purpose. -
Page 6: Chapter 2 Scale Prepare
Printing ticket sample for Manual-Dynamic Weighing Department: Manual input. Blank information will not be printed. Serial No: Generated by indicator. Date and Time: Set in the system. Truck: Vehicle License Number. Manual input. Operator: For signature purpose. Driver: For Signature purpose. Location: Manual input. - Page 7 a. Wired Single Scale (Typical: Weighbridge): Connect your scale to the indicator Channel A OR Channel B. Double Scale (Typical: Axle Scale): Connect your scale to the indicator Channel A AND Channel B. Multiple Scale (Typical: Wheel Scale): Connect your scale to the indicator Channel 1# and Channel 2# for the 1 axle, Channel 3# and Channel 4# for the 2 axle, …...
-
Page 8: Chapter 3 System Operation
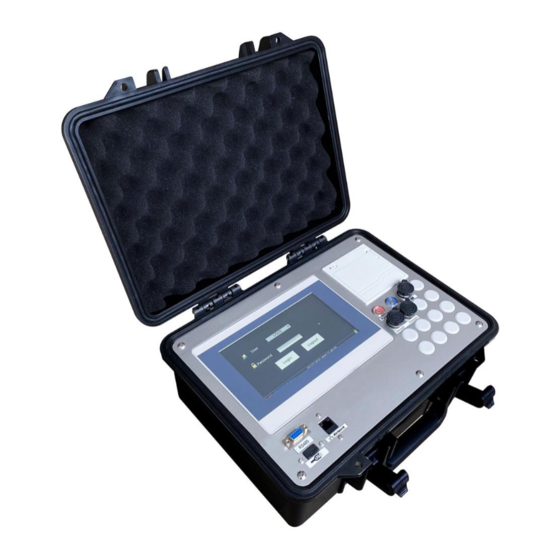
b. Choose a flat area to place the portable scales. Make sure the scales stand on ground without seesawing. c. Make sure the ground is clear and without small chippings. d. Make sure the scale is towards the vehicle wheels center. e. - Page 9 1. System a. Switch On Press the “Power” button on indicator first to start power supply. Please note the indicator should be charged or connected to the AC power supply. The indicator will start self-checking process, and this will take up to 10 seconds. b.
- Page 10 c. Main Menu L og Out Current User Chang password for User and Administrator Hardware Software L ogged Date Time Battery Version Version In User Volume C lick on “User Permission” to change password for User and Administrator 2. Settings Click on “Settings”...
- Page 11 “Department” There are 3 lines to enter the using department information including company name, company address, contact number, etc. The information will be printed in the weighing ticket. Please note: Each line accepts maximum 128 alphabets. “Operator” Enter the name of operator. “Manual”...
- Page 12 It is the “Auto En d” option. When this is ON, the countdown timing can be changed. Default is 10 seconds. In “Dynamic Weighing” the countdown timer will be available. In “System Setting”, brightness of the screen, date, time screen saver time, can be adjusted. 3.
- Page 13 The default password for this is “878586” and in case you changed it, please write down and keep the password at a safe place. Please note: Everywhere require Class II level password will be the same. If you have ever changed this password, you will need to use new password for other places where require Class II level password.
-
Page 14: Warranty
4. Enter main menu of Weighing Setting Caution: All options here are related with kernel computing and any Unauthorized Change may result in Losing Warranty. “Axle Config Optimize” This is the key algorithm of our system for different axles. This data comes from our analysis to over 12,000 vehicles. - Page 15 This is to make the upgrade of the system. Please note: Please use the firmware offered by the manufacturer only. Unauthorized Firmware will result in Losing Warranty. This is the algorithm for AUTO In-Motion Weighing (Unmanned). This data comes from our analysis to over 12,000 vehicles.
-
Page 16: Chapter 4 Calibration
This is to select the Channels which is going to work. For two channels system, there are Channel A and Channel B for option. If only 1 channel is selected, the wire must be connected to the Selected Channel Port. Typical Application for one channel is getting the total weight from a weighbridge. - Page 17 1. Calibration (II) When click on Calibration (II) on main menu, you will need to enter password, the default password is 878586. However, the Admin can change it after calibration and once the password is changed, there is no way to recover. So, please keep the new password at a safe place.
- Page 18 Please confirm the unit and select the division your demand before calibration. 3. Although two channels are connected, only ONE c hannel could be calibrated one time.
- Page 19 4. Calibrate Zero Point first. M ake sure there n othing left on the scale. If only 2 points calibration is executed, the system will automatically record the loading. If multi-point calibrated, the system would have linear compensation. The loading point must be input before loading the weights on scale. During calibration, the procedure could be always re-start again by clicking on “Restart from ZERO”.
-
Page 20: Chapter 5 Printer
5. When changing password, please input t wice new password. CHAPTER 5 PRINTER 1. Main Functions: a. It using thermal printing method. b. It with CPU inside with 6 pins Data a nd Power supply serial port, it w orkable with all kinds of PC, Tablet, Smart... - Page 21 d. The printing speed i s adjustable by p rogramming. e. It starts with self-check program and is able t o print all coding with high resolution c haracters and fonts. f. The valid buffering is 18kb. g. Printing paper i s thermo-sensitive paper a nd width i s 57.5±0.5mm.
-
Page 22: Chapter 6 Maintenance
c. Power Supply: PDK3 d. Control Code: ESC, FS, e. Press physical button feed printing paper. f. Any error with red light alarm. g. Stability: 15) x 106 rows no error. h. Working Temperature: 0℃ ~ 50℃ Humidity: 2 0% ~ 85% CHAPTER 6 MAINTENANCE 1.
Need help?
Do you have a question about the US-M6+ and is the answer not in the manual?
Questions and answers