Chapters
Table of Contents

Related Manuals for LG CVCA


Summary of Contents for LG CVCA
- Page 1 OWNER’S MANUAL LG Digital Signage ( LED SIGNAGE, SYSTEM CONTROLLER) Please read this manual carefully before operating your set and retain it for future reference. CVCA www.lg.com Copyright © 2020 LG Electronics Inc. All Rights Reserved.
-
Page 2: Table Of Contents
PREPARING ......13 - Parts and Buttons ........... 14 - Rack Installation (Optional) ........ 15 - Connecting to CVCA with LAN Cable ... 16 USING CVCA ......17 - Connecting to PC ............. 17 - Connecting to External Devices ....... 18 CONNECT A USB DEVICE .. -
Page 3: Safety Precautions
WARNING - This equipment is compliant with Class A of CISPR 32. In a residential environment this equipment may cause radio interference. SAFETY PRECAUTIONS The safety precautions are intended to prevent unexpected danger or harm by helping the user to use the product safely and for its intended purpose. -
Page 4: Precautions For The Ac Adapter And Power
• Use only the power cord or AC adapter provided or approved by LG Electronics, Inc. If you use another power cord, make sure that it is certified by the national standards. If the power cable is faulty in any way, please contact the manufacturer or the nearest authorized service center for a replacement. - Page 5 • If water or any foreign substance goes inside the product, disconnect the power cord immediately and contact the service center. - Otherwise, this may cause a fire or electric shock due to damage to the product. • Keep the power cord or AC adapter away from any heating devices. - The cord coating may melt and cause fire or electric shock.
-
Page 6: Precautions For Moving The Product
Precautions for Moving the Product WARNING • Contact the service center before moving the product. - It may cause electric shock and damage the product. • Make sure the product is turned off, unplugged, and all cables have been removed before the product is moved. - You may be electrocuted or the product can be damaged. -
Page 7: Precautions For Installing The Product
Precautions for Installing the Product WARNING • Contact the service center before installing the product. - It can cause electric shock and damage the product. • Do not drop an object on or impact on the product. Keep out of reach of children and do not place toys or objects near the product to prevent throwing things on the product screen. - Page 8 CAUTION • Install the product where no Electromagnetic Interference occurs. • If you install the product in a place that does not meet the recommended conditions, this may cause serious damage to the product’s picture quality, life cycle, and appearance. Please check with service engineer before installing. Please do not install the product in places such as where there is an abundance of fine dust or oil mist, chemical substances are used, exposed to direct sunlight, the temperature is very high or low, the humidity is very high.
-
Page 9: Precautions For Cleaning The Product
Precautions for Cleaning the Product WARNING • Keep the product clean at all times. - If you don’t clean the unit for a long time and it becomes covered in dust, it can cause fire or product damage. • When you need to clean the inside of the product, you must contact the service center. - Otherwise, cleaning without support may cause a fire, electric shock, or damage to the product. -
Page 10: Precautions For Using The Product
Precautions for Using the Product WARNING • Do not use the product in any environment with excessively high temperatures or humidity. • If you use the product for a long period of time, take a rest from time to time to protect your vision. - Extended viewing could result in impaired vision. -
Page 11: Product Disposal
• Do not use high voltage electrical goods near the product (e.g., a bug zapper). - This may result in product malfunction if it receives an electrical shock. • If there is a gas leak, do not touch the outlet, and open the windows for ventilation. - Otherwise, the product may cause fire or electric shock. -
Page 12: Licenses
LICENSES Supported licenses may differ by model. Visit www.lg.com for more information on licenses. The terms HDMI, HDMI High-Definition Multimedia Interface, and the HDMI Logo are trademarks or registered trademarks of HDMI Licensing Administrator, Inc. -
Page 13: Assembling And Preparing
ASSEMBLING AND PREPARING CAUTION • Always use genuine components to ensure safety and durability of the product. • The product warranty will not cover damage or injury caused by the use of unauthorized components. • Replacing the batteries with the wrong type may result in explosion. •... -
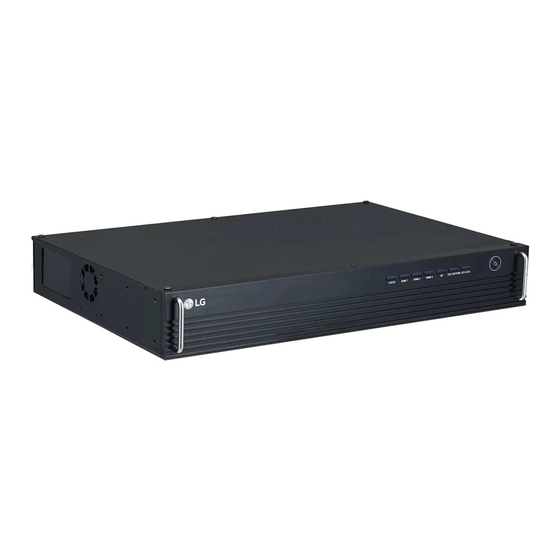
Page 14: Parts And Buttons
Parts and Buttons The illustrations may differ depending on the model. Explanation • Turns the power on and off. • Switches to HDMI input. • Switches to OPS input. • Switches to DP input. • Accesses/Exits White Pattern. • Consecutively accesses/exits R/G/B Pattern. •... -
Page 15: Rack Installation (Optional)
Rack Installation (Optional) Rack (*Not provided) NOTE • Use the bolts included in the rack to fasten the product. -
Page 16: Connecting To Cvca With Lan Cable
Connecting to CVCA with LAN Cable Connect the LAN cable with the set. CAUTION • Check the direction so that the LAN cable is not damaged. • Inserting the LAN cable with excessive force may damage the contact point. •... -
Page 17: Using Cvca
USING CVCA Connecting to PC The CVCA model itself does not have any screen. Connect a specific LED Signage to the CVCA model to use a screen. CVCA supports the feature. : a feature that enables a PC to recognize devices attached by the user without device configuration or... -
Page 18: Connecting To External Devices
Connecting to External Devices Connect a HD receiver, DVD, or VCR player to the product and select an appropriate input mode. For the best picture quality, use a HDMI cable to connect the product to external devices. NOTE • For the best image quality using a HDMI connection is recommended. •... -
Page 19: Connect A Usb Device
CONNECT A USB DEVICE Connect a USB storage device, such as a USB flash memory to the display device to use multimedia features. CAUTION • Do not turn the Device off or remove the USB storage device when the multimedia screen is activated. This may cause the loss of a file or damage to a USB storage device. - Page 20 Tips for Using USB Devices • Only USB storage devices are recognized. • A USB storage device using an automatic recognition program may not be recognized. • A USB storage device which uses its own driver may not be recognized. •...
-
Page 21: Troubleshooting
TROUBLESHOOTING No image is displayed. Problem Solution Is the power cord connected to the • Check if the power cord is correctly plugged into the power outlet. product? The ‘Unknown Product’ message appears when the product is connected. Problem Solution Did you install the driver? •... - Page 22 The display color is abnormal. Problem Solution Screen has poor color resolution (16 • Set the color depth to more than 24 bits (true color). To do this, colors). select (Control Panel) (Display) (Setting) (Color Palette) on Windows. (May differ depending on your operating system (OS).) Screen color is unstable or mono-colored.
-
Page 23: Product Specifications
PRODUCT SPECIFICATIONS Without prior notice, all product information and specifications contained in this manual are subject to change to improve the performance of the product. symbol means alternating current, and the symbol means direct current. HDMI/ DisplayPort/ OPS: 3840 x 2160 @ 60 Hz Max Resolution - This may not be supported on some OS or graphics card types. - Page 24 (Unit: mm (inches)) 307.5 (12.1) 443 (17.4) 483 (19.0) (2.4)
- Page 25 HDMI/DisplayPort/OPS (PC) Support Mode Resolution Horizontal Frequency (kHz) Vertical Frequency (Hz) 800 x 600 37.879 60.317 1024 x 768 48.363 60.0 1280 x 720 44.772 59.855 1280 x 1024 63.981 60.02 1680 x 1050 65.290 59.954 1920 x 1080 67.5 3840 x 2160 67.5 3840 x 2160...
- Page 26 NOTE • Resolutions available for the Input Label option in HDMI/ DisplayPort/ OPS input modes. - PC resolutions: 800 x 600 / 60 Hz, 1280 x 720 / 60 Hz, 1920 x 1080 / 60 Hz, 3840 x 2160 / 60 Hz - DTV resolutions: 480p, 720p, 1080p, 2160p • Horizontal Frequency: The horizontal interval is the time taken to display one horizontal line. When one horizontal line is divided by the horizontal interval, the number of horizontal lines displayed every second is the horizontal frequency.
- Page 27 Supplier’s Declaration of Conformity Trade Name Responsible Party LG Electronics USA, Inc. Address 111 Sylvan Avenue, North Building, The model and serial number of the product are Englewood Cliffs, NJ 07632 located on the back and on one side of the product.
- Page 28 USER MANUAL LG Digital Signage (LG System Controller) After reading this user manual, keep it where any user can read it at any time. webOS 4.0 www.lg.com...
- Page 29 LG Electronics will also provide open source code to you on CD-ROM for a charge covering the cost of performing such distribution (such as the cost of media, shipping, and handling) upon email request to opensource@lge.com.
-
Page 30: How To Access Lg System Controller Page
How To Access LG System Controller Page Enter https://System Controller's IP Address:3737 into the address field of the web browser. Select Advanced, and select Move to SetIP (unsafe). Enter the password into the password field. (Default set value: serial number followed by LGe12#) For example, the password for serial number ABCD123456789 would be ABCD123456789LGe12#. -
Page 31: Lg System Controller Menu
LG System Controller Menu Menu • The image may vary according to the model. Language You can set the language used for the System Controller. Or you can change the language by using the RS- 232C command below. (See the section of “Language” on page 16.) -
Page 32: Network
Network You can change the network configuration environment of the System Controller. You can access the System Controller page via the set value. (See the section of “Network” on page 17.) ※ Numbers 7 to 9 are only supported by some models. Item Description Automatically Automatically receives the IP via the Dynamic Host Configuration Protocol Assign IP Address (DHCP) method. - Page 33 You can manually set the address of the Domain Name System (DNS) DNS Server server. 802.1X EAP Authentication based on IEEE 802.1X can be used for wired connections. Select the desired EAP type and Phase 2 Authentication, enter the ID/ password registered in the authentication server, and click the ‘Connect’...
-
Page 34: Led Assistant
LED Assistant You can connect to the System Controller by changing the configuration environment of the network connected to the LED Assistant page. You can access the LED Assistant page via the set value. Item Description Activate You can activate/deactivate via the Activate button. -
Page 35: Lg Connectedcare (Signage 365 Care)
- Click the [NO] button to close the pop-up. NOTE • The pop-up only appears if the network settings have not been set. LG ConnectedCare App Not Installed Item Description Install Proceeds with the installation of the LG ConnectedCare app. - Page 36 LG ConnectedCare App Installed Item Description LG ConnectedCare You can activate/deactivate via the LG ConnectedCare app button. Account Displays the account number and name. Version Displays the version of the LG ConnectedCare app. Server Status Displays the status of the LG ConnectedCare app.
- Page 37 A pop-up for entering the account number is displayed. - Enter the 6-digit account number and click the [OK] button. A pop-up that informs the difference between the current time and the time set in the LG ConnectedCare app is displayed.
- Page 38 A pop-up for the installation progress is displayed. For Successful Installation - A pop-up will indicate that the app was successfully installed. The pop-up will close automatically in 5 seconds. For Failed Installation - A pop-up will indicate that the app installation has failed. Clicking the [OK] button will close the pop-up.
-
Page 39: Enterprise Settings
Enterprise Settings ※ The following method applies only to some models. The Enterprise Settings can be applied by entering the company account code. Enterprise code Application Process Press the [Enter] button to display a pop-up, and enter the company account code. After the code is entered, the enterprise settings will take effect when the set reboots. - Page 40 When Applying Enterprise Code - If a code has already been entered, it cannot be changed to another code.
-
Page 41: System
System You can initialize and restart the System Controller. In addition, you can perform S/W Update. Item Description Change Enter current and new passwords to change the password. Password Factory Reset Applies the initial set value via the Reset button. System Reboot If you select the Reboot... -
Page 42: To Control Multiple Products
To Control Multiple Products • The following method applies only to some models. You can connect multiple products to a single PC by using this method. You can connect multiple products to a single PC and control them at the same time. In the General menu, non-repeated values between 1 and 1000 must be assigned as the set ID. -
Page 43: Communication Parameter
Communication Parameter Reception/Transmission Protocol Board speed: 9600 BPS Data length: 8 bit Language Parity bit: None Stop bit: 1 bit (Command: f i) Transmission Flow control: None [f][i][ ][Set ID][ ][Data][Cr] Communication code: ASCII code Data 00: Czech Republic 01: Danish 02: German 03: English 04: Spanish (Europe) -
Page 44: Network
Network (Command: s n, 80 or 81 or 82) Transmission [s][n][ ][Set ID][ ][Data1][ ][Data2][ ] [Data3][ ][Data4][ ][Data5][Cr] Data 1 80: Set/check the temporary IP mode (auto/manual), subnet mask, and gateway 81: Set/check a temporary DNS address. 82: Save the temporary set value, and check the current network information * When Data 1 equals 80, Data 2 00: Auto...
Need help?
Do you have a question about the CVCA and is the answer not in the manual?
Questions and answers