Table of Contents
Advertisement
Quick Links
Operator's Manual
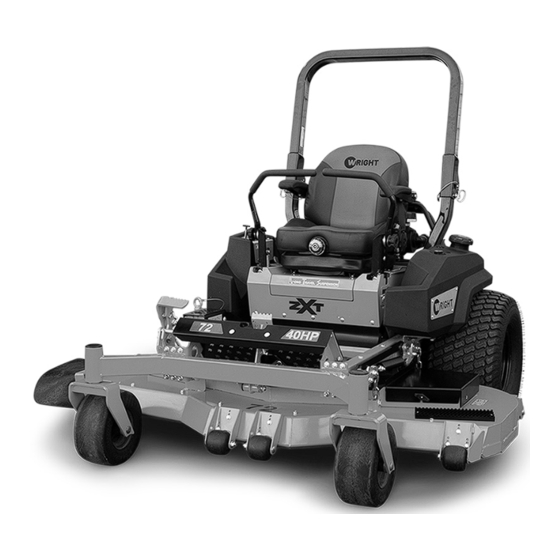
WRIGHT Z EXTREME
Serial # 163268 and higher until superseded
Revised 10/10/23
P/N 79510018
FAILURE TO FOLLOW SAFE OPERATING PRACTICES MAY RESULT IN SERIOUS INJURY OR DEATH.
Read this manual and other manuals that came with your mower before operating.
©1998-23 Wright Manufacturing, Inc. All rights reserved. This material may not be reproduced or copied, in whole or part, without written permission
from Wright Manufacturing, Inc. Grass Gobbler, Gobbler, Leaf Gobbler, Velke, Pro 1, X2, Stander, and Sentar are trademarks of Wright Manufacturing.
Advertisement
Table of Contents

Related Manuals for WRIGHT Z EXTREME


Summary of Contents for WRIGHT Z EXTREME
- Page 1 Read this manual and other manuals that came with your mower before operating. ©1998-23 Wright Manufacturing, Inc. All rights reserved. This material may not be reproduced or copied, in whole or part, without written permission from Wright Manufacturing, Inc. Grass Gobbler, Gobbler, Leaf Gobbler, Velke, Pro 1, X2, Stander, and Sentar are trademarks of Wright Manufacturing.
-
Page 2: Table Of Contents
Mowing on Varying Terrain ........6-3 Maintenance Record ..........7-9 Facing Uphill Maintenance Record ..........7-10 Facing Downhill 8 WRIGHT MANUFACTURING, INC. POWER Crossing a Slope Sideways EQUIPMENT LIMITED WARRANTY ......8-1 Discharge Chute ............6-3 9 FEDERAL EVAPORATIVE EMISSIONS CONTROL... -
Page 3: Introduction
Please read it in its entirety and follow the instructions carefully so that you can have many years of safe and productive operation with your Wright machine. Your Wright dealer knows your machine and is interested in your satisfaction. Your dealer can provide you with quality maintenance and other assistance that you may need. -
Page 4: New Machine Setup
2 NEW MACHINE SETUP 2 NEW MACHINE SETUP If you are not completely familiar with the Safety Instruction Manual read it now before proceeding with the Pre-Delivery Service of the mower. The following items must be completed before attempting to operate a newly delivered machine. Inspect the mower for any damage, missing parts, and labels. -
Page 5: Rops Information
3 ROPS INFORMATION P/N 98410437 IMPORTANT INFORMATION • DO NOT cut, drill, modify or repair ROPS in any manner. • Always replace a damaged ROPS. • Always use the seatbelt and ROPS together. • Frequently inspect roll bar and seat belts for damage or loose hardware. •... -
Page 6: Rops Parts List
ROPS Parts List DESCRIPTION 11990208 BOLT, HEX 1/2-13 X 3 1/4 Z5 12990076 NUT, FLANGED NYLOCK 1/2-13 Z5 13990060 WASHER, SPRING, 1.142OD X 0.512 15990076 ANTI-RATTLE CLIP, ROPS 21420016 LOCKING PIN, ROPS, W/LANYARD & COTTER PIN 98410438 UPPER AND LOWER ROPS, WZXT... -
Page 7: Safety Precautions
4 SAFETY PRECAUTIONS Important • Use only approved repair parts to maintain. This machine is capable of amputating hands and • Unauthorized modifications to the machine may feet and throwing objects. Failure to observe the impair its function and safety. following safety instructions could result in serious injury or death. -
Page 8: Preparation
Preparation assembly are not worn or damaged. Never straighten or weld blades. • Carefully inspect and walk the property where you plan to use the machine for hidden, hard- to-see objects or uneven ground that may Operating be hidden in the grass. Uneven terrain could overturn the machine, or cause the operator to •... -
Page 9: Slope Specific
• Do not leave the machine running unattended. depending on the weather and must be taken Always park on level ground, disengage the into consideration at all times. attachment, set parking brake, and stop engine. • Some liquid landscape chemicals contain •... -
Page 10: Fire And Fuel Specific
• Keep children out of the operating area and • If fuel is spilled, do not attempt to start the under the watchful care of a responsible adult engine and avoid creating any source of ignition other than the operator. until fuel vapors have dissipated. - Page 11 • Use of parts other than specified parts supplied by Wright Manufacturing, Inc. may compromise the safe use of the machine and not recommended. Their use could void the warranty. Always check with your Dealer or the Wright website, www.wrightmfg.com for the Part...
-
Page 12: Machine Overview
Clutch to engine shaft Loctite 2760 55-65 Hydro Oil System Wheel lug nuts 80-90 • Hydro Oil: Wright Blend Full Synthetic 15W-50 Split Hub (Spindle & Drive) 13-17 Wright PN 36490013 Blade Bolts 70-80 • Hydro Filter: Spin-on, 25 micron, no bypass... -
Page 13: Machine Features
Machine Features • This machine is meant to solely cut, bag or mulch grass. Use for any other purpose is not recommended. • Do not disconnect any safety switches or remove any decals. -
Page 14: Rider Comfort Adjustments
Rider Comfort Adjustments • Seat Position: Remove all weight from seat then • Backrest: Use the knob on the left side of the press orange latch towards seat to adjust seat seat to adjust forwards or rearwards forwards or rearwards. •... -
Page 15: Warning, Safety, And Instructional Decals
Warning, Safety, and Instructional Decals • Specific safety warning decals are located on the equipment near immediate areas of potential hazards. • Keep all safety signs legible - Replace worn, damaged or missing safety decals. • Remove all grease, dirt and debris from safety signs and instructional decals. •... -
Page 16: Operation
6 OPERATION Basic Operation: The following procedures are • When practical, remove gas-powered to guide you through the basic operation of the equipment from the truck or trailer and refuel machine. You should be a qualified machine operator the equipment with its wheels on the ground. If according to the safety section of this manual. -
Page 17: Driving The Machine
7 seconds. If not, service the OPC control levers inwards from the neutral position. system or contact your local Wright dealer. The Move the hand control levers, one at a time, OPC switch is located directly under the seat. -
Page 18: Mowing On Varying Terrain
Stop and then gradually bump into the curb with Crossing a Slope Sideways that tire until it is just on top of the curb. • Machine has the average amount of weight on If the tire slips then the curb is too high and you the drive wheels versus the front wheels. -
Page 19: Service And Maintenance
Replace drive tires with less than 3/32” of any tread groove left. • Use tires with the tread pattern recommended by Wright Mfg., Inc. only. • Keep the drive tire pressure between 12-18 psi. Factory setting is 18 psi. -
Page 20: Moving The Mower If It Won't Start
Check that the fuel valve is fully open. and the magnetic coil increases electrical resistance. If battery is good and starter does not engage: a. Check that the park brake is engaged and the b. Use an ohm meter and measure the PTO switch is off. -
Page 21: Height Of Cut
Raise the deck to the transport position by Deck Size Front Rear pressing the upper deck lift pedal all the way 36, 42, 48, and 52 3” 3 1/4” to 3 3/8” forward until the latch system engages the 61 and 72 3”... -
Page 22: Belt Adjustment/Replacement
Belt Adjustment/Replacement Hydraulic System The pump and blade drive belts are self-adjusting, and require no adjustment, just replacement. Replacing the Cutter Deck Belt Stop the engine, remove the key and wait for all When servicing the hydraulic system it is moving parts to stop. -
Page 23: Lubrication
Lubrication Your machine is made with sealed bearings, oil based bushings and with limited grease fittings Do not use a gear puller. It will not pull the hub therefore only the front caster pivots need to be off and may frustrate you. Properly performed greased. -
Page 24: Parking Brake Adjust
Parking Brake Adjust each side of the unit. There are two adjustments which can be made on The ramp should be long enough so that the angle the parking brake for the ZXT. between the ramp and the trailer or truck does not exceed 15 degrees. -
Page 25: Engine Manual / Maintenance
Check intake air filter and replace as necessary. Every 1000hrs or Annually/Offseason • Replace hydro oil in tank and filter. Use only approved Wright oil and filters. • Check for idler, belt and spindle wear • Check caster pivots. Add grease if leaking. -
Page 26: Maintenance Record
Maintenance Record... - Page 27 Maintenance Record...
-
Page 28: Maintenance Record
Maintenance Record 7-10 7-10... -
Page 29: Wright Manufacturing, Inc. Power Equipment Limited Warranty
SUPERSEDES ALL PREVIOUS WARRANTIES. EFFECTIVE FOR UNITS RETAILED ON OR AFTER 3/1/2023 Limited Warranty Wright Manufacturing, Inc. (hereinafter: WMI) warrants to the original retail purchaser (Owner) that any new WMI power equipment unit (Mower) originally accompanied by this warranty with a retail sales date on or after the effective date above will be free from manufacturing defects in materials or workmanship subject to the limitations and exclusions defined below. - Page 30 tampering with the hour meter, the warranty will become void. WMI reserves the right to change or improve the design of any WMI power equipment without assuming any obligation to modify any WMI power equipment previously manufactured. All other implied warranties are limited in duration to the applicable two (2) year or 5 (five) year/ 500 hour warranty period or ninety (90) days for units used for rental purposes.
-
Page 31: Federal Evaporative Emissions Control Warranty Statement
Also included may be hoses, belts, connectors, and other emission-related assemblies. Where a warrantable condition exists, Wright Manufacturing, Inc. will repair your commercial equipment at no cost to you including diagnosis, parts and labor. - Page 32 4600 Wedgewood Blvd Ste X Frederick MD 21703-7167 www.wrightmfg.com...
Need help?
Do you have a question about the Z EXTREME and is the answer not in the manual?
Questions and answers