vacuubrand RE 2.5 Instructions Manual
Rotary vane pumps
Hide thumbs
Also See for RE 2.5:
- Instructions for repair (72 pages) ,
- Instructions for use manual (80 pages)

Related Manuals for vacuubrand RE 2.5


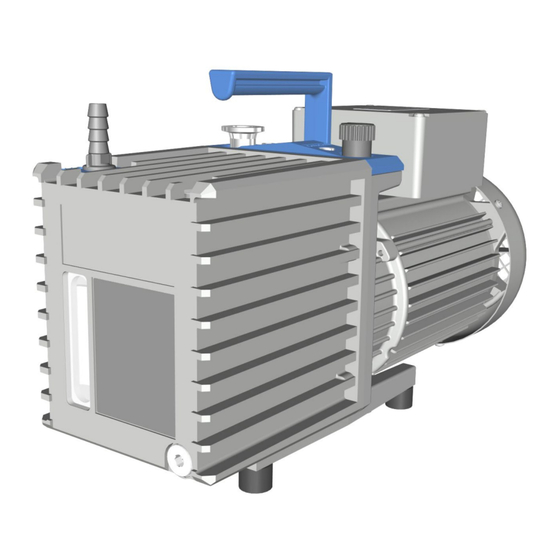
Summary of Contents for vacuubrand RE 2.5
- Page 1 RE 2.5 RZ 2.5 RE 6 RZ 6 Instructions for repair Original instructions EN OI no.: 20901567...
- Page 2 +49 9342 808‑0 Sales +49 9342 808‑5550 Service +49 9342 808‑5660 Fax: +49 9342 808‑5555 Email: info@vacuubrand.com Web: www.vacuubrand.com Thank you for purchasing this product from VACUUBRAND GMBH + CO KG VACUUBRAND GMBH + CO KG. You have chosen a modern and technically high quality product. IA_EN_RE_RZ_2.5_6_V1_251023...
-
Page 3: Table Of Contents
4.2 Replacing the removable sleeve ......17 4.3 Maintenance RE 2.5 and RE 6 ......25 4.4 Maintenance RZ 2.5 and RZ 6 . - Page 4 IA_EN_RE_RZ_2.5_6_V1_251023...
-
Page 5: Introduction
The illustrations in this manual are provided as examples. They are ƒ General intended to aid in your understanding. information VACUUBRAND GMBH + CO KG reserves the right to modify or ƒ change the product design and/or technical specifications at any time without advanced notice. Copyright The content of these instructions is protected by copyright. -
Page 6: About This Document
Please ask for replacement in case of incomplete instructions for Contact us ƒ use. Alternatively, you can download instructions for use on our web page: www.vacuubrand.com. Contact us regarding any questions about this product, if you need ƒ further information, or to provide us with feedback. -
Page 7: Display Conventions
Introduction 1.2.2 Display conventions Warning levels Convention for DANGER DANGER warnings Indicates an imminent hazardous situation. Disregarding the situation will result in serious and even fatal injury or death. Take appropriate action to avoid dangerous situation! > WARNING Indicates a potentially hazardous situation. Disregarding the situation could result in serious, even fatal injury or massive damage to property. -
Page 8: Safety Instructions
The qualified personnel must be adequately informed of potentially hazardous substances in the device. 2.2 Safety precautions Products of VACUUBRAND GMBH + CO KG are subject to high quality Quality standards and safety tests with goals for safety and operation. Prior to delivery each pro‑... -
Page 9: Personal Responsibility
Safety instructions 2.2.1 Personal responsibility Ensure that only authorized and skilled personnel works with the Qualification and personal equipment. This is particularly important with regard to trouble‑ responsibility shooting and remedy. > Carefully read these instructions for repair before starting work. >... -
Page 10: Environmental Protection
If you wish to dispose of a VACUUBRAND electrical or electronic de‑ vice, this must be done separately from unsorted municipal waste. This is indicated by the symbol of the crossed‑out wheelie bin (see illustration). -
Page 11: Notes Concerning Repair
Notes concerning repair Notes concerning repair IMPORTANT! Replace defective parts in any case. WARNING Risk of injury due to a disassembled device. Operating a disassembled device may lead to personal injury. Never operated a opened or disassembled device. > Ensure that a disassembled device never starts >... -
Page 12: General Notes
Notes concerning repair 3.1 General notes Oils > Comply with all relevant laws and regulations for the handling, storage and disposal of oils. > Use only oil of the recommended type. Other oils or operating flu‑ ids may damage the pump or cause hazards. >... -
Page 13: Prior To Maintenance And Repair
Notes concerning repair 3.2 Prior to maintenance and repair Preparation Genuine spare parts > Use only genuine spare parts and accessories. When using components of other manufacturers the safety and per‑ formance of the equipment as well as the electromagnetic compat‑ ibility of the equipment might be reduced. -
Page 14: Cleaning The Components
Notes concerning repair 3.4 Cleaning the components > Dispose of used oil and solvents, taking into account any conta‑ mination from pumped‑off substances / chemicals, in accordance with the relevant regulations. > Avoid damage to running and sealing surfaces. > Use clean oil and a lint‑free cloth to clean sealing rings. Replace defective sealing rings. -
Page 15: Maintenance
Maintenance Maintenance Dismantle the separator and the exhaust filter, if present, before servicing. In the event of oil leakage from the pump (oil dripping from the bottom of the housing), it is often sufficient to replace only the replacement sleeve or the oil reservoir seal. The pump oil does not have to be drained for this. -
Page 16: Tools
Maintenance 4.1 Tools Tool kit 22612186 Puller sleeve for coupling ƒ Press‑in mandrel 3 for shaft seal ƒ Press‑in mandrel 4 for shaft seal ƒ Press‑in mandrel 7 for shaft seal ƒ Puller for coupling with cap screws and wing ƒ... -
Page 17: Replacing The Removable Sleeve
Maintenance 4.2 Replacing the removable sleeve 1. Close the pump outlet. 2. Place the pump on the oil reservoir (on the rating plate). 3. Unscrew the suction felt cover. 4. Replace the suction felt if it is soaked with oil. IA_EN_RE_RZ_2.5_6_V1_251023... - Page 18 Maintenance 5. Unscrew the fan cover. 6. Lift the fan cover by tilting it sideways over the fan wheel. > Avoid damaging the fan wheel. 7. Loosen the screws. 8. Pull out the screws. IA_EN_RE_RZ_2.5_6_V1_251023...
- Page 19 Maintenance 9. Lift the motor out of the housing. 10. Lay the motor down as shown. > Avoid pulling the rotor out of the stator pack. 11. Check the coupling for run‑in marks (“finger‑ nail test”). > Replace the coupling if indentations can be detected, see section “Maintenance”.
- Page 20 Maintenance 13. Unscrew the removeable sleeve. 14. Lift out the removeable sleeve. 15. Place a new O‑ring around the new remove‑ able sleeve. 16. Fill the space in front of the removeable slee‑ ve with the vacuum pump oil with which you operate the pump.
- Page 21 Maintenance 17. Insert the removeable sleeve. 18. Screw the removeable sleeve tight. 19. Insert the protective wall. > Ensure that the O‑ring is correctly seated in the housing. > Alternatively, the O‑ring can also be placed around the protective wall for installati‑ on.
- Page 22 Maintenance > A gap may occur when inserting the motor. 21. Turn the fan wheel slightly until the motor slides completely into the housing. 22. Screw the motor tight. 23. Note the orientation of the fan cover. IA_EN_RE_RZ_2.5_6_V1_251023...
- Page 23 Maintenance 24. Align the fan cover at the marked points. 25. Thread the fan cover onto the motor flange by tilting it sideways over the fan wheel. > Avoid damaging the fan wheel. 26. Screw the fan cover tight. 27. Place (if necessary a new) suction felt in the housing.
- Page 24 Maintenance 29. Place the pump on the pump feet. 30. Let the pump run for approx. 1 hour with the outlet open, the gas ballast valve open and the inlet port closed. DANGER DANGER Danger of electric shock. Improperly executed repairs will result in an electrical shock.
-
Page 25: Maintenance Re 2.5 And Re 6
Maintenance 4.3 Maintenance RE 2.5 and RE 6 1. Unscrew the oil drain plug and drain the oil. 2. Screw the oil drain plug back in. 3. Close the pump outlet. 4. Place the pump on the oil reservoir (on the rating plate). - Page 26 Maintenance 6. Replace both suction felts if soaked with oil. 7. Unscrew the fan cover. 8. Lift the fan cover by tilting it sideways over the fan wheel. > Avoid damaging the fan wheel. 9. Loosen the screws. IA_EN_RE_RZ_2.5_6_V1_251023...
- Page 27 Maintenance 10. Pull out the screws. 11. Lift the motor out of the housing. 12. Lay the motor down as shown. > Avoid pulling the rotor out of the stator pack. 13. Check the coupling for run‑in marks (“finger‑ nail test”). 14.
- Page 28 Maintenance 15. Place the motor on the fan wheel. 16. Put the extraction sleeve onto the motor shaft. 17. Position the puller on the extraction sleeve and coupling as shown. 18. Place a ring wrench on the puller. 19. Turn the puller with the ring wrench until the coupling is pulled off.
- Page 29 Maintenance 21. Slide a new tolerance ring over the motor shaft using a flat‑blade screwdriver. 22. Clamp a mandrel, e.g. in a pillar drill or hand lever press. 23. Position the motor shaft on the mandrel as a counter bearing. 24.
- Page 30 Maintenance 25. Press the coupling in as far as it will go. 26. Lift the protective wall out of the housing. 27. Unscrew the removeable sleeve. 28. Lift out the removeable sleeve. IA_EN_RE_RZ_2.5_6_V1_251023...
- Page 31 Maintenance 29. Remove the cross coupling. 30. Loosen the screws on the oil reservoir. 31. Lift the housing with the aggregate out of the oil reservoir. 32. Unscrew the cover plate. IA_EN_RE_RZ_2.5_6_V1_251023...
- Page 32 Maintenance 33. Pull the vanes out of the rotor. 34. Unscrew the screws on the aggregate. 35. Pay attention to the Usit rings in the bea‑ ring cover. > The Usit rings must be reinstalled during assembly. 36. Lift off the bearing cover. IA_EN_RE_RZ_2.5_6_V1_251023...
- Page 33 Maintenance 37. Lift the oil pump rotor out of the bearing cover. 38. Remove the cross coupling. 39. Lift off the stator. 40. Pull the vanes out of the rotor. IA_EN_RE_RZ_2.5_6_V1_251023...
- Page 34 Maintenance 41. Lift off the rotor and the bearing plate. 42. Pull the rotor and the bearing plate apart. 43. Remove the seals on the bearing plate. 44. Remove the seal on the bearing plate on the other side. IA_EN_RE_RZ_2.5_6_V1_251023...
- Page 35 Maintenance 45. Remove all seals in the housing. 46. Unscrew the screw plug of the oil retention valve from the bearing cover. 47. Disassemble the oil retention valve. 48. Replace the oil retention valve seal. 49. Unscrew the noise damping nozzle from the bearing cover.
- Page 36 Maintenance 53. Unscrew the oil separator. 54. Lift off the oil separator. 55. Replace the cap and the spring. 56. Press the shaft seal out of the bearing plate using a flat‑blade screwdriver. > Do not damage the surfaces. IA_EN_RE_RZ_2.5_6_V1_251023...
- Page 37 Maintenance 57. Press the shaft seal out of the bearing cover using a flat blade screwdriver. > Do not damage the surfaces. 58. Clamp the press‑fit mandrel 4 in a pillar dril‑ ling machine. 59. Observe the correct alignment of the shaft seal, see also section „Press‑fit mandrel“.
- Page 38 Maintenance 65. Press the shaft seal into the bearing cover as far as it will go. 66. Place new seals in the housing. 67. Place the O‑ring around the bearing plate. 68. Place the O‑rings in the bearing plate on the opposite side.
- Page 39 Maintenance 69. Place the bearing plate in the housing. 70. Place the oil separator with spring and cap into the stator. 71. Screw the oil separator tight. 72. Insert the stator. > The oil separator must point in the direction of the pump handle.
- Page 40 Maintenance 73. Place the rotor with vanes into the stator. 74. Assemble the oil retention valve with housing. 75. Screw the retaining device into the bearing cover. 76. Insert the bearing cover. IA_EN_RE_RZ_2.5_6_V1_251023...
- Page 41 Maintenance 77. Place the Usit rings in the holes of the bea‑ ring cover. 78. Screw the aggregate parts together. 79. Insert the cross coupling. 80. Insert the rotor and the vanes. IA_EN_RE_RZ_2.5_6_V1_251023...
- Page 42 Maintenance 81. Fill the space around the rotor with the vacu‑ um pump oil with which you operate the pump. 82. Screw the cover plate tight. 83. Screw the aggregate to the oil reservoir. 84. Place a new O‑ring around the new remove‑ able sleeve.
- Page 43 Maintenance 85. Fill the space in front of the removeable slee‑ ve with the vacuum pump oil with which you operate the pump. 86. Insert the removeable sleeve. 87. Screw the removeable sleeve tight. 88. Insert the protective wall. > Ensure that the O‑ring is correctly seated in the housing.
- Page 44 Maintenance 89. Carefully place the motor in the housing. > The terminal box of the motor must be alig‑ ned in the direction of the pump handle. > A gap may occur when inserting the motor. 90. Turn the fan wheel slightly until the motor slides completely into the housing.
- Page 45 Maintenance 92. Note the orientation of the fan cover. 93. Align the fan cover at the marked points. 94. Thread the fan cover onto the motor flange by tilting it sideways over the fan wheel. > Avoid damaging the fan wheel. 95.
- Page 46 Maintenance 97. Screw the cover of the suction felt. 98. Place the pump on the pump feet. 99. Pull the cap off the outlet. 100. Unscrew the oil inlet screw. 101. Fill in oil. > The oil level must be between the „Min.“ and „Max.“...
- Page 47 Maintenance DANGER DANGER Danger of electric shock. Improperly executed repairs will result in an electrical shock. Check the electrical safety of the device according to IEC > 61010 and national regulations after repair. Check the protective conductor resistance. > Check the insulation resistance. >...
-
Page 48: Maintenance Rz 2.5 And Rz 6
Maintenance 4.4 Maintenance RZ 2.5 and RZ 6 1. Unscrew the oil drain plug and drain the oil. 2. Screw the oil drain plug back in. 3. Close the pump outlet. 4. Place the pump on the oil reservoir (on the rating plate). - Page 49 Maintenance 6. Replace both suction felts if soaked with oil. 7. Unscrew the fan cover. 8. Lift the fan cover by tilting it sideways over the fan wheel. > Avoid damaging the fan wheel. 9. Loosen the screws. IA_EN_RE_RZ_2.5_6_V1_251023...
- Page 50 Maintenance 10. Pull out the screws. 11. Lift the motor out of the housing. 12. Lay the motor down as shown. > Avoid pulling the rotor out of the stator pack. 13. Check the coupling for run‑in marks (“finger‑ nail test”). >...
- Page 51 Maintenance 14. Place the motor on the fan wheel. 15. Put the extraction sleeve onto the motor shaft. 16. Position the puller on the extraction sleeve and coupling as shown. 17. Place a ring wrench on the puller. > Turn the puller with the ring wrench until the coupling is pulled off.
- Page 52 Maintenance 20. Slide a new tolerance ring over the motor shaft using a flat‑blade screwdriver. 21. Clamp a mandrel, e.g. in a pillar drill or hand lever press. 22. Position the motor shaft on the mandrel as a counter bearing. 23.
- Page 53 Maintenance 24. Press the coupling in as far as it will go. 25. Lift the protective wall out of the housing. 26. Unscrew the removeable sleeve. 27. Lift out the removeable sleeve. IA_EN_RE_RZ_2.5_6_V1_251023...
- Page 54 Maintenance 28. Remove the cross coupling. 29. Loosen the screws on the oil reservoir. 30. Lift the housing with the aggregate out of the oil reservoir. 31. Position the aggregate suitably, e.g. on the edge of a table. IA_EN_RE_RZ_2.5_6_V1_251023...
- Page 55 Maintenance 32. Unscrew the cover plate. 33. Pull the vanes out of the rotor. 34. Unscrew the screws on the aggregate. 35. Pay attention to the Usit rings in the bearing cover. > The Usit rings must be reinstalled during assembly.
- Page 56 Maintenance 36. Lift off the bearing cover. 37. Lift the oil pump rotor out of the bearing cover. 38. Remove the cross coupling. 39. Lift off the stator. IA_EN_RE_RZ_2.5_6_V1_251023...
- Page 57 Maintenance 40. Pull the vanes out of the rotor. 41. Lift off the rotor. 42. Remove the intermediate bearing plate. 43. Unscrew the oil separator. IA_EN_RE_RZ_2.5_6_V1_251023...
- Page 58 Maintenance 44. Remove the oil separator. 45. Replace the cap and the spring. 46. Remove the cross coupling. 47. Remove the stator. IA_EN_RE_RZ_2.5_6_V1_251023...
- Page 59 Maintenance 48. Pull the vanes out of the rotor. 49. Lift off the rotor and the bearing plate. 50. Pull the rotor and the bearing plate apart. 51. Remove the seals on the bearing plate. IA_EN_RE_RZ_2.5_6_V1_251023...
- Page 60 Maintenance 52. Remove the seal on the bearing plate on the other side. 53. Remove all seals in the housing. 54. Unscrew the screw plug of the oil retention valve from the bearing cover. 55. Disassemble the oil retention valve. 56.
- Page 61 Maintenance 57. Unscrew the noise damping nozzle from the bearing cover. > Attention: The nozzle is glued in place with Omnifit® 50M locking adhesive. 58. Check the nozzle for continuity. 59. Replace a dirty nozzle. 60. Use Omnifit® 50M locking adhesive and screw the nozzle back in.
- Page 62 Maintenance 64. Press the shaft seal out of the bearing plate using a flat‑blade screwdriver. > Do not damage the surfaces. 65. Press the shaft seal out of the bearing cover using a flat blade screwdriver. > Do not damage the surfaces. 66.
- Page 63 Maintenance 70. Clamp the press‑fit mandrel 7 in a pillar dril‑ ling machine. 71. Observe the correct alignment of the shaft seal, see also section „Press‑fit mandrel“. 72. Place the shaft seal on the press‑fit mandrel. 73. Press the shaft seal into the bearing cover as far as it will go.
- Page 64 Maintenance 76. Place the O‑rings in the bearing plate on the opposite side. 77. Place the bearing plate in the housing. 78. Place the oil separator with spring and cap into the stator. 79. Screw the oil separator tight. IA_EN_RE_RZ_2.5_6_V1_251023...
- Page 65 Maintenance 80. Insert the stator. > The oil separator must point in the direction of the pump handle. 81. Place the rotor with vanes into the stator. 82. Insert the intermediate bearing plate. 83. Insert the cross coupling. IA_EN_RE_RZ_2.5_6_V1_251023...
- Page 66 Maintenance 84. Assemble the oil separator and insert the stator. > The oil separator must point in the direction of the pump handle. 85. Place the rotor with vanes into the stator. 86. Insert the cross coupling. 87. Assemble the oil retention valve with housing.
- Page 67 Maintenance 88. Screw the retaining device into the bearing cover. 89. Insert the bearing cover. 90. Place the Usit rings in the holes of the bea‑ ring cover. 91. Screw the aggregate parts together. IA_EN_RE_RZ_2.5_6_V1_251023...
- Page 68 Maintenance 92. Check the correct fit of the cross coupling and place the rotor in the stator. 93. Insert the rotor and the vanes. 94. Fill the space around the rotor with the vacu‑ um pump oil with which you operate the pump.
- Page 69 Maintenance 96. Screw the aggregate to the oil reservoir. 97. Place a new O‑ring around the removeable sleeve. 98. Fill the space in front of the removeable slee‑ ve with the vacuum pump oil with which you operate the pump. 99.
- Page 70 Maintenance 100. Screw the removeable sleeve tight. 101. Insert the protective wall. > Ensure that the O‑ring is correctly seated in the housing. > Alternatively, the O‑ring can also be placed around the protective wall for installati‑ on. Use a little grease for better hold of the O‑ring.
- Page 71 Maintenance 103. Turn the fan wheel slightly until the motor slides completely into the housing. 104. Screw the motor tight. 105. Note the orientation of the fan cover. 106. Align the fan cover at the marked points. IA_EN_RE_RZ_2.5_6_V1_251023...
- Page 72 Maintenance 107. Thread the fan cover onto the motor flange by tilting it sideways over the fan wheel. > Avoid damaging the fan wheel. 108. Screw the fan cover tight. 109. Place (new ones if necessary) suction felts in the housing. 110.
- Page 73 Maintenance 112. Pull the cap off the outlet. 113. Unscrew the oil inlet screw. 114. Fill in oil. > The oil level must be between the „Min.“ and „Max.“ markings on the rating plate. 115. Screw in the oil inlet screw. 116.
-
Page 74: Press-In Mandrels
Press-in mandrels Press-in mandrels > The press‑in mandrels are designed for mounting shaft sealing rings in VACUUBRAND rotary vane pumps. > Shaft sealing rings should only be mounted with a special press‑in mandrel. > Press only on the outer ring of the shaft seal. -
Page 75: Mandrel 4
Press-in mandrels 5.2 Mandrel 4 14,90 9,61 DETAIL Z 4 : 1 17,95 -0,05 23,95 -0,05 0,05 A alle unbemaßten Fasen 0,5x45° all undimensioned chamfers 0.5 x 45° +0,1 18,10 Bearing plate 20636159 IA_EN_RE_RZ_2.5_6_V1_251023... -
Page 76: Mandrel 7
Press-in mandrels 5.3 Mandrel 7 14,9 9,61 DETAIL Z 4 : 1 17,95 -0,05 23,95 -0,05 0,05 A alle unbemaßten Fasen 0,5x45° all undimensioned chamfers 0.5 x 45° +0,1 18,1 Bearing cover 20636448 IA_EN_RE_RZ_2.5_6_V1_251023... -
Page 77: Exploded Drawing Re 2.5 / Re 6
Exploded drawing RE 2.5 / RE 6 Exploded drawing RE 2.5 / RE 6 IA_EN_RE_RZ_2.5_6_V1_251023... - Page 78 Exploded drawing RZ 2.5 / RZ 6 Exploded drawing RZ 2.5 / RZ 6 IA_EN_RE_RZ_2.5_6_V1_251023...
- Page 79 Pumping assembly RE 6 20637378 Pumping assembly RZ 2.5 20637379 Pumping assembly RZ 6 20637391 Pumping assembly RE 2.5 20637465 Motor 230 V / 50‑60 Hz 20637466 Motor 100‑230 V / 50‑60 Hz 20637467 Motor 230 V / 50‑60 Hz 20637468 Motor 100‑230 V / 50‑60 Hz...
- Page 80 With Health and Safety Clearance form: return, disposal. ƒ > Visit our website for further information: www.vacuubrand.com. Service handling > Follow the description on: VACUUBRAND > Support > Service Meet the terms of Reduce downtime, speed up processing. Please have the...
- Page 81 IA_EN_RE_RZ_2.5_6_V1_251023...
- Page 82 IA_EN_RE_RZ_2.5_6_V1_251023...
- Page 83 IA_EN_RE_RZ_2.5_6_V1_251023...
- Page 84 VACUUBRAND > Support > Manuals Manufacturer: VACUUBRAND GMBH + CO KG VACUUBRAND GMBH + CO KG Alfred‑Zippe‑Str. 4 Alfred‑Zippe‑Str. 4 97877 Wertheim 97877 Wertheim GERMANY GERMANY Phone: Head office +49 9342 808‑0 Sales +49 9342 808‑5550 Service +49 9342 808‑5660 Fax: +49 9342 808‑5555 Email: info@vacuubrand.com Web: www.vacuubrand.com...
Need help?
Do you have a question about the RE 2.5 and is the answer not in the manual?
Questions and answers