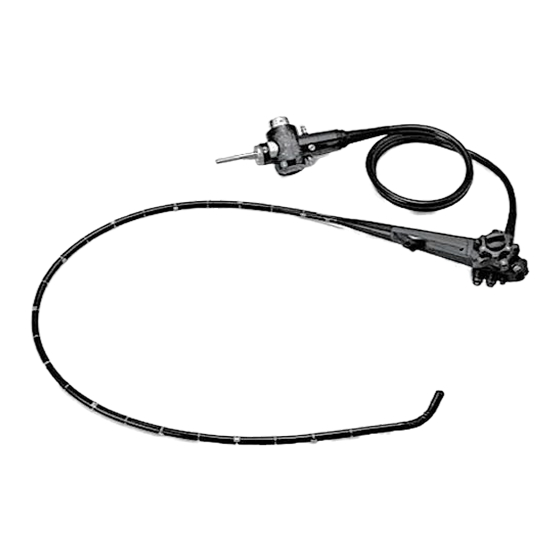
Page 1
INSTRUCTIONS EVIS EXERA II ULTRASOUND GASTROVIDEOSCOPE OLYMPUS GF TYPE UCT180 CAUTION : Balloons Used with This Product Contain Natural Rubber Latex, Which May Cause Allergic Reactions.
Contents Contents Symbols..................Important Information — Please Read Before Use....Intended use .................... Applicability of endoscopy and endoscopic treatment ......Instruction manual..................User qualifications..................Instrument compatibility ................Reprocessing before the first use/reprocessing and storage after use ..Spare equipment ..................Maintenance management ...............
Page 4
Water ....................Rinse water ..................Alcohol .................... ETD (Endo Thermo Disinfectors) ............ OER-AW (Olympus Endoscope Reprocessor) ....... 6.10 Washer-Disinfector................6.11 Ethylene oxide gas sterilization............6.12 Steam sterilization (autoclaving) ............. 6.13 Signs of degradation from reprocessing and its number of times ...
Page 5
Contents Chapter 9 Reprocessing the Endoscope (and related reprocessing accessories) ........127 Summary of reprocessing the endoscope ........Preparing the equipment for reprocessing........Precleaning the endoscope and accessories ......... Leakage testing of the endoscope ..........Manually cleaning the endoscope and accessories......Manually disinfecting the endoscope and accessories ....
Page 6
Symbol key ....................Acoustic output table with Hitachi or FUJIFILM Healthcare diagnostic ultrasound system ..............Acoustic output table when combined with Olympus universal endoscopic ultrasound center EU-ME1 ............ Clinical measurement accuracy with Hitachi or FUJIFILM Healthcare diagnostic ultrasound system ..............
Symbols Symbols The meaning(s) of the symbol(s) shown on the package, the back cover of this instruction manual and/or this instrument are as follows: Refer to instructions. Caution TYPE BF applied part Serial number IPX7 Ingress protection rating (except for connectors) Lock the ultrasound connector Release the ultrasound connector Ultrasound endoscope...
Page 8
Symbols Nonsterile Keep away from sunlight Keep dry Do not use if package is damaged Contains or Presence of Natural Rubber Latex Date of manufacture Manufacturer Translation Importer (into European Union) Authorized representative in the European Community ULTRASOUND GASTROVIDEOSCOPE GF-UCT180...
Important Information — Please Read Before Use Intended use This instrument has been designed to be used with an Olympus universal endoscopic ultrasound center or a diagnostic ultrasound system (Hitachi, Ltd. or FUJIFILM Healthcare Corporation), video system center, light source, documentation equipment, monitor, EndoTherapy accessories and other ancillary equipment.
Keep this and all related instruction manuals in a safe and accessible location. If you have any questions or comments about any information in this manual, please contact Olympus. Terms used in this manual NBI (Narrow Band Imaging) observation mode: This is an observation mode using narrow band observation light.
Important Information — Please Read Before Use User qualifications If there are official standards for user qualifications for performing endoscopy and endoscopic treatment that are defined by the healthcare facility’s medical administrators or other official institutions, such as academic societies on endoscopy, follow those standards.
Equipment that has been disassembled, repaired, altered, changed, or modified by persons other than Olympus’ own authorized service personnel is excluded from Olympus’ limited warranty and is not warranted by Olympus in any manner.
Important Information — Please Read Before Use Precautions Follow the warnings and cautions given below when handling this instrument. This information is to be supplemented by the warnings and cautions given in each chapter. • After using this instrument, reprocess and store it according to the instructions given in Chapter 7, “Cleaning, Disinfection, and Sterilization Procedures”.
Page 14
Important Information — Please Read Before Use • Never operate the bending section, feed air, perform suction, insert or withdraw the endoscope’s insertion section, or use EndoTherapy accessories without viewing the endoscopic image. Patient injury, bleeding, and/or perforation may result. •...
Page 15
Important Information — Please Read Before Use • When withdrawing the endoscope, make sure that the balloon is completely deflated, using the ultrasound image and endoscopic field of view. Withdrawing the endoscope while the balloon is inflated could result in patient injury. •...
Page 16
Important Information — Please Read Before Use • Do not attempt to bend the endoscope’s insertion section with excessive force. Otherwise, the insertion section may be damaged. • Do not touch the electrical contacts inside the videoscope cable connector. CCD damage may result. •...
Important Information — Please Read Before Use • To check the electromagnetic interference from other equipment (any equipment other than this instrument or the components that constitute this system), the system should be observed to verify its normal operation in the configuration in which it will be used.
Page 18
Important Information — Please Read Before Use • Inserting or withdrawing the endoscope, feeding air, applying suction, or operating the bending section without a clear endoscopic image may cause patient injury, bleeding, and/or perforation. ∗1 • For reasons described below, do not rely on the NBI observation mode alone for primary detection of lesions or to make a decision regarding any potential diagnostic or therapeutic intervention.
Match all items in the package with the components shown below. Inspect each item for damage. If the instrument is damaged, a component is missing, or you have any questions, do not use the instrument; immediately contact Olympus. This instrument was not disinfected or sterilized before shipment. Before using this instrument for the first time, reprocess it according to the instructions given in Chapter 7, “Cleaning, Disinfection, and Sterilization Procedures”.
Page 20
Chapter 1 Checking the Package Contents Balloon 3 Mouthpiece Channel plug Injection tube (MAJ-249 sterile, 20 pcs.) (MB-142, 2 pcs.) (MAJ-621) (MH-946) Cleaning brush Single use single-ended Single use combination Cleaning adapter for (MAJ-1534) cleaning brush cleaning brush instrument channel port (BW-400L, 3 pcs.) (BW-412T, 3 pcs.) (MAJ-350)
Chapter 1 Checking the Package Contents Ultrasonic cable The ultrasonic cable (MAJ-1597) is necessary to use this endoscope (GF-UCT180), but it must be purchased separately (optional) from Olympus. For Olympus universal endoscopic ultrasound center and the diagnostic ultrasound system (Hitachi, Ltd. or...
Chapter 2 Instrument Nomenclature and Specifications Chapter 2 Instrument Nomenclature and Specifications Nomenclature Universal cord 1. Ultrasonic cable connector 2. Suction connector 3. S-cord connector mount 4. Endoscope connector 5. Air supply connector 5. Water supply connector Water-resistant cap Product number and serial number (MH-553) 6.
Page 23
Chapter 2 Instrument Nomenclature and Specifications 9. UP/DOWN angulation lock 8. UP/DOWN angulation control knob Suction cylinder 7. Elevator control lever 10. Suction valve (MAJ-1443) 11. Air/water valve (MAJ-1444) 20. RIGHT/LEFT angulation control knob 19. RIGHT/LEFT Air/water cylinder angulation lock Control section Grip section...
Connects the endoscope to the suction tube of the suction pump. 3. S-cord connector mount Connects the endoscope with the Olympus electrosurgical unit via the S-cord. The S-cord conducts leakage current from the endoscope to the electrosurgical unit. To connect the S-cord, refer to the instruction manual for the electrosurgical unit.
Page 25
Chapter 2 Instrument Nomenclature and Specifications 10. Suction valve (MAJ-1443) The suction valve is depressed to the first stage to activate suction. The valve is also used to remove any fluid or debris adhering to the objective lens. The suction valve is depressed completely to activate suction of sterile water from the balloon through the balloon channel.
Page 26
Chapter 2 Instrument Nomenclature and Specifications 19. RIGHT/LEFT angulation lock Turning this lock in the “F ” direction frees angulation. Turning the lock in the opposite direction locks the bending section at any desired position. 20. RIGHT/LEFT angulation control knob When this knob is turned in the “R ”...
Page 28
Chapter 2 Instrument Nomenclature and Specifications Specifications Endoscope functions Model GF-UCT180 ° Optical system Field of view ° Direction of view forward oblique Depth of field 3 – 100 mm Insertion tube Distal end outer ø 14.6 mm diameter Distal end enlarged 1.
Page 29
Balloon method, Direct contact method Transducer surface 43°C > max. temperature ∗1 These products may not be available in some areas. Ultrasound function with Olympus universal endoscopic ∗1 ultrasound center EU-ME1 Operation mode B mode, color flow mode, power flow mode...
Page 30
Chapter 2 Instrument Nomenclature and Specifications General safety IEC 60601-1: 2005 Whole of this instrument is possible standard for medical to contact live bodies of operators or electrical equipment patients. Medical Devices This device complies with the Directive requirements of Directive 93/42/EEC concerning medical devices.
Chapter 2 Instrument Nomenclature and Specifications UDI Indication The UDI Indication is required by some countries’ regulations regarding the identification of medical device also known as Unique Device Identification (UDI). The following information is being coded in the 2-dimensional barcode (GS1 Data Matrix): •...
Page 32
Chapter 2 Instrument Nomenclature and Specifications • Connecting the fitting part to the suction connector may impair the connection of the suction tube to the suction connector. It may also cause the suction tube to become detached from the endoscope and allow patient debris to spray.
Page 33
Chapter 2 Instrument Nomenclature and Specifications Place the hole on the fitting part over the endoscope’s S-cord connector mount. Connecting plate Notch Venting connector Water-resistant cap Figure 2.2 The instructions on the remaining pages of this manual are given under the assumption that the chain for water-resistant cap is detached from the endoscope.
Inspect other equipment to be used with this instrument as described in their respective instruction manuals. If this instrument malfunctions, do not use it. Return it to Olympus for repair as described in Section 13.3, “Returning the endoscope for repair” on page 220. If any irregularities are suspected after inspection, follow the instructions given in Chapter 13, “Troubleshooting”.
Refer to the respective instruction manuals for each piece of equipment. Monitor Olympus universal endoscopic ultrasound center, Hitachi or FUJIFILM Healthcare diagnostic Video system center...
Chapter 3 Preparation and Inspection Inspection of the endoscope Clean and disinfect or sterilize the endoscope as described in Chapter 7, “Cleaning, Disinfection, and Sterilization Procedures” and Chapter 11, “Reprocessing Endoscopes and Accessories Using an AER/WD” of this manual. Then remove the water-resistant cap from the endoscope connector. Inspection of the endoscope Inspect the control section and the endoscope connector for excessive scratching, deformation, loose parts, or other irregularities.
Page 37
Chapter 3 Preparation and Inspection Using both hands, bend the insertion tube of the endoscope into a semicircle. Then, moving your hands as shown by the arrows in Figure 3.3, confirm that the entire insertion tube can be smoothly bent to form a semicircle and that the insertion tube is pliable.
Page 38
Chapter 3 Preparation and Inspection Inspection for smooth operation Confirm that both the UP/DOWN and RIGHT/LEFT angulation locks move all the way in the “F ” direction. Turn the UP/DOWN and RIGHT/LEFT angulation control knobs slowly in each direction until they stop, and return them to their respective neutral positions.
Page 39
Chapter 3 Preparation and Inspection Inspection of the RIGHT/LEFT angulation mechanism Turn the RIGHT/LEFT angulation lock all the way in the opposite direction of the “F ” mark. Then turn the RIGHT/LEFT angulation control knob in the “R ” or the “ L”...
Chapter 3 Preparation and Inspection Elevator control lever Forceps elevator Figure 3.5 Preparation and inspection of accessories Clean and disinfect or sterilize the air/water valve, suction valve, biopsy valve as described in Chapter 7, “Cleaning, Disinfection, and Sterilization Procedures”. Inspection of the air/water and suction valves •...
Page 41
Chapter 3 Preparation and Inspection Air/water cylinder Air channel Water channel Air/water nozzle Figure 3.6 Confirm that the holes of the valves are not blocked (see Figures 3.7 and 3.8). Confirm that the valves are not deformed or cracked (see Figures 3.7 and 3.8).
Page 42
Chapter 3 Preparation and Inspection Spring Skirt Packing Hole Suction valve (MAJ-1443) Figure 3.8 The air/water and suction valves are consumables. If the inspection of the air/water or suction valve reveals any irregularity, use new valves. ULTRASOUND GASTROVIDEOSCOPE GF-UCT180...
Page 43
Chapter 3 Preparation and Inspection Inspection of the biopsy valve The biopsy valve is a consumable that should be inspected as follows before each use. Replace it with a new one if any irregularity is observed during the inspection. An irregular, abnormal, or damaged valve can reduce the efficacy of the endoscope’s suction system, and may leak or spray patient debris or fluids, posing an infection control risk.
Page 44
Chapter 3 Preparation and Inspection Inspection of the mouthpiece Do not use a mouthpiece that is damaged, deformed, or reveals other irregularities. Doing so may cause patient injury and/or equipment damage. Placing the mouthpiece in the patient’s mouth before the procedure prevents the patient from biting and/or damaging the endoscope’s insertion section.
Chapter 3 Preparation and Inspection Attaching accessories to the endoscope The air/water valve and the suction valve do not require lubrication. Lubricants can cause swelling of the valves’ seals, which will impair valve function. Attaching the suction valve Attach the suction valve (MAJ-1443) to the suction cylinder of the endoscope (see Figure 3.12).
Page 46
Chapter 3 Preparation and Inspection Attaching the air/water valve Attach the air/water valve (MAJ-1444) to the air/water cylinder of the endoscope (see Figure 3.13). Confirm that valve is fitted properly without any bulging of the skirt. Air/water valve Skirt Air/water cylinder Figure 3.13 The air/water valve may stick at first, but it should operate smoothly after it is depressed a few times.
Connection of the ultrasonic cable (MAJ-1597) and Olympus universal endoscopic ultrasound center Insert the ultrasonic connector properly into the transducer port of the Olympus universal endoscopic ultrasound center. Rotate the connector’s lock handle 1/4 turn clockwise (see Figure 3.15).
Page 48
Chapter 3 Preparation and Inspection Connection of the ultrasonic cable (MAJ-1597) and Hitachi or FUJIFILM Healthcare diagnostic ultrasound system Insert the ultrasound connector properly into the transducer port of the diagnostic ultrasound system. Rotate the connector’s lock handle 1/4 turn clockwise (see Figure 3.16).
Page 49
Chapter 3 Preparation and Inspection ∗1 ProSound α7 Ultrasonic connector Lock handle ∗1 ProSound F75 PROBE 2 PROBE 1 PROBE 3 PROBE 4 Lock handle Ultrasound connector ∗1 These products may not be available in some areas. ALOKA ARIETTA 850, ARIETTA 70, ARIETTA 750 Junction box (JB-294C or later)
Page 50
Chapter 3 Preparation and Inspection Connection of the endoscope and ancillary equipment Firmly connect the suction tube from the suction pump to the suction connector on the endoscope connector. If the suction tube is not attached properly, debris may drip from the tube and can pose an infection control risk, cause equipment damage, and/or reduce suction capability.
Page 51
Chapter 3 Preparation and Inspection Air supply connector Water supply connector Water container’s connection adapter Endoscope connector Air supply channel Metal tip Water supply channel Figure 3.17 Align the mark on the videoscope cable with mark 1 on the endoscope connector and push it in until it stops (see Figure 3.18).
Page 52
Chapter 3 Preparation and Inspection Attach the suction tube from the suction pump to the suction connector on the endoscope connector (see Figure 3.19). Suction pump Suction connector Suction tube Figure 3.19 Connection of the endoscope and ultrasonic cable The electrical contacts inside the ultrasound connector have sharp tips and may be damaged by handling.
Chapter 3 Preparation and Inspection Mark B (red) Mark B (red) Mark A (red) Mark A (red) Mark (red) Mark (red) Endoscope-side connector of the ultrasonic cable Figure 3.20 Inspection of the endoscopic system Inspection of the endoscopic image Do not stare directly into the distal end of the endoscope while the examination light is ON.
Page 54
If this fails to stop air bubbles from being emitted, do not use the endoscope because there may be a malfunction. Contact Olympus. When the distal end of the insertion section is immersed less than 10 cm below the surface of the sterile water, a small amount of air bubbles may be emitted from the air/water nozzle even when the air/water valve is not operated.
Page 55
Chapter 3 Preparation and Inspection Inspection of the objective lens cleaning function Use sterile water only. Nonsterile water may cause patient cross-contamination and/or infection. • When the air/water valve is depressed for the first time, it may take a few seconds before water is emitted. •...
Page 56
If the reattached or replaced suction valve fails to operate smoothly, the endoscope may be malfunctioning; stop using it and contact Olympus. • If the biopsy valve leaks, replace it with a new one. A leaking biopsy valve can reduce the efficacy of the endoscope’s...
Page 57
Confirm that the EndoTherapy accessory can be withdrawn smoothly from the biopsy valve. Inspection of the ultrasound image with the Olympus universal endoscopic ultrasound center EU-ME1 Turn on Olympus universal endoscopic ultrasound center EU-ME1.
Page 58
Chapter 3 Preparation and Inspection Inspect the endoscopic ultrasound center as described in its instruction manual. When setting the frequency, choose the setting value CLA2, and then the frequencies available with the keyboard (see Figure 3.22). Refer to EU-ME1’s instruction manual for instructions on how to set the frequency. Figure 3.22 Press the “FREEZE”...
Chapter 3 Preparation and Inspection Inspection of the ultrasound image with the Hitachi or FUJIFILM Healthcare diagnostic ultrasound system Inspect the diagnostic ultrasound system as described in its instruction manual. Turn the diagnostic ultrasound system ON. Confirm that the ultrasound image is visible on the diagnostic ultrasound system (see Figure 3.24).
Page 60
Chapter 3 Preparation and Inspection • Confirm that the balloon applicator (MAJ-675) and cotton thread that is used to tie the balloon have been properly reprocessed as described in Chapters 5, “Reprocessing: General Policy” through 7, “Cleaning, Disinfection, and Sterilization Procedures”. •...
Page 61
Chapter 3 Preparation and Inspection Attaching the balloon Inspect the balloon and confirm that there are no holes, swelling, color changes or any other irregularities. If an irregularity is detected, do not use the balloon; use a spare instead, inspecting it thoroughly before use. Insert the front end of the balloon into the installation side of the balloon applicator.
Page 62
Chapter 3 Preparation and Inspection Inspection of the balloon and expelling air • Do not feed water into the balloon when the water level in the water container is too low. The balloon may not be inflated properly. If this occurs, refer to Section 13.1, “Troubleshooting guide”...
Page 63
Chapter 3 Preparation and Inspection Do not obstruct the balloon water supply port with the cotton thread. If the balloon water supply port is obstructed, the balloon cannot be inflated or deflated (see Figure 3.27). Balloon water supply port Balloon attachment groove Figure 3.27 ULTRASOUND GASTROVIDEOSCOPE GF-UCT180...
Chapter 4 Operation Chapter 4 Operation This manual does not explain or discuss clinical endoscopic procedures. It only describes basic operation and precautions related to the operation of this instrument. • To guard against dangerous chemicals and potentially infectious material during the procedure, wear personal protective equipment, such as eyewear, face mask, moisture-resistant clothing, and chemical-resistant gloves that fit properly and are long enough so that your skin is not...
Page 65
Chapter 4 Operation • Never insert or withdraw the endoscope under any of the following conditions. Otherwise, patient injury, bleeding, and/or perforation can result. − While the EndoTherapy accessory extends from the distal end of the endoscope. − While the bending section is locked in position. −...
Chapter 4 Operation • Set the brightness of the light source to the minimum level necessary to perform the procedure safely. If the endoscope is used for a prolonged period at or near maximum light intensity, vapor may be observed in the endoscopic image. This is caused by the evaporation of organic material (blood, moisture in stool, etc.) due to heat generated by the light guide near the light guide lens.
Page 67
Chapter 4 Operation Insertion of the endoscope Keep the elevator control lever moved all the way in the opposite direction of the “ U” direction while inserting or withdrawing the endoscope into or from the patient. If the elevator control lever is moved all the way in the “ U”...
Page 68
Chapter 4 Operation Move the elevator control lever in the opposite direction of the “ U” until it stops. If necessary, apply a medical-grade, water-soluble lubricant to the insertion section. Place the mouthpiece between the patient’s teeth or gums, with the outer flange on the outside of the patient’s mouth.
Page 69
Chapter 4 Operation Air/water feeding and suction • If the sterile water level in the water container is too low, then air, not water, will be supplied. In this case, turn the airflow regulator on the light source OFF and add sterile water to the water container until it reaches the specified water level.
Page 70
Chapter 4 Operation Air/water feeding Cover the air/water valve’s hole to feed air from the air/water nozzle at the distal end (see Figure 4.3). Depress the air/water valve to the first stage to feed water onto the objective lens (see Figure 4.3). Suction valve Air/water valve Figure 4.3...
Page 71
Chapter 4 Operation Suction • Avoid aspirating solid matter or thick fluids; instrument channel, suction channel, or suction valve clogging can occur. If the suction valve clogs and suction cannot be stopped, detach the suction tube from the suction connector on the endoscope connector.
Chapter 4 Operation Observation of the ultrasound image The sterile deaerated water immersion method • Completely insert the water feeding valve (MD-744) of the water supply unit (UWS-1) into the biopsy valve (MAJ-853). Improper connection may cause water to leak. •...
Page 73
Chapter 4 Operation Position the distal end of the endoscope near the target site and press the “FREEZE” switch on the ultrasound system to change the ultrasound image to the REAL-TIME mode. Cover the small hole in the air/water valve of the endoscope and completely depress the valve to inflate the balloon.
Chapter 4 Operation Using EndoTherapy accessories For more information on combining the endoscope with particular EndoTherapy accessories, refer to the “System chart” in the Appendix and the instruction manuals for the accessories. • When using EndoTherapy accessories, keep the distance between the distal end of the endoscope and the mucous membrane greater than the endoscope’s minimum visible distance so that the EndoTherapy accessory remains visible...
Page 75
Chapter 4 Operation • Do not insert EndoTherapy accessories without the forceps elevator being raised. If they are inserted without the forceps elevator being raised, the accessory cannot be observed in the endoscopic image and it may cause patient injury. •...
Page 76
Chapter 4 Operation Insertion of EndoTherapy accessories into the endoscope • Do not insert EndoTherapy accessories forcibly or abruptly. Otherwise, the EndoTherapy accessory may extend from the distal end of the endoscope abruptly, which could cause patient injury, bleeding, and/or perforation. •...
Page 77
Chapter 4 Operation Select EndoTherapy accessories compatible with the instrument from the “System chart” in the Appendix. Refer to the accessories’ instruction manuals for operating instructions. Move the elevator control lever all the way in the “ U” direction. Hold the UP/DOWN and RIGHT/LEFT angulation knobs stationary. Confirm that the tip of the EndoTherapy accessory is closed or retracted into its sheath and insert the EndoTherapy accessory slowly and straight into the slit of the biopsy valve.
Page 79
Chapter 4 Operation Operation of EndoTherapy accessories Operate the EndoTherapy accessory according to the directions given in its instruction manual. Withdrawal of EndoTherapy accessories • Patient debris might spray when EndoTherapy accessories are withdrawn from the biopsy valve. To prevent this, hold a piece of gauze around the accessory and the biopsy valve during withdrawal.
Page 80
Chapter 4 Operation High-frequency cauterization treatment • Performing treatment while the intestines are filled with a flammable gas could result in an explosion, fire, and/or serious patient injury. If the intestines contain a flammable gas, replace it with air or a nonflammable gas such as CO before performing high-frequency treatment.
Chapter 4 Operation Withdrawal of the endoscope and inspection of air/water and balloon channels Withdrawal of the endoscope If blood unexpectedly adheres to the surface of the insertion section of the withdrawn endoscope, carefully check the condition of the patient. When using the balloon method, aspirate water from the balloon by depressing the suction valve while covering the hole in the valve.
Page 82
If your scope does not continuously emit air bubbles during this step, please immediately cease use of the scope and contact Olympus to schedule service and repair of the scope. Keep the air/water valve’s hole covered with your finger and depress the valve to the first stage.
Page 83
If water does not emit, the balloon water channel may be clogged by patient fluids. If water is not emitted from your scope during this step, please immediately cease use of the scope and contact Olympus to schedule service and repair of the scope. •...
Roll up the rear end of the balloon with your fingers (see Figure 4.6). After the removal of the balloon, confirm that the surface of the ultrasound transducer is free from scratches. In case the ultrasound transducer surface is scratched, stop using the endoscope and contact Olympus. Figure 4.6 ULTRASOUND GASTROVIDEOSCOPE GF-UCT180...
Chapter 4 Operation Transportation of the endoscope Transporting within the healthcare facility When carrying the endoscope by hand, loop the universal cord, hold the endoscope connector with the control section in one hand and hold the distal end of the insertion tube securely, but gently without squeezing, in the other hand (see Figure 4.7).
• If you have any questions or comments about any information in this manual, or if a problem that cannot be solved occurs while reprocessing, contact Olympus. • This manual is based on the requirement of ISO 17664: 2017. ULTRASOUND GASTROVIDEOSCOPE GF-UCT180...
Chapter 5 Reprocessing: General Policy Importance of cleaning, disinfection, and sterilization The medical literature reports incidents of cross-contamination resulting from improper cleaning, disinfection, or sterilization. It is strongly recommended that all individuals engaged in reprocessing closely observe all instructions given in this manual and the manuals of all ancillary equipment, and have a thorough understanding of the following items: •...
• Olympus only confirms validation of the endoscope reprocessors it recommends. When using an endoscope reprocessor that is not recommended by Olympus, the manufacturer of the endoscope reprocessor is responsible for validating compatibility of the reprocessor with the endoscope models listed in its instruction manual.
Page 90
Chapter 5 Reprocessing: General Policy • Before using an endoscope reprocessor, confirm that it is capable of reprocessing the endoscope including all channels. If you are uncertain as to the ability of your endoscope reprocessor to clean and high-level disinfect the endoscope including all channels, contact the endoscope reprocessor’s manufacturer for specific instructions and/or information on connectors.
Page 91
For information on the durability against each method, please contact Olympus. If cleaning, disinfection, and sterilization methods not stated in this instruction manual are performed, Olympus cannot guarantee the effectiveness, safety and durability of this instrument.
Reprocessing before the first use New endoscopes, repaired endoscopes, accessories, and the carrying case for endoscopes are not reprocessed prior to shipping from Olympus, regardless of whether those instruments are for new purchase, demo, or loaner purposes. Reprocess all such endoscopes and accessories received from Olympus according to the instructions given in this manual before storage and before using them in a patient procedure.
Chapter 5 Reprocessing: General Policy • Store the endoscope and accessories in a proper storage cabinet, following the policies at your institution, applicable national laws and standards, and professional society guidelines and recommended practices. • Improper storage practices, such as not thoroughly drying external and internal surfaces (lumens) prior to storage, will lead to an infection control risk.
Olympus repairs devices to manufacturer’s specifications using original equipment manufacturer’s (OEM) materials. The use of non-OEM materials to repair an Olympus device may affect the material compatibility and reprocessing efficacy of the device with certain reprocessing chemicals or methods. In...
Chapter 6 Compatible Reprocessing Methods List of compatible methods Reprocessing methods listed in Table 6.1 through 6.5 have been validated with this endoscope and accessories. For details on the chemicals and devices that can be used, refer to Section 6.3 and subsequent sections. ULTRASOUND GASTROVIDEOSCOPE GF-UCT180...
Page 96
The endoscope is only compatible with ultrasonic cleaning as performed in an Olympus-recommended reprocessor, such as OER-AW (OER-AW may not be available in some areas). When using an AER/WD that is recommended by Olympus other than listed above, contact Olympus.
Page 97
The endoscope is only compatible with ultrasonic cleaning as performed in an Olympus-recommended reprocessor, such as OER-AW (OER-AW may not be available in some areas). When using an AER/WD that is recommended by Olympus other than listed above, contact Olympus.
Page 98
The endoscope is only compatible with ultrasonic cleaning as performed in an Olympus-recommended reprocessor, such as OER-AW (OER-AW may not be available in some areas). When using an AER/WD that is recommended by Olympus other than listed above, contact Olympus.
Page 99
The endoscope is only compatible with ultrasonic cleaning as performed in an Olympus-recommended reprocessor, such as OER-AW (OER-AW may not be available in some areas). When using an AER/WD that is recommended by Olympus other than listed above, contact Olympus.
Page 100
The endoscope is only compatible with ultrasonic cleaning as performed in an Olympus-recommended reprocessor, such as OER-AW (OER-AW may not be available in some areas). When using an AER/WD that is recommended by Olympus other than listed above, contact Olympus.
Follow the instructions provided by the detergent manufacturer regarding concentration, temperature, contact time, use life, expiration date, and rinsing unless otherwise specified by Olympus. The detergents shown in Table 6.6 were used for validation. Trade name...
Within 28 days Table 6.7 Peracetic acid and Glutaraldehyde disinfectant with properties Unless otherwise specified by Olympus, follow the disinfectant manufacturer’s instructions regarding activation (if required), concentration, temperature, contact time, use life, expiration date and rinsing. If the disinfectant manufacturer does not specify how many times the disinfectant should be rinsed, perform rinsing at least two times.
Chapter 6 Compatible Reprocessing Methods Do not reuse rinse water. Rinsing after disinfection Olympus recommends using sterile water, fresh potable water or water that has been processed (e.g., filtered, deionized, or purified) to improve its chemical and/or microbiological quality.
• For the other details, refer to the instruction manual for ETD. Accessories when ETD Double or ETD4 is used Adapter Basket Configuration Model name Olympus 3 (WD00122A) ETD Double (WD00117A) Olympus 3-6 (WD00163A) 3XMB-109 (E0424446) ETD4 –...
(i.e., lower the forceps elevator), attach the dedicated connecting tube to the distal end of the endoscope, and set it in your OER-AW according to its instructions. When using an AER/WD that is not recommended by Olympus, set the forceps elevator according to the AER/WD manufacturer’s instructions.
Chapter 6 Compatible Reprocessing Methods These products are not available in the member states of the EU. • When the endoscope is cleaned and disinfected simultaneously in combination with an endoscope of the same or another model using OER-AW, see the group number of the endoscopes shown in the “List of Compatible Endoscopes/Connecting Tubes 2 and the instruction manual for OER-AW to confirm the combination.
Page 107
Drying (95°C, 10 min) (Setting values) Table 6.13 WD program parameters Olympus tested the compatibility of medical instrument with the WD compatible ° with ISO 15883-1, 2. The drying temperature and the drying duration were 110 and 20 minutes, respectively *2 This value may not be the actual temperature of the medical instrument being processed in the chamber, but it is a setting value for the WD.
Page 108
Chapter 6 Compatible Reprocessing Methods • ISO 15883-2 regulate that disinfection temperature give an of at least 600. Olympus recommends that WD provide an value of 3000. • Do not use a program that exceeds 55°C in the cleaning process and 93°C in the disinfection process.
Chapter 6 Compatible Reprocessing Methods 6.11 Ethylene oxide gas sterilization • Use packages appropriate for ethylene oxide gas sterilization. If packages are not appropriate for ethylene oxide gas sterilization, the equipment may not be properly sterilized. • The results of sterilization depend on various factors such as how the sterilized accessories are packed and positioned, and the method of placing and loading it in the sterilization device.
• Olympus recommends use of water and steam compliant with EN 285: 2015. • Use packages appropriate for steam sterilization. If packages are not appropriate for steam sterilization, the equipment may not be properly sterilized.
Page 111
Chapter 6 Compatible Reprocessing Methods • The results of sterilization depend on various factors such as how the sterilized medical instrument are packed and positioned, and the method of placing and loading it in the sterilization device. Please verify the sterilization effects by using biological or chemical indicators.
Endoscope • Reprocessing may cause the following degradations. If any of these signs of degradation happens, contact Olympus. − Cracked, peeled or discolored adhesives at either end of the bending section and at objective lens and light guide lens −...
Page 113
Chapter 6 Compatible Reprocessing Methods • Olympus has verified no degradation happens when the listed number of disinfection or sterilization cycle is performed. When this endoscope is Automatic cleaning and disinfected or sterilized more than the following times, the degradation shown in Figure 6.4 may occur. If such degradations happens, maintenance is required.
Page 114
Chapter 6 Compatible Reprocessing Methods • When these accessories are reprocessed more than the following times (see Table 6.18 through 6.20), these accessories do not function due to degradations. Please discard and replace it with a new one. Reprocessing methods Chain for Water-resistant Balloon...
Page 115
Chapter 6 Compatible Reprocessing Methods Reprocessing methods Suction Air/water Cleaning Channel Air/water Valve valve brush plug channel (MAJ-1443) (MAJ-1444) (MAJ-1534) (MAJ-621) cleaning adapter (MAJ-629) Manual Alkaline enzymatic 190 times 190 times 100 times 190 times 190 times cleaning detergent Neutral enzymatic 190 times 190 times 100 times...
Page 116
Chapter 6 Compatible Reprocessing Methods Reprocessing methods Injection tube Suction Cleaning Washing tube (MH-946) cleaning adapter for (MH-974) adapter instrument (MH-856) channel port (MAJ-350) Manual Alkaline enzymatic detergent 300 times 300 times 75 times 300 times cleaning Neutral enzymatic detergent 300 times 300 times 75 times...
Chapter 7 Cleaning, Disinfection, and Sterilization Procedures Chapter 7 Cleaning, Disinfection, and Sterilization Procedures ALL channels of the endoscope, including the elevator wire channel and balloon channel, MUST be cleaned and high-level disinfected or sterilized during EVERY reprocessing cycle, even if the channels were not used during the previous patient procedure.
Page 118
Chapter 7 Cleaning, Disinfection, and Sterilization Procedures Injection tube Channel plug Single use combination Single use (MH-946) (MAJ-621) cleaning brush single-ended cleaning (BW-412T) brush (BW-400L) Air/water channel Cleaning brush Suction cleaning adapter Washing tube cleaning adapter (MAJ-1534) (MH-856) (MH-974) (MAJ-629) Leakage tester Biopsy valve Water-resistant cap...
Page 119
Chapter 7 Cleaning, Disinfection, and Sterilization Procedures Reprocessing equipment parts and functions For inspection of other equipment than that mentioned below, refer to the instruction manual for the equipment being used. Water-resistant cap (MH-553) The two water-resistant caps are attached to the videoscope cable connector and the ultrasonic cable connector on the endoscope to protect the connectors from water penetration during reprocessing.
Page 120
Chapter 7 Cleaning, Disinfection, and Sterilization Procedures Single use combination cleaning brush (BW-412T) The channel cleaning brush part of the single use combination cleaning brush is used to brush the inside of the instrument channel, suction channel, and the interior and/or openings of the suction valve, AW channel cleaning adapter, and biopsy valve.
Page 121
Chapter 7 Cleaning, Disinfection, and Sterilization Procedures Single use single-ended cleaning brush (BW-400L) The single use single-ended cleaning brush is used to clean the balloon channel (see Figure 7.6). Metal tip Shaft Figure 7.6 Balloon suction channel Figure 7.7 ULTRASOUND GASTROVIDEOSCOPE GF-UCT180...
Page 122
Chapter 7 Cleaning, Disinfection, and Sterilization Procedures Cleaning brush (MAJ-1534) The cleaning brush is used to brush the external surface of the distal end of the endoscope (see Figure 7.8). Long bristle row Short bristle row Grip section Figure 7.8 ...
Page 123
Chapter 7 Cleaning, Disinfection, and Sterilization Procedures Air/water channel cleaning adapter (MAJ-629) During precleaning, the air/water channel cleaning adapter is connected to the air/water cylinder. When the adapter is depressed, water is fed through the air/water channel. Air is continuously fed when the adapter is not depressed (see Figure 7.10).
Page 124
Chapter 7 Cleaning, Disinfection, and Sterilization Procedures Channel plug (MAJ-621) The channel plug is used to plug the openings of the instrument channel port, air/water and suction cylinders during cleaning (see Figure 7.12). Biopsy valve cap Cylinder plug Figure 7.12 ...
Page 125
Chapter 7 Cleaning, Disinfection, and Sterilization Procedures Cleaning adapter for instrument channel port (MAJ-350) The cleaning adapter for instrument channel port is attached to the instrument channel port during reprocessing so that the endoscope may be connected to reprocessing equipment (see Figure 7.14). Notice card Figure 7.14 Inspection of reusable equipment...
Page 126
Chapter 7 Cleaning, Disinfection, and Sterilization Procedures Inspection of the water-resistant caps (MH-553) Confirm that the inside of the water-resistant caps is dry and free from debris (see Figure 7.2 on page 113). Wipe with a dry cloth when the inside of the water-resistant cap is wet or debris is detected.
Page 127
Chapter 7 Cleaning, Disinfection, and Sterilization Procedures Inspection of the channel plug (MAJ-621) Confirm that the cylinder plug and biopsy valve cap are free from cracks, scratches, flaws and debris (see Figure 7.12 on page 118). Inspection of the cleaning adapter for instrument channel port (MAJ-350) Check for cracks, scratches, flaws, debris and other damage (see Figure 7.14 on page 119).
Page 128
Chapter 7 Cleaning, Disinfection, and Sterilization Procedures Inspection of the single use combination cleaning brush (BW-412T) Remove the brush from its packaging just prior to use (see Figure 7.15). Confirm that the channel cleaning brush part and the tip at the distal end are securely attached.
Chapter 8 Reprocessing Workflow for Endoscopes and Accessories Chapter 8 Reprocessing Workflow for Endoscopes and Accessories Summary of reprocessing workflow This chapter describes the workflow for reprocessing the endoscope and accessories. Deviation from the recommended workflow may pose an infection control risk. ULTRASOUND GASTROVIDEOSCOPE GF-UCT180...
Chapter 8 Reprocessing Workflow for Endoscopes and Accessories Workflow for reprocessing endoscopes and accessories Withdrawal of the endoscope Precleaning (Section 9.3 on page 128) Leakage testing of the endoscope (Section 9.4 on page 133) *3, *7 Manually cleaning the endoscope and accessories (Section 9.5 on page 138) Reprocessing Endoscopes and Accessories Using an AER/WD (Chapter 11)
Page 131
Chapter 8 Reprocessing Workflow for Endoscopes and Accessories *7 The following accessories are used in the cleaning of the endoscope: Accessories MH-553, MAJ-621, MAJ-629, MH-946, MH-856, MAJ-350 and MH-974 are cleaned simultaneously with the endoscope in Section 9.5, performing Section 10.2 is not required.
Page 132
Chapter 8 Reprocessing Workflow for Endoscopes and Accessories ULTRASOUND GASTROVIDEOSCOPE GF-UCT180...
Chapter 9 Reprocessing the Endoscope (and related reprocessing accessories) Chapter 9 Reprocessing the Endoscope (and related reprocessing accessories) Summary of reprocessing the endoscope Certain accessories are required to manually reprocess the endoscope. Some of these accessories are cleaned and disinfected along with the endoscope. The steps for reprocessing the endoscope and these accessories are explained in this chapter.
Chapter 9 Reprocessing the Endoscope (and related reprocessing accessories) Preparing the equipment for reprocessing If the endoscope is not immediately precleaned after each procedure, residual organic debris will begin to solidify and it may be difficult to effectively reprocess the endoscope. Preclean the endoscope at the bedside in the procedure room immediately after each procedure.
Page 135
Chapter 9 Reprocessing the Endoscope (and related reprocessing accessories) Wipe down the insertion section • Handle the insertion section carefully. Tightly gripping or sharply bending the insertion section or bending section can stretch or severely damage the insertion section and the covering of the bending section.
Page 136
Chapter 9 Reprocessing the Endoscope (and related reprocessing accessories) Suction valve Detergent solution Figure 9.1 Flush water and air into the air/water channel Do not use the air/water channel cleaning adapter for patient examinations. It will cause continuous insufflation and could result in patient injury.
Page 137
Chapter 9 Reprocessing the Endoscope (and related reprocessing accessories) Switch the airflow regulator to maximum output (“HIGH” or “3”). Immerse the distal end of the insertion tube in the water (see Figure 9.1). Depress the air/water channel cleaning adapter to feed water through the channels for about 30 seconds.
Page 138
Chapter 9 Reprocessing the Endoscope (and related reprocessing accessories) Use the 5 cm (5 ml) syringe to slowly flush clean water through the elevator wire channel several times (see Figure 9.4). Use the 5 cm (5 ml) syringe to slowly flush air through the elevator wire channel several times until a steady stream of air bubbles exit the distal end (see Figure 9.4).
If the ultrasonic cable connector or the electrical connector is scratched, contact Olympus. • Never immerse the water-resistant caps unless they are attached to the endoscope. Water remaining inside the...
Page 140
Chapter 9 Reprocessing the Endoscope (and related reprocessing accessories) • Always use a dry water-resistant cap. Any water remaining on the water-resistant cap may cause damage to the endoscope, maintenance unit or light source. Confirm that the inside of the water-resistant cap is dry and free from debris. Wipe with a dry, lint-free clean cloth if the inside of the water-resistant cap is wet or there is debris.
Page 141
Chapter 9 Reprocessing the Endoscope (and related reprocessing accessories) Mark 2 (red) Mark 2 (red) Water-resistant Rotate Rotate (a) When performing leakage (b) When using a manual disinfector testing, cleaning, disinfection or using an endoscope reprocessor Figure 9.6 ULTRASOUND GASTROVIDEOSCOPE GF-UCT180...
Page 142
This means that water will be able to penetrate the inside of the endoscope. If you locate a leak, remove the endoscope from the water and contact Olympus. • Never attach or detach the water-resistant cap or the leakage tester’s connector cap while immersed.
Page 143
Chapter 9 Reprocessing the Endoscope (and related reprocessing accessories) Leakage tester connector Maintenance unit or light source Water-resistant cap (MH-553) Leakage tester connector cap Venting connector Figure 9.7 Confirm that the leakage tester is emitting air by gently depressing the pin located inside the leakage tester’s connector cap.
Chapter 9 Reprocessing the Endoscope (and related reprocessing accessories) Manually cleaning the endoscope and accessories To prevent a water leak, do not apply excessive force when cleaning the endoscope. After completing the leakage test, perform manual cleaning according to the procedures described below.
Page 145
Chapter 9 Reprocessing the Endoscope (and related reprocessing accessories) • Injection tube (MH-946) • Cleaning adapter for (MAJ-350) instrument channel port • Washing tube (MH-974) • To prevent damage to the endoscope, never immerse it together with objects other than the equipment listed above. •...
Page 146
Chapter 9 Reprocessing the Endoscope (and related reprocessing accessories) Immerse the endoscope in the detergent solution. With the endoscope immersed, use a lint-free cloth to thoroughly wipe all external surfaces of the endoscope. Pay particular attention to the air/water nozzle opening and the objective lens, and ensure that all surfaces of the distal end are thoroughly cleaned (see Figure 9.8).
Page 147
Chapter 9 Reprocessing the Endoscope (and related reprocessing accessories) Turn the elevator control lever all the way in the opposite direction of the “ U” direction. perform the following brushing in the detergent solution. While holding the distal end, brush the groove of the interior of the forceps elevator with the cleaning brush (MAJ-1534) until all debris is removed (see Figure 9.9).
Page 148
Chapter 9 Reprocessing the Endoscope (and related reprocessing accessories) Look at the right side of the instrument channel opening from the distal end, brush the interior of this part with the cleaning brush (MAJ-1534) until all debris is removed (see Figure 9.11). Cleaning brush (MAJ-1534) Figure 9.11...
Page 149
Chapter 9 Reprocessing the Endoscope (and related reprocessing accessories) Flushing the interior of the forceps elevator Immerse the distal end in detergent solution, operate the elevator control lever to raise and lower the forceps elevator 3 times. With the forceps elevator raised, flush the interior of the forceps elevator with detergent solution using the 30 cm (30 ml) syringe (see Figure 9.13).
Page 150
Depending on the location, the missing part may not be recoverable by passing a new brush or other EndoTherapy accessory through the channel. In this case, contact Olympus. • Clean only one endoscope and/or accessories with a single use combination cleaning brush (BW-412T), a single use single-ended cleaning brush (BW-400L), and dispose of the brushes immediately after use.
Page 151
Chapter 9 Reprocessing the Endoscope (and related reprocessing accessories) While the endoscope is submerged, brush the instrument and the suction channel, suction cylinder, instrument channel port, balloon channel and irrigation port according to the following procedures (see Figure 9.14). Suction cylinder Instrument channel port Suction...
Page 152
Chapter 9 Reprocessing the Endoscope (and related reprocessing accessories) Brushing the suction channel in the universal cord (location B) Grip the single use combination cleaning brush (BW-412T) at a point 3 cm from the bristles. Insert the single use combination cleaning brush (BW-412T) straight into the opening of the suction cylinder as illustrated by B in Figure 9.14.
Page 153
Chapter 9 Reprocessing the Endoscope (and related reprocessing accessories) Brushing the suction cylinder (location D) When inserting the single use combination cleaning brush (BW-412T) into the suction cylinder, do not forcibly insert the brush beyond the middle of the brush section. Otherwise, the brush may become stuck in the suction cylinder.
Page 154
Chapter 9 Reprocessing the Endoscope (and related reprocessing accessories) Aspirating detergent solution into the instrument channel and the suction channels Attach the suction valve (MAJ-1443) to the suction cylinder of the endoscope. Attach the cleaning adapter for instrument channel port to the instrument channel port.
Page 155
Chapter 9 Reprocessing the Endoscope (and related reprocessing accessories) Reprocess the suction tube, the suction cleaning adapter and suction valve as described in Section 10.1, “Summary of reprocessing the accessories” on page 165. Suction cleaning adapter Weighted end Figure 9.15 Cleaning adapter for the Suction cleaning Weighted...
Page 156
Chapter 9 Reprocessing the Endoscope (and related reprocessing accessories) Flushing detergent solution into the air/water and balloon channels Attach the channel plug’s biopsy valve cap to the cleaning adapter for instrument channel port (see Figure 9.17). Lower the channel plug’s cylinder plug onto the air/water and suction cylinders and slide the plug until it stops (see Figure 9.17).
Page 157
Chapter 9 Reprocessing the Endoscope (and related reprocessing accessories) Attach the 30 cm (30 ml) syringe to the injection tube’s air/water channel port (see Figure 9.19). Inject 150 cm (150 ml) of detergent solution into the air/water channel and the balloon channel. Detach the channel plug, the cleaning adapter for instrument channel port and injection tube from the endoscope, and leave all items immersed.
Page 158
Chapter 9 Reprocessing the Endoscope (and related reprocessing accessories) Flushing detergent solution into the elevator wire channel Attach the washing tube to the elevator channel plug (see Figure 9.20). Elevator channel plug Washing tube Figure 9.20 Use the 5 cm (5 ml) syringe to inject 15 cm (15 ml) of detergent solution into the elevator wire channel via the washing tube (see Figure 9.21).
Page 159
Chapter 9 Reprocessing the Endoscope (and related reprocessing accessories) Soaking the endoscope and all reprocessing equipment in detergent solution Using a lint-free cloth, wipe all debris from the endoscope’s external surfaces while the endoscope is immersed in the detergent solution. Cover the basin with a tight-fitting lid to minimize the diffusion of detergent vapors.
Page 160
Chapter 9 Reprocessing the Endoscope (and related reprocessing accessories) Using the 30 cm (30 ml) syringe, flush the air/water, balloon, and suction channels with 150 cm (150 ml) of air, respectively, via the injection tube (see Figures 9.19 and 9.22). Use the 5 cm (5 ml) syringe, to flush the elevator wire channel with 10 cm (10 ml) of air via the washing tube (see Figure 9.21).
Page 161
Chapter 9 Reprocessing the Endoscope (and related reprocessing accessories) (Optional) Alcohol flush Fill a small container with 70% ethyl or isopropyl alcohol. Inject nonsterile water and air following the procedure given in “Rinse the endoscope and accessories” on page 162. Immerse the suction port of the injection tube in the alcohol.
Page 162
Chapter 9 Reprocessing the Endoscope (and related reprocessing accessories) Dry the endoscope When aerating the endoscope channels, the air pressure used for manual drying should be 0.2 MPa or more but less than 0.5 MPa (≥2 and <5 kgf/cm , ≥29 and <72 psig). Move the elevator control lever in the opposite direction of the “...
Page 163
Chapter 9 Reprocessing the Endoscope (and related reprocessing accessories) Feed compressed filtered air of 0.2 MPa or more, less than 0.5 MPa from the luer port of the washing tube until no alcohol exits from the distal end of the endoscope (e.g. In the case of 0.2 MPa, it is necessary to feed compressed air for 2 minutes or more for alcohol and 1 minute or more for water.).
Chapter 9 Reprocessing the Endoscope (and related reprocessing accessories) Manually disinfecting the endoscope and accessories All disinfection steps should be performed with the endoscope and all equipment completely immersed in disinfectant solution. If the equipment is connected to the endoscope while they are immersed, or any part of the equipment is not immersed completely, disinfectant solution may not adequately contact all surfaces of the equipment.
Page 165
Chapter 9 Reprocessing the Endoscope (and related reprocessing accessories) Preparation Fill a basin with disinfectant solution at the temperature and concentration recommended by the disinfectant manufacturer. Use a basin that is at least 40 cm by 40 cm (16” by 16”) in size and deep enough to completely immerse the endoscope.
Page 166
Chapter 9 Reprocessing the Endoscope (and related reprocessing accessories) Soaking the endoscope and all equipment in disinfectant solution All disinfection steps should be performed with the endoscope and all equipment completely immersed. If the equipment is detached while not immersed, disinfectant solution may not adequately contact all surfaces.
Chapter 9 Reprocessing the Endoscope (and related reprocessing accessories) Rinsing the endoscope and accessories following disinfection Use appropriate rinse water as instructed in Section 6.6, “Rinse water”. After reprocessing, purge the channels of the endoscope to thoroughly dry them. Otherwise, bacteria may proliferate in the channels and pose an infection control risk to the patient and/or operators performing the next procedure with the endoscope.
Page 168
Chapter 9 Reprocessing the Endoscope (and related reprocessing accessories) If sterile water is not available, prepare the following equipment. • Clean water for nonsterile water rinse • Small basin with a tight-fitting lid • Sterile cotton swabs • 70% ethyl or isopropyl alcohol Alcohol is flammable.
Chapter 9 Reprocessing the Endoscope (and related reprocessing accessories) Use a sterile, lint-free cloth to thoroughly wipe and dry the external surfaces of the endoscope and all equipment. Store the components following the instructions as described in Chapter 9, “Reprocessing the Endoscope (and related reprocessing accessories)”. Flushing the channels with 70% ethyl or isopropyl alcohol after rinsing them with sterile water facilitates drying inside the channels.
Page 170
Chapter 9 Reprocessing the Endoscope (and related reprocessing accessories) Ethylene oxide gas sterilization As an alternative to high-level disinfection, the endoscope can be sterilized by ethylene oxide gas. After performing manual cleaning and drying as described in Section 9.2, “Preparing the equipment for reprocessing” on page 128 and Section 9.5, “Manually cleaning the endoscope and accessories”...
Chapter 10 Reprocessing the Accessories Chapter 10 Reprocessing the Accessories 10.1 Summary of reprocessing the accessories All reusable parts and reprocessing equipment must be cleaned and high-level disinfected or sterilized after each use. Otherwise, an infection control risk to the patient and/or operators can result.
Chapter 10 Reprocessing the Accessories Equipment needed Prepare the following equipment, and wear appropriate personal protective equipment. • Personal protective equipment • Small basins with tight-fitting lids • Clean water • Detergent solution • Single use combination cleaning brush (BW-412T) •...
Page 173
Chapter 10 Reprocessing the Accessories Clean the external surfaces Fill a clean basin with the detergent solution at the temperature and concentration recommended by the detergent manufacturer. Detach the cap of the biopsy valve (MAJ-853) from the main body of the valve.
Page 174
Chapter 10 Reprocessing the Accessories Brush the biopsy valve (MAJ-853) Use the channel cleaning brush part of the single use combination cleaning brush (BW-412T). Channel cleaning brush part Figure 10.2 While immersing the biopsy valve completely in the detergent solution, brush the hole and the slit of the valve (2 areas).
Page 175
Chapter 10 Reprocessing the Accessories Flush the accessories with detergent solution Flush the Air/water channel cleaning adapter (MAJ-629) While immersing the air/water channel cleaning adapter completely in the detergent solution, depress and release the piston of the adapter several times.
Page 176
Chapter 10 Reprocessing the Accessories While immersing the air/water channel cleaning adapter completely in the detergent solution and rotating the adapter 360 degrees, using the syringe, flush the interior of seals and the back of skirt of the adapter thoroughly with 30 ml of the detergent solution each (4 areas).
Page 177
Chapter 10 Reprocessing the Accessories If air bubbles exit, flush the part where air bubbles exit with 30 ml of the detergent solution until no air bubbles exit. Flush the suction cleaning adapter (MH-856) While immersing the syringe and the suction cleaning adapter completely in the detergent solution, slowly fill the syringe with the detergent solution, press it to the connecting end of the suction cleaning adapter, and flush the adapter with 30 ml of the detergent solution.
Page 178
Chapter 10 Reprocessing the Accessories If air bubbles exit, repeat Step 1. Flush the injection tube (MH-946) Attach the syringe to the suction channel port of the injection tube. Air/water channel port Syringe Suction channel port Figure 10.9 While immersing the syringe and the injection tube completely in the detergent solution, slowly pull the syringe plunger to fill the syringe with the detergent solution.
Page 179
Chapter 10 Reprocessing the Accessories Move the syringe to the air/water channel port of the injection tube. Air/water channel port Syringe Suction channel port Figure 10.11 While immersing the syringe and the injection tube completely in the detergent solution, slowly pull the syringe plunger to fill the syringe with the detergent solution.
Page 180
Chapter 10 Reprocessing the Accessories While immersing the syringe and the injection tube completely in the detergent solution, slowly fill the syringe with the detergent solution, press it to one side of the connector plug’s opening, and flush the plug with 30 ml of the detergent solution.
Page 181
Chapter 10 Reprocessing the Accessories If air bubbles exit, flush the part where air bubbles exit with 30 ml of the detergent solution until no air bubbles exit. Flush the cleaning adapter for instrument channel port (MAJ-350) While immersing the cleaning adapter for instrument channel port (MAJ-350) completely in the detergent solution, using the syringe, flush the interiors, the holes of the adapter with 30 ml of the detergent solution each (2 areas).
Page 182
Chapter 10 Reprocessing the Accessories While immersing the cleaning adapter for instrument channel port (MAJ-350) completely in the detergent solution and rotating the adapter 360 degrees, using the syringe, flush the groove of the adapter thoroughly with 30 ml of the detergent solution. Confirm that no air bubbles exit from the groove during the flush.
Page 183
Chapter 10 Reprocessing the Accessories Repeat Step 1 and 2 until no debris is observed upon inspection of the brush. Immerse the accessories in detergent solution Leave all accessories completely immersed in the detergent solution, according to the instructions of the detergent manufacturer. Remove all accessories from the detergent solution.
Page 184
Chapter 10 Reprocessing the Accessories Hold the adapter and tilt it to expel the water remaining in the adapter. Flush the washing tube (MH-974) While immersing the syringe and the washing tube completely in the water, slowly fill the syringe with the water, press it to the connecting end of the washing tube, and flush the tube with 30 ml of the water (see Figure 10.8).
Page 185
Chapter 10 Reprocessing the Accessories Dry the external surface Remove all other accessories from the water. Wipe and dry the external surfaces of all accessories, using clean lint-free cloths. Inspect all accessories for residual debris. If debris is found on any accessory, return to the beginning of Section 10.2, “Manually cleaning the accessories”...
Page 186
Chapter 10 Reprocessing the Accessories Flush the suction cleaning adapter (MH-856) Fill the syringe with the alcohol, press it to the connecting end of the suction cleaning adapter, and flush the adapter with 30 ml of the alcohol. Syringe Connecting end Weighted end Figure 10.18...
Page 187
Chapter 10 Reprocessing the Accessories Flush the injection tube (MH-946) Completely immerse the suction port of the injection tube in the alcohol. Attach the syringe to the suction channel port of the injection tube (see Figure 10.9). Slowly pull the syringe plunger to fill the syringe with the alcohol. Then push in the plunger to flush the suction channel tube of the injection tube with 30 ml of the alcohol.
Page 188
Chapter 10 Reprocessing the Accessories Attach the syringe to the suction channel port of the injection tube (see Figure 10.9). Pull the syringe plunger to fill the syringe with air. Then push in the plunger to flush the suction channel tube of the injection tube with air. Confirm that no alcohol exits from the tube during the flush.
Page 189
Chapter 10 Reprocessing the Accessories Rotate Skirt Rotate Seal Figure 10.23 Thoroughly dry the external surfaces of the adapter by wiping with sterile lint-free cloths. Dry the biopsy valve (MAJ-853) Feed compressed filtered air of 0.2 MPa or more, less than 0.5 MPa to the interiors of the cap and the main body of the biopsy valve from both sides each (4 areas) until no alcohol or water exits from the valve.
Page 190
Chapter 10 Reprocessing the Accessories Dry the suction cleaning adapter (MH-856) Cover the weighted end of the suction cleaning adapter in sterile lint-free cloths to prevent splashing from the weighted end of the adapter. Cloth Connecting end Figure 10.25 Feed compressed filtered air of 0.2 MPa or more, less than 0.5 MPa from the connecting end of the suction cleaning adapter until no alcohol or water exits from the adapter.
Page 191
Chapter 10 Reprocessing the Accessories Dry the washing tube (MH-974) Cover the weighted end of the washing tube in sterile lint-free cloths to prevent splashing from the weighted end of the tube. Cloth Luer port Figure 10.27 Feed compressed filtered air of 0.2 MPa or more, less than 0.5 Mpa from the luer port of the washing tube until no alcohol or water exits from the tube.
Page 192
Chapter 10 Reprocessing the Accessories Dry the injection tube (MH-946) Cover the outlet of the suction channel tube, the air pipe port, the air/water channel port and the suction channel port of the injection tube in sterile lint-free cloths to prevent splashing from the openings of the injection tubes. Cloth Figure 10.29 Feed compressed filtered air of 0.2 MPa or more, less than 0.5 MPa from...
Page 193
Chapter 10 Reprocessing the Accessories Feed compressed filtered air of 0.2 MPa or more, less than 0.5 MPa from the suction channel port and the air/water channel port each (2 ports) until no alcohol or water exits from the suction channel tube, the air/water channel tube, and filter tubes.
Page 194
Chapter 10 Reprocessing the Accessories Dry the channel plug (MAJ-621) Feed compressed filtered air of 0.2 MPa or more, less than 0.5 MPa to the interiors, the springs, and the holes of the channel plug each (5 areas) until no alcohol or water exits from them.
Chapter 10 Reprocessing the Accessories 10.3 Manually disinfecting the accessories • Completely remove all air bubbles from all equipment, including inner channels. Air bubbles remaining on the equipment prevent proper disinfection. • All disinfection steps should be performed with all equipment completely immersed.
Page 196
Chapter 10 Reprocessing the Accessories While immersing the Air/water channel cleaning adapter completely in the disinfectant solution, using the syringe, flush the holes of the adapter with 30 ml of the disinfectant solution each (2 holes). Confirm that no air bubbles exit from the adapter during the flush.
Page 197
Chapter 10 Reprocessing the Accessories Flush the biopsy valve (MAJ-853) While immersing the biopsy valve completely in the disinfectant solution, using the syringe, flush the interiors of the cap and the main body of the valve from both sides with 30 ml of the disinfectant solution each (4 areas). Confirm that no air bubbles exit from the valve during the flush.
Page 198
Chapter 10 Reprocessing the Accessories Flush the suction cleaning adapter (MH-856) While immersing the syringe and the suction cleaning adapter completely in the disinfectant solution, slowly fill the syringe with the disinfectant solution, press it to the connecting end of the suction cleaning adapter, and flush the adapter with 30 ml of the disinfectant solution.
Page 199
Chapter 10 Reprocessing the Accessories Flush the injection tube (MH-946) Attach the syringe to the suction channel port of the injection tube. Air/water channel port Syringe Suction channel port Figure 10.40 While immersing the syringe and the injection tube completely in the disinfectant solution, slowly pull the syringe plunger to fill the syringe with the disinfectant solution.
Page 200
Chapter 10 Reprocessing the Accessories Move the syringe to the air/water channel port of the injection tube. Air/water channel port Syringe Suction channel port Figure 10.42 While immersing the syringe and the injection tube completely in the disinfectant solution, slowly pull the syringe plunger to fill the syringe with the disinfectant solution.
Page 201
Chapter 10 Reprocessing the Accessories While immersing the syringe and the injection tube completely in the disinfectant solution, slowly fill the syringe with the disinfectant solution, press it to one side of the connector plug’s opening, and flush the plug with 30 ml of the disinfectant solution.
Page 202
Chapter 10 Reprocessing the Accessories If air bubbles exit, flush the part where air bubbles exit with 30 ml of the disinfectant solution until no air bubbles exit. Flush the cleaning adapter for instrument channel port (MAJ-350) While immersing the cleaning adapter for instrument channel port (MAJ-350) completely in the disinfectant solution, using the syringe, flush the interiors, the holes of the adapter with 30 ml of the disinfectant solution each (2 areas).
Page 203
Chapter 10 Reprocessing the Accessories While immersing the cleaning adapter for instrument channel port (MAJ-350) completely in the disinfectant solution and rotating the adapter 360 degrees, using the syringe, flush the groove of the adapter thoroughly with 30 ml of the disinfectant solution. Confirm that no air bubbles exit from the groove during the flush.
Page 204
Chapter 10 Reprocessing the Accessories Immerse the accessories in disinfectant solution While immersing the accessory completely in the disinfectant solution, detach the syringe from the accessory. Confirm that all accessories are completely immersed in the disinfectant solution. While immersing the all accessories completely in the disinfectant solution, wipe all external surfaces of them to remove air bubbles, using clean lint-free cloths.
Page 205
Chapter 10 Reprocessing the Accessories Remove the injection tube (MH-946) Remove the injection tube from the disinfectant solution. Attach the syringe to the suction channel port of the injection tube (see Figure 10.40). Pull the syringe plunger to fill the syringe with air. Then push in the plunger to flush the suction channel tube of the injection tube with 30 ml of air to expel the disinfectant solution.
Chapter 10 Reprocessing the Accessories 10.4 Rinsing the accessories following disinfection Use appropriate rinse water as instructed in Section 6.6, “Rinse water”. Alcohol is flammable. Handle with care. Consult with your healthcare facility's infection control committee regarding rinse water quality as described in Section 6.6, “Rinse water”.
Page 207
Chapter 10 Reprocessing the Accessories Flush the suction cleaning adapter (MH-856) While immersing the syringe and the suction cleaning adapter completely in the rinse water, slowly fill the syringe with the rinse water, press it to the connecting end of the suction cleaning adapter, and flush the adapter with 30 ml of the rinse water.
Page 208
Chapter 10 Reprocessing the Accessories If air bubbles exit, repeat Step 7. Flush the channel plug (MAJ-621) While immersing the channel plug completely in the rinse water, using the syringe, flush the interiors, the springs, and the holes of the plug with 30 ml of the rinse water each (5 areas) (see Figure 10.45).
Page 209
Chapter 10 Reprocessing the Accessories Remove the washing tube (MH-974) Remove the washing tube from the rinse water. Hold the tube and tilt it to expel the rinse water remaining in the tube. Place it in a sterile basin. ...
Chapter 10 Reprocessing the Accessories 10.5 Sterilizing the accessories Some components are compatible with several sterilization methods. However, certain components are not compatible with some methods, which can cause equipment damage. In this section, the sterilization methods for the equipment compatible with ethylene oxide gas sterilization or steam sterilization (autoclaving) listed in Table 6.1 on page 90, are described below.
Page 211
Chapter 10 Reprocessing the Accessories Seal the individual parts or equipment separately in packages appropriate for steam sterilization (autoclaving) according to your healthcare facility’s protocol. Steam sterilize the packages according to the recommended steam sterilization (autoclaving) exposure parameters as described in Section 6.12, “Steam sterilization (autoclaving)”...
Chapter 11 Reprocessing Endoscopes and Accessories Using an AER/WD Chapter 11 Reprocessing Endoscopes and Accessories Using an AER/WD 11.1 Reprocessing endoscopes and accessories using an AER Follow the workflow described in Section 8.2, “Workflow for reprocessing endoscopes and accessories” when reprocessing endoscopes and accessories with an AER.
• Make sure to use the correct adapters for this endoscope according to the instruction manua for the OER-AW or Section 6.9, “OER-AW (Olympus Endoscope Reprocessor)”. • OER-AW is not available in the member states of the EU. ULTRASOUND GASTROVIDEOSCOPE GF-UCT180...
Page 214
(i.e., lower the forceps elevator), attach the dedicated connecting tube to the distal end of the endoscope, and set it in your OER-AW according to its instructions. When using an AER/WD that is not recommended by Olympus, set the forceps elevator according to the AER/WD manufacturer’s instructions.
Chapter 11 Reprocessing Endoscopes and Accessories Using an AER/WD 11.4 Reprocessing accessories using a WD Follow the workflow described in Section 8.2, “Workflow for reprocessing endoscopes and accessories” when reprocessing accessories with a WD. Be sure to attach all required connectors to the accessories. For details concerning appropriate connectors, refer to the instructions of the WD manufacturer.
Chapter 12 Storage and Disposal Chapter 12 Storage and Disposal • After reprocessing, keep the endoscope and accessories separate from any contaminated equipment. If the clean endoscope and accessories become contaminated between procedures, they could present an infection control risk to the patient and/or operators in the subsequent procedure.
Store the balloon at room temperature, in a clean and dry environment. Do not store it in direct sunlight. If you have any questions about any information in this manual, contact Olympus. ULTRASOUND GASTROVIDEOSCOPE GF-UCT180...
Chapter 12 Storage and Disposal 12.3 Storage of reusable parts and reprocessing equipment Confirm that all reusable parts and reprocessing equipment are dry. Store all reusable parts in the storage cabinet. Make sure that parts do not touch each other during storage. Store all reprocessing equipment in a container, then place the container in the storage cabinet.
Troubles or failures due to other causes than those listed below should be serviced. As repair performed by persons who are not qualified by Olympus could cause patient or user injury and/or equipment damage, be sure to contact Olympus for repair following the instructions given in Section 13.3, “Returning the endoscope for repair”...
Page 220
Chapter 13 Troubleshooting Endoscope functions Angulation Irregularity Possible cause Solution description Resistance is The angulation lock(s) is Rotate angulation lock(s) in the encountered when engaged. “F ” direction. rotating angulation control knob(s). Air/water feeding Irregularity Possible cause Solution description No air feeding.
Page 221
Chapter 13 Troubleshooting Suction Irregularity Possible cause Solution description The suction is The biopsy valve is not Attach it correctly. absent or attached properly. insufficient. The biopsy valve is Replace it with a new one. damaged. The suction pump is not set Adjust the suction pump’s setting as properly.
Page 222
Chapter 13 Troubleshooting EndoTherapy accessories Irregularity Possible cause Solution description An EndoTherapy An incompatible Refer to the “System chart” in the accessory does not EndoTherapy accessory is Appendix and select a compatible pass through the being used. EndoTherapy accessory. Confirm instrument channel that the color code on the smoothly.
Page 223
Chapter 13 Troubleshooting Ultrasound function (display monitor image) Irregularity Possible cause Solution description Echo appears where Multiple echoes Move the endoscope’s distal end there is no object. generated from an to another position and check to object with strong see if the echo in question moves reflection.
If the endoscope or EndoTherapy accessory cannot be withdrawn from the patient smoothly, do not attempt to forcibly withdraw it. Should any irregularity be observed, immediately contact Olympus. Forcibly withdrawing the endoscope or EndoTherapy accessory may cause patient injury, bleeding, and/or perforation.
Page 225
Chapter 13 Troubleshooting Withdrawal when EITHER the WLI or the NBI endoscopic image does not appear on the monitor Turn all equipment OFF except the video system center, light source, monitor, and suction pump. Operate the video system center and the light source to switch to the endoscopic image that is still displayed.
Olympus. Olympus is not liable for any injury or damage that occurs as a result of repairs attempted by non-Olympus personnel. Before returning the endoscope for repair, contact Olympus. With the...
New products released after the introduction of this instrument may also be compatible for use in combination with this instrument. For further details, contact Olympus. If combinations of equipment other than those shown below are used, the full responsibility is assumed by the medical treatment facility.
Page 228
EXERA II (MAJ-1430) EXERA (MAJ-843) Videoscope cable 100 ∗1 ∗1 (MD-680 , MD-148 , or ∗1 MH-976 EVIS EXERA EVIS EXERA II video system center Water container video system center ∗1 ∗1 (CV-145 , CV-160 ∗1 (MH-884 , MAJ-901) ∗1 ∗1...
Page 229
Appendix A: System Chart Electrosurgical units EndoTherapy accessories See next page. UES-20, UES-30 Electrosurgical accessories See next page. PSD-30, PSD-60 ESG-100 ULTRASOUND GASTROVIDEOSCOPE GF-UCT180...
Page 230
Appendix A: System Chart Cleaning and disinfection equipment Single use single-ended Single use combination Cleaning brush Leakage tester cleaning brush cleaning brush (MAJ-1534) (MB-155) (BW-400L) (BW-412T) Channel plug Endoscope reprocessor Water-resistant cap Maintenance unit ∗ (OER-AW (MH-553) (MU-1) (MAJ-621) Air/water valve Suction valve Air/water channel Cleaning adapter for...
Page 231
Appendix A: System Chart EndoTherapy accessories Please not that some of the accessories may not be available in some areas. Biopsy forceps Alligator type with With needle Rat tooth Alligator type rat tooth Endoscope GF-UCT180 FB-13Q-1 FB-39Q-1, FB-40Q-1 FB-45Q-1 FB-46Q-1 Biopsy forceps (fenestrated) Elongated cups with...
Page 232
Appendix A: System Chart Grasping forceps Rubber tips Basket type Flower basket type Tripod type (non-latex) Endoscope FG-16U, FG-18Q-1, GF-UCT180 FG-301Q FG-20P-1 FG-45U-1 FG-22Q-1, FG-23Q-1 Rotatable Grasping forceps Disposable grasping forceps grasping forceps Rat tooth with Pentapod type Flower basket type Basket type alligator type Endoscope...
Appendix B: Inspection of the endoscope after cleaning, disinfection or sterilization in accordance with IEC 60601-2-37 Appendix B: Inspection of the endoscope after cleaning, disinfection or sterilization in accordance with IEC 60601-2-37 After cleaning, disinfection or sterilization this instrument, check the parts or accessories that can be contaminated through contact with the patient, with body fluids, or with expired gases according to the “Method of inspection”...
Page 235
Section 3.6, “Inspection of the endoscopic system”, on page 51. Ultrasound image See “Inspection of the ultrasound image with the Olympus universal endoscopic ultrasound center EU-ME1” and “Inspection of the ultrasound image with the Hitachi or FUJIFILM Healthcare diagnostic ultrasound system” in Section 3.6, “Inspection of the endoscopic system”, on...
Appendix C: EMC Information Appendix C: EMC Information Guidance and manufacturer’s declaration — Electromagnetic emissions This model is intended for use by medical personnel in healthcare facility environments and for use in the electromagnetic environment specified below. The customer or the user of this model should assure that it is used in such an environment.
Page 237
The customer or the user of this model should assure that it is used in such an environment. This instrument can be used with the high-frequency electrosurgical equipment that designated by Olympus. IEC 60601-1-2 IEC 60601-1-2 (2007, 2001) IEC 60601-1-2 (2014)
Page 238
Appendix C: EMC Information IEC 60601-1-2 IEC 60601-1-2 (2007, 2001) IEC 60601-1-2 (2014) Compliance Immunity test (2007, 2001) Electromagnetic environment test level level test level — Guidance Voltage dips, short 0% U < 5% U Same as left Mains power quality should be interruptions, and that of a typical commercial or (100% dip in U...
Page 239
Appendix C: EMC Information IEC 60601-1-2 IEC 60601-1-2 IEC 60601-1-2 (2007, 2001) Immunity Compliance (2014) (2007, 2001) Electromagnetic environment — test level test level test level Guidance Conducted RF 3V (V Same as left Recommended separation distance IEC 61000-4-6 (150 kHz – (150 kHz –...
Page 240
Appendix C: EMC Information • Field strength from fixed RF transmitters as determined by an electromagnetic site survey should be less than the compliance level in each frequency range Field strength from fixed transmitters, such as base stations for radio (cellular/cordless) telephones and land mobile radios, amateur radio, AM and FM radio broadcast and TV broadcast cannot be predicted theoretically with accuracy.
Page 241
Portable RF communications equipment (including peripherals such as antenna cables and external antennas) should be used no closer than 30 cm (12 inches) to any part of this instrument, including cables specified by Olympus. Otherwise, degradation of the performance of this equipment could result.
Appendix D: Acoustic Output Information in Accordance with the FDA Guidance: “Information for Manufacturers Appendix D: Acoustic Output Information in Accordance with the FDA Guidance: “Information for Manufacturers Seeking Marketing Clearance of Diagnostic Ultrasound Systems and Transducers” Symbol key Mechanical Index Soft Tissue Thermal Index in an auto-scanning mode scan Soft Tissue Thermal Index in a non-autoscanning mode...
Page 243
Appendix D: Acoustic Output Information in Accordance with the FDA Guidance: “Information for Manufacturers Equivalent beam diameter as a function of axial distance z, and equal to [(4/π) (W (z))] , where I (z) is the temporal-average intensity as a function of z (centimeters) Center frequency (MHz).
Appendix D: Acoustic Output Information in Accordance with the FDA Guidance: “Information for Manufacturers Acoustic output table with Hitachi or FUJIFILM Healthcare diagnostic ultrasound system Acoustic output table for default settings when combined with SSD-α10 Transducer Model: GF-UCT180 Acoustic Output Maximum Value 0.36 0.11...
Page 245
Appendix D: Acoustic Output Information in Accordance with the FDA Guidance: “Information for Manufacturers Acoustic output table for track3 when combined with SSD-α10 Transducer Model: Operating Mode: GF-UCT180 PWD-mode Index label Non- non-scan scan scan <=1 >1 aprt aprt Maximum Index Value 0.88 –...
Page 246
Appendix D: Acoustic Output Information in Accordance with the FDA Guidance: “Information for Manufacturers GF-UCT180 Mflow-mode Transducer Model: Operating Mode: Index label Non- non-scan scan scan >1 <= aprt aprt Maximum Index Value 0.88 – 0.76 – 0.89 (MPa) r. 3 (mW) –...
Appendix D: Acoustic Output Information in Accordance with the FDA Guidance: “Information for Manufacturers Acoustic measurement uncertainty Uncertainty Quantity (95% confidence) 12.22% 25.62% 13.19% 2.39% Acoustic output table when combined with Olympus universal endoscopic ultrasound center EU-ME1 Acoustic output table SPTA.3 TI type TIS, TIB TI value 0.83 0.99 PA.3...
±10% ±0.1 cm/sec Velocity in Doppler mode ±1BPM or ±5% ±1 beat per minute Heart rate Clinical measurement accuracy when combined with Olympus universal endoscopic ultrasound center EU-ME1 Measurement Feature Accuracy Maximum measurement range ±5% Length 20 – 40 mm Direction ±5%...
Appendix E: Acoustic Output Information Accordance with IEC 60601-2-37 Appendix E: Acoustic Output Information Accordance with IEC 60601-2-37 Acoustic output table with Hitachi or FUJIFILM Healthcare diagnostic ultrasound system The terms used in the acoustic output table are as follows: α...
Page 250
Appendix E: Acoustic Output Information Accordance with IEC 60601-2-37 Peak-rarefactional acoustic pressure Attenuated peak-rarefactional acoustic pressure α Pulse repetition rate Thermal index Bone thermal index Cranial-bone thermal index Soft-tissue thermal index Soft tissue thermal index in an auto-scanning mode scan Soft tissue thermal index in a non-autoscanning mode non scan –...
Page 251
Appendix E: Acoustic Output Information Accordance with IEC 60601-2-37 Acoustic output table when combined with SSD-α10 Transducer Model: Operating Mode: GF-UCT180 B-mode Table 201.103 – Acoustic output reporting table Index label Non-scan Non- Scan scan ≤1cm >1cm aprt aprt Maximum Index Value 0.84 0.69...
Page 252
Appendix E: Acoustic Output Information Accordance with IEC 60601-2-37 Transducer Model: Operating Mode: GF-UCT180 B/M-mode Table 201.103 – Acoustic output reporting table Index label Non-scan Non- Scan scan ≤1cm >1cm aprt aprt Maximum Index Value 0.84 0.45 – – 0.096 0.56 (MPa) r, α...
Page 253
Appendix E: Acoustic Output Information Accordance with IEC 60601-2-37 Transducer Model: Operating Mode: GF-UCT180 M-mode Table 201.103 – Acoustic output reporting table Index label Non-scan Non- Scan scan ≤1cm >1cm aprt aprt Maximum Index Value 0.84 – 0.074 – 0.30 0.13 (MPa) r, α...
Page 254
Appendix E: Acoustic Output Information Accordance with IEC 60601-2-37 Transducer Model: Operating Mode: GF-UCT180 PWD-mode Table 201.103 – Acoustic output reporting table Index label Non-scan Non- Scan scan ≤1cm >1cm aprt aprt Maximum Index Value 0.88 – 0.62 – 0.93 (MPa) r, α...
Page 255
Appendix E: Acoustic Output Information Accordance with IEC 60601-2-37 Transducer Model: Operating Mode: GF-UCT180 Mflow-mode Table 201.103 – Acoustic output reporting table Index label Non-scan Non- Scan scan ≤1cm >1cm aprt aprt Maximum Index Value 0.88 – 0.76 – 0.89 (MPa) r, α...
Page 256
Appendix E: Acoustic Output Information Accordance with IEC 60601-2-37 Transducer Model: Operating Mode: GF-UCT180 B/PWD-mode Table 201.103 – Acoustic output reporting table Index label Non-scan Non- Scan scan ≤1cm >1cm aprt aprt Maximum Index Value 0.88 – 0.50 – 0.95 (MPa) r, α...
Page 257
Appendix E: Acoustic Output Information Accordance with IEC 60601-2-37 Transducer Model: Operating Mode: GF-UCT180 B/Bflow-mode Table 201.103 – Acoustic output reporting table Index label Non-scan Non- Scan scan ≤1cm >1cm aprt aprt Maximum Index Value 0.88 0.91 – – – 0.82 (MPa) r, α...
Page 258
Appendix E: Acoustic Output Information Accordance with IEC 60601-2-37 Transducer Model: Operating Mode: GF-UCT180 Power flow-mode Table 201.103 – Acoustic output reporting table Index label Non-scan Non- Scan scan ≤1cm >1cm aprt aprt Maximum Index Value 0.88 0.91 – – –...
Page 259
Appendix E: Acoustic Output Information Accordance with IEC 60601-2-37 Transducer Model: Operating Mode: GF-UCT180 B/Bflow/D-mode Table 101 – Acoustic output reporting table Index label Non-scan Non- Scan scan ≤1cm >1cm aprt aprt Maximum Index Value 0.88 – 0.50 – 0.90 (MPa) r, α...
Appendix E: Acoustic Output Information Accordance with IEC 60601-2-37 Acoustic output table with Olympus universal endoscopic ultrasound center EU-ME1 GF-UCT180 will not exceed an MI of 1.0, or an I of 720 mW/cm in any SPTA.3 mode. In addition, GF-UCT180 will not exceed a TI of 1.0 in any mode.
Need help?
Do you have a question about the EVIS EXERA II and is the answer not in the manual?
Questions and answers