Table of Contents
Advertisement
Quick Links
Interactive solutions
Contents of Package
P
lease make sure that following items are in luded in the box, along with the main. If any items missing, contact your deale .
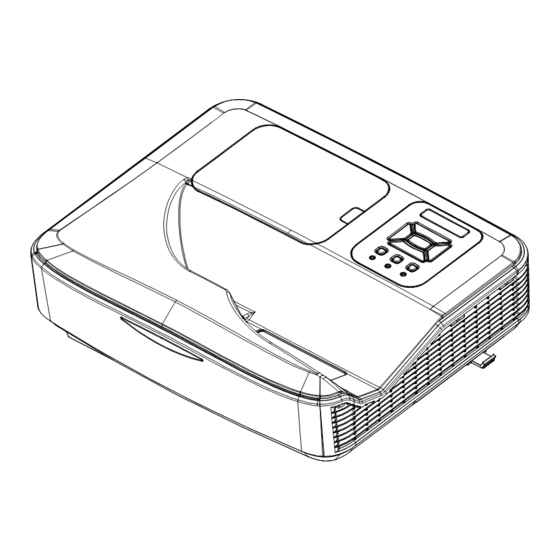
P
rojector
Q
uick Start Guide
Adjusting Projection Image Size (Diagonal)
WXGA series: Projection Image Size from 80" to 110" (2.032 to 2.794 meters).
A
B
D
D=Throw distance
B=Offset - 4.19cm
A=Throw distance - 25.17cm
1
Quick Start Guide
• Before using, read the " Quick Start Guide " and the owner 's manual to
ensure correct usage through understanding.
• After reading, store them in a safe place for future reference.
• Do not look into the lens while the project or's power is turned on.
VGA
Cable
O
wner's Manual
Screen Size
Projection
Projection
Distance (A) V-Offset (B)
Diagonal of
Distance (D)
cm
Screen
W (Width)
H (Height)
cm
D= Throw distance
80
172.3
107.7
45.7
81
174.5
109
46.2
B= Offset- 4.19cm
82
176.6
110.4
46.8
83
178.8
11 1.7
47.4
A= Throw distance – 25.17cm
84
180.9
113.1
47.9
85
183.1
114.4
48.5
86
185.2
115.8
49.1
87
187.4
117.1
49.7
88
189.5
118.5
50.2
89
191.7
119.8
50.8
90
193.9
121.2
51.4
91
196
122.5
51.9
92
198.2
123.9
52.5
93
200.3
125.2
53.1
94
202.5
126.5
53.7
95
204.6
127.9
54.2
96
206.8
129.2
54.8
97
208.9
130.6
55.4
98
211.1
131.9
55.9
99
213.2
133.3
56.5
100
215.4
134.6
57.1
101
217.5
136
57.6
102
219.7
137.3
58.2
103
221.9
138.7
58.8
104
224
140
59.4
105
226.2
141.4
59.9
106
228.3
142.7
60.5
107
230.5
144
61.1
108
232.6
145.4
61.6
109
234.8
146.7
62.2
110
236.9
148.1
62.8
Powering On the Projector
1. Securely connect the power cord and signal cable. When
connected, the POWER/STANDBY LED will turn Red.
2. Turn on the lamp by pressing " " button either on the projec-
tor or on the remote. At this moment, the POWER/STANDBY
LED will now turn Blue.
S/N: 13350755
3. Turn on and connect the source that you want to display
on the screen (computer, notebook, video player, etc).
The projector will detect the source automatically. If not,
AC Power cord
press menu button and go to "OPTIONS", make sure "Auto
Source" is enabled.
If you connect multiple sources at the same time, press the
"INPUT" button on the control panel or direct source keys on
the remote control to switch between inputs.
R
emote control
Adjusting the Projected Image
Adjusting the Projector's Height
The projector is equipped with elevator feet for adjusting the image height.
1. Locate the adjustable feet you wish to modify on the
underside of the projector.
2. Rotate the adjustable ring clockwise to raise the projector
or counter clockwise to lower it. Repeat with the remaining
feet as needed.
cm
cm
20.5
12
... or installing the wall mount
21.1
12.2
21.6
12.4
22.2
12.6
Please refer to the wall mount manual.
22.8
12.8
23.3
13
23.9
13.2
24.5
13.4
Adjusting the Projector
25.1
13.6
25.6
13.8
To focus the image, slide the focus lever to left/right until the
26.2
14
image is clear.
26.8
14.2
27.3
14.4
WXGA series: The projector will focus at distances from
27.9
14.6
1.499 to 2.06 ft. (0.457 to 0.628 meter).
28.5
14.8
29.1
15
29.6
15.2
30.2
15.4
30.8
15.6
31.3
15.8
31.9
16
32.5
16.2
33.1
16.4
58.5
16.6
59.1
16.8
59.7
17
60.3
17.2
60.8
17.4
61.4
17.6
2
62
17.8
62.5
18
1
POWER/STANDBY
s Focus
'
ON(B)
STANDBY(R)
TEMP
LAMP
MENU
INPUT
Enter
Tilt-Adjustment Feet
Tilt-Adjustment Ring
Focus Lever
Advertisement
Table of Contents

Subscribe to Our Youtube Channel
Related Manuals for Speechi SPE-400 W-I-P


Summary of Contents for Speechi SPE-400 W-I-P
- Page 1 Powering On the Projector Quick Start Guide Interactive solutions 1. Securely connect the power cord and signal cable. When • Before using, read the “ Quick Start Guide ” and the owner ’s manual to connected, the POWER/STANDBY LED will turn Red. ensure correct usage through understanding.
- Page 2 “off ”. been replaced. Microphone • Due to the difference in applications for each country, some regions may have different accessories. NOTE • Optional accessory Need Support ? Email : support@speechi.net...
Need help?
Do you have a question about the SPE-400 W-I-P and is the answer not in the manual?
Questions and answers