
Related Manuals for Sony CMD-C1


Summary of Contents for Sony CMD-C1
- Page 1 3-865-514-22 (1) Mobile Telephone Operating Instructions CMD-C1 ©1999 by Sony Corporation...
- Page 2 • Note that in some countries using • Use only Sony-approved CMD-C1 a cellular phone without a hands- batteries and CMD-C1 accessories free kit while driving is not with your CMD-C1 phone.
-
Page 3: Table Of Contents
Table of Contents What’s Included in Your CMD-C1 Kit ....4 Welcome to Sony The Basic Features of Your CMD-C1 ....4 CMD-C1 Icon Glossary ............6 Menu Overview ............7 Inserting the SIM Card .......... 8 Getting Started Inserting the Battery ..........9 Charging .............. -
Page 4: Welcome To Sony Cmd-C1
Welcome to Sony CMD-C1 Welcome to the Sony CMD-C1 designed for use in the worldwide network of GSM (Global System for Mobile Communications). The CMD-C1 is fully equipped with the revolutionary Jog Dial and a visual menu for easy access and navigation - with only one hand! What’s Included in Your CMD-C1 Kit... - Page 5 “personal answering service” to listen to messages, etc. See also Phonebook, Voice Mail. The Keypad Lock Your CMD-C1 can be locked to avoid involuntary dialling or menu scrolling especially when carrying your mobile phone. From standby mode, simply press...
-
Page 6: Icon Glossary
Icon Glossary The Sony CMD-C1 lets you see at a glance if you have missed calls, have messages waiting, and the status of options you have selected (like if you have diverted your phone or turned the ringer off). Sony has developed... -
Page 7: Menu Overview
Menu Overview Rotate the Jog Dial or press the Menu key from standby mode to access the main menu: – DIVERT MESSAGING REDIAL CONTROL PREFERENCES LIST (page 24) (page 26) (page 32) (page 33) (page 42) If Not Read Last Calls Security Caller ID Reachable... -
Page 8: Getting Started
Do not bend, scratch or expose to moisture; avoid static electricity. Important To avoid corrupting the memory of the SIM Card, always switch off your CMD-C1 before removing or inserting your SIM Card. Press (indentation) and slide down the battery cover. -
Page 9: Inserting The Battery
Important Use only the Sony-specified CMD-C1 battery and charger. The battery must be connected during charging. Usage Time When your battery is weak, the battery icon in the display flashes and... -
Page 10: Switching On Your Cmd-C1
Switching On your CMD-C1 To switch your CMD-C1 on/off, press and hold the Power key. Entering PIN For security reasons, your SIM Card is protected with a Personal Identification Number (PIN), which is supplied with your SIM Card. Enter your PIN... - Page 11 Connecting to the Network After sucessfully entering your PIN code, your CMD-C1 searches for an available GSM network. The network search is automatic, but may take a few seconds (see also “Menu Operations, Control”). You are ready to make and receive calls when the Network Operator’s name appears on the display.
-
Page 12: Basic Operation
• If the Auto Redial option is on (see page 45) and the number you have called is engaged, your CMD-C1 automatically displays the Auto Redial option to call the number repeatedly at progressive intervals until the number is no longer busy. -
Page 13: Answering/Ending Calls
Answering/Ending Calls Incoming calls are indicated by a ringing tone as well as the incoming call indicator icon on the display. Press the Jog Dial (or ) to accept the call. If the caller is using the Caller ID feature, the caller’s name appears on the display if the number is saved in the called person’s Phonebook. -
Page 14: During A Call
Notepad During a call, use your CMD-C1 as a notepad to enter a phone number. If you make a second call simultaneously, the active call is put on hold (see also “Call Hold”). Even when the call has ended, the number you entered will reappear on the display. -
Page 15: Call Hold
Call Hold allows you to manage two calls at the same time. For example, if you are speaking to someone on your CMD-C1 and you want to make another call, you can put the current or active call on hold in order to call someone else. - Page 16 During a Call (Continued) One active call (or one call on hold) and one call waiting When your CMD-C1 alerts you (beep) that a call is waiting, there are several options available. 1 The display automatically offers you call waiting options.
-
Page 17: Phonebook
Phonebook Phonebook Organisation Your Phonebook is organised in the following sections: • Voice Mail • Customized Phonebook of priority entries (entries 1-9) • Alphabetically-ordered Phonebook (standard entries sorted in alphabetical order) • FDN Phonebook or Fixed Dialling Numbers (SIM Card-dependent. Contact your Network Operator or Service Provider for details) •... - Page 18 Phonebook (continued) Entering Characters in the Phonebook The Jog Dial provides a quick alternative to standard character entry. Simply press a key once and then rotate the Jog Dial to move the cursor to the desired character on the preview bar. Press the Jog Dial or wait for a moment to confirm.
-
Page 19: Saving Phonebook Entries
Saving Phonebook Entries from Standby Mode 1 Enter the phone number. 2 Press the Jog Dial for the option to call or to save the number. 3 Rotate the Jog Dial to select Save. – 4 Press the Jog Dial to confirm your selection. -
Page 20: Editing The Phonebook
Phonebook (continued) Editing the Phonebook The Jog Dial and the Phonebook make it easy to keep all your contacts up to date and for flexibility in customizing the names and numbers. Following the steps below you can call, edit, delete or copy entries. You can even set a special ringing tone for a selected entry so that you can distinguish among callers! 1 Press the Jog Dial in standby mode to... -
Page 21: Voice Mail
Voice Mail The first entry in the Phonebook is reserved for your Voice Mail number. Like other Phonebook entries, you can save and edit your Voice Mail number here. For your convenience, there is also quick access to your Voice Mail via - just press and hold to dial your Voice Mail without even opening the Phonebook! -
Page 22: Own Number
Phonebook (continued) Own Number For your reference, the first entry in the Phonebook is a place holder for your Own Number where you can make one or more entries (depending on your SIM Card) to note down your own mobile number, etc. in case you forget them! To display Own Numbers 1 Press the Jog Dial to open the Phonebook... -
Page 23: Menu Operations
Menu Operations The CMD-C1 menu system provides you with an easy overview of your options grouped into five separate menu points. An icon represents each menu point for easy recognition and the icons rotate as you scroll using the Jog Dial. Some menu options are network dependent. Please contact your Network Operator/Service Provider for information about which options are available in your network. -
Page 24: Divert
You may need to register for this service with your Network Operator/Service Provider. If Not Reachable Diverts incoming calls when your CMD-C1 is switched off or out of network coverage. If No Reply Diverts incoming calls if you do not answer the call after a certain period of time. - Page 25 IF NOT REACHABLE IF NO REPLY CLEAR ALL ALL CALLS IF BUSY Setting a Divert 1 Select the Divert menu icon from the main menu. 2 Select a Divert option using the Jog Dial (e.g. All Calls). – 3 Select Set to set the chosen divert condition.
-
Page 26: Messaging
READ CREATE SERVICE CENTRE LOCAL AREA INFO SETTINGS Messaging Choose Messaging from the main menu for correspondence options to create, send and read short messages (SMS). You can use short messages to send another mobile phone user a text message. The Jog Dial makes it easy to enter characters using the preview bar together with the keypad. - Page 27 READ CREATE SERVICE CENTRE LOCAL AREA INFO SETTINGS SMS List Icons indicate the properties of the message received message (unread) √ received message (read) created message (stored in the SIM) this incoming message is only stored in the phone’s memory, not in the SIM memory and will be deleted if you switch off the phone.
- Page 28 READ CREATE SERVICE CENTRE LOCAL AREA INFO SETTINGS To Delete a message 1 Follow steps 1-4 in Viewing Messages. 2 Select Delete and press the Jog Dial to – confirm your selection. 3 Select No to return to step 1 or select Yes to reconfirm that you want to delete the message.
- Page 29 READ CREATE SERVICE CENTRE LOCAL AREA INFO SETTINGS Create Messages You can create a new message, edit your last message or use one of the five (5) pre-defined messages. 1 Select Create from the Messaging menu. – 2 Select an option to create a new message and press the Jog Dial to confirm your selection.
- Page 30 READ CREATE SERVICE CENTRE LOCAL AREA INFO SETTINGS Service Centre Before you can send short messages, you must register your Service Centre number via the Service Centre option in the Messaging menu. Contact your Network Operator/Service Provider for details. 1 Select Service Centre from the Messaging menu.
- Page 31 READ CREATE SERVICE CENTRE LOCAL AREA INFO SETTINGS Validity Period You can specify how long messages are stored in the service centre by selecting: 1 hour, 6 hours, 24 hours, 1 week, 4 weeks. The default Validity Period is 24 hours. Reply Cost Choose Reply Cost and select On if you would like to pay for the recipient to respond to your message.
-
Page 32: Redial List
LAST CALLS RECEIVED CALLS MISSED CALLS Redial List The Redial List provides a record and quick access of up to 10 of the last incoming and missed calls as well as up to 10 of the last outgoing (may vary depending on your Network Operator/Service Provider). If the call is from someone in your Phonebook, you can see the name of the caller in the Redial List. -
Page 33: Control
Security The Security options allow you to control who uses your CMD-C1 as well as their calling privileges. However, emergency calls (SOS) are always possible regardless of the restrictions/codes you set. Your Network Operator/Service Provider provides a PIN number with your SIM card. - Page 34 If successfully verified, the new PIN is effective immediately. Note If the PIN code is disabled, the risk of unauthorised use of your CMD-C1 is greater. The disabling of the PIN control is SIM card dependent. Contact your Network Operator/Service Provider for details.
- Page 35 SECURITY NETWORK SERVICES TIME, COST PIN2 PIN2 is a code provided by your Network Operator/Service Provider and is required for access to some features such as FDN Phonebook or Call Costs. These features are not supported by all networks. Contact your Network Provider/Service Provider for details.
- Page 36 Choose Limit Calls Out from the Security menu to bar calls made from your CMD-C1. This feature can be especially useful e.g. if you lend your CMD-C1 to someone else but do not want them to make international calls. The restrictions in the Limit Calls Out menu require the Network Password;...
- Page 37 SECURITY NETWORK SERVICES TIME, COST Limit Calls In Choose the feature Limit Calls In from the Security menu to bar incoming calls to your CMD-C1. The Limit Calls In menu contains the following options: All Calls Restricts all incoming calls.
-
Page 38: Network Services
Select Network This feature gives you the option to select a network automatically when you turn on your CMD-C1 or manually from a list of available networks. To set the Network Selection method 1 Choose Select Network from the Network Services Menu. -
Page 39: Call Waiting
TIME, COST Call Waiting Set the Call Waiting feature for your CMD-C1 to alert you (beep) that a call is waiting so that you don’t miss any calls. You may need to subscribe to this service. Contact your Network Operator/Service Provider for details. -
Page 40: Time, Cost
Call Costs can be used as a security measure e.g. when you loan your CMD-C1, you must use your PIN2 as a security code when you set or change options. Some of the options in the Call Costs menu may not be supported in your network. - Page 41 ) to exit. Charge Limit Select Charge Limit to set a unit figure at which your CMD-C1 will not allow any more phone calls to be made. (If you have selected Unit in the Charge Rate Menu (see above), enter the Unit value. In case of Currency, enter the Currency value.)
-
Page 42: Preferences
CMD-C1 according to your preferences like which language your phone speaks, how the ringer sounds, even how the keys sound! When you receive your CMD-C1, it has the following default settings. item default page... - Page 43 CALLER ID LANGUAGE RINGER TONE RINGER VOLUME Caller ID Caller ID allows you to choose whether or not you want the party you are calling to see your telephone number. 1 Select Caller ID from the Preferences menu. 2 Select On or Off. 3 Press the Jog Dial to confirm your selection.
- Page 44 RINGER TONE RINGER VOLUME Ringer Tone Your CMD-C1 has 30 different ringer tones which you can select in the Ringer Tone setting. 1 Select Ringer Tone from the Preferences menu. 2 The current selection is highlighted and the phone rings with the current ringer tone.
- Page 45 Illumination You can choose to turn the illumination of the keypad and display on or off using this setting. If the illumination is switched off, your CMD-C1 battery charge will last longer. Auto Redial The Auto Redial setting offers you the option of automatically redialling an engaged line until it is no longer busy.
-
Page 46: Appendix
Appendix Alert Tones Your CMD-C1 has the following Alert Tones, which are implemented as default and can only be turned off by switching to silent mode. Each of the Alert Tones can be distinguished from one another by their different sounding beeps. -
Page 47: Unblocking The Sim Card
Problem Possible Causes Possible Remedies Difficult to hear ____ Adjust earpiece volume, and reduce the other party noise around you. Phone loses Weak signal Reconnection, or connection to network another operator is automatic. Switching phone off and on may accelerate this. SIM error Damaged SIM Card Please contact your service provider. -
Page 48: Gsm Control Codes
GSM Control Codes The CMD-C1 menu allows easy use of most network functions. However, your Network Operator may advise users of all phones to use standard code commands, which can also be used with the CMD-C1. Teleservice Setting You can specify the type of carrier service you want your function setting to apply to. - Page 49 Call Divert If Not Reachable If No Reply If Busy (TS) Activate SEND TIME) SEND SEND SEND SEND SEND Cancel SEND SEND SEND Check All Divert Always All Conditional Divert Activate SEND SEND SEND 002( SEND SEND 004( SEND Cancel SEND SEND SEND...
-
Page 50: Technical Specifications; Licensing
Handset Operating Temperature – 10 ˚C — + 55 ˚C Accessories Operating Temperature ± 10 ˚C — + 45 ˚C Licensing Your CMD-C1 is authorised for use in GSM networks and complies with EU standards. • 89/336/EEC “Electromagnetic Compatibility” •... -
Page 51: Index
Index Messaging ....26 D, E, F, G Microphone .... 2,14 Alert Tones ....46 Default settings ..42 Mute/Unmute ..14 Answering Calls ..13 Display ......2 Antenna ......5 Divert ....24-25 N, O, P Any key answer ..44 Setting .... - Page 52 Index (continued) Signal strength ..11 Q, R, S SIM card ....... 8 Redial List ....32 Inserting/ Ringer removing ....8 On/Off ....5 Unblocking ..47 RingerID ....20 Silent Mode ....5 Single Beep .... 5 Single Beep ....5 Silent Mode ...
- Page 53 Notes...
- Page 54 Notes...
- Page 55 CMD-C1 and SIM Card. This information will assist you in customer inquiries to your retail dealer, manufacturer or Network Operator/Service Provider. In case of loss or theft of your CMD-C1 and/or SIM Card, call your Network Operator/Service Provider immediately to prevent misuse.
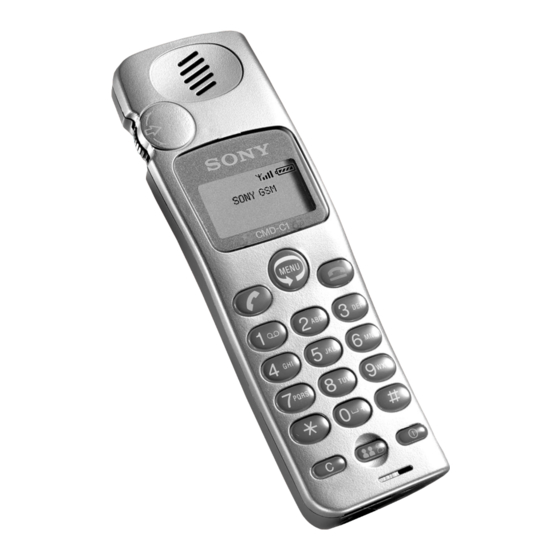
- Page 58 Quick Reference !™ !¡ CM D-C 1 MEN U !¢ !£ !∞ !§ 1 Ear piece !£ Battery Cover 2 Jog Dial !¢ Finger Stop 3 Display !∞ DC Jack (Charging) 4 Keypad (alphanumeric keys) !§ External Connector (Accessories) 5 Clear Key 6 Microphone 7 Manner Key 8 On/Off Key...
- Page 59 Made from chlorine-free recyclable paper Sony Corporation Printed in France...
Need help?
Do you have a question about the CMD-C1 and is the answer not in the manual?
Questions and answers