Table of Contents
Advertisement
Quick Links
User's Manual
Important Safety Information. . . . . . . . . . . . . . . . . . . .page 3
Part Names and Functions. . . . . . . . . . . . . . . . . . . . . . .page 5
Setup. . . . . . . . . . . . . . . . . . . . . . . . . . . . . . . . . . . . . . . . . . .page 6
Basic Operations. . . . . . . . . . . . . . . . . . . . . . . . . . . . . . .page 13
Installing/Replacing the Roll Paper. . . . . . . . . . . . . .page 14
Cleaning. . . . . . . . . . . . . . . . . . . . . . . . . . . . . . . . . . . . . . .page 15
Troubleshooting. . . . . . . . . . . . . . . . . . . . . . . . . . . . . . .page 16
Specifications. . . . . . . . . . . . . . . . . . . . . . . . . . . . . . . . . .page 18
Appendix. . . . . . . . . . . . . . . . . . . . . . . . . . . . . . . . . . . . . .page 19
412774502EN
Advertisement
Table of Contents

Related Manuals for Epson TM-T83II


Summary of Contents for Epson TM-T83II
-
Page 1: Table Of Contents
User’s Manual Important Safety Information....page 3 Part Names and Functions..... . .page 5 Setup. - Page 2 Neither Seiko Epson Corporation nor its affiliates shall be liable to the purchaser of this product or third parties for damages, losses, costs, or expenses incurred by purchaser or third parties as a result of: accident, misuse, or abuse of this product or unauthorized modifications, repairs, or alterations to this product, or (excluding the U.S.) failure to strictly comply with Seiko Epson Corporation’s operating and maintenance...
-
Page 3: Important Safety Information
❏ If water or other liquid spills into this equipment, unplug the AC cable immediately, and then contact your dealer or a Seiko Epson service center for advice. Continued usage may lead to fire. ❏... - Page 4 CAUTION: ❏ Be sure to set this equipment on a firm, stable, horizontal surface. The product may break or cause injury if it falls. ❏ Do not use in locations subject to high humidity or dust levels. Excessive humidity and dust may cause equipment damage or fire. ❏...
-
Page 5: Part Names And Functions
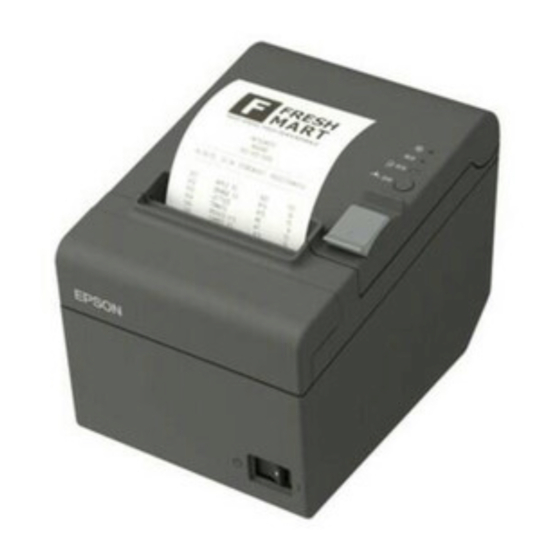
Part Names and Functions Roll paper cover Manual cutter Control panel Cutter cover Cover open lever Power switch Roll paper cover Open this cover to install/replace the roll paper. Manual cutter Use this cutter when you cut the roll paper manually. Cutter cover Open this cover to unlock the autocutter blade when the roll paper cover does not open due to a paper jam. -
Page 6: Setup
Setup Installing the Printer Install the printer horizontally on a flat surface. If you want to install the printer vertically, be sure to attach the included control panel label for vertical installation, rubber feet, and power switch cover (Waterproof). (U “Installing the printer vertically” on page 6) Also, you can hang it on a wall using the included accessories. - Page 7 ❏ Rubber feet ❏ Power switch cover (Waterproof) Note: You can install the printer so that the roll paper cover is upright to the mounting surface using the included wall hanging 207 mm bracket. Follow the steps below. {8.15"} Install the wall hanging bracket on the printer, and fix it using 2 included screws.
- Page 8 Attach 2 rubber feet on the printer case, and attach 2 rubber feet on the hanging bracket. Hanging the printer on a wall Follow the steps below to hang the printer on the wall. CAUTION: ❏ To fix the printer securely, install the wall hanging bracket on a wall made of wood, concrete, or metal.
- Page 9 Remove the installed 2 screws from the printer. Install the wall hanging bracket on the printer, and fix it using the screws removed in Step 2. Align the holes in the wall hanging bracket with the screws on the wall, and hook it securely.
- Page 10 Connecting the AC Adapter Follow the steps below to connect the AC adapter. WARNING: Be sure to use the specified AC adapter [PS-180 (Model: M159D)] only. Firmly insert the DC connector of the AC adapter all the way into the DC-in connector on the printer.
- Page 11 Connecting External Devices If you connect external devices, connect each cable to the port/connector on the back of the printer. Make sure the printer is turned off. Connect the each interface cable to the connectors on the printer back. (Mounted interfaces vary by the printer model.) Connect the interface cable to the computer.
- Page 12 Attaching the Power Switch Cover Attaching the included power switch cover prevents inadvertent changing of the power switch and tampering. You can turn the power switch on and off by inserting a sharp-pointed object in the holes in the power switch cover. To detach the cover, also use a sharp-pointed object.
-
Page 13: Basic Operations
Basic Operations Turning Power On/Off Operate the power switch to turn on/off the printer. Opening the Covers Opening the roll paper cover Pull the cover open lever to open the roll paper cover. Opening the cutter cover Put your fingers in the indents in both sides of the cutter cover, and pull it to open... -
Page 14: Installing/Replacing The Roll Paper
Installing/Replacing the Roll Paper Follow the steps below to install/replace the roll paper. CAUTION: Be sure to use the specified roll paper. ( “Specifications” on page 18) Open the roll paper cover. (U “Opening the roll paper cover” on page 13) Remove the used roll paper core, if there is one. -
Page 15: Cleaning
Never clean the product with alcohol, benzine, thinner, or other such solvents. Doing so may damage or break the parts made of plastic and rubber. Cleaning the Thermal Head To maintain print quality, Epson recommends cleaning the thermal head periodically (generally every 3 months) by following the steps below. CAUTION: ❏... -
Page 16: Troubleshooting
Troubleshooting No lights on the control panel Check whether the DC cable and AC cable are correctly connected to the printer and the power outlet. (U“Connecting the AC Adapter” on page 10) Error LED is on ❏ Check whether the roll paper cover is closed. ❏... - Page 17 The roll paper cover will not open When the autocutter blade is locked, the roll paper cover will not open. Follow the steps below to return the autocutter blade to the normal position. Turn off the printer. (U “Turning Power On/Off” on page 13) Open the cutter cover.
-
Page 18: Specifications
10 to 90% RH Humidity Storage 10 to 90% RH Overall dimensions 140 × 199 × 146mm {5.51 × 7.83 × 5.75"} (W × D × H) Weight (mass) Approx. 1.7 kg {3.74 lb} *: Based on Epson operating conditions. -
Page 19: Appendix
Downloading Drivers, Utilities, and Manuals The latest versions of drivers, utilities, and manuals can be downloaded from the following URL. http://download.epson-biz.com/?service=pos Restriction of Use When this product is used for applications requiring high reliability/safety, such as transportation devices related to aviation, rail, marine, automotive, etc.;...
Need help?
Do you have a question about the TM-T83II and is the answer not in the manual?
Questions and answers