Advertisement
Available languages
Available languages
Quick Links
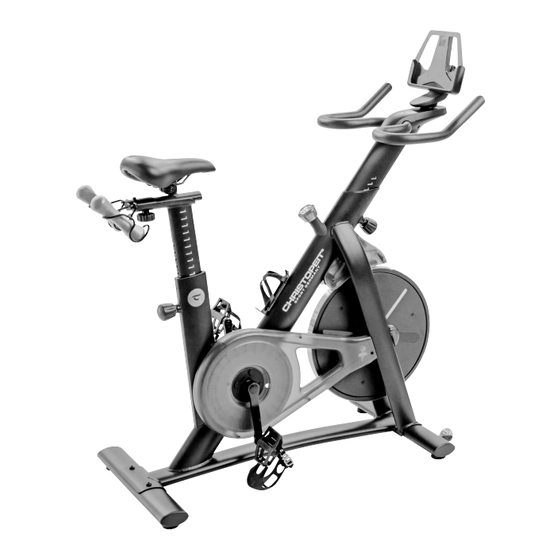
RACER BIKE 4.0
HEMSPORT TRAININGSGERÄT
Montage- und Bedienungsanleitung
Bestell-Nr.: 2310
DE
Seite: 2-12
Assembly and operating instructions
Order No.: 2310
GB
Page: 13-21
Instructions de montage et d'utilisation
F
No. de commande: 2310
Page: 22-30
Montage- en bedieningsinstructies
Bestellnr.: 2310
NL
Pagina: 31-39
1
Advertisement

Related Manuals for Christopeit Sport KINOMAP RACER BIKE 4.0


Summary of Contents for Christopeit Sport KINOMAP RACER BIKE 4.0
- Page 1 RACER BIKE 4.0 HEMSPORT TRAININGSGERÄT Montage- und Bedienungsanleitung Bestell-Nr.: 2310 Seite: 2-12 Assembly and operating instructions Order No.: 2310 Page: 13-21 Instructions de montage et d'utilisation No. de commande: 2310 Page: 22-30 Montage- en bedieningsinstructies Bestellnr.: 2310 Pagina: 31-39...
-
Page 2: Table Of Contents
INHALTSÜBERSICHT Seite Inhalt Christopeit-Sport Community Wichtige Empfehlungen und Sicherheitshinweise Montageübersicht Montageanleitung Benutzung des Gerätes Reinigung, Wartung und Lagerung Widerstand-Regler App-Konnektivität Garantiebestimmungen Trainingsanleitung Allgemein 11-12 Stückliste - Ersatzteilliste Explosionszeichnung SEHR GEEHRTE KUNDIN, SEHR GEEHRTER KUNDE, wir gratulieren Dir zum Kauf dieses Heimsport-Trainingsgerätes und wünschen Dir viel Vergnügen damit. Bitte beachte und befolge die Hinweise und Anweisungen dieser Montage- und Bedienungsanleitung. -
Page 3: Wichtige Empfehlungen Und Sicherheitshinweise
WICHTIGE EMPFEHLUNGEN UND SICHERHEITSHINWEISE Achtung! Vor Benutzung Unsere Produkte sind grundsätzlich TÜV-GS geprüft Bedienungs- entsprechen damit dem aktuellen, höchsten Sicherheitsstandard. anleitung lesen! Diese Tatsache entbindet aber nicht die nachfolgenden Grundsätze strikt zu befolgen. Das Gerät genau nach der Montageanleitung aufbauen und nur darauf achten, dass... - Page 4 MONTAGEÜBERSICHT ASSEMBLY OVERVIEW APERÇU DE L‘ASSEMBLÉE MONTAGE OVERZICHT...
-
Page 5: Montageanleitung
MONTAGEANLEITUNG Entnehmen Sie alle Einzelteile der Verpackung, legen diese auf den Boden und kontrollieren die Vollzähligkeit anhand Montageschritte. Gerät wurde größtmöglich vormontiert, sodass die Endmontage de Gerätes leicht und schnell durchführbar ist. Montagezeit ca. 30Min. SCHRITT 1 Montage der Fußrohre (13+47) am Grundrahmen (3). 1. - Page 6 SCHRITT 4 Montage der Tablet-Halterung (85) an der Halterung (80). 1. Entnehmen Sie die beiden Schrauben M6x16 (17) aus der Halterung und Schrauben Sie damit die Tablet-Halterung (85) an der Halterung (80) fest. SCHRITT 5 Montage der Hantelablage (88) am Sitzschlitten (5). 1.
- Page 7 SCHRITT 7 Inbetriebnahme der Bluetooth-Senders (75). 1. Das Trainingsgerät ist mit einem Bluetooth-Sender ausgestattet, sodass man die Trainingsdaten auf einem Handy/Tablet in einer Trainings-APP sichtbar machen kann. Öffnen Sie den Batteriefachdeckel (31) und ziehen Sie den Isolierstreifen (A) von der Batterie ab, sodass der Bluetooth-Sender (75) betriebsbereit ist.
-
Page 8: Benutzung Des Gerätes
BENUTZUNG DES GERÄTES Sitzhöhenverstellung Aufsteigen Um eine angenehme Sitzposition beim Training zu erhalten Nachdem die Sitzhöhe richtig eingestellt wurde halten Sie muss die Sitzhöhe richtig eingestellt werden. Die richtige sich am Lenker fest. Führen Sie die naheliegende Pedale zur untersten Position und schieben Sie den Fuß unter das Sitzhöhe ist dann vorhanden, wenn beim Trainieren das Pedalsicherungsband ein, sodass Sie einen sicheren Stand Knie bei tiefster Pedalstellung noch eine wenig gebeugt ist... -
Page 9: App-Konnektivität
Drehen Sie den Bremsknopf im Uhrzeigersinn, um den CHRISTOPEIT-SPORT CONNECT APP Widerstand zu erhöhen. Die Christopeit Sport Connect App ist dein Partner für ein Drehen Sie den Bremsknopf entgegen dem Uhrzeigersinn, starkes Training! Verbinde dein Christopeit Sportgerät mit um den Widerstand zu verringern. -
Page 10: Trainingsanleitung Allgemein
TRAININGSANLEITUNG ALLGEMEIN Um spürbare, körperliche und gesundheitliche Verbesserungen zu 02: Trainingspuls-Berechnen erreichen, müssen für Bestimmung erforderlichen Durch meine Ziele Trainingsgrad passt für mich Trainingsaufwandes folgende Faktoren beachtet werden. Fettstoffwechsel-Zone am besten. Trainingspuls = 60 bis 70% von dem Maximalpuls INTENSITÄT Trainingspuls = 190 x 0,6 [60%] Die Stufe der körperlichen Belastung beim Training muß... -
Page 11: Stückliste - Ersatzteilliste
STÜCKLISTE - ERSATZTEILLISTE Artikel: Racer Bike 4.0 Art.-Nr.: 2310 30.06.2023 Stand der technische Daten: Stellmaß [cm]: L 115 x B 58 x H 115 Trainingsplatzbedarf [m Gerätegewicht [kg]: 32kg (inkl. 2 Hanteln) Benutzergewicht von max. [kg] EIGENSCHAFTEN HINWEISE • Magnet-Brems-System Wenn ein Bauteil nicht in Ordnung ist oder fehlt, oder wenn Sie •... - Page 12 Abb.- Abmessung Montiert an Bezeichnung Menge ET Nummer Abb. Nr. Schwungmasse 33-2310-12-SW Innensechskantschraube M6x10 39-10120-SW Hantel 36-2310-23-BT Innensechskantschraube M8x45 3,13+47 39-9914-SW Unterlegscheibe 8//16 39-9962-SW Innensechskantschraube M5x6 39-9907 Fussrohr vorne 33-2310-02-SW Bremsbuchse 33-2310-14-SW Mutter 39-10031 Kunststoff-Endanschlag 36-2310-24-BT Bremswellenabdeckung 36-2310-25-BT Bremswelle 36-2310-26-BT Bremsknopfabdeckung 36-2310-27-BT Bremsknopf...
- Page 13 CONTENTS DEAR CUSTOMER, Page Contents We congratulate you on your purchase of this home training sports unit and hope that we will have a great deal of pleasure Assembly overview with it. Please take heed of the enclosed notes and instructions Important recommendations and safety instructions and follow them closely concerning assembly and use.
- Page 14 ASSEMBLY INSTRUCTIONS Remove all the separate parts from the packaging, lay them on the floor and check roughly that all are there on the base of the assembly steps. The device was pre- assembled as much as possible. This makes the final assembly easier and quicker for you.
- Page 15 STEP 4 Assembling the tablet holder (85) to the lower bracket cover (80). 1. Remove the two M6x16 screws (17) from the lower bracket cover (80) and use them to screw the tablet holder (85) to the bracket cover (80). STEP 5 Assembly of the dumbbell rack (88) at the seat slide (5).
- Page 16 STEP 7 Commissioning the Bluetooth transmitter (75). 1. The exercise machine is equipped with a Bluetooth transmitter (75), which can make the exercise data visible in a trainings APP on a mobile phone or tablet. Open the battery compartment cover (31) and pull out the insulating strip off the battery, so that the Bluetooth transmitter (75) is ready for use.
- Page 17 USE OF THE DEVICE Adjustment – Seat Position Mount For an effective workout, the seat must be adjusted properly. After the seat is adjusted to properly position, insert your foot While your are pedaling, your Knees should be slightly bent into retaining strap of pedal step on the pedal and hold the handlebar tightly.
- Page 18 Turn the brake knob clockwise to increase resistance. CHRISTOPEIT-SPORT CONNECT APP Turn the brake knob counter clockwise to decrease The Christopeit Sport Connect App is your partner for strong resistance. training! Connect your Christopeit-Sport equipment to the app and get started right away. With exciting data about your...
- Page 19 GENERAL TRAINING INSTRUCTIONS You must consider the following factors in determining the amount of 02: Training heart rate calculation training effort required in order to attain tangible physical and health Due to my goals and training level, the fat metabolism zone benefits.
- Page 20 PARTS LIST – SPARE PARTS LIST Type: Racer Bike 4.0 Order-Nr.: 2310 30.06.2023 Date of technical data: Dimensions approx: [cm]: L 115 x W 58 x H 115 Space requirements [m Weight approx. [kg]: 32kg (incl. 2dumbbells) Load max. (User weight) [kg]: NOTE FEATURES Please contact us if any components are defective or missing, or...
- Page 21 Illustration Dimension Designation Quantity Attached to ET-Number Flywheel 33-2310-12-SW Inner hex screw M6x10 39-10120-SW Dumbbell 36-2310-23-BT Hex half round head screw M8x45 3,13+47 39-9914-SW Washer 8//16 39-9962-SW Cross head screw M5x6 39-9907 Front foot tube 33-2310-02-SW Brake bushing 33-2310-14-SW 39-10031 Plastic limit block 36-2310-24-BT Brake screw sleeve...
- Page 22 SOMMAIRE CHÈRE CLIENTE, CHER CLIENT, Page Contenu Nous vous félicitons pour l’achat de ce cycle d’entraînement intérieur et nous vous souhaitons beaucoup de plaisir avec. Aperçu de l‘assemblée Veuillez respecter et suivre les indications et les instructions de Recommandations importantes et consignes montage et d’emploi.
- Page 23 INSTRUCTIONS DE MONTAGE Sortez toutes les pièces de l’emballage, posez-les sur le sol et contrôlez si rien ne manque en vous basant grossièrement sur la étapes de montage. L'appareil a été préassemblé autant que possible afin que l'assemblage final de l'appareil puisse être effectué rapidement et facilement.
- Page 24 ÉTAPE N° 4 Montage du porte-tablette (85) au support (80). 1. Retirez les deux vis M6x16 (17) du support et utilisez-les pour visser le support de la tablette (85) au support ci-dessous (80). ÉTAPE N° 5 Montage du support d'haltères (88) sur le chariot de selle (5).
- Page 25 ÉTAPE N° 7 Mise en service de l'émetteur Bluetooth (75). 1. L'appareil d'exercice est équipé d'un émetteur Bluetooth, afin que vous puissiez avoir les données d'entraînement sur un téléphone mobile/tablette en un seul APP de formation peut rendre visible. Ouvrez le couvercle du compartiment à...
- Page 26 MONTER, UTILISER & DESCENDRE Réglage de la position de la selle Monter Un entraînement efficace demande un correct réglage de la Après avoir réglé la selle dans la position désirée, placez selle. Il faut que vos genoux soient encore légèrement pliés votre pied dans la bande de la pédale et saisissez solidement la poignée.Essayez de mettre votre poids entier sur ce pied et si les pédales se trouvent dans la position la plus basse.
- Page 27 Tournez le bouton de frein dans le sens des aiguilles d'une CHRISTOPEIT-SPORT CONNECT APP montre pour augmenter la résistance. L'application Christopeit Sport Connect est votre partenaire Tournez le bouton de frein dans le sens antihoraire pour pour un entraînement solide ! Connectez votre équipement diminuer la résistance.
- Page 28 CONSIGNES GÉNÉRALES DE FORMATION Les facteurs ci-après doivent être pris en compte pour la détermination de 01 : Impulsion maximale - calcul l’entraînement indispensable afin d’améliorer concrètement son physique et Fréquence cardiaque maximale = 214 - (0,5 x âge) - (0,11 x poids) sa santé.
- Page 29 LISTE DES PIÈCES- LISTE DES PIÈCES DE RECHANGE Désignation: Racer Bike 4.0 No. de commande: 2310 30.06.2023 Caractéristiques version du: Dimension environ [cm]: L 115 x W 58 x H 115 Besoins en espace [m Poids du produit [kg]: 32kg (incl. 2 Haltère) Poids maximal de l’utilisateur.
- Page 30 Schéma Dimensions Quantité Monté sur Désignation Numéro ET n° en mm Unités Schéma n° Volant 33-2310-12-SW Vis à tête Allen M6x10 39-10120-SW Haltère 36-2310-23-BT Vis à tête Allen M8x45 3,13+47 39-9914-SW Rondelle 8//16 39-9962-SW Vis à tête Allen M5x6 39-9907 Tube de pied avant 33-2310-02-SW Douille de frein...
- Page 31 INHOUDSOPGAVE GEACHTE KLANT Pagina Inhoud Wij willen u van harte gelukwensen met de aanschaf van uw hometrainer en hopen dat u hier veel plezier aan zult beleven. Montage overzicht Neem a.u.b. de instructies en aanwijzingen uit deze montage- en Belangrijke aanbevelingen en veiligheidsinstructies bedieningshandleiding in acht en volg deze op.
- Page 32 MONTAGEHANDLEIDING Neem alle losse onderdelen uit de verpakking, leg deze op de grond en controleer aan de hand van de montage staps. Het apparaat is zoveel mogelijk voorgemonteerd zodat de eindmontage van het apparaat snel en eenvoudig kan worden uitgevoerd. Montagetijd ca. 30 minuten.
- Page 33 STAP 4 Montage van de tablethouder (85) aan de houder (80). 1. Verwijder de twee M6x16 schroeven (17) uit de beugel en gebruik deze om de tab houder (85) aan de lagerste houder (80) te schroeven. STAP 5 Montage van het halter rek (88) op de stoelslede (5). 1.
- Page 34 STAP 7 Inbedrijfstelling van de Bluetooth-zender (75). 1. De hometrainer is uitgerust met een Bluetooth-zender, zodat u de trainingsgegevens op een mobiele telefoon/tablet in één kunt hebben Training APP kan zichtbaar maken. Open het deksel van het batterijvak (31) en trek de isolatiestrip van de batterij zodat de Bluetooth-zender (75) klaar is voor gebruik.
- Page 35 OPSTAPPEN, GEBRUIKEN & AFSTAPPEN Aanpassen – Hoogte zadel Opstappen Voor een effectieve workout, dient het zadel op de juiste Nadat u de zitting op de juiste hoogte hebt afgesteld, plaatst hoogte te zijn afgesteld. Tijdens het trappen, dienen Uw u uw voet op de voetsteun, onder het riempje en houdt het handvat stevig vast.
- Page 36 Weerstand instellen CHRISTOPEIT-SPORT CONNECT APP Draai de remknop rechtsom om de weerstand te verhogen. De Christopeit Sport Connect-app is uw partner voor een Draai de remknop linksom om de weerstand te verminderen. krachtige training! Verbind je Christopeit-Sport-toestellen met de app en ga direct aan de slag. Met spannende gegevens over je...
- Page 37 ALGEMENE TRAININGSINSTRUCTIES U moet rekening houden met de volgende factoren bij het bepalen van 02: Training hartslagberekening Door mijn doelen en trainingsniveau past de vetstofwisselingszone het bedrag van trainingsinspanning die nodig is om tastbare fysieke en gezondheid te bereiken voordelen. het beste bij mij.
- Page 38 STUKLIJST – LIJST MET RESERVEONDERDELEN Aanduiding: Racer Bike 4.0 Bestellnr.: 2310 30.06.2023 Stand technische gegevens: Afmetingen ca: [cm]: L 115 x B 58 x H 115 Ruimtevereisten [m Productgewicht ca. [kg]: 32kg (inkl. 2 Halters) Belasting max. (Gewicht gebruiker) [kg]: EIGENSCHAPPEN OPMERKING •...
- Page 39 Afbeel- Afmetingen Aantal Gemonteerd aan Beschrijving ET-nummer dings- nr. stuks afbeeldings nr. Vliegwiel 33-2310-12-SW Binnenzeskantschroef M6x10 39-10120-SW Halter 36-2310-23-BT Binnenzeskantschroef M8x45 3,13+47 39-9914-SW Onderlegschijf 8//16 39-9962-SW Binnenzeskantschroef M5x6 39-9907 Voetbuis voor 33-2310-02-SW Rem bus 33-2310-14-SW Moer 39-10031 Kunststof eindstop 36-2310-24-BT Rem as deksel 36-2310-25-BT Rem as...
- Page 44 Service / Hersteller Bei Reklamationen, notwendigen Ersatzteilbestellungen oder Reparaturen wenden Sie sich bitte an unsere Service Abteilung. Top-Sports Gilles GmbH Friedrichstrasse 55 Tel.: +49 (0)2051/6067-0 Fax: +49 (0)2051/6067-44 D - 42551 Velbert http://www.christopeit-sport.com info@christopeit-sport.com © by Top-Sports Gilles GmbH D-42551 Velbert (Germany)
Need help?
Do you have a question about the KINOMAP RACER BIKE 4.0 and is the answer not in the manual?
Questions and answers