Table of Contents
Advertisement
Quick Links
Advertisement
Table of Contents

Related Manuals for Baker Ruskinn Sci-tive SI-046


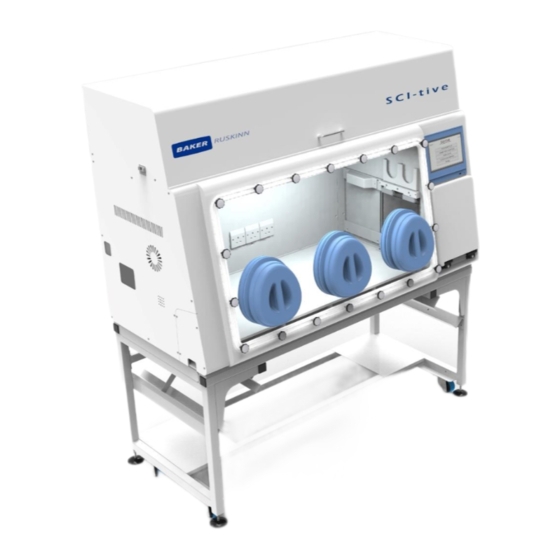
Summary of Contents for Baker Ruskinn Sci-tive SI-046
-
Page 2: Table Of Contents
OVERVIEW ............................... 3 ........................... 3 AFETY NSTRUCTIONS ........................4 EGULATORY COMPLIANCE ............................6 YMBOLS 1 YEAR SERVICE PROCEDURE ........................7 ......................7 EMOVING THE ETOX ACHETS ......................7 EPLACING THE XYGEN ENSOR ...................... 9 LEANING THE ATER AND ANKS ......................14 EPLACING THE UMIDITY ENSOR... -
Page 3: Overview
1. Overview Safety Instructions Baker and/or Ruskinn do not take any responsibility for damages caused by using the equipment for other purposes than described in this user manual. The mains appliance coupler and plug are the AC mains supply isolation device and must be easily accessible when installed. -
Page 4: Regulatory Compliance
Regulatory compliance 1.2.1 European Region 1.2.2 WEEE: This equipment must be disposed of in accordance with the Waste from Electrical and Electronic Equipment (WEEE) Directive This product must not be treated as household waste. Instead, it shall be handed over to an appropriate collection point for the recycling of electrical and electronic equipment. - Page 5 1.2.3 North America Region: This product is UL 61010-1 Listed, and CSA C22.2 No. 61010-1 under file number E113911. This equipment has been tested and found to comply with the limits for a Class A digital device, pursuant to part 15 of the FCC Rules. These limits are designed to provide reasonable protection against harmful interference when the equipment is operated in a commercial environment.
-
Page 6: Symbols
Symbols Before using the SCI-tive, please ensure that you are familiar with the symbols on the SCI-tive. Figure 1: SCI-tive symbols Symbol Meaning Refer to user manual. Alternating current Functional Earth Connection Protective Earth Connection This product complies with the essential EEA requirements for Electrical Safety and Electromagnetic compatibility as set out in the EMC directive 2004/108/EC and the Low Voltage Directive 2006/95/EC Caution, do not remove covers. -
Page 7: Year Service Procedure
2. 1 Year Service Procedure Removing the Detox Sachets Replacing the Oxygen Sensor Figure 2: Humidity End Panel SI-46 Version 2.0 Page 7 of 34 SCI-tive Service Procedure... - Page 8 Figure 3: Oxygen Sensor SI-46 Version 2.0 Page 8 of 34 SCI-tive Service Procedure...
-
Page 9: Cleaning The Water And Oil Tanks
Cleaning the Water and Oil Tanks Figure 4: Inside panel of water tank Figure 5: Water tank drain tube SI-46 Version 2.0 Page 9 of 34 SCI-tive Service Procedure... - Page 10 Figure 6: Water tank HEPA filter tube connections Figure 7: By passing water tank HEPA filter SI-46 Version 2.0 Page 10 of 34 SCI-tive Service Procedure...
- Page 11 Figure 8: Secondary Pressure Relief (oil) tank SI-46 Version 2.0 Page 11 of 34 SCI-tive Service Procedure...
- Page 12 Figure 9: Engineering Mode Software Screen Figure 10: Engineering 2 Software screen SI-46 Version 2.0 Page 12 of 34 SCI-tive Service Procedure...
- Page 13 Figure 11: Humidity System Settings SI-46 Version 2.0 Page 13 of 34 SCI-tive Service Procedure...
-
Page 14: Replacing The Humidity Sensor
Replacing the Humidity Sensor Figure 12: Humidity Chip Removable Cover Plate SI-46 Version 2.0 Page 14 of 34 SCI-tive Service Procedure... -
Page 15: Testing Procedure
Testing procedure SI-46 Version 2.0 Page 15 of 34 SCI-tive Service Procedure... - Page 16 Figure 13: Pressure Integrity Test Screen SI-46 Version 2.0 Page 16 of 34 SCI-tive Service Procedure...
-
Page 17: Year Service
3. 2 Year Service Removing the Floor Tray SI-46 Version 2.0 Page 17 of 34 SCI-tive Service Procedure... -
Page 18: Removing The Ceiling Panel
Removing the Ceiling Panel Figure 14: Ceiling Panel Removing the Rear Wall Figure 15: Rear Wall SI-46 Version 2.0 Page 18 of 34 SCI-tive Service Procedure... -
Page 19: Replacing The Circulation Fans
Replacing the Circulation Fans Figure 16: Circulation Fans SI-46 Version 2.0 Page 19 of 34 SCI-tive Service Procedure... -
Page 20: Replacing The Interlock Door Clamps
Replacing the Interlock Door Clamps Figure 17: Inner Door Switch Moulded Cover Figure 18: Inner Door Clamp Brackets Figure 19: Inner Door Tube Retaining Plates SI-46 Version 2.0 Page 20 of 34 SCI-tive Service Procedure... -
Page 21: Refitting The Rear Wall
Figure 20: Inner Door Clamps Refitting the Rear Wall SI-46 Version 2.0 Page 21 of 34 SCI-tive Service Procedure... -
Page 22: Replacing The Oxygen Sensor
Replacing the Oxygen Sensor Figure 21: Humidity End Panel Figure 22: Oxygen Sensor SI-46 Version 2.0 Page 22 of 34 SCI-tive Service Procedure... -
Page 23: Replacing The Condenser Fan
Replacing the Condenser Fan Figure 23: Condensate Fan SI-46 Version 2.0 Page 23 of 34 SCI-tive Service Procedure... -
Page 24: Replacing The Gas Sample Pump
Replacing the Gas Sample Pump Figure 24: Gas Sample Pump 3.10 Replacing the Gas Sample Condensate Fan Figure 25: Gas Sample Condensate Fan Figure 26: Gas Sample Condensate Fan Fixings SI-46 Version 2.0 Page 24 of 34 SCI-tive Service Procedure... -
Page 25: Replacing The Gas Sample Heatsink Fan
3.11 Replacing the Gas Sample Heatsink Fan Figure 28: Gas Sample Heatsink Fan Fixings Figure 27: Gas Sample Heatsink Fan Location 3.12 Replacing the Interlock End Panel Air Circulation Fan Figure 29: Interlock Cooling Fan Location Figure 30: Interlock Cooling Fan Fixings ... -
Page 26: Cleaning The Water And Oil Tanks
3.13 Cleaning the Water and Oil Tanks Figure 31: Inside panel of water tank Figure 32: Water tank drain tube Figure 33: Water tank HEPA filter tube connections SI-46 Version 2.0 Page 26 of 34 SCI-tive Service Procedure... - Page 27 Figure 34: Bypassing water tank HEPA filter SI-46 Version 2.0 Page 27 of 34 SCI-tive Service Procedure...
- Page 28 Figure 35: Secondary Pressure Relief (oil) tank SI-46 Version 2.0 Page 28 of 34 SCI-tive Service Procedure...
- Page 29 Figure 36: Engineering Mode Software Screen Figure 37: Engineering 2 Software screen SI-46 Version 2.0 Page 29 of 34 SCI-tive Service Procedure...
- Page 30 Figure 38: Humidity System Settings SI-46 Version 2.0 Page 30 of 34 SCI-tive Service Procedure...
-
Page 31: Replacing The Humidity Sensor
3.14 Replacing the Humidity Sensor Figure 39: Humidity Chip Removable Cover Plate SI-46 Version 2.0 Page 31 of 34 SCI-tive Service Procedure... -
Page 32: Testing Procedure
3.15 Testing procedure SI-46 Version 2.0 Page 32 of 34 SCI-tive Service Procedure... -
Page 33: Reference Documents
Figure 40: Pressure Integrity Test 4. Reference Documents SI-46 Version 2.0 Page 33 of 34 SCI-tive Service Procedure... - Page 34 SI-46 Version 2.0 Page 34 of 34 SCI-tive Service Procedure...
Need help?
Do you have a question about the Sci-tive SI-046 and is the answer not in the manual?
Questions and answers