Table of Contents
Advertisement
Quick Links
Advertisement
Table of Contents

Related Manuals for Russell Hobbs RHM2572CG


Summary of Contents for Russell Hobbs RHM2572CG
- Page 1 Family Combination Microwave User Guide Model Number: RHM2572CG For Customer Services & Spare Parts please call 0345 209 7461 Opening times: Monday - Friday 8am – 8pm & Saturday 9am – 1pm Or visit us at www.productcare.co.uk PLEASE RETAIN FOR FUTURE REFERENCE...
-
Page 2: Table Of Contents
CONTENTS Page(s) Safety instructions About your microwave 10-11 Product information Unpacking the microwave Product overview Microwave oven installation 15-16 Turntable installation 17-18 Control panel How to use the microwave 20-31 Cooking tips Cleaning the microwave Problem solving 34-37 Guarantee & customer services Spare parts Connection to the mains supply 40-41... -
Page 3: Safety Instructions
SAFETY INSTRUCTIONS IMPORTANT SAFETY INSTRUCTIONS READ CAREFULLY AND KEEP FOR FUTURE REFERENCE WARNING: • If the door or door seals are damaged, the oven must not be operated until it has been repaired by a competent person. • It is hazardous for anyone other than a competent person to carry out any service or repair operation that involves the removal of a cover which gives protection against exposure to microwave energy. - Page 4 SAFETY INSTRUCTIONS READ CAREFULLY AND KEEP FOR FUTURE REFERENCE WARNING: • This microwave is intended for heating food and beverages only. The drying of food or clothing and heating of warming pads, wheat bags, slippers, sponges, damp cloth and similar is extremely dangerous and may lead to risk of injury, ignition or fire.
- Page 5 SAFETY INSTRUCTIONS READ CAREFULLY AND KEEP FOR FUTURE REFERENCE WARNING: • When heating or cooking food or liquid, remember that there are certain foods (such as, jam, Christmas pudding, and mincemeat) which heat up very quickly. • Microwave heating of beverages can result in delayed eruptive boiling, therefore care must be taken when handling the container.
- Page 6 SAFETY INSTRUCTIONS READ CAREFULLY AND KEEP FOR FUTURE REFERENCE WARNING: • When heating food in plastic or paper containers, keep an eye on the oven due to the possibility of ignition. • If materials inside the oven smoke or catch fire, keep the oven door closed to stifle the flames, turn the oven off at the wall switch, or shut the power off at the fuse or circuit- breaker panel.
- Page 7 SAFETY INSTRUCTIONS READ CAREFULLY AND KEEP FOR FUTURE REFERENCE WARNING: • Do not use melamine dishes as they contain a material which will absorb microwave energy. This may cause the dishes to crack or burn, and will slow down the cooking speed. •...
- Page 8 SAFETY INSTRUCTIONS READ CAREFULLY AND KEEP FOR FUTURE REFERENCE WARNING: • On the right hand wall of the cavity is the wave guide cover, microwaves are passed through this to enable your food to cook. It is important that this wave guide cover is kept clean at all times.
- Page 9 SAFETY INSTRUCTIONS READ CAREFULLY AND KEEP FOR FUTURE REFERENCE WARNING: • Regularly remove the glass turntable to clean it, wash it in warm soapy water or a dishwasher. Regularly clean the turntable support and oven floor. Simply wipe the bottom surface of the oven with mild detergent and water, then dry.
-
Page 10: About Your Microwave
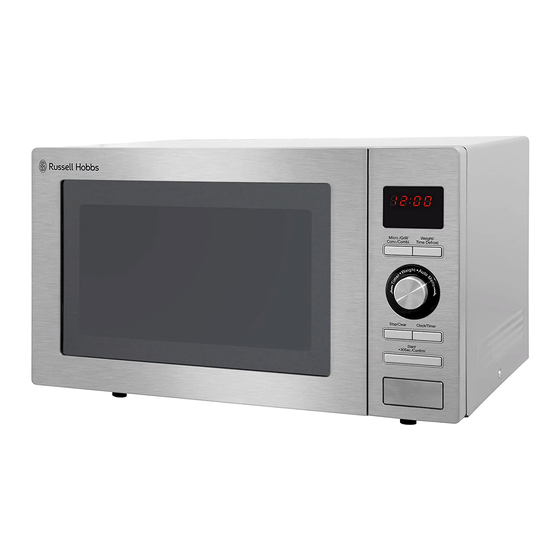
ABOUT YOUR MICROWAVE Thank you for purchasing your Russell Hobbs microwave oven. This stylish large capacity 25 litre Russell Hobbs Microwave features a sleek and modern design with a mirror finish door. It combines microwave cooking with grill power and convection oven enabling you to cook a variety of dishes with just one appliance. - Page 11 ABOUT YOUR MICROWAVE How do microwaves work? Microwaves are high-frequency electromagnetic waves similar to radio waves. While radio waves may vary in length from one metre to many kilometres, microwaves are very short (less than 12.5 centimetres.) Microwaves do not make any heat themselves but cause water molecules in the food to vibrate.
-
Page 12: Product Information
PRODUCT INFORMATION Model number RHM2572CG Rated Voltage 230-240V ~ 50Hz Rated Output Power (Microwave) 900W Rated Power (Grill) 1100W Rated Power (Convection) 2500W Imported by: G2S Limited Wigan WN2 4AY For Customer Services & Spare Parts please call 0345 209 7461 Opening times: Monday - Friday 8am –... -
Page 13: Unpacking The Microwave
UNPACKING THE MICROWAVE Before you use your microwave oven 1. Remove all the packaging. Do not remove the small piece of card from the right hand side of the cavity wall (refer to the below image). This is called a wave-guide cover which allows the microwaves to pass through to cook the food. -
Page 14: Product Overview
PRODUCT OVERVIEW 5 6 7 1. Safety interlock latches 6. Turntable coupling 2. Microwave window 7. Glass turntable 3. Ventilation slots 8. Waveguide cover 4. Oven cavity 9. Control panel (including door 5. Turntable ring release button). Grill Rack & Baking Tray to be used for grilling & convection cooking only. CAUTION: GRILL RACK AND BAKING TRAY WILL BE HOT AFTER COOKING. -
Page 15: Microwave Oven Installation
MICROWAVE OVEN INSTALLATION • Place the oven as far away from radios and televisions as possible. Using the oven may cause interference with the reception. • Plug the oven into a suitable 13 amp mains socket, make sure the voltage is the same as on the rating label (do not use extension cables or mains socket adaptors.) •... - Page 16 MICROWAVE OVEN INSTALLATION The minimum installation height is 85cm. A minimum clearance of 20cm is required between the oven and the side walls and 7.5cm between the oven and the back wall. Leave a minimum clearance of 30cm above the oven. WARNING: DO NOT install the oven over a cooker or other heat or steam producing appliances as this will damage the microwave oven.
-
Page 17: Turntable Installation
TURNTABLE INSTALLATION • Before first use, check that any securing tape and all packaging has been removed from the glass tray and turntable ring assembly. • These parts must never be restricted from rotating. • Never place the glass tray upside down. •... - Page 18 TURNTABLE INSTALLATION The glass tray, turntable ring, and turntable coupling assembly must always be used during cooking (as shown below). • Do not place the food directly onto the glass tray, always place on or in a suitable microwaveable cookware. Please check that crockery is microwave safe before using.
-
Page 19: Control Panel
CONTROL PANEL SCREEN DISPLAY Cooking time, power, action indicators, and clock time are displayed. TIMER/WEIGHT/AUTO MENU This rotational dial is used for a number of functions including the auto cook menus. WEIGHT/TIME DEFROST Press this button for the defrost function. MICROWAVE/GRILL/CONV./COMBI. -
Page 20: How To Use The Microwave
HOW TO USE THE MICROWAVE Turn on the power Insert the plug into a suitable 13amp mains socket. Note: Make sure the voltage is the same as on the rating label located on the back of the microwave (do not use extension cables or mains socket adaptors.) The microwave oven will beep. - Page 21 HOW TO USE THE MICROWAVE Microwave cooking Once you have correctly installed the unit, turned on the power and set the clock, you are ready to start cooking. Your microwave has 5 power levels, the lowest at 10%, then 30%, 50%, 80%, up to 100%.
- Page 22 HOW TO USE THE MICROWAVE Grill cooking Note: This function is only recommended for browning food as it is not as powerful as a household grill. The grill element should be preheated to ensure optimum operation and cooking. The recommended preheat time is 10-15 minutes.
- Page 23 HOW TO USE THE MICROWAVE COMBINATION COOKING (MICROWAVE + GRILL + CONVECTION) Combination cooking enables you to combine microwave energy, a grill and convection heating (fanned hot air) so you can heat, roast, crisp and brown the food. Which function shall I use? The C-1 Method: Microwave &...
- Page 24 HOW TO USE THE MICROWAVE COMBINATION COOKING (MICROWAVE + GRILL + COVECTION) Combination function/program table For the various settings the cooking time is divided as below: Microwave Grill Convection 900W 165 ℃ 165 ℃ 900W 200 ℃ 200 ℃ 900W 200 ℃...
- Page 25 HOW TO USE THE MICROWAVE Convection cooking (With preheating function) The convection cooking allows you to cook food using the unit as a traditional oven; the microwave function is not used. It is recommended that you preheat the oven to the appropriate temperature before placing the food in the oven.
- Page 26 HOW TO USE THE MICROWAVE Convection cooking (Without preheating function) The convection cooking allows you to cook food using the unit as a traditional oven when the microwave function is not used. It is recommended that you preheat the oven to the appropriate temperature before placing the food in the oven.
- Page 27 HOW TO USE THE MICROWAVE Multi-stage cooking Two cooking stages can be set in sequence. If one of your required cooking stages is for defrosting, make sure this is programmed to come on first. The buzzer will ring once after each stage and then the next stage will proceed.
- Page 28 HOW TO USE THE MICROWAVE Quick Start cooking One of the quickest ways to start microwave cooking is by using the “+30SEC.” function. 1. Press the “START/+30SEC./CONFIRM” button to cook with 100% power level for 30 seconds. Each press on the same button increases the cooking time by 30 seconds.
- Page 29 HOW TO USE THE MICROWAVE Auto Menu 1. Turn the “TIMER/WEIGHT/AUTO” dial clockwise to choose the required function. "A1","A2","A3".."A10" will be displayed. An Auto Menu cooking guide is on the following page. 2. Press the “START/ +30 SEC./CONFIRM” button to confirm the menu you require.
- Page 30 HOW TO USE THE MICROWAVE Display Weight (g) Power Setting 150g 250g A1 – Auto Reheat 350g 100% 450g 600g 1 (approx. 230g) A2 - Potato 2 (approx. 460g) 100% 3 (approx. 690g) 150g 300g A3 - Meat 100% 450g 600g 150g A4 - Vegetable...
- Page 31 HOW TO USE THE MICROWAVE Child lock function The child lock function is ideal to stop children from using the microwave if unsupervised. No buttons will function in this mode. To set the lock, in waiting state, press “STOP/CLEAR” for 3 seconds, there will be a long ‘beep’...
-
Page 32: Cooking Tips
COOKING TIPS Defrosting tips Microwaves penetrate around 4cm into most food. To maximize defrosting effectiveness follow the below guidelines. 1. For thick foods, turn regularly during operation in order to defrost evenly. 2. If food weighs over 500g, it is advised to turn at least 2 times. 3. -
Page 33: Cleaning The Microwave
CLEANING THE MICROWAVE • Before you clean the oven, turn it off and unplug it. • Keep the inside of the oven clean. When foods or liquids stick to the oven walls, wipe with a damp cloth. We recommend that you do not use harsh detergents or abrasives. -
Page 34: Problem Solving
PROBLEM SOLVING WARNING: To reduce the risk of personal injury, always unplug the microwave before performing maintenance or trouble shooting checks. The microwave oven may cause interference to your radio, TV or similar equipment. If this happens, you can stop the interference by moving the radio, TV or equipment as far away from your microwave oven as possible. - Page 35 PROBLEM SOLVING Problem Potential reason Potential solution Spillages or splashes can burn and catch fire, all food that is put into the microwave should be appropriately covered. All spillages or splashes must be cleaned, and all areas of microwave cleaned after each use.
- Page 36 PROBLEM SOLVING Problem Potential reason Potential solution By the very nature of how a microwave works, it ‘excites’ the water molecules in the food it is heating, causing them to move about and generate heat from within the food. Often when the food heats up it reaches the point where steam is released.
- Page 37 PROBLEM SOLVING Problem Potential reason Potential solution 1. Glass turntable fitted Check that the glass turntable has been placed correctly on the incorrectly turntable and is not stopping the door from shutting correctly. Door not If the microwave is within its warranty period, please contact shutting/ 2.
-
Page 38: Guarantee & Customer Services
GUARANTEE & CUSTOMER SERVICES At Russell Hobbs, we take all our customer feedback seriously. Feel free to contact our Product Care Team, on 0345 209 7461 Monday – Friday: 8am-8pm & Saturday: 9am – 1pm, who will be more than happy to assist you. -
Page 39: Spare Parts
SPARE PARTS To check the availability of the following spare parts, simply contact our friendly Customer Services team using the details provided at the bottom of this page. Turntable coupling Turntable Ring Glass turntable Wave Guide cover Grill rack For Customer Services & Spare Parts please call 0345 209 7461 Opening times: Monday - Friday 8am –... -
Page 40: Connection To The Mains Supply
CONNECTION TO THE MAINS SUPPLY WARNING- THIS APPLIANCE MUST BE EARTHED This appliance is designed to operate from a mains supply of 220-240V~ 50Hz. Check that the voltage marked on the product corresponds with your supply voltage. This product is fitted with a 13A plug complying with BS1363. If this plug is unsuitable or needs to be replaced, refer to customer services. - Page 41 CONNECTION TO THE MAINS SUPPLY For UK use only – PLUG • As the colours of the wires in the mains lead of this appliance may not correspond with the coloured markings identifying the terminals in your plug, proceed as follows: •...
-
Page 42: Notes
NOTES... - Page 43 NOTES...
-
Page 44: Disposal Information
For Customer Services & Spare Parts please call 0345 209 7461 Opening times: Monday - Friday 8am – 8pm & Saturday 9am –1pm Or visit us at www.productcare.co.uk Revision 3 This symbol is known as the 'Crossed-out wheelie bin Symbol'. When this symbol is marked on a product/batteries, it means that the product/batteries should not be disposed of with your general household waste.
Need help?
Do you have a question about the RHM2572CG and is the answer not in the manual?
Questions and answers