Schuller VENTO Installation Manual
Dimmable ceiling fan
Hide thumbs
Also See for VENTO:
- User manual (10 pages) ,
- Installation manual (10 pages) ,
- Installation manual (10 pages)
Advertisement
Available languages
Available languages
Quick Links
VENTO
VENTILADOR DE TECHO DIMABLE
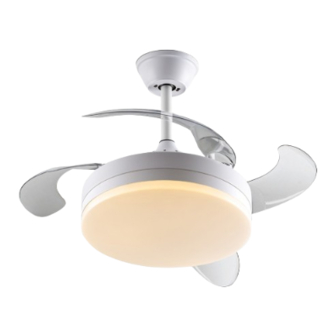
DIMMABLE CEILING FAN
169228
Luz LED CCT 3000k a 6000K (LUZ CÁLIDA, NEUTRA Y FRIA)
Ventilador con motor DC de 6 velocidades e inversión de giro.
Aspas escamoteables en acrílico transparente.
Función temporizador. Mando a distancia.
(ES) GUÍA DE INSTALACIÓN · p 2
(EN) INSTALLATION GUIDE · p 6
Para ver la ficha técnica de producto completa, puede usar el siguiente código QR:
Para cualquier duda técnica póngase en contacto con nuestro Departamento Técnico.
Estamos a su servicio en nuestro email
irodriguez@schuller.es
o en nuestro teléfono 961 601 051 Ext. 229
Rev.07.23
1
Advertisement

Subscribe to Our Youtube Channel
Related Manuals for Schuller VENTO


Summary of Contents for Schuller VENTO
- Page 1 VENTO VENTILADOR DE TECHO DIMABLE DIMMABLE CEILING FAN 169228 Luz LED CCT 3000k a 6000K (LUZ CÁLIDA, NEUTRA Y FRIA) Ventilador con motor DC de 6 velocidades e inversión de giro. Aspas escamoteables en acrílico transparente. Función temporizador. Mando a distancia.
- Page 2 Advertencia l. La potencia de entrada para este ventilador debe ser de 220 V / 50 HZ. 2. La instalación eléctrica debe ser realizada por un profesional cualificado. 3. Para reducir el riesgo de lesiones, no toque la cuchilla cuando el ventilador esté funcionando. INSTRUCCIONES Y PASOS DE INSTALACIÓN.
- Page 3 2º- Coloque la semiesfera en el tubo seleccionado, si no está ya pre-instalada. Usando el pasador y el tornillo de fijación. 3º- Coloque el canopí y el embellecedor en el tubo y en el orden indicado en el esquema siguiente. 4º- Afloje los tornillos y retire el pasadordel aro de unión (situado en la parte superior del cuerpo del ventilador)e inserte el Tubo, pasando el cable eléctrico del cuerpo a través de él previamente.
- Page 4 7º- Levante el canopí hasta el techo para cubrir el soporte de montaje (asegúrese que el canopí se asiente en los dos tornillos del soporte.), gire el canopí para asegurarse que la cabeza del tornillo coincide con los orificios del soporte. Apretar los tornillos. 8º- Coloqué...
- Page 5 NOTAS DE FUNCIONAMIENTO: 1. Las primeras 24 horas tras la instalación es normal apreciar un ligero rumor durante el funcionamiento del ventilador. Tras ese periodo de ajuste el rumor desaparecerá. La luz del ventilador apagada a través del mando a distancia queda en stand-by. Quedará completamente apagada, si se corta la corriente a través del interruptor de pared Si realiza la instalación en un falso techo de escayola, madera o metal es posible que se amplifique el rumor del ventilador debido a la cámara de aire existente.
- Page 6 VENTO DIMMABLE CEILING FAN WITH LED LIGHT 169228 LED light CCT 3000k to 6000K (WARM, NEUTRAL AND COOL LIGHT) Fan with 6-speed DC motor, and reversible rotation. Retractable blades in clear acrylic. Timer function. Remote control. You may use the following QR code to view the complete technical data sheet of the product: If you have any technical questions, please do not hesitate to contact our technical Department.
- Page 7 Warning: l. This ceiling fan requires a power input of 220 V / 50 HZ. 2. The electrical installation should be carried out by a qualified electrician. 3. To reduce risk of injury, do not touch the blades while the fan is in operation. INSTRUCTIONS AND INSTALLATION STEPS.
- Page 8 3. Installation of the suspension system. 1º- Select the downrod (2A or 2B) you wish to use according to the desired height of the fan. 2º- If it isn´t already been pre-installed, use the pin and set-screw to insert the hemisphere onto the selected downrod. 3º- Place the canopy and the connector cover onto the tube, in the order indicated in the diagram below.
- Page 9 7º- Raise the canopy to the ceiling to cover the ceiling-mount (ensuring the canopy rests on the two bracket screws), rotate the canopy to ensure the screw headsalign with the holes on the bracket, and tighten the screws. 8º- Place the light shade on the underside of the fan body, covering the LEDring. Ensure the grooves on the shade diffuser align with the pivots on the ring of the fan body, then turn the shade diffuser clockwise until it fixes in place.
- Page 10 REMARKS: The first 24 hours after installation, it is normal to notice a slight noise during fan operation. After this adjustment period, the rumor will disappear. 2. The light of the fan turned off through the remote control remains in stand-by mode. It will be completely off if power is cut off through the wall switch.
Need help?
Do you have a question about the VENTO and is the answer not in the manual?
Questions and answers