
Related Manuals for FujiFilm instax Pal


Summary of Contents for FujiFilm instax Pal
- Page 1 NA_EN Digital Camera User’s Guide (Full version) model number: FI026 FI026-EN-NA-01...
-
Page 2: Table Of Contents
Taking photos ���������������������������������������������������������������������������������� 19 Table of contents Simple photo taking ������������������������������������������������������������������������������19 Continuous shooting ���������������������������������������������������������������������������� 20 NOTICE ��������������������������������������������������������������������������������������������������3 About flash photography ������������������������������������������������������������������� 20 Battery disposal ���������������������������������������������������������������������������������3 Taking photos using the provided multi-use detachable ring Preparation for the camera ............. 4 as a viewfinder ���������������������������������������������������������������������������������������� 20 Before use ��������������������������������������������������������������������������������������������4 Using the multi-use detachable ring as a base for your Part names �������������������������������������������������������������������������������������������4... -
Page 3: Notice
• Micro SD Card image transfer limitations apply, and only images taken with the INSTAX PAL may be transferred from Micro SD card to the INSTAX PAL App when the INSTAX PAL sets “Fun mode”� Press and hold both ends of the camera to release and remove the cover. -
Page 4: Preparation For The Camera
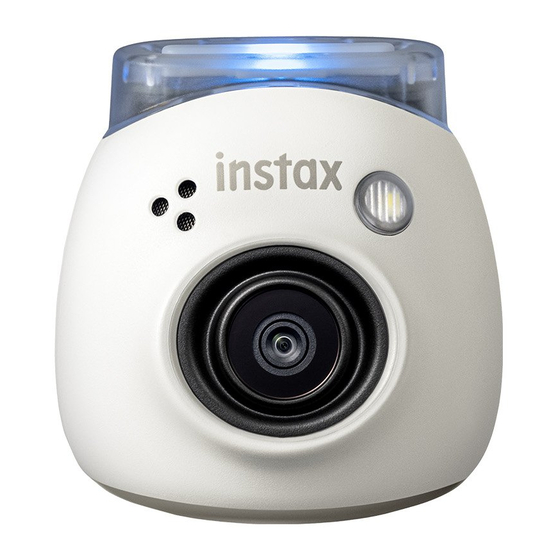
Preparation for the camera Front Before use Before using the camera, check the following has been included with your camera� Supplied accessories • USB Type-C cable for charging • Multi-use detachable ring (1) (YG059291QBU0000) • Quick Start Guide (1) Rear The battery is not fully charged at the factory�... -
Page 5: Using The Multi-Use Detachable Ring
Preparation for the camera Using the multi-use detachable ring Using the SD card The multi-use detachable ring can be used not only as a strap, but The camera’s internal memory can store about 50 still images, but also as a simple viewfinder or base for the camera� (page 20) you can store more images by using an SD card�... -
Page 6: Charging The Battery
PC or other device by inserting it into the camera and battery is fully charged� When the camera is turned on without using the INSTAX Pal app before using it in the camera� being connected to the app, the light turns white after the battery * You can format the SD card from the Media settings on the app�... -
Page 7: Turning On/Off The Power
Connect the PAL camera to the The camera will automatically be turned off after 2 minutes of downloaded INSTAX PAL Smartphone App inactivity (default setting)� You can change the setting to “5 min” / via Bluetooth and transfer images via the “OFF”... -
Page 8: Preparation For The App
You can enjoy creating various prints such as adding text and using the camera� applying filters to images with the functions of the INSTAX Pal app� • If you are using an Android OS smartphone, please search for the For details on how to use the app, refer to the following site�... - Page 9 Preparation for the app Check the region where you want to use the app, Confirm the privacy settings and tap [I agree to the and tap [OK]. privacy policy]. Read the terms of use, then put a check mark in the [Agree] box, and tap [Agree and use].
- Page 10 Preparation for the app When a camera is detected, tap [Connect]. Tap [Next] and give the camera a name of your choice. If multiple cameras are detected, select the camera to connect from the list� To name it later, tap [Skip]� The camera’s identifier (device name) is located on the For details on how to name the camera, see “Naming the bottom of the camera�...
-
Page 11: Overview Of The App
Overview of the app Status of the camera Depending on the version upgrade of the app, the screen Displays remaining battery level and current shooting format� configuration, functions, and specifications may change. Profile Screen on the app You can check the remaining battery level and “Reward Level”� When you launch the app, you will see the main screen below�... -
Page 12: Settings Screen
Overview of the app Basic settings Settings screen Auto power off Set the time until the power turns off automatically when the camera is not operated� Reset settings Restores the settings to the default settings� Startup LED settings Sets the pattern of how the LED lights up when the power is turned on�... -
Page 13: Preparing For Shooting
Preparing for shooting Pairing with the app Naming the camera You can shoot from your smartphone by linking the camera and You can name the camera whatever you like� the app� Tap the setting icon → [Settings] → [Camera Name Settings]. -
Page 14: Selecting Pre-Shutter Sound
Preparing for shooting Tap [Save pre-shutter sound]. Selecting pre-shutter sound When “Completed” is displayed on the screen, it is completed� You can set the sound that plays before the shutter sound� You can register up to 5 pre-shutter sounds� * You cannot change the shutter sound when shooting� Tap “Pre-shutter sounds”. -
Page 15: Selecting A Shooting Format
Preparing for shooting Saving images transferred to the app on the Selecting a shooting format camera You can select the size of the image to be shot from three types: “mini”, “SQUARE”, and “WIDE”� We recommend that you use the By default, the data on the camera side will be deleted when the settings that match your printer�... -
Page 16: Shooting Data
Shooting data Captured data save destination Number of shots/storable The data save destination changes depending on whether the SD The number of images that can be shot and the number of images card is inserted or not� that can be saved are shown below� You can check the shooting data saved in the internal memory or When not inserting the SD card SD card from the setting “Media settings”�... -
Page 17: Shooting Flow With App
Shooting flow with app There is no upper limit to the number of shots taken, as each shot When shooting by connecting to the app is transferred to the app� You can continue shooting without worrying about the capacity of the internal memory or SD card� Captured images are automatically transferred when the app is connected�... -
Page 18: Shooting Flow Without App
Shooting flow without app When the number of untransferred images reaches the upper When shooting without connecting to the limit A warning announcement will be played from the camera� To continue shooting, transfer the untransferred shooting data to the Shooting data is saved in the internal memory or SD card� When app�... -
Page 19: Shooting
Shooting Precautions on shooting Taking photos Point the PAL camera at your subject and press the shutter button • When connected to the app, the shooting data is automatically on the back of the camera to take a photo� Captured images will transferred to the app and the original image in the camera be stored on an inserted Micro SD card (sold separately) or if no disappears�... -
Page 20: Continuous Shooting
Shooting Continuous shooting About flash photography You can take up to 7 continuous shots by pressing and holding The flash fires automatically when it’s dark, but you can turn it off� down the shutter button� Please set in [Flash] of the menu� Set the mode selector switch to “F”. -
Page 21: Remote Shooting Using The App
Shooting Remote shooting using the app Interval shooting using the app You can shoot from your smartphone by linking the camera and You can shoot continuously at regular intervals� the app� Tap “Remote shooting” on the main screen, then tap You can shoot after checking the through image on the app “Interval shooting”... -
Page 22: Gallery And Instax Animation
Gallery and INSTAX Animation Tap [ ] to edit the image. Viewing/editing captured images You can browse the images you have taken in the gallery� Editing such as applying filters and effects is also possible� Tap “Gallery”. Thumbnails of captured images are displayed� Tap the image thumbnail. -
Page 23: Creating An Instax Animation
Gallery and INSTAX Animation Tap [Create slideshow]. Creating an INSTAX Animation An animation is created with the selected image� “INSTAX Animation” is a function that allows you to create an animation by selecting several images you like from the gallery� Tap “Gallery”. -
Page 24: Printing
Printing Choose a printer. Printing images from the app The app for the selected printer will start� You can print photos from the app� You can apply effects to your photos before printing� The following procedure is an example when connecting with INSTAX mini Link�... -
Page 25: Printing Images Directly From Your Camera Via Your Instax Link Series Smartphone Printer Device
The camera enters “Link” mode� Connect the camera to an INSTAX LINK Smartphone printer. When the INSTAX PAL camera and the INSTAX LINK Series printer are both turned on and placed close together, the device LED lights will turn Green, and the devices will automatically be paired via Bluetooth�... -
Page 26: Specifications
Specifications Operating Temperature: 41°F to 95°F (5°C to 35°C) environment Humidity: 20% to 80% (no condensation) ■ Camera function Direct print INSTAX mini Link Image sensor 1/5-inch CMOS with primary color filter compatible models INSTAX mini Link 2 INSTAX SQUARE Link Number of recorded 2560 ×... -
Page 27: Troubleshooting
If the problem persists even after taking action, properly� • The battery may be exhausted� Please please contact the FUJIFILM service center for repair in your charge the camera� country or visit the website below� • If it still does not work properly, please FUJIFILM website: http://www�fujifilm�com/... -
Page 28: Important Safety Notice
If one of the following cases occur, immediately unplug the dedicated charging cable, turn the camera off and refrain from any further use of the camera� Call the applicable Fujifilm customer service center: • If you notice anything abnormal, such as the camera (or battery) becoming hot, emitting smoke or a burning smell�... -
Page 29: Simple Camera Care
■ Use only as part of a Bluetooth network. Simple camera care Fujifilm does not accept liability for damages resulting from use in ■ Handling the camera and battery a manner not authorized or intended� Do not use in applications •... - Page 30 • Consult the dealer or an experienced radio/TV technician for help� FCC CAUTION Changes or modifications not expressly approved by Fujifilm could void the user’s authority to operate the equipment� This transmitter must not be co-located or operated in conjunction with any other antenna or transmitter�...
- Page 31 Bluetooth SIG, Inc�, and any use of such marks by Fujifilm is under license� Independent JPEG Group (IJG) Licenses The software used in the INSTAX PAL Digital Camera is based in part on the work of the Independent JPEG Group�...
Need help?
Do you have a question about the instax Pal and is the answer not in the manual?
Questions and answers