Table of Contents
Advertisement
Quick Links
Advertisement
Table of Contents

Subscribe to Our Youtube Channel
Related Manuals for Fondital MADEIRA SOLAR COMPACT KBS 24


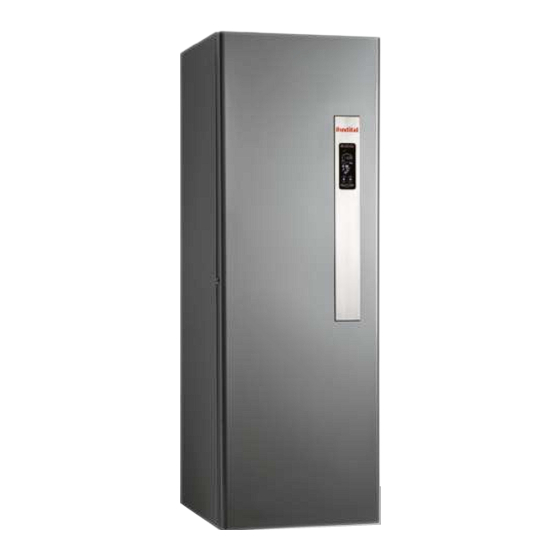
Summary of Contents for Fondital MADEIRA SOLAR COMPACT KBS 24
- Page 1 MADEIRA SOLAR COMPACT KBS 24 - 32 INSTALLATION, USE AND MAINTENANCE...
-
Page 2: Warnings
Dear Sirs, thank you for choosing and buying our boilers. Please, carefully read these instructions in order to properly install, operate and maintain the above-mentioned equipment. We inform users that: • boilers shall be installed by an authorised company in full compliance with the prevailing standards; •... -
Page 3: General Notes For Installers, Maintenance Technicians, And Users
General notes for installing and maintenance technicians, and users This instruction manual, which is an integral and indispensable part of the product, must be handed over to the user by the installer and must be kept in a safe place for future reference. The manual must accompany the kit should it be sold or its possession transferred. This document shall be supplied together with the equipment in case the latter is sold or transferred to others. -
Page 4: Rapid Operating Instructions
RAPID OPERATING INSTRUCTIONS The following instructions will help you to switch the boiler on quickly and regulate it for immediate use. It is presumed that the boiler has been installed by a qualified installer, it has been commissioned and is ready to operate correctly. -
Page 5: Table Of Contents
CONTENTS Warnings ........................................page 2 General notes for installers, maintenance technicians, and users ......................page 3 Rapid operating instructions ..................................page 4 1. Instructions for the user ..................................page 7 1.1. Control panel ..............................................page 7 1.2. Interpreting BOILER STATUS from LCD DISPLAY INDICATIONS ............................page 9 1.3. - Page 6 3.4.1. Preliminary checks ........................................... page 51 3.4.2. Switching on and switching off ......................................page 51 3.5. Wiring diagrams ..............................................page 52 3.6. Adaptation to other gas types and burner adjustment ..............................page 58 3.6.1. Switching from METHANE to PROPANE ................................... page 58 3.6.2.
-
Page 7: Instructions For The User
INSTRUCTIONS FOR THE USER 1.1. Control panel fig. 1 A. Temperature selection (day/night) and recall information. B. Weekly programme for temperature zones and manual programme selection. C. Timer and ambient temperature setting. D. Domestic hot water setting (see paragraphs 1.3., 1.4., 1.5., 1.14.3). E. - Page 8 SYMBOL STEADY FLASHING Indication of "parameter" inside the parameter menu. Displaying of the number of parameters, or of the system pressure, or of the burner power percentage. Indication of the temperatures, parameter values, faults and shut-downs. CH water temperature adjustment Boiler is in CH mode.
-
Page 9: Interpreting Boiler Status From Lcd Display Indications
1.2. Interpreting BOILER STATUS from LCD DISPLAY INDICATIONS Normal operation Boiler switch in OFF mode Boiler switch in SUMMER or WINTER mode or CH ONLY No active function The flow temperature and the heating system pressure are displayed CENTRAL HEATING SUMMER WINTER ONLY... - Page 10 Boiler switch in SUMMER or WINTER mode Comfort function in progress (the plate exchanger is kept heated) The flow water temperature is displayed SUMMER WINTER Table 1 - BOILER STATUS - LCD DISPLAY INDICATIONS during normal operation Malfunction No flame Triggering of double flow probe Triggering of flue gas thermostat Insufficient system pressure...
- Page 11 Fan failure Communication failure between peripheral devices (zone boards, solar) Hydraulic configuration not allowed (wrong P03 and P18 parameter setting) Zone configuration error (ambient probe, Remote Control and ambient thermostat). Wrong setting of P61 parameter. Ambient probe 1 failure Ambient probe 2 failure Pressure transducer failure External probe fault with connected ambient probe (displayed if P57=2 or P57=3) Communication error between main board and interface board...
-
Page 12: Enabling/Disabling The "Comfort" Function
1.3. Enabling/disabling the “Comfort” function This function keeps the plate heat exchanger hot, to minimise the waiting time for the production of DHW. When the "COMFORT" icon (6, fig. 1) is on, the function is enabled. When it is off the function is disabled and the boiler performs the standard functions. If “COMFORT”... -
Page 13: Selecting The Operating Mode
1.4. Selecting the operating mode Whenever button is pressed, the "SUMMER” ,“WINTER” , “CH ONLY” , “OFF” modes are enabled in sequence. At this stage, all buttons are enabled. When the "SUMMER" mode is enabled, only the DHW production function is active. When the "CH ONLY"... -
Page 14: Adjusting Heating And Dhw Temperature
1.5. Adjusting heating and DHW temperature Press the "DHW + and -" button (D, fig. 1) to select the desired domestic hot water temperature (refer to paragraph 1.14.3). During selection, DHW icon (5, fig. 1) will flash. As soon as button is released, icon will continue flashing for approx. 3 seconds, and temperature value will flash as well. After this time, value is stored and display standard operation will be restored. -
Page 15: Timer Setting
1.6. Timer setting 1- To set time, minutes and day 2- Flashing values can be edited by pressing "CH + of the week, press “set”. and -" buttons. Press "ok" to confirm the edited value and shift to next parameter, press "reset"... -
Page 16: Day Temperature" And "Night Temperature" Setting
1.7. "Day temperature" and "night temperature" setting When one or more ambient probes are connected to boiler electronic board, two levels of ambient temperatures can be set. Boiler will manage the heating request based on the set temperatures, as follows. If no ambient probe is connected to the boiler, temperatures cannot be set. "Day"... -
Page 17: Manual Programme Setting
1.8. "Manual" programme setting The "manual" mode selection indicated with symbol , allows activating the heating function, 24 hours a day, in both zones at the "day temperature", disabling at the same time zone 1 and zone 2 programming. 1- Press “prog” to access the 2- Press “ok”... -
Page 18: Programme Mode
1.10. CH programme mode To access zone 1 heating programme displaying or editing, press "prog" button twice. 1- The display shows zone 2- Press “ok” to access zone 1 symbol flashing, sun or programming function. moon symbols, bars on or off, "Prog"... -
Page 19: Parameters Display
1.11. Parameters display Press “Info” (A, fig. 1) to scroll the different parameter values. You can quit this function at any time by simply pressing the "Reset" button. Paragraph 3.2.14 describes the meaning of all parameters. PARAMETERS DESCRIPTION P30 - TSP30 External temperature displaying (if an external probe is present). -
Page 20: Failures That Cannot Be Reset
1.12. Failures that cannot be reset The display shows the failure based on the corresponding error code (see paragraph 1.2). Some failures can be reset through the reset key, while some others are self-resettable. Refer to the following paragraph (“Resume boiler function”). If failures cannot be reset but are of the self-resettable type, no key will be enabled and only the LCD back-lighting will be on. -
Page 21: Boiler Operation
1.14. Boiler operation 1.14.1. Switching on It is presumed that the boiler has been installed by a qualified installer, it has been commissioned and is ready to operate correctly. Open the gas stop cock; - turn the master switch installed ahead of the boiler ON. The display turns on and indicates the function currently active (see tables 1 and 2); - select boiler operating mode pressing “Operating mode selection”... -
Page 22: Dhw Production Through Solar Plant
1.4.3.2. DHW production through solar plant Rear view The domestic hot water production through solar plant is always enabled, as long as the solar collectors are correctly connected. In this case, the solar plant heats the water inside the water heater, according to the settings made on the solar plant electronic control board through the dedicated parameters (see paragraph 3.2.14). -
Page 23: Pump And Valve Anti-Shutdown Function
1.14.10. Operation with (optional) Remote Control Boiler interface includes all the possible functions of a Fondital Remote Control, and can control up to two heating zones. User can also connect the boiler to a Remote Control (optional - not compulsory, supplied by the manufacturer) so as to manage several boiler parameters, such as: - boiler mode selection;... -
Page 24: Boiler Shut-Down
1.15. Boiler shut-down The boiler shuts down automatically if a malfunction occurs. Refer to Tables 1 and 2 to identify the boiler operating mode. To determine the possible causes of malfunction, see also paragraph 6. The troubleshooting section is at the end of this manual. Below is a list of kinds of shut-down and the procedure to follow in each. -
Page 25: Shut-Down For Fan Malfunction
1.15.4. Shut-down for fan malfunction The fan operation is constantly monitored and in case of malfunction the burner goes off; the code E40 flashes on the display. This mode is maintained until the fan recovers normal working parameters. If the boiler does not start and remains in this mode, contact a Service Centre or a qualified service engineer. 1.15.5. -
Page 26: Technical Features And Dimensions
TECHNICAL FEATURES AND DIMENSIONS 2.1. Technical features This boiler is equipped with a built-in fully pre-mixed gas burner, a condensing heat exchanger, a single-coil water heater and hydraulic and electronic equipment for connection to a solar plant. The following models are available: - KBS 24 - Condensing boiler with water heater with single coil for solar integration and domestic hot water production, with 23.7 kW heat input. - Page 27 Operating features - CH electronic flame modulation with timer-controlled rising ramp (60 seconds, adjustable); - Electronic flame modulation in DHW mode; - DHW priority function; - Flow anti-freeze function: ON 5°C; OFF 30°C or after 15 minutes of operation if CH temperature > 5 °C; - DHW anti-freeze function: ON 5°C;...
-
Page 28: Dimensions
2.2. Dimensions FRONT VIEW RH SIDE VIEW Opening for hydraulic connections (see figure 5) TOP VIEW REAR VIEW 1783 1718 1653 1588 1523 1458 1393 1328 1263 1133 1071 1006 fig. 4... - Page 29 CH FLOW (3/4") HYDRAULIC CONNECTIONS CH RETURN (3/4") MADEIRA SOLAR COMPACT KBS GAS (1/2”) DHW OUTLET (3/4”) COLD WATER INLET (1/2") SOLAR RETURN (3/4") SOLAR FLOW (3/4") fig. 5 HIGH-TEMPERATURE CH FLOW ZONE 1 (3/4”) HYDRAULIC CONNECTIONS LOW-TEMPERATURE CH RETURN ZONE 2 (3/4”) MADEIRA SOLAR COMPACT KBS V GAS (1/2”) HIGH-TEMPERATURE CH RETURN ZONE 1 (3/4”)
-
Page 30: Key Components
2.3. Key components Ref. no. Description Boiler protective anode DHW flowmeter Three-way valve Gas valve Condensate trap Modulating fan Pre-mixed burner Flue gas discharge tower CH expansion vessel CH circulation pump Solar system pressure gauge DHW motorised 3-way deviating valve Solar system circulation pump Solar plant flowmeter with filler cock and discharge cock... - Page 31 Ref. no. Description DHW expansion vessel Solar expansion vessel DHW mixing valve Solar 6-bar safety valve CH system filler cock Hydraulic separator fig. 9...
-
Page 32: Boiler Operating Diagram
2.4. Boiler operating diagram Ref. Description Ref. Description Double CH flow probe 12 litre solar expansion vessel DHW probe CH system discharge cock Solar valve probe (water heater top part) DHW 6-bar safety valve Solar water heater probe (water heater low part) Water heater drain cock Solar collector probe DHW motorised 3-way deviating valve... -
Page 33: Operating Data
2.5. Operating data Burner pressures reported in the following page must be verified after the boiler has been operating for 3 minutes. KBS 24 Gas mains Diaphragm Flue gas heat output heat output DHW heat output max. Nozzle Type of gas pressure diameter value... -
Page 34: Circulation Pump Available Head
KBS 24 Max. output Min. output 30% load Casing heat loss with burner on 0.61 6.52 Casing heat loss with burner off 0.21 Flue system heat loss with burner on 2.69 2.08 Flue system mass capacity 12.43 1.33 Flue gas temp. – air temp °C Efficiency rating at maximum heat output (60/80°C) 96.7... -
Page 35: Low And High Temperature Circulation Pumps Available Head (V Versions)
2.8. Low and high temperature circulation pumps available head (V versions) HIGH-TEMPERATURE CIRCULATION PUMP HEAD fig. 13 LOW-TEMPERATURE CIRCULATION PUMP HEAD fig. 14 2.9. Low and high temperature circulation pump available head (Z versions) HIGH-TEMPERATURE CIRCULATION PUMP HEAD fig. 15... -
Page 36: Solar Circulation Pump Available Head
LOW-TEMPERATURE ZONE 1 CIRCULATION PUMP HEAD fig. 16 LOW-TEMPERATURE ZONE 2 CIRCULATION PUMP HEAD fig. 17 2.10. Solar circulation pump available head SOLAR CIRCULATION PUMP HEAD fig. 18... -
Page 37: Instructions For The Installer
INSTRUCTIONS FOR THE INSTALLER 3.1. Installation standards This is an II2H3P category boiler and must be installed in compliance with the laws and standards in force in the country of installation, which are herein considered as entirely transcribed. 3.2. Installation Accessories and spare parts for installation and service procedures are to be supplied by the Manufacturer. -
Page 38: Boiler Room Ventilation
3.2.4. Boiler room ventilation The boiler has sealed combustion chamber. Combustion air is not drawn from boiler room, therefore no specific recommendations need to be applied concerning the boiler room or openings and ventilation provided to the boiler room. The boiler must be installed in a room that is compliant with the legislation and standards in force in the country of installation, which are herein considered as entirely transcribed 3.2.5. -
Page 39: Configuration Of Air Intake And Flue Gas Venting Ducts: B23, B53, C13, C33, C43, C53, C83
3.2.5.1. Configuration of air intake and flue gas venting ducts: B23, B53, C13, C33, C43, C53, C83 The information given above is with reference to air intake/flue gas venting ducts made from smooth, rigid pipes approved and supplied by the manufacturer. B23 installation type Boiler intended for connection to an existing flue system external to the boiler room. -
Page 40: Ø 100/60 Mm And Ø 125/80 Mm Air/Flue Gas Coaxial Duct System
3.2.5.2. Ø 100/60 mm and Ø 125/80 mm air/flue gas coaxial duct system The information given above is with reference to air intake/flue gas venting ducts made from smooth, rigid pipes approved and supplied by the manufacturer. C13 installation type C33 installation type 24 kW Minimum permissible length of horizontal coaxial pipes is 1 meter. -
Page 41: Air Intake And Flue Gas Venting Via 80 Mm Split Pipes
3.2.5.3. Air intake and flue gas venting via Ø 80 mm split pipes The information given above is with reference to air intake/flue gas venting ducts made from smooth, rigid pipes approved and supplied by the manufacturer. Installation types C43 - C53 - C83 24 kW 32 kW Minimum permissible length of air intake pipe is 1 meter. -
Page 42: Checking Combustion Efficiency
3.2.6. Checking combustion efficiency 3.2.6.1. Flue cleaning function The boiler features a flue cleaning function which must be used to measure combustion efficiency during operation and to adjust the burner. To enable the flue cleaning function, press the "reset" key and it keep it pressed for about three seconds. If the "reset"... -
Page 43: Connection To Gas Mains
3.2.7. Connection to gas mains Gas supply pipe cross-section must be equal or greater than boiler gas pipe. Cross-section gas pipe size depends on its length, layout pattern, gas flow rate. Gas pipe size is to be selected accordingly. connection Comply with installation standards enforced in the country where the boiler is installed which are considered as fully transcribed in this booklet. -
Page 44: Solar Collector Probe Installation
CONDENSATE DRAIN Comply with condensate drain laws and standards applicable in the country of installation, which are considered herein integrally transcribed. Unless forbidden, the condensate produced by combustion is to be routed (via the condensate drain in fig. 26) through a discharge system connected to the domestic sewer, which due to its basicity, counteracts flue gas condensate acidity. -
Page 45: Connection To Ambient Thermostat (Optional)
3.2.12. Connection to ambient thermostat (optional) The boiler is designed to be connected to an ambient thermostat (optional, not compulsory). Ambient thermostat contacts must be properly sized in compliance with a load of 5 mA at 24 Vdc. Ambient thermostat cables shall be connected to electronic board pins 1 and 2 (fig. 29, 30 and 31), after having eliminated the jumper supplied as a standard with the boiler. -
Page 46: Connection To The (Optional) External Probe And Sliding Temperature Operation
3.2.14. Connection to the external probe (optional) and “sliding temperature” operation The boiler can be connected to an external temperature probe (optional - not compulsory) for sliding temperature operation. Only original external temperature probes supplied by the manufacturer must be used. If non-original external temperature probes are used, correct operation of the boiler and external probe cannot be guaranteed. - Page 47 Figure 27 shows the curves for a calculated ambient temperature of 20°C. Parameter P10 allows selecting the curve value shown in fig. 27. If calculated ambient temperature value is edited on boiler display, the curves shift up or down, respectively, by the same amount. With a calculated ambient temperature setting of 20°C, for example, if you select the curve corresponding to parameter 1 and the outdoor temperature is - 4°C, the CH flow temperature will be 50°C.
-
Page 48: Tsp Parameters That Can Be Set From Interface And Remote Control
3.2.15. TSP parameters that can be set from interface or Remote Control Parameter Settable values Default values Notes P0 - TSP0 Depending on 1 = 24 kW methane; 3 = 24 kW propane; 1, 3, 6, 7 Boiler power selection the model 6 = 32 kW methane;... - Page 49 in V versions Current zone 2 flow temperature in Z versions Set point of zone 3 flow temperature in Z versions Current zone 3 flow temperature only with three zone boards connected (optional) Set point of zone 4 flow temperature only with three zone boards connected (optional) Current zone 4 flow temperature Plate DHW temperature...
-
Page 50: Filling The System
0 ÷ 300 sec. 140 sec. only with zone boards connected Low temperature zone mixer valve opening time 0 ÷ 35 °C 5 °C only with zone boards connected Rise in nominal boiler temperature with zone board 0 ÷ 1 0 = disabled;... -
Page 51: Filling The Solar Plant
WARNING After long inactivity of the boiler, its pumps may be stuck. Before starting up the boiler, make sure that the pumps are operating, with the following procedure: - unscrew the protective cap at the centre of the pump motor; - put a screwdriver into the hole and manually rotate the circulation pump shaft clockwise;... - Page 52 3.5. Wiring diagrams KBS version fig. 29...
- Page 53 ACC1: ignition transformer PV: Air pressure switch X2-X7: ground connectors PCS: solar collector pump 0CREMOTO04: Open Therm Fondital Remote Control SBS: solar water heater probe PT1000 0SONDAES01: external probe to be used with 0CREMOTO04 Remote Control SCS: solar collector probe PT1000...
- Page 54 KBS V version fig. 30...
- Page 55 SR1-SR2: CH NTC probe 10 kOhm at 25 °C B=3435 X2-X7: ground connectors SF: flue gas NTC probe 10 kOhm at 25 °C B=3435 0CREMOTO04: Open Therm Fondital Remote Control PV: Air pressure switch 0SONDAES01: external probe to be used with 0CREMOTO04 Remote Control...
- Page 56 KBS Z version fig. 31...
- Page 57 X2-X7: ground connectors SR1-SR2: CH NTC probe 10 kOhm at 25 °C B=3435 0CREMOTO04: Open Therm Fondital Remote Control SF: flue gas NTC probe 10 kOhm at 25 °C B=3435 0SONDAES01: external probe to be used with 0CREMOTO04 Remote Control...
- Page 58 T (°C) 27203 24979 22959 21122 19451 17928 16539 15271 14113 13054 12084 11196 10382 9634 8948 8317 7736 7202 6709 6254 5835 5448 5090 4758 4452 4168 3904 3660 3433 3222 3026 2844 2674 2516 2369 2232 2104 1984 1872 1769 1670...
- Page 59 - Access the programming page to set the parameters P4-P5-P6-P7 to the propane gas values, as described in table 10. - Adjust the gas valve (see next paragraph, 3.6.3.). Gas pipe Air intake pipe Mixer Gas valve fig. 32 fig. 33 gas fitting O-ring retaining screws...
- Page 60 FLUE CO RATES Fuel rate (%) 24 kW Methane 9.0 - 9.3 24 kW Propane 32 kW Methane 9.0 - 9.3 32 kW Propane table 13 - CO rates DIAMETER OF NOZZLES / DIAPHRAGMS (mm) Methane Propane 24 kW 3.70 3.00 3.55 + diaphragm 32 kW...
- Page 61 TESTING THE BOILER 4.1. Preliminary checks Before testing the boiler, it is recommended to check the following: - the installation is compliant with the prevailing standards; - the flue gas venting duct and the relative terminal are installed in conformity with the instructions: with the boiler operating there must be no leakage of combustion by-products from any of the gaskets;...
- Page 62 MAINTENANCE Any maintenance (and repair) work must only be carried out by qualified personnel. The user is strongly advised to have the boiler serviced and repaired by a qualified Service Centre. Appropriate boiler maintenance ensures efficient operation, environment preservation, and safety for people, animals and objects. 5.1.
- Page 63 TROUBLESHOOTING BOILER STATUS MALFUNCTION PROBABLE CAUSE SOLUTION Check gas supply. Gas supply failure. Check gas supply cock or gas network safety valve intervention. Burner does not ignite Gas valve is disconnected. Reconnect it. Gas valve is faulty. Replace it. Electronic board is faulty. Replace it.
- Page 64 BOILER STATUS MALFUNCTION PROBABLE CAUSE SOLUTION The Remote Control is not connected to Reconnect it. boiler board. Remote Control connection failure (only E31** Remote control faulty. Replace it. shown on Remote Control display). Boiler board is faulty. Replace it. Mixer valve is faulty. Replace it.
- Page 68 Tel. +39 0365/878.31 - Fax +39 0365/878.304 e mail: info@fondital.it - www.fondital.com The manufacturer reserves the right to modify his/her products as deemed necessary, without altering the basic characteristics of the products themselves. Uff. Pubblicità Fondital IST 03 C 620 - 03 | Luglio 2019 (07/2019)
Need help?
Do you have a question about the MADEIRA SOLAR COMPACT KBS 24 and is the answer not in the manual?
Questions and answers