Table of Contents
Advertisement
Quick Links
INSTALLATION, USE AND MAINTENANCE
It is compulsory to read this manual before proceeding with the boiler installation, use
and maintenance operations.
This boiler is intended for production of hot technical water only:
• For heating of residential, commercial and industrial rooms.
• For heating of industrial process water.
• For indirect production of domestic hot water.
Any other use is forbidden.
ITACA CH
KR 45
KR 60
EN
Translation of the
original instructions
(in Italian)
Advertisement
Table of Contents

Related Manuals for Fondital ITACA CH KR 45


Summary of Contents for Fondital ITACA CH KR 45
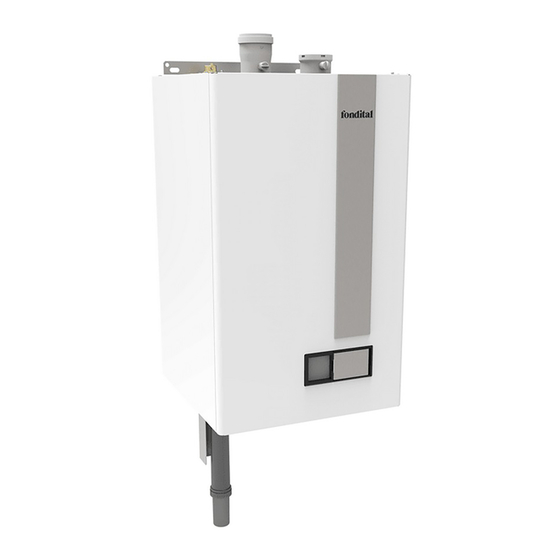
- Page 1 ITACA CH KR 45 KR 60 INSTALLATION, USE AND MAINTENANCE Translation of the original instructions (in Italian) It is compulsory to read this manual before proceeding with the boiler installation, use and maintenance operations. This boiler is intended for production of hot technical water only: •...
- Page 2 Dear Sirs, thank You for choosing and buying one of our products. Please read these instructions carefully in order to properly install, operate, and maintain the product. WARNING We inform users that: • Boilers shall be installed by an authorised company under the requirements set forth by the prevailing rules, in full compliance with the prevailing regulations and standards.
- Page 3 General notes for installing and maintenance technicians, and users This instruction manual is an integral and essential part of the product. It shall be supplied by the installer to the user who shall keep it carefully to consult it whenever necessary. This document shall be supplied together with the equipment in case the latter is sold or transferred to others.
- Page 4 DANGER Carefully read the instructions relating to air intake and flue gas venting systems in the specific section of this manual. DANGER This boiler must be connected to a gas distribution system which complies with the existing technical standards. Check the gas system state of conservation before installing the boiler. Any connection to a gas system which does not comply with the existing technical standards is forbidden.
- Page 5 DANGER Before starting the boiler, and each time it is at a standstill for several days, make sure the trap is full of water. If the trap is empty, fill it by pouring water into the boiler through the flue gas venting duct. WARNING The boiler must be serviced periodically as indicated in the relevant section of this manual.
-
Page 6: Table Of Contents
Instructions for the user ..........Control panel ............................10 Boiler ignition... - Page 7 Maintenance ............Maintenance schedule ..........................80 Combustion analysis...
- Page 8 Fig. 1 Control panel ................Fig.
- Page 9 Tab. 1 Adjustment specifications KR 45 ..............Tab.
-
Page 10: Instructions For The User
1. Instructions for the user Control panel menu Outside “Wednesday, 16. November 2016” 08:25 Fig. 1 Control panel 1.1.1 Display Outside “ Wednesday , 16. November 2016” 08:25 Fig. 2 Display Ref. Description Request for domestic hot water enabled Flow temperature External temperature (only if external probe is installed) Indication of DHW function enabling/disabling through timer Operating mode... - Page 11 1.1.2 Control panel keys and relevant functions SWITCHING ON OFF: stops the device, blocking the control panel keys. Outside OFF OFF STAND-BY: starts the device, unblocking the con- trol panel keys. “Wednesday, 16. November 2016” “Wednesday, 16. November 2016” 08:25 08:25 STAND-BY OPERATING MODE...
- Page 12 HOLIDAY Holiday start Holiday end Sets the holiday start and end dates and the CH 20 / 10 30 / 10 and DHW water temperature values for this inter- 2018 2018 val. to confirm to confirm UP and DOWN User menu User menu Scroll up and down the screen lines.
-
Page 13: Boiler Ignition
Boiler ignition DANGER It is presumed that the boiler has been installed by a qualified installer, it has been commissioned and is ready to operate correctly. For boiler ignition, proceed as follows: • Open the gas cock installed ahead of the boiler. •... -
Page 14: User Menu
USER MENU Check that the boiler display is ON - not in “OFF” mode. If this is not the case press key to switch the boiler on. menu Press key to access the menu list. MENU Press (high) key to access the USER MENU. USER TECHNICIAN Press... - Page 15 1.4.1 USER MENU navigation table User menu Sub-menu 1 Sub-menu 2 Factory value Settable values 20 ÷ Absolte max temp. 1. Temperature set 75°C 1. Temperature set 2. Outside temperature for CH off 7 ÷ 30°C 2. ECO setpoint reduc- 50°C 0 ÷...
- Page 16 User menu Sub-menu 1 Sub-menu 2 Factory value Settable values English Italian Polish French Spanish 1. Select Language Italian Russian Turkish Romanian Bulgarian 5. SETTINGS German Fahrenheit 2. Select Units Celsius Celsius day / month 3. Set date year 24 hours 4.
- Page 17 1.4.2 Description of USER MENU items Ref. Description 1. HEATING 1.1. Temperature set 1.1.1. CH setpoint Heating flow temperature setpoint setting. 1.1.2. Outside temperature for External temperature setpoint setting for automatic switch to "SUMMER” mode. CH off 1.2. ECO setpoint reduction Heating flow temperature reduction value setting in ECO mode.
-
Page 18: Timer Setting
TIMER setting It is possible to set the time slots during which the boiler must operate (in standard or ECO mode), if heat is requested, and those during which the boiler must remain OFF. There is a maximum of 6 programmable time slots in the 24 hour time frame. Each time slot has a start time (ON) and an end time (OFF). - Page 19 Select the day or groups of days and press Scheduler set Monday-Friday 1. --:-- - --:-- 5. Friday 2. --:-- - --:-- 6. Saturday 3. --:-- - --:-- 7. Sunday 4. --:-- - --:-- 8. Monday-Friday 5. --:-- - --:-- 9.
-
Page 20: Holiday Function
HOLIDAY function The HOLIDAY function allows reducing the boiler operating temperatures, in heating and DHW modes, during a set time period (in days). This function is useful in case of temporary absences (weekends, travels, etc.). WARNING During the period of absence the boiler must be electrically supplied, must remain in “WINTER” mode and the gas cock must remain open. - Page 21 Press to go back to the starting page. Holiday start Press to access the HOLIDAY period programming. 20 / 10 2018 Outside OFF OFF “Wednesday, 16. November 2016” 08:25 to confirm Press to set HOLIDAY start day. Holiday start Holiday start Press to go to the month setting.
-
Page 22: Eco Function
ECO function ECO operating mode can be activated both through TIMER setting (see TIMER setting on page 18) both through key (see Control panel keys and relevant functions on page 11). Activation through key has higher priority than activation TIMER setting. When ECO operating mode is activated through key, the icon is displayed, together with ECO under the cock and radiator symbols. -
Page 23: Anti-Legionella Function
1.8.2 Water heater freeze protection function (with water heater probe only) When the DHW temperature sensor detects a temperature lower than 6°C, the boiler switches on and stays on until the temperature exceeds +15°C. Anti-legionella function If the boiler is connected to an external water heater (optional, not mandatory), it is possible to activate the anti-legionella function through parameter “3.1.6. -
Page 24: Boiler Shut-Down
1.12 Boiler shut-down The boiler shuts down automatically if a malfunction occurs. To determine the possible causes of malfunction, see Malfunctions, possible causes and solutions on page 82. Below is a list of shut-down types and the procedure to follow in each case. 1.12.1 Burner shut-down Fault code ERROR 1 is displayed on the display in the event of burner shut-down due to missing flame. -
Page 25: Maintenance
1.12.6 Alarm due to temperature probe malfunction The following fault codes are shown on the display in the event of burner shut-down due to a temperature probe fault: • ERROR 30 Flow probe in short circuit: for the central heating water probe; iIn this case, the boiler does not work. •... -
Page 26: Technical Features And Dimensions
2. Technical features and dimensions Technical features This boiler is equipped with a fully pre-mixed gas burner. The following models are available: • KR condensing boiler with sealed chamber and forced draught, supplying CH water only. The following power rates are available: •... -
Page 27: Dimensions
Dimensions Fig. 3 Dimensions KR 45 - KR 60 1. Gas inlet (¾”) 2. CH system flow (1 ¼") 3. Safety valve discharge outlet 4. CH system return (1 ¼") 5. Condensate trap Technical features and dimensions... -
Page 28: Key Components
Key components KR 45 Fig. 4 Components KR 45 (I) Technical features and dimensions... -
Page 29: Fig. 5 Components Kr 45 (Ii)
Fig. 5 Components KR 45 (II) 1. Condensate trap 2. CH system flow (1 ¼") 3. Gas inlet (¾”) 4. Heating circuit pressure sensor 5. Modulating gas valve 6. Heating system water pressure gauge 7. Air/gas mixer 8. Intake pipe 9. -
Page 30: Fig. 6 Components Kr 60 (I)
KR 60 Fig. 6 Components KR 60 (I) Technical features and dimensions... -
Page 31: Fig. 7 Components Kr 60 (Ii)
Fig. 7 Components KR 60 (II) 1. Condensate trap 2. CH system flow (1 ¼") 3. Gas inlet (¾”) 4. Heating circuit pressure sensor 5. Modulating gas valve 6. Heating system water pressure gauge 7. Air/gas mixer 8. Intake pipe 9. -
Page 32: Hydraulic Diagram
Hydraulic diagram Gas inlet Condensate drain CH system flow Safety valve discharge outlet CH system return Fig. 8 Hydraulic diagram KR 45 - KR 60 1. Condensate trap 11. Deaerator on exchanger 2. Modulating gas valve 12. Flue gas thermostat 3. -
Page 33: Operating Data
Operating data Burner pressures reported in the following page must be verified after the boiler has been operating for 3 minutes. Gas category: II2H3P Flue CO value Flue CO value Gas mains pres- Upper nozzle Lower nozzle sure Max. output Min. -
Page 34: Tab. 4 Combustion Specifications Kr 45
Description Max. output Min. output 30% load Casing heat loss with burner on 0,15 1,05 Casing heat loss with burner off 0,21 Flue system heat loss with burner on 2,80 2,19 Flue system mass capacity 18,98 1,85 Residual head available Flue gas temperature - Air temperature °C Heat efficiency (80-60°C) -
Page 35: Erp And Labelling Data
Sound power level, indoors Contact details: FONDITAL S.p.A. - Via Cerreto, 40 I-25079 VOBARNO (Brescia) Italia - Italy (*) High-temperature regime means 60 °C return temperature at heater inlet and 80 °C feed temperature at heater outlet. (**) Low temperature means for condensing boilers 30 °C, for low-temperature boilers 37 °C and for other heaters 50 °C return temperature (at heater inlet). -
Page 36: Instructions For The Installer
3. Instructions for the installer Installation standards This boiler must be installed in compliance with the laws and standards in force in the country of installation, which are herein consi- dered as entirely transcribed. To find out about the gas category and technical specifications, refer to operation data and general features specified in the previous pages. -
Page 37: Positioning The Boiler
Positioning the boiler Each boiler is supplied with a paper template, found inside the packaging (see Fig. 9 Paper template). The template allows you to ensure that the pipes connected to the CH system and the gas mains, and the air intake/flue gas venting ducts are all laid out correctly during the realisation of the water system and before installation of the boiler. -
Page 38: Installing The Boiler
Installing the boiler DANGER Before connecting the boiler to CH and DHW networks, clean the pipes carefully. Before commissioning a NEW system, clean it to remove any metal chips due to machining and welding, and any oil and grease that might negatively affect boiler operation or even damage it in case they get inside it. Before commissioning a RECONDITIONED system (where radiators have been added, the boiler has been replaced, etc.) thoroughly clean it to remove any sludge and residues. -
Page 39: Fig. 10 Fastening The Trap
In order to install the boiler proceed as follows: • Affix the template to the wall. • Drill two Ø 14 mm holes in the wall to accommodate the boiler bracket wall blocks. • If necessary, provide holes in the wall to allow air intake and/or flue gas venting ducts to pass through it; •... -
Page 40: Boiler Room Ventilation
Boiler room ventilation The boiler has sealed combustion chamber. Combustion air is not drawn from boiler room, therefore no specific recommendations need to be applied concerning the boiler room or openings and ventilation provided to the boiler room. In the case of type B23 installation in a closed room, air vents must be provided for in compliance with the standards in force in the country of installation. -
Page 41: Fig. 11 Split Kit Installation
3.6.1 Starter kit installation Refer to Fig. 11 Split kit installation and to Fig. 12 Coaxial kit installation. DANGER There must be no leakage of combustion by-products from any of the gaskets. Split kit (optional) Clean the boiler roof from dust and other debris due to any masonry works. Fix the adhesive gasket under the flange connection for flue gas venting system (A). -
Page 42: Fig. 13 Installation Examples
3.6.2 Pipe and terminal installation DANGER Flue gas venting pipes are to be installed tilted toward the boiler so that condensate runs toward the combustion cham- ber, which is designed for condensate collection and drainage. Should the above procedure not be possible, it is necessary to install, in condensate stagnation areas, devices designed for condensate collection and conveying to the condensate drain system. -
Page 43: Fig. 15 Wall-Mounted Terminal Installation
Wall-mounted terminals The final parts of air intake and flue gas venting terminals, both split and coaxial, feature a groove (A) to fix the external collar (see Fig. 15 Wall-mounted terminal installation). Insert the external collar into the terminal until reaching the groove. Insert the terminal, from outside, making the external collar adhere to the wall. -
Page 44: Fig. 17 Roof Flue Installation
Roof flues Insert the intake and/or flue gas venting flue from above through the tile. Position the rainproof collar (A) until it bottoms on the cap of the tile for roofs (B) and fix it with the screw supplied. Keep the distance indicated in the figure between the rainproof collar and the terminal. Check that the flue is in a vertical position and fix it to the structure with collars or other fixing systems. - Page 45 3.6.3 Possible configuration of air intake and flue gas venting ducts Type B23/B23P Boiler intended for connection to an existing flue system external to the boiler room. Combustion air is taken directly from the boiler room itself while flue gas is conveyed to the outside. The boiler is not to be fitted with anti-wind gust device;...
-
Page 46: Tab. 8 Pipe Length Kr 45
3.6.4 Length of air intake and flue gas venting ducts Lengths are expressed in equivalent metres on flue gas vent (m To calculate the actual length of the air intake/flue gas vent system, flow resistances of the accessories must be used (see Flow re- sistance tables on page 47). -
Page 47: Tab. 10 Flow Resistance Of Separate Ducts Ø 80 Mm
3.6.5 Flow resistance tables Flow resistance of separate ducts Ø 80 mm (in equivalent metres on flue gas vent (m KR 45 KR 60 Component Code M/F extension L=1000 mm 0PROLUNG00 M/F extension L=500 mm 0PROLUNG01 90° M/F elbow 0CURVAXX02 45°... -
Page 48: Tab. 12 Flow Resistance Of Concentric Ducts Ø 80/125 Mm
Flow resistance of concentric ducts Ø 80/125 mm (in equivalent metres on flue gas vent (m KR 45 KR 60 Component Code M/F extension L=1000 mm 0PROLUNG04 M/F extension L=500 mm 0PROLUNG05 90° M/F elbow 0CURVAXX07 45° M/F elbow 0CURVAXX06 Wall intake/vent terminal L=900 mm 0KITASCA01 Wall vent kit:... -
Page 49: Tab. 14 Flow Resistance Of Ducts Ø 80 Mm For Type C9 In 133X133 Mm Lightwell
Flow resistance of ducts Ø 80 mm for type C9 in 133x133 mm lightwell (in equivalent metres on flue gas vent (m KR 45 KR 60 Component Code Intake/vent flange connection (Ø 80/125 mm) 0ATTCOFL01 M/F extension L=1000 mm (Ø 80/125 mm) 0PROLUNG04 M/F extension L=500 mm (Ø... -
Page 50: Checking Combustion Efficiency
Checking combustion efficiency 3.7.1 MANUAL TEST function The boiler features a MANUAL TEST function which must be used to measure combustion efficiency during operation and to adjust the burner. The MANUAL TEST function allows using the boiler with a settable fixed power. Maximum duration of the MANUAL TEST is 15 minutes. -
Page 51: Connection To Gas Mains
3.7.2 Measurement procedure The boiler is supplied with two initial fittings: one for connection of the air intake duct A and one for connection of the flue gas vent duct B (see Fig. 18 Combustion analysis ports). Fittings are provided with ports for combustion analysis. If the starting fittings supplied are not used, provide for ports for combustion analysis. -
Page 52: Hydraulic Connections
Hydraulic connections 3.9.1 Central heating Prior to installing the boiler, the hydraulic system is to be cleaned in order to remove impurities; they could be present in system com- ponents and damage the pump and the heat exchanger. The CH outlet and return pipes must be connected to the respective 1¼” connectors M and R on the boiler (see Fig. 9 Paper tem- plate). -
Page 53: Installation And Operation With Open Therm Remote Control (Optional)
3.12 Installation and operation with Open Therm Remote Control (optional) WARNING Only use original Remote Control Units supplied by the manufacturer. The correct operation of the Remote Control itself and of the boiler is not guaranteed if non original Remote Control units not supplied by the manufacturer are used. -
Page 54: Fig. 19 Climate Curve
WARNING The temperature probe cables must NOT be routed together with power cables. The temperature probe must be installed on an outside wall facing NORTH - NORTH EAST, in a position protected from weather. Do not install near a window, ventilation openings or sources of heat. Once the external probe has been installed, it is necessary to enable its operation by changing parameter “1.6. -
Page 55: Operation With External 0-10V Signal
3.14 Operation with external 0-10V signal The boiler can be controlled by an external 0-10VDC signal. Control can be performed in terms of power or temperature. WARNING If the control from external 0-10VDC power signal is set, it is necessary to install a temperature probe on the boiler flow, to be connected to the 0-10VDC external controller. -
Page 56: Technician Menu
3.15 TECHNICIAN MENU WARNING Parameter change in the TECHNICIAN MENU is reserved to service centres or qualified service engineers. Check that the boiler display is ON - not in “OFF” mode. If this is not the case press key to switch the boiler on. menu Press key to access the menu list. - Page 57 3.15.1 TECHNICIAN MENU navigation table Technician menu Sub-menu 1 Sub-menu 2 Factory value Settable values 1. Maximum power 100% 0 ÷ 100% 1. CH power set 2. Minimum power 0 ÷ 100% 1. ABS max temperature 80°C 20 ÷ 85°C 2.
- Page 58 Technician menu Sub-menu 1 Sub-menu 2 Factory value Settable values 1. Ignition power (**) 0 ÷ 100% 2. Delay siphon check 10 sec 0 ÷ 60 sec Pump and 3-way valve 3. Number of boiler pump Double pump Double pump 4.
- Page 59 Technician menu Sub-menu 1 Sub-menu 2 Sub-menu 3 Factory value Settable values English Italian Polish French Spanish 1. Select Langua- Italian Russian Turkish Romanian 2. User interface Bulgarian settings German 3. SYSTEM SET- Fahrenheit TINGS 2. Select Units Celsius Celsius day / month 3.
- Page 60 Technician Sub-menu 1 Sub-menu 2 Sub-menu 3 Factory value Settable values menu 1. Temperature set 75°C 20 ÷ 80°C 1. Temperature set 2. Outside tempera- ture for CH off 7 ÷ 30°C 2. ECO setpoint 50°C 0 ÷ 50°C reduction Enabled 1.
-
Page 61: Tab. 16 Special Parameters Per Single Model
Technician menu Sub-menu 1 Sub-menu 2 Factory value Settable values 1. Cascade switch 30 sec 0 ÷ 255 sec delay 2. Cascade min power 10% min 0 ÷ 100% 3. Single burner power According to the model 0 ÷ 2550 kW 4. - Page 62 3.15.2 Description of TECHNICIAN MENU lines Ref. Description 1. HEATING 1.1. CH power set 1.1.1. Maximum power Setting of maximum usable power with respect to the available one. Setting of minimum usable power with respect to the available one (0% corresponds to burner 1.1.2.
- Page 63 Ref. Description 3. SYSTEM SETTINGS 3.1. Boiler parameters 3.1.1. Ignition power Boiler ignition power setting (in % with respect to the maximum available power). 3.1.2. Delay siphon check ** Not used ** 3.1.3. Number of boiler pump System type setting: Pump and 3-way valve or Double pump. 3.1.4.
- Page 64 Ref. Description 3.2. User interface settings 3.2.1. Select Language Selecting the display language. 3.2.2. Select Units Selecting the unit of measurement for temperature (Celsius or Fahrenheit). 3.2.3. Set date Current date setting (day/month/year). 3.2.4. Set time Current time setting (12 or 24 hours / hours: minutes format). 3.3.
-
Page 65: Hydraulic Resistance
3.16 Hydraulic resistance The boilers are supplied without circulation pump. Below are the boiler hydraulic resistances. 1.000 1.500 2.000 2.500 3.000 Fig. 21 Hydraulic Resistance KR 45 1.000 1.500 2.000 2.500 3.000 Fig. 22 Hydraulic Resistance KR 60 ΔP ... Hydraulic resistance (mbar) Q . -
Page 66: Circulation Pumps
3.17 Circulation pumps The boilers are supplied without circulation pump. The boilers can manage external circulation pumps with PWM or ON/OFF command. 3.17.1 Circulation pumps supplied by the boiler manufacturer (optional) Some circulation pumps are available as accessories. Below are the head curves of circulation pumps available as accessories. YONOS PARA RS 25/7.5 Fig. -
Page 67: Fig. 24 Available Head Yonos Para Hf 25/7
YONOS PARA HF 25/7 Fig. 24 Available head YONOS PARA HF 25/7 H ... . Available head (mbar) Q ... . Flow rate (l/h) The circulation pump must be connected to the following terminals of boiler electronic board (see Wiring diagram). -
Page 68: Fig. 25 Pwm Signal
3.17.2 Circulation pumps not supplied by the boiler manufacturer The boilers can manage external circulation pumps with PWM or ON/OFF command. If circulation pumps different from those supplied by the boiler manufacturer are used, carry out the following checks: • Check compatibility of circulation pump hydraulic connections with those of the boiler. •... -
Page 69: Wiring Diagram
3.18 Wiring diagram To access the electric connections it is necessary to: • Disconnect the boiler from power supply. • Remove the boiler front casing (see Fig. 26 Casing opening). • Rotate the electric box forward by 90° (see Fig. 27 Electric box). •... -
Page 70: Fig. 28 Wiring Diagram
Fig. 28 Wiring diagram Instructions for the installer... -
Page 71: Fig. 29 Connections Performed By The Installer
PI (+24V) PI (PWM) PI (GND) PI (+6V) SOLS 10VDC IN + 10VCD IN - FUSE 5X20mm 4A-250V T4AL250V 230 Vac - 50 Hz Fig. 29 Connections performed by the installer Instructions for the installer... - Page 72 Internal connections ACC: ..Ignition/detection electrode IGN: ..ignition transformer VG: ..gas valve V: .
-
Page 73: Cascade Connection
3.19 Cascade connection It is possible to connect up to 6 boilers in a cascade-type connection. The boilers connected with a cascade-type connection work with the MASTER-SLAVE logic: the first boiler (MASTER) controls the entire cascade. For the electric cascade connection of the boilers, refer to the following diagram: Fig. -
Page 74: Adaptation To Other Gas Types And Burner Adjustment
3.20 Adaptation to other gas types and burner adjustment WARNING This boiler is built to run on the type of gas specified on the packaging and on the boiler rating plate. Any later transformation is to be exclusively carried out by qualified personnel, using manufacturer designed accessori- es and following the procedure and adjustment instructions for an accurate boiler setting-up. -
Page 75: Fig. 32 Intake Pipe
Fig. 32 Intake pipe Fig. 33 Mixer Fig. 34 Mixer plastic body Fig. 35 Assembling direction A. Gas valve B. Mixer C. Air intake D. Gas pipe E. Pipe coupling F. O-ring G. Venturi to mixer retaining screws H. Direction tab I. -
Page 76: Gas Valve Setting
3.21 Gas valve setting • Make sure that the ambient thermostat (optional), if fitted, is set to ON. • Select the CH ONLY mode on the control panel by pressing key until the side screen is displayed. • Start MANUAL TEST function from TECHNICIAN MENU (see MANUAL TEST function on Outside page 50). -
Page 77: Filling The System
3.22 Filling the system WARNING As for water treating in the domestic heating systems in order to optimise efficiency and safety, ensure a long life, trouble- free operation of auxiliary equipment, minimise power consumption, thereby integrating the standards and rules in force in the country of installation, it is recommended to use specific products suitable for multi-metal heating systems. -
Page 78: Filling The Trap
3.23 Filling the trap Before starting the boiler, and each time it is at a standstill for several days, make sure the trap is full of water. If the trap is empty, fill it by pouring water into the boiler through the flue gas venting duct. Fig. -
Page 79: Testing The Boiler
4. Testing the boiler Preliminary checks Before testing the boiler, it is recommended to check the following: • The flue gas venting duct and the relevant terminal are installed in conformity with the instructions: with the boiler operating, there must be no leakage of combustion by-products from any of the gaskets. •... - Page 80 5. Maintenance WARNING Any maintenance (and repair) work must only be carried out by qualified personnel. The user is strongly advised to have the product serviced and repaired by a service centre or qualified personnel. Appropriate boiler maintenance ensures efficient operation, environment preservation, and safety for people, animals and objects. Maintenance operations must be carried out at least once a year.
-
Page 81: Decommissioning, Disassembly And Disposal
6. Decommissioning, disassembly and disposal Warning If you decide to definitively decommission the boiler, have decommissioning, disassembly and disposal procedures car- ried out by qualified personnel, only. The user is not authorised to carry out such operations. Decommissioning, disassembly and disposal operations must be performed with boiler cold and disconnected from gas and power mains. -
Page 82: Malfunctions, Possible Causes And Solutions
7. Malfunctions, possible causes and solutions The boiler shuts down automatically if a malfunction occurs. The type of malfunction is signalled on the display. Error message To determine the possible causes of malfunction, see the table below. * errors that can be reset by the user by keeping the button pressed. - Page 83 Error Malfunction Probable cause USER'S TASKS QUALIFIED PERSON- NEL'S TASKS Circulation pump is Contact qualified person- Check pump electrical The flow temperature seized. nel. connection. and/or return temperatu- re reached the limit value Contact qualified person- Circulation pump is faulty. Replace it.
- Page 84 Error Malfunction Probable cause USER'S TASKS QUALIFIED PERSON- NEL'S TASKS Contact qualified person- ERROR 21 * The board is faulty Replace it. nel. Electronic board firmware Contact qualified person- ERROR 25 * The board is faulty Replace it. fault. nel. The flow probe detected a temperature outside the Contact qualified person-...
- Page 85 Error Malfunction Probable cause USER'S TASKS QUALIFIED PERSON- NEL'S TASKS The return probe de- Contact qualified person- Probe is faulty. Replace it. tected a temperature nel. ERROR 44 * outside the allowed ran- Contact qualified person- ge (equivalent to circuit Probe is disconnected.
- Page 86 Error Malfunction Probable cause USER'S TASKS QUALIFIED PERSON- NEL'S TASKS The system is provided with closed shut-off Check the system. valves. Contact qualified person- Pump is seized. Unseize the pump. The detected water flow nel. rate is lower than the ERROR 88 ** Contact qualified person- minimum value to keep...
- Page 87 Page left intentionally blank Malfunctions, possible causes and solutions...
- Page 88 Tel. +39 0365/878.31 Fax +39 0365/878.304 e mail: info@fondital.it www.fondital.com The manufacturer reserves the right to modify his/her products as deemed necessary, without alte- ring the basic characteristics of the products themselves. Uff. Pubblicità Fondital IST 03 C 1164-01 Luglio 2018 (07/2018)
Need help?
Do you have a question about the ITACA CH KR 45 and is the answer not in the manual?
Questions and answers