
Related Manuals for Fondital KBS 24 - 32


Summary of Contents for Fondital KBS 24 - 32
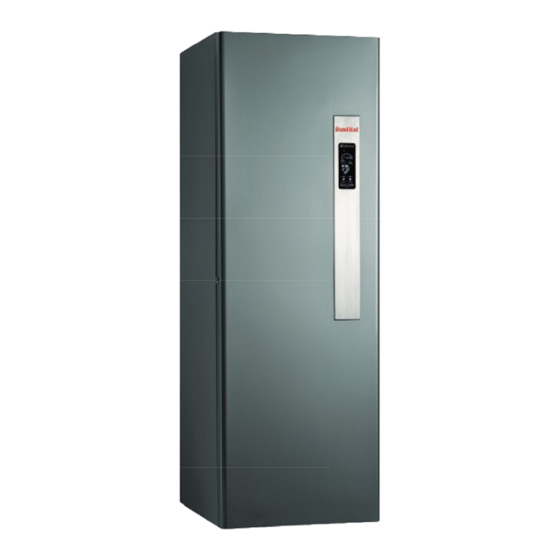
- Page 1 MADEIRA SOLAR COMPACT KBS 24 - 32 INSTALLATION, USE AND MAINTENANCE Translation of the original instructions (in Italian)
- Page 2 Dear Sirs, thank You for choosing and buying one of our products. Please read these instructions carefully in order to properly install, operate, and maintain the product. WARNING • We inform users that: • Boilers shall be installed by an authorised company under the requirements set forth by the prevailing rules, in full compliance with the prevailing regulations and standards.
- Page 3 General notes for installing and maintenance technicians, and users This instruction manual is an integral and essential part of the product. It shall be supplied by the installer to the user who shall keep it carefully to consult it whenever necessary. This document shall be supplied together with the equipment in case the latter is sold or transferred to others.
-
Page 4: Rapid Operating Instructions
Rapid operating instructions The following instructions will help you to switch the boiler on quickly and regulate it for immediate use. WARNING It is presumed that the boiler has been installed by a qualified installer, it has been commissioned and is ready to operate correctly. If any accessories have been fitted on the boiler, these instructions will not cover them. -
Page 5: Table Of Contents
Instructions for the user ............Control panel ....................................... - Page 6 Decommissioning, disassembly and disposal ........Malfunctions, possible causes and solutions .
- Page 7 Fig. 1 Control panel ......................Fig.
- Page 8 Tab. 1 Displayable parameters with info button ................. Tab.
-
Page 9: Instructions For The User
1. Instructions for the user Control panel Fig. 1 Control panel A. Temperature selection (day/night) and information recall. B. Weekly programme for temperature zones and manual programme selection. C. Time and ambient temperature setting. D. Set the domestic hot water (DHW +/-). E. - Page 10 Ref. Symbol Steady on Flashing Indication of "parameter" inside the Not used parameter menu Displaying of the number of parameters, or of the system pressure, or of the burner Not used power percentage Lit flame indication Not used Indication of the temperatures and values Not used of fault and shutdown parameters Displaying of the heating temperature...
- Page 11 Ref. Symbol Steady on Flashing Indication of the centigrade degrees Not used Solar pump or solar valve active Not used Indication of system pressure Not used measurement unit Percentage indication Not used During parameter editing, the wrench symbol stays on until the set datum is Not used confirmed.
-
Page 12: Interpreting Boiler Status From Display Indications
Interpreting boiler status from display indications 1.2.1 Normal operation Boiler switch in OFF mode. Boiler switch in SUMMER or WINTER mode or CH ONLY. No active function. The flow temperature and the heating system pressure are displayed. SUMMER WINTER CENTRAL HEATING ONLY Boiler switch in SUMMER or WINTER mode or CH ONLY. - Page 13 Boiler switch in WINTER mode or CH ONLY. CH function active. The flow water temperature is displayed. WINTER CENTRAL HEATING ONLY Boiler switch in SUMMER or WINTER mode. Comfort function in progress (the plate exchanger is kept heated). The flow water temperature is displayed. SUMMER WINTER 1.2.2...
-
Page 14: Selecting The Operating Mode
Selecting the operating mode Whenever key is pressed, the "SUMMER”, “WINTER” , “CH ONLY”, “OFF” modes are enabled in sequence. At this stage, all buttons are enabled. "OFF" operating status When the "OFF" mode is enabled, no function is active. "SUMMER"... -
Page 15: Adjusting Heating And Dhw Temperature
"CH ONLY" operating status When the "CH ONLY" mode is enabled, only the heating water production function is active. Adjusting heating and DHW temperature Press button +/- DHW to select the desired DHW temperature. During selection, icon will flash. In the phase in which the icon is flashing, only the buttons to adjust the temperature are enabled. As soon as button is released, icon will continue flashing for approx. -
Page 16: Comfort Function Enable/Disable
Comfort function enable/disable This function keeps the plate heat exchanger hot, to minimise the waiting time for the production of DHW. When the "COMFORT" icon is on, the function is enabled. When it is off the function is disabled and the boiler performs the standard functions. If "COMFORT"... -
Page 17: Time Setting
Time setting To set time, minutes and day of the week, press Flashing values can be edited by pressing CH +/- buttons. The first value to be modified is "HOURS". Press OK to confirm the edited values and shift to next parameter. The second value to be modified is "MINUTES". Flashing values can be edited by pressing CH +/- buttons. -
Page 18: Day Temperature" And "Night Temperature" Setting
"Day temperature" and "night temperature" setting When one or more ambient probes are connected to boiler electronic board, two levels of desired ambient temperatures can be set. Boiler will manage the heating request based on the set temperatures, as follows. If no ambient probe is connected to the boiler, temperatures cannot be set. - Page 19 Press OK to confirm the edited values and enter the "night temperature" setting mode. Press CH +/- buttons to edit "night temperature" values. Press OK to confirm the edited values and quit the setting mode. Instructions for the user...
-
Page 20: Manual" Programme Setting
"Manual" programme setting The "manual" mode selection indicated with symbol , allows activating the heating function, 24 hours a day, in both zones at the "day temperature", disabling at the same time zone 1 and zone 2 programming. External water heater, if there is one, is heated according to the specific programme. Press to access the manual programme setting mode. -
Page 21: Automatic" Programme Setting
"Automatic" programme setting The selection of "automatic" mode, identified by symbol , allows boiler to enable heating of both zones in "day temperature" or "night temperature", based on the programming envisaged for zone 1 and zone 2. Press PROG twice to access the automatic programme setting mode. Press OK to confirm. -
Page 22: Ch Programme Mode
1.10 CH programme mode To access zone 1 heating programme displaying or editing, press button twice. The display shows zone 1 symbol flashing, sun or moon symbols, bars on or off, respectively , at 00:00.Clock lights display the programming connected to day 1 (Monday) and 00:00 bar is flashing. Press OK to access zone programming function."PROG"... -
Page 23: Parameter Display
1.11 Parameter display Press to scroll the different parameter values. You can quit this function at any time by simply pressing the button. To find the meaning of all parameters, see TSP parameters on page 61. Par. DESCRIPTION P30 - TSP30 External temperature displaying (if an external probe is present). -
Page 24: Failures That Cannot Be Reset
1.12 Failures that cannot be reset The display shows the failure based on the corresponding error code (see Troubleshooting on page 86). Some failures can be reset through the key, while some others are self-resettable (refer to the following paragraph). If failures cannot be reset but are of the self-resettable type, no key will be enabled and only the LCD backlighting will be on. -
Page 25: Boiler Operation
1.14 Boiler operation 1.14.1 Switching on DANGER It is presumed that the boiler has been installed by a qualified installer, it has been commissioned and is ready to operate correctly. • Open the gas shut-off cock. • Turn the master switch installed ahead of the boiler to ON. •... - Page 26 1.14.3.1 DHW integration through boiler burner To set the domestic hot water temperature, press DHW +/- buttons. DHW temperature may be set within a range from 35°C to 57°C. During temperature setting, the DHW symbol on the LCD appears and the DHW setting is displayed. DHW production function through boiler burner consists in controlling the motorised deviating valve (see Fig.
- Page 27 1.14.4 Freeze protection function This boiler is fitted with a freeze protection system, which works when the following functions are activated: OFF/SUMMER/WINTER/CH ONLY. DANGER The freeze protection function only protects the boiler, not the whole heating system. Ambient probes or a room thermostat must be used to provide freeze protection for the central heating system. Bear in mind, however, that they are disabled when the boiler is in OFF operating mode.
- Page 28 1.14.5 Anti-seize function If the boiler remains inactive and connected to the power mains, the circulation pump and the deviating valve will be shortly enabled every 24 hours so as to avoid any shut-down. Moreover, the solar plant circulation pump is activated for 10 seconds for every 24 hours of inactivity. On models with high- and low-temperature outlet (V, Z versions, only) the high- and low-temperature zone pumps and the mixing valve are equipped with an anti-shutdown function.
-
Page 29: Boiler Shut-Down
1.14.10 Operation with (optional) remote control The boiler can also be connected to a Remote Control (optional - not compulsory, supplied by the manufacturer) so as to manage several boiler parameters, such as: • boiler status selection. • ambient temperature selection. •... - Page 30 1.15.3 Shut-down due to low water pressure If "shutdown due to insufficient pressure in system" error E04 starts flashing (indicating safety water pressure switch triggering), fill the system by opening the filler cock as shown in Fig. 3 Filler cock. E04 error is displayed when system pressure drops below 0.4 bar and error will be automatically reset as soon as system pressure reaches 1.0 bar.
- Page 31 1.15.5 Alarm due to temperature probe malfunction The following fault codes are shown on the display in the event of burner shut-down due to a temperature probe fault: • E05 for the CH flow probe. In this case the boiler ignition is disabled. •...
-
Page 32: Maintenance
1.16 Maintenance WARNING The boiler must be serviced periodically as indicated in the relevant section of this manual. Appropriate boiler maintenance ensures efficient operation, environment preservation, and safety for people, animals and objects. Boilers must be maintained by qualified personnel only, under the requirements set forth by the prevailing rules. The user is strongly advised to have the boiler serviced and repaired by a qualified Service Centre. -
Page 33: Technical Features And Dimensions
2. Technical features and dimensions Technical features This boiler is equipped with a built-in fully pre-mixed gas burner, a condensing heat exchanger, a single-coil water heater and hydraulic and electronic equipment for connection to a solar plant. The following models are available: •... - Page 34 The key technical features of the boilers are listed below. 2.1.1 Manufacturing characteristics • IPX5D electrically protected control panel. • Integrated, modulating electronic safety board. • Solar plant electronic control board. • Electronic start-up with igniter and ionisation flame detection. •...
- Page 35 2.1.2 User interface • Touch interface with built-in LCD to display and control boiler operating condition: OFF, WINTER, SUMMER and CH ONLY; • System water temperature regulator: 20/78 °C (standard range) – 20/45 °C (reduced range); • DHW temperature regulator on the control panel: 35/57 °C; •...
-
Page 36: Dimensions
Dimensions 1783 1718 1653 1588 1523 1458 1393 1328 1263 1133 1071 1006 Fig. 4 Dimensions • A Front view • B RH side view • C Rear view • D View from top • E Opening for hydraulic connections Technical features and dimensions... -
Page 37: Hydraulic Connections
Hydraulic connections MADEIRA SOLAR COMPACT KBS CH system flow 3/4” CH return 3/4" Gas 1/2” DHW outlet (3/4”) Cold water inlet 1/2” Solar return 3/4" Solar flow 3/4" Fig. 5 Madeira Solar Compact KBS hydraulic diagram MADEIRA SOLAR COMPACT KBS V High-temperature CH flow zone 1 - 3/4"... - Page 38 MADEIRA SOLAR COMPACT KBS Z High-temperature CH flow zone 1 - 3/4" Low-temperature CH flow zone 2 - 3/4" Gas 1/2” High-temperature CH return zone 1 - 3/4" Low-temperature CH return zone 2 - 3/4" Low-temperature CH flow zone 3 - 3/4" Low-temperature CH return zone 3 - 3/4"...
-
Page 39: Key Components
Key components Fig. 8 Key components Boiler protective anode 18. Zone 1 high-temperature pump (V and Z versions) DHW flowmeter 19. Zone 2 low-temperature pump (V and Z versions) Three-way valve 20. Zone 3 low-temperature pump (Z versions) Gas valve 21. - Page 40 KBS-V KBS-Z Fig. 9 Boiler operation diagram Technical features and dimensions...
- Page 41 Key elements Double CH flow probe DHW probe Solar valve probe (water heater top part) Solar water heater probe (low part) Solar collector probe CH circulation pump 10 litre CH expansion vessel 3-bar safety valve Motorised 3-way deviating heating valve 10.
-
Page 42: Operating Data
Operating data Burner pressures reported in the following page must be verified after the boiler has been operating for 3 minutes. Gas category: II2H3P Gas mains Diaphragm Flue CO2 value Fuel Nozzle [mm] pressure [mbar] diameter [mm] Natural gas G20 9.0 ÷... -
Page 43: General Characteristics
General characteristics Description KBS 24 KBS 32 CH nominal heat input 23.7 30.4 Minimum heat input Maximum heat output (80-60°C) - CH 22.9 29.4 Minimum heat output (80-60°C) - CH Maximum heat output (50-30°C) - CH 24.9 32.3 Minimum heat output (50-30°C) - CH 3.22 Minimum CH system pressure Maximum CH system pressure... - Page 44 Description Max. output Min. output 30% load Casing heat loss with burner on 0.61 6.52 Casing heat loss with burner off 0.21 Flue system heat loss with burner on 2.69 2.08 Flue system mass capacity 12.43 1.33 Flue temp. – air temp. °C Heat output efficiency rating (60/80°C) 96.7...
-
Page 45: Erp And Labelling Data
KBS-Z 59 (2) Contact details: FONDITAL S.p.A. - Via Cerreto, 40 I-25079 VOBARNO (Brescia) Italia - Italy (*) High-temperature regime means 60 °C return temperature at heater inlet and 80 °C feed temperature at heater outlet. (**) Low temperature means for condensing boilers 30 °C, for low-temperature boilers 37 °C and for other heaters 50 °C return temperature (at heater inlet). - Page 46 KBS-Z 58 (2) Contact details: FONDITAL S.p.A. - Via Cerreto, 40 I-25079 VOBARNO (Brescia) Italia - Italy (*) High-temperature regime means 60 °C return temperature at heater inlet and 80 °C feed temperature at heater outlet. (**) Low temperature means for condensing boilers 30 °C, for low-temperature boilers 37 °C and for other heaters 50 °C return temperature (at heater inlet).
-
Page 47: Instructions For The Installer
3. Instructions for the installer Installation standards This boiler must be installed in compliance with the laws and standards in force in the country of installation, which are herein considered as entirely transcribed. To find out about the gas category and technical specifications, refer to operation data and general features specified in the previous pages. DANGER Accessories and spare parts for installation and service procedures are to be supplied by the Manufacturer. -
Page 48: Installing The Boiler
Installing the boiler DANGER Before connecting the boiler to CH and DHW networks, clean the pipes carefully. Before commissioning a NEW system, clean it to remove any metal chips due to machining and welding, and any oil and grease that might negatively affect boiler operation or even damage it in case they get inside it. -
Page 49: Air Intake And Flue Gas Venting System
Air intake and flue gas venting system Flue gas discharge into the atmosphere and air intake/flue gas venting systems must comply with applicable laws and standards in the country of installation that are considered as fully transcribed herein. DANGER The boiler is equipped with a safety device for flue gas exhaustion check. It is strictly forbidden to tamper with and/or prevent operation of such safety device. - Page 50 3.5.1 Possible configuration of air intake and flue gas venting ducts Type B23 Boiler intended for connection to an existing flue system external to the boiler room. Combustion air is taken directly from the boiler room itself while flue gas is conveyed to the outside. The boiler is not to be fitted with anti-wind gust device;...
- Page 51 3.5.2 Ø 100/60 mm and Ø 125/80 mm air/flue gas coaxial duct system WARNING The information given above is with reference to air intake/flue gas venting ducts made from smooth, rigid pipes approved and supplied by the manufacturer. C13 installation type KB 24 •...
- Page 52 Fig. 10 Coaxial ducts C33 Fig. 11 Coaxial ducts C33 distance specs A. Blanking cap B. Gasket 3.5.3 Air intake and flue gas venting via 80 mm split pipes Installation types C43 - C53 - C83 24 kW • Minimum permissible length of air intake pipe is 1 meter. •...
- Page 53 3.5.4 Air intake and flue gas venting via 60 mm split pipes Installation types C43 - C53 - C83 24 kW - 32 kW • Minimum permissible length of air intake pipe is 1 meter. • Minimum permissible length of flue gas venting pipe is 1 meter. •...
-
Page 54: Checking Combustion Efficiency
Checking combustion efficiency 3.6.1 Flue cleaning function • The boiler features a flue cleaning function which must be used to measure combustion efficiency during operation and to adjust the burner. • To enable the flue cleaning function, press the key and keep it pressed for 3 seconds. •... -
Page 55: Connection To Gas Mains
Connection to gas mains Cross-section gas pipe size must be chosen depending on its length, layout pattern, gas flow rate. Gas supply pipe cross-section must be equal or greater than boiler gas pipe. DANGER Comply with installation standards enforced in the country where the boiler is installed which are considered as fully transcribed in this booklet. - Page 56 3.8.2 Cold water inlet and DHW outlet shall be connected to the boiler through the dedicated fittings (see Hydraulic connections on page 55). WARNING Depending on the hardness of the mains water supply, ascertain whether or not to install appropriate domestic water treatment systems using water treatment products suitable for drinking water and compliant with the regulations and standards in force in the country of installation.
-
Page 57: Solar Collector Probe Installation
Solar collector probe installation The boiler is equipped with a solar plant temperature probe that must be installed by a qualified engineer. The probe must be installed between the boiler and the solar field. If the supplied cable is not long enough, add an extension by using a 2-wire shielded outdoor cable. -
Page 58: Installation And Operation With Open Therm Remote Control (Optional)
3.12 Installation and operation with Open Therm Remote Control (optional) WARNING Only use original Remote Control Units supplied by the manufacturer. The correct operation of the Remote Control itself and of the boiler is not guaranteed if non original Remote Control units not supplied by the manufacturer are used. - Page 59 3.12.1 Installation of the (optional) external probe and sliding temperature operation The boiler can be connected to an (optional) external temperature probe (optional, provided by the manufacturer) for sliding temperature operation. WARNING Only original external temperature probes supplied by the manufacturer must be used. If non-original external temperature probes are used, correct operation of the boiler and external probe cannot be guaranteed.
- Page 60 After this time, value is stored and display standard operation will be restored. The figure shows the curves for a fictitious ambient temperature of 20°C.Parameter P10 allows selecting the curve value shown (see Fig. 18 Thermoregulation curves). If fictitious ambient temperature value is edited on boiler display, the curves shift up or down, respectively, by the same amount. With a fictitious ambient temperature setting of 20°C, for example, if you select the curve corresponding to parameter 1 and the outdoor temperature is - 4°C, the CH flow temperature will be 50°C.
-
Page 61: Tsp Parameters
3.13 TSP parameters Parameter Settable values Default values Notes P0 - TSP0 According to the 1 = 24 kW natural gas; 3 = 24 kW propane; 6 1, 3, 6, 7 model = 32 kW natural gas; 7 = 32 kW propane Boiler power selection 24 kW natural gas = 199;... - Page 62 Parameter Settable values Default values Notes P16 - TSP16 0 ÷ 199 sec. Ambient thermostat reading delay / OT 0 = shut-down and malfunction; 1 = P17 - TSP17 ambient thermostat request 1/Remote 0 ÷ 3 control; 2 = solar; 3 = ambient thermostat Multifunction relay setting request 2 From P18 to P26 see "Solar parameters (with P17=2 or with supplementary board)
- Page 63 Parameter Settable values Default values Notes 0 = flow temp.; 1 = SA1 probe temp.; 2 = SA2 probe temp.; 3 = external temp.; 4 = water 0 ÷ 7 heater temp.; 5 = solar coll. temp.; 6 = solar Type of temperature visualization on display valve temp.;...
- Page 64 Parameter Settable values Default values Notes P18 - TSP18 0 ÷ 1 0 = solar valve; 1 = solar pump Solar plant type choice P19 - TSP19 10 ÷ 90 °C 60 °C Water heater set-point setting P20 - TSP20 1 ÷...
- Page 65 Parameter Settable values Default values Notes only with external probe connected External temperature Flow temperature only with external probe connected Nominal calculated flow temperature in V versions Set point of zone 2 flow temperature in V versions Current zone 2 flow temperature in Z versions Set point of zone 3 flow temperature in Z versions...
- Page 66 Parameter Settable values Default values Notes 0 ÷ 1 0 = standard function; 1 = relay energised Multifunction relay forcing 0 ÷ 1 0 = standard function; 1 = relay energised Zone 2 pump relay forcing 0 = standard function; 1 = force opening; 2 = 0 ÷...
-
Page 67: Filling The System
3.14 Filling the system Once all boiler connections have been completed, CH system circuit and solar system can be filled. 3.14.1 Filling the heating system The procedure is to be cautiously carried out, following each step: • Open the bleeding valves on all radiators and verify the boiler automatic valve operation. •... -
Page 68: Starting Up The Boiler
3.14.2 Filling the solar plant The solar plant should be filled when the collectors are cold, in the morning or in the evening. If this is not possible, cover the collectors with sheets that do not let the sun rays through. Keep in mind that the suggested solar plant pressure, in case of a classic installation with two collectors and a total surface of approximately 2.5 sq. -
Page 69: Available Head
3.16 Available head Boiler circulation pump The boiler is equipped with a high-efficiency circulation pump with variable speed. Circulation pump speed is automatically managed by the electronics, according to the settings of boiler parameters. It is possible to choose between two pump working modes: 1 1 “Constant ΔT”... - Page 70 100% 75% (*) 30% (**) 1000 1200 Fig. 20 Available head KBS 24 100% 75% (*) 30% (**) 1000 1200 1400 Fig. 21 Available head KBS 32 1000 Fig. 22 Available head solar circulation pump Q ....Flow rate (l/h) H .
- Page 71 1000 1200 1400 1600 Fig. 23 Available head KBS-V-Z high temperature zone 1000 1200 1400 1600 Fig. 24 Available head KBS-V-Z low temperature zone 1 1000 1200 1400 1600 Fig. 25 Available head KBS-Z low temperature zone 2 Q ....Flow rate (l/h) H .
-
Page 72: Wiring Diagrams
3.17 Wiring diagrams Fig. 26 Wiring diagram KBS Instructions for the installer... - Page 73 Internal connections DK: ....pressure transducer FL: ....Flow meter SR1-SR2: ..CH NTC temperature probe 10k Ohm a 25°C B=3435 S3S: .
- Page 74 Fig. 27 Wiring diagram KRBS-V Instructions for the installer...
- Page 75 Internal connections DK: ....pressure transducer FL: ....Flow meter SR1-SR2: ..CH NTC temperature probe 10k Ohm a 25°C B=3435 S3S: .
- Page 76 Fig. 28 Wiring diagram KRBS-Z Instructions for the installer...
- Page 77 Internal connections DK: ....pressure transducer FL: ....Flow meter SR1-SR2: ..CH NTC temperature probe 10k Ohm a 25°C B=3435 S3S: .
-
Page 78: Adaptation To Other Gas Types And Burner Adjustment
3.17.1 Relationship between temperature and nominal resistance of all NTC probes (°C) 27203 24979 22959 21122 19451 17928 16539 15271 14113 13054 12084 11196 10382 9634 8948 8317 7736 7202 6709 6254 5835 5448 5090 4758 4452 4168 3904 3660 3433 3222 3026... - Page 79 3.18.2 Switching from PROPANE to NATURAL GAS • Disconnect the boiler from the electric power supply. • Open the boiler front casing. • Loosen the three screws securing combustion chamber front panel to frame, then remove panel. • Loosen the screw securing intake pipe to mixer, and remove pipe (see Fig. 29 Intake pipe). •...
- Page 80 Fig. 29 Intake pipe Fig. 30 Mixer Fig. 31 Mixer plastic body Fig. 32 Assembling direction A. Gas valve B. Mixer C. Air intake D. Gas pipe E. O-ring F. Nozzles G. Venturi to mixer retaining screws H. Gas fitting I.
- Page 81 3.18.3 Gas valve setting Maximum heating output adjustment • Make sure that the ambient thermostat (optional), if fitted, is set to ON. • Select the "heating" mode on the control panel pressing key n times until symbol is displayed. • Start the ‘flue cleaning’ function by keeping key pressed until symbol stops flashing.
- Page 82 Fig. 33 Adjusting CO2 value Fuel CO2 value (%) 24 kW Methane 9.0 - 9.3 24 kW Propane 32 kW Methane 9.0 - 9.3 32 kW Propane Tab. 18 Flue CO2 content Model Natural gas Propane 24 kW 3.70 3.00 32 kW 4.45 3.55 + diaphragm Ø...
-
Page 83: Testing The Boiler
4. Testing the boiler Preliminary checks Before testing the boiler, it is recommended to check the following: • the installation is compliant with the prevailing standards; • the flue gas venting duct and the relative terminal are installed in conformity with the instructions: when the boiler is working there must be no leakage of combustion by-products from any of the gaskets;... -
Page 84: Maintenance
5. Maintenance WARNING Any maintenance (and repair) work must only be carried out by qualified personnel. The user is strongly advised to have the boiler serviced and repaired by a qualified Service Centre. Appropriate boiler maintenance ensures efficient operation, environment preservation, and safety for people, animals and objects. The boiler must be serviced at least once every year. -
Page 85: Combustion Analysis
When checking the boiler for the very first time, also verify: • Boiler room suitability. • Diameter and length of flue gas system ducts. • Boiler installation in accordance to this “Installation use and maintenance” manual instructions. WARNING Should the boiler not operate correctly, while not posing danger to people, animals or property, notify the system supervisor both verbally and in writing. -
Page 86: Troubleshooting
7. Malfunctions, possible causes and solutions Troubleshooting BOILER STATUS MALFUNCTION PROBABLE CAUSE USER'S TASKS QUALIFIED PERSONNEL'S TASKS Check gas supply. Gas supply failure. Check gas supply cock or gas network safety valve intervention. Gas valve is disconnected. Contact qualified personnel Reconnect it. - Page 87 BOILER STATUS MALFUNCTION PROBABLE CAUSE USER'S TASKS QUALIFIED PERSONNEL'S TASKS Flue probe is electrically Contact qualified personnel Reconnect it. disconnected. E07** Flue probe failure Flue probe is faulty. Contact qualified personnel Replace it. During manual filling, a system Progressively drain the System pressure is too close to pressure too close to the safety Contact qualified personnel...
- Page 88 BOILER STATUS MALFUNCTION PROBABLE CAUSE USER'S TASKS QUALIFIED PERSONNEL'S TASKS Interface display is Contact qualified personnel Reconnect it. disconnected. No communication between board and peripheral devices Zone/solar boards are E41** Contact qualified personnel Reconnect them. (panel interface and/or zone/ disconnected. solar boards).
- Page 89 BOILER STATUS MALFUNCTION PROBABLE CAUSE USER'S TASKS QUALIFIED PERSONNEL'S TASKS Check that there are no other Circulation of foreign water in Contact qualified personnel boilers or additional cascading boiler. heat sources. Return temperature increases E87* too quickly. Bleed the air from the boiler Air present inside heating Contact qualified personnel by opening the jollies on the...
- Page 91 Page left intentionally blank...
- Page 92 Fax +39 0365/878.304 e mail: info@fondital.it www.fondital.com The manufacturer reserves the right to modify his/her products as deemed necessary, without altering the basic characteristics of the products themselves. Uff. Pubblicità Fondital IST 03 C 872 - 01 Settembre 2015 (09/2015)
Need help?
Do you have a question about the KBS 24 - 32 and is the answer not in the manual?
Questions and answers