IKEA FORNEBY Manual
Hide thumbs
Also See for FORNEBY:
- Manual (68 pages) ,
- Installation instructions manual (40 pages) ,
- Quick start manual (8 pages)
Table of Contents
Advertisement
Quick Links
Advertisement
Table of Contents

Related Manuals for IKEA FORNEBY


Summary of Contents for IKEA FORNEBY
- Page 1 FORNEBY...
- Page 2 ENGLISH Please refer to the last page of this manual for the full list of IKEA appointed After Sales Service Provider and relative national phone numbers.
- Page 3 ENGLISH...
-
Page 4: Table Of Contents
Energy efficiency Before first use Menu structure Daily use Environmental concerns Clock functions IKEA guarantee Using the accessories Additional functions Subject to change without notice. Safety information Before the installation and use of the appliance, carefully read the supplied instructions. The manufacturer is not responsible if an incorrect installation and use causes injuries and damage. - Page 5 ENGLISH WARNING: The appliance and its accessible parts become • hot during use. Keep children and pets away from the appliance when in use and when cooling down. If the appliance has a child safety device, it should be • activated.
-
Page 6: Safety Instructions
ENGLISH Safety instructions Installation Ventilation opening 560x20 mm Warning! Only a qualified person minimum size. Open‐ must install this appliance. ing placed on the bot‐ tom rear side • Remove all the packaging. • Do not install or use a damaged Mains supply cable 1500 mm appliance. - Page 7 ENGLISH • Do not pull the mains cable to disconnect – do not put water directly into the hot the appliance. Always pull the mains plug. appliance. • Use only correct isolation devices: line – do not keep moist dishes and food in protecting cut-outs, fuses (screw type the appliance after you finish the fuses removed from the holder), earth...
-
Page 8: Installation
ENGLISH Internal lighting • Use original spare parts only. Warning! Risk of electric shock. Disposal Warning! Risk of injury or • Concerning the lamp(s) inside this suffocation. product and spare part lamps sold separately: These lamps are intended to • Disconnect the appliance from the mains withstand extreme physical conditions in supply. -
Page 9: Product Description
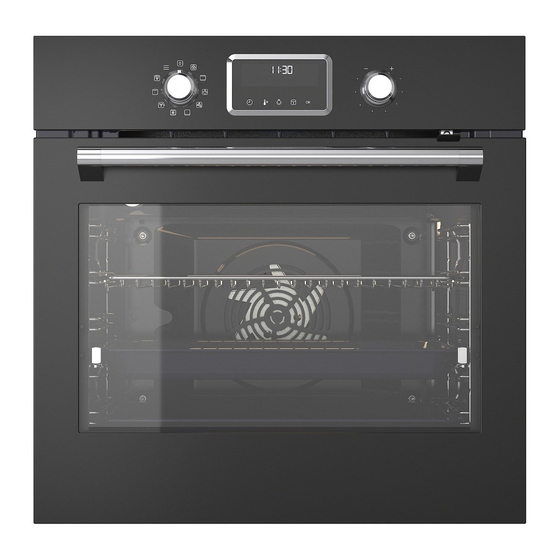
ENGLISH Product description General overview Control panel Knob for the heating functions Display Control knob Heating element Lamp Cavity embossment Shelf support, removable Shelf positions Accessories • Grill- / Roasting pan x 1 To bake and roast or as pan to collect fat. •... -
Page 10: Before First Use
ENGLISH Display Display with key functions. Display indicators Basic indicators Lock Assisted Cooking Settings Fast Heat Up Timer indicators Minute minder Time Delay Uptimer End time Progress bar - for temperature or time. The bar is fully red when the appliance reaches the set temperature. - Page 11 ENGLISH Initial preheating Preheat the empty oven before the first use. Step 1 Remove all accessories and removable shelf supports from the oven. Step 2 Set the maximum temperature for the function: Let the oven operate for 1 h. Step 3 Set the maximum temperature for the function: Let the oven operate for 15 min.
-
Page 12: Daily Use
ENGLISH Daily use Warning! Refer to Safety chapters. How to set: Heating functions Step 1 Turn the knob for the heating functions and select a heating function. Step 2 Turn the control knob to set the temperature. - press and hold to turn on the function: Fast Heat Up. It is available for some oven func‐ tions. - Page 13 ENGLISH Heating function Application To bake and roast food on one shelf position. Conventional Cook‐ To add humidity during the cooking. To get the right colour and crispy crust during baking. To give more juiciness during reheating. To preserve fruit or vegetables. SteamBake To bake pizza.
- Page 14 ENGLISH For the cooking instructions refer to "Hints and tips" chapter, Moist Fan Baking. How to set: Assisted Cooking Every dish in this submenu has a recommended heating function and temperature. Use the function to prepare a dish quickly with default settings. You can also adjust the time and the temperature during cooking.
- Page 15 ENGLISH Dish Weight Shelf level / Accessory Beef roast / 1.5 - 2 kg 2; roasting dish on wire shelf braised (prime Fry the meat for a few minutes on a hot pan. rib, top round, Add liquid. Insert to the appliance. thick flank) Roast Beef, rare (slow cooking)
- Page 16 ENGLISH Dish Weight Shelf level / Accessory Duck, whole 2 - 3 kg 2; roasting dish on wire shelf Use your favourite spices. Put the meat on roasting dish. Turn the duck after half of the cooking time. Goose, whole 4 - 5 kg 2;...
-
Page 17: Clock Functions
ENGLISH Dish Weight Shelf level / Accessory Croquets, frozen 0.5 kg 3; baking tray Pommes, frozen 0.75 kg 3; baking tray Meat / vegetable 1 - 1.5 kg 2; casserole dish on wire shelf lasagna with dry pasta sheets Potato gratin 1 - 1.5 kg 1;... - Page 18 ENGLISH How to set: Clock functions How to set: Time of day Step 1 Step 2 Step 3 To change the time of day enter the menu and select Settings, Time of day. Set the clock. Press: Refer to "Menu structure" chapter. How to set: Minute minder Step 1 Step 2...
-
Page 19: Using The Accessories
ENGLISH How to set: Time Delay Step 1 Step 2 Step 3 Step 4 Step 5 Step 6 The dis‐ play The dis‐ shows: play the time shows: of day --:-- Select Press re‐ STOP Press: Set the Set the peatedly: start time. - Page 20 ENGLISH Baking tray / Deep pan: Push the tray between the guide bars of the shelf support. How to use: telescopic runners Caution! Do not clean the telescopic runners in the Keep the installation instructions dishwasher. Do not lubricate the for the telescopic runners for telescopic runners.
-
Page 21: Additional Functions
ENGLISH Additional functions Lock This function prevents an accidental change of the appliance function. Turn it on when the appliance works - the set cooking continues, the control panel is locked. Turn it on when the appliance is off - it cannot be turned on, the control panel is locked. - press and hold to turn on - press and hold to turn it the function. - Page 22 ENGLISH (°C) (min) Sweet rolls, 16 baking tray or dripping 20 - 30 pieces Rolls, 9 pieces baking tray or dripping 30 - 40 Pizza, frozen, 0.35 wire shelf 10 - 15 Swiss Roll baking tray or dripping 25 - 35 Brownie baking tray or dripping 25 - 30...
- Page 23 ENGLISH (°C) (min) Short crust bis‐ baking tray or dripping 25 - 35 cuits, 20 pieces Tartlets, 8 pieces baking tray or dripping 20 - 30 Vegetables, baking tray or dripping 35 - 45 poached, 0.4 kg Vegetarian ome‐ pizza pan on wire shelf 25 - 30 lette Mediterranean...
- Page 24 ENGLISH ( °C) (min) Small True Fan Baking 150 - 160 20 - 35 cakes, 20 Cooking tray per tray Small True Fan Baking 2 and 4 150 - 160 20 - 35 cakes, 20 Cooking tray per tray Apple Conven‐...
-
Page 25: Care And Cleaning
ENGLISH ( °C) (min) Toast, 4 - Grill Wire shelf max. 1 - 5 Preheat the oven 6 pieces for 10 min Beef bur‐ Grill Wire shelf, max. 20 - 30 Put the wire shelf ger, 6 dripping on the fourth level pieces, and the dripping 0.6 kg... - Page 26 ENGLISH How to clean: Cavity embossment Clean the cavity embossment to remove limestone residue after cooking with steam. Step 1 Step 2 Step 3 Pour: 250 ml of white vinegar Let the vinegar dissolve the Clean the cavity with warm into the cavity embossment.
- Page 27 ENGLISH Step 1 Open the door fully and hold both hinges. Step 2 Lift and pull the latches until they click. Step 3 Close the oven door halfway to the first opening position. Then lift and pull to remove the door from its seat.
- Page 28 ENGLISH Step 8 Clean the glass panels with water and soap. Dry the glass panels carefully. Do not clean the glass panels in the dishwasher. Step 9 After cleaning, install the glass panels, the door trim and the oven door, close the latches on the both hinges.
-
Page 29: Troubleshooting
ENGLISH Step 2 Clean the glass cover. Step 3 Replace the lamp with a suitable 300 °C heat-resistant lamp. Step 4 Install the glass cover. Troubleshooting Warning! Refer to Safety chapters. What to do if... In any cases not included in this table please contact with an Authorised Service Centre. The appliance does not turn on or does not heat up Problem Check if... -
Page 30: Technical Data
We recommend that you write the data here: Model (MOD.) ......... Product number (PNC) ......... Serial number (S.N.) ......... Technical data Technical data Model identification FORNEBY 805.577.97 Width 480 mm Dimensions (internal) Height 361 mm Depth 416 mm Area of baking tray 1438 cm²... -
Page 31: Menu Structure
ENGLISH Keep breaks between baking as short as Keep food warm possible when you prepare a few dishes at Choose the lowest possible temperature one time. setting to use residual heat and keep a meal warm. The residual heat indicator or Cooking with fan temperature appears on the display. -
Page 32: Environmental Concerns
“What is not covered under this TILLREDA - from the original date of guarantee?” Within the guarantee period. purchase of your appliance at IKEA or from • The costs to remedy the fault e.g. repairs, the installation date with maximum limit of parts, labour and travel will be covered, three months from the purchase date. - Page 33 • Deliberate or negligent damage, damage • Cost for carrying out the initial installation caused by failure to observe operating of the IKEA appliance. However, if an IKEA instructions, incorrect installation or by service provider or its authorized service connection to the wrong voltage, damage...
- Page 34 Manual before contacting us. How to reach us if you need our service Please refer to the last page of this manual for the full list of IKEA appointed contacts and relative national phone numbers. In order to provide you with a...
- Page 35 UNITED ARAB EMIRATES & OMAN : رﻗﻢ ﻣﺠﺎﻧﻲ Toll free: 8 004 532 : ﻣﻮﻗﻊ اﻹﻧﺘﺮﻧﺖ Web: www.IKEA.com QATAR : رﻗﻢ ﻣﺠﺎﻧﻲ Toll free: 8 004 532 : ﻣﻮﻗﻊ اﻹﻧﺘﺮﻧﺖ Web: www.IKEA.qa : اﻟﺒﺮﻳﺪ اﻹﻟﻜﺘﺮوﻧﻲ e-mail: Ikea_qatar@alfuttaim.com EGYPT : اﻟﺨﻂ اﻟﺴﺎﺧﻦ...
- Page 36 21552 © Inter IKEA Systems B.V. 2022 AA-2355602-1...
Need help?
Do you have a question about the FORNEBY and is the answer not in the manual?
Questions and answers