IKEA FORNEBY Manual
Hide thumbs
Also See for FORNEBY:
- Manual (68 pages) ,
- Installation instructions manual (40 pages) ,
- Quick start manual (8 pages)
Table of Contents
Advertisement
Advertisement
Table of Contents

Subscribe to Our Youtube Channel
Related Manuals for IKEA FORNEBY


Summary of Contents for IKEA FORNEBY
- Page 1 FORNEBY...
- Page 2 ENGLISH Please refer to the last page of this manual for the full list of IKEA appointed After Sales Service Provider and relative national phone numbers.
- Page 3 ENGLISH...
-
Page 4: Table Of Contents
Energy efficiency Before first use Menu structure Daily use Environmental concerns Clock functions IKEA guarantee Using the accessories Additional functions Subject to change without notice. Safety information Before the installation and use of the appliance, carefully read the supplied instructions. The manufacturer is not responsible if an incorrect installation and use causes injuries and damage. - Page 5 ENGLISH WARNING: The appliance and its accessible parts become • hot during use. Keep children and pets away from the appliance when in use and when cooling down. If the appliance has a child safety device, it should be • activated.
-
Page 6: Safety Instructions
ENGLISH Safety instructions Installation Ventilation opening 560x20 mm Warning! Only a qualified person minimum size. Open‐ must install this appliance. ing placed on the bot‐ tom rear side • Remove all the packaging. • Do not install or use a damaged Mains supply cable 1500 mm appliance. - Page 7 ENGLISH • Do not pull the mains cable to disconnect – do not put water directly into the hot the appliance. Always pull the mains plug. appliance. • Use only correct isolation devices: line – do not keep moist dishes and food in protecting cut-outs, fuses (screw type the appliance after you finish the fuses removed from the holder), earth...
-
Page 8: Installation
ENGLISH Internal lighting • Use original spare parts only. Warning! Risk of electric shock. Disposal Warning! Risk of injury or • Concerning the lamp(s) inside this suffocation. product and spare part lamps sold separately: These lamps are intended to • Disconnect the appliance from the mains withstand extreme physical conditions in supply. -
Page 9: Product Description
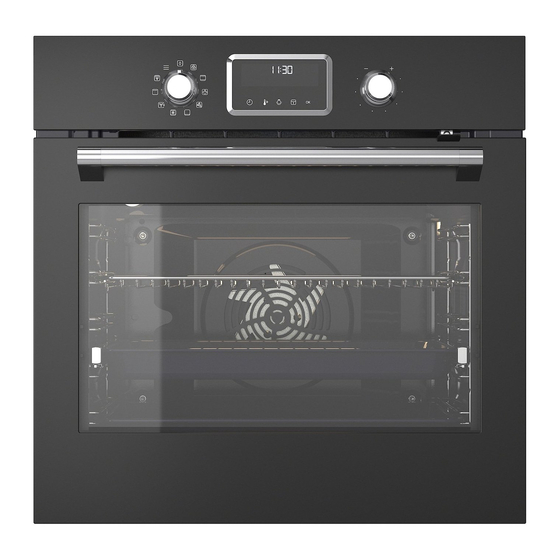
ENGLISH Product description General overview Control panel Knob for the heating functions Display Control knob Heating element Lamp Cavity embossment Shelf support, removable Shelf positions Accessories • Grill- / Roasting pan x 1 To bake and roast or as pan to collect fat. •... -
Page 10: Before First Use
ENGLISH Display Display with key functions. Display indicators Basic indicators Lock Assisted Cooking Settings Fast Heat Up Timer indicators Minute minder Time Delay Uptimer End time Progress bar - for temperature or time. The bar is fully red when the appliance reaches the set temperature. - Page 11 ENGLISH Initial preheating Preheat the empty oven before the first use. Step 1 Remove all accessories and removable shelf supports from the oven. Step 2 Set the maximum temperature for the function: Let the oven operate for 1 h. Step 3 Set the maximum temperature for the function: Let the oven operate for 15 min.
-
Page 12: Daily Use
ENGLISH Daily use Warning! Refer to Safety chapters. How to set: Heating functions Step 1 Turn the knob for the heating functions and select a heating function. Step 2 Turn the control knob to set the temperature. - press and hold to turn on the function: Fast Heat Up. It is available for some oven func‐ tions. - Page 13 ENGLISH Heating function Application To bake and roast food on one shelf position. Conventional Cook‐ To add humidity during the cooking. To get the right colour and crispy crust during baking. To give more juiciness during reheating. To preserve fruit or vegetables. SteamBake To bake pizza.
- Page 14 ENGLISH For the cooking instructions refer to "Hints and tips" chapter, Moist Fan Baking. How to set: Assisted Cooking Every dish in this submenu has a recommended heating function and temperature. Use the function to prepare a dish quickly with default settings. You can also adjust the time and the temperature during cooking.
- Page 15 ENGLISH Dish Weight Shelf level / Accessory Steak, medium 180 - 220 g per 3; roasting dish on wire shelf piece; 3 cm Fry the meat for a few minutes on a hot pan. thick slices Insert to the appliance. Beef roast / 1.5 - 2 kg 2;...
- Page 16 ENGLISH Dish Weight Shelf level / Accessory Lamb leg with 1.5 - 2 kg; 7 - 9 2; roasting dish on baking tray bones cm thick pieces Add liquid. Turn the meat after half of the cooking time. Whole chicken 1 - 1.5 kg;...
- Page 17 ENGLISH Dish Weight Shelf level / Accessory Apple pie 100 - 150 ml; 22 cm pie form on wire shelf Brownies 2 kg of dough 3; deep pan Chocolate muf‐ 100 - 150 ml; muffin tray on wire fins shelf Loaf cake 2;...
-
Page 18: Clock Functions
ENGLISH Clock functions Clock functions Clock Function Application When the timer ends, the signal sounds. Minute minder When the timer ends, the signal sounds and the heating function stops. Cooking time To postpone the start and / or end of cooking. Time Delay Maximum is 23 h 59 min. -
Page 19: Using The Accessories
ENGLISH How to set: Cooking time Step 1 Step 2 Step 3 Step 4 The display shows: 0:00 Choose a heating Press repeatedly: Set the cooking function and set Press: time. the temperature. Timer starts counting down immediately. How to set: Time Delay Step 1 Step 2 Step 3... - Page 20 ENGLISH Wire shelf: Push the shelf between the guide bars of the shelf support and make sure that the feet point down. Baking tray / Deep pan: Push the tray between the guide bars of the shelf support. How to use: telescopic runners Caution! Do not clean the telescopic runners in the Keep the installation instructions...
-
Page 21: Additional Functions
ENGLISH Step 2 Put the wire shelf on the telescopic runners and carefully push them into the oven. °C Make sure you push back the telescopic run‐ ners fully in the oven before you close the oven door. Additional functions Lock This function prevents an accidental change of the appliance function. -
Page 22: Hints And Tips
ENGLISH Hints and tips Cooking recommendations The temperature and cooking times in the tables are guidelines only. They depend on the recipes and the quality and quantity of the ingredients used. Your appliance may bake or roast differently to the appliance you had before. The hints be‐ low show recommended settings for temperature, cooking time and shelf position for spe‐... - Page 23 ENGLISH (°C) (min) Fish fillet, 0.3 kg pizza pan on wire shelf 25 - 30 Poached meat, baking tray or dripping 35 - 45 0.25 kg Shashlik, 0.5 kg baking tray or dripping 25 - 30 Cookies, 16 pieces baking tray or dripping 20 - 30 Macaroons, 24 baking tray or dripping...
- Page 24 ENGLISH Ceramic Dark, non-reflective Dark, non-reflective Dark, non-reflective 8 cm diameter, 28 cm diameter 26 cm diameter 28 cm diameter 5 cm height Cooking tables for test institutes Information for test institutes Tests according to IEC 60350-1. ( °C) (min) Small True Fan Baking...
-
Page 25: Care And Cleaning
ENGLISH ( °C) (min) Beef bur‐ Grill Wire shelf, max. 20 - 30 Put the wire shelf ger, 6 dripping on the fourth level pieces, and the dripping 0.6 kg pan on the third level of the oven. Turn the food halfway through the cooking time. - Page 26 ENGLISH How to clean: Cavity embossment Clean the cavity embossment to remove limestone residue after cooking with steam. Step 1 Step 2 Step 3 Pour: 250 ml of white vinegar Let the vinegar dissolve the Clean the cavity with warm into the cavity embossment.
- Page 27 ENGLISH Step 1 Open the door fully and hold both hinges. Step 2 Lift and pull the latches until they click. Step 3 Close the oven door halfway to the first opening position. Then lift and pull to remove the door from its seat.
- Page 28 ENGLISH Step 8 Clean the glass panels with water and soap. Dry the glass panels carefully. Do not clean the glass panels in the dishwasher. Step 9 After cleaning, install the glass panels, the door trim and the oven door, close the latches on the both hinges.
-
Page 29: Troubleshooting
ENGLISH Step 2 Clean the glass cover. Step 3 Replace the lamp with a suitable 300 °C heat-resistant lamp. Step 4 Install the glass cover. Troubleshooting Warning! Refer to Safety chapters. What to do if... In any cases not included in this table please contact with an Authorised Service Centre. The appliance does not turn on or does not heat up Problem Check if... -
Page 30: Technical Data
2990 W Voltage 220 - 240 V Frequency 50 - 60 Hz Number of functions Energy efficiency Product Information Sheet according to UK Ecodesign and Energy Labelling Regulations Supplier's name IKEA FORNEBY 505.577.94 Model identification FORNEBY 005.568.91 Energy Efficiency Index 81.2... - Page 31 Number of cavities Heat source Electricity Volume 72 l Type of oven Built-In Oven FORNEBY 32.2 kg 505.577.94 Mass FORNEBY 32.2 kg 005.568.91 BS EN 60350-1 - Household electric cooking appliances - Part 1: Ranges, ovens, steam ovens and grills - Methods for measuring performance.
-
Page 32: Menu Structure
Help protect the environment and municipal office. human health by recycling waste of electrical and electronic appliances. Do not dispose of IKEA guarantee How long is the IKEA guarantee valid? - Page 33 IKEA. The original sales receipt is required environmental conditions. as proof of purchase. If service work is • Consumable parts including batteries and carried out under guarantee, this will not lamps.
- Page 34 Please refer to the last page of this manual demands. However these conditions do not for the full list of IKEA appointed contacts limit in any way consumer rights described and relative national phone numbers.
- Page 35 Magyarország 06-1-252-1773 Belföldi díjszabás Hétköznap 8.00 és 17.00 óra között 050-7111267 ma-vr: 8.00 - 21.00 Nederland Geen extra kosten. (0900-BEL IKEA) zat: 9.00 - 21.00 Luxembourg +31 507111267 Alleen lokaal tarief. zon / pub. vakantie: 10.00 - 18.00 (internationaal) Norge l i t Österreich...
- Page 36 21552 © Inter IKEA Systems B.V. 2022 AA-2350198-1...
Need help?
Do you have a question about the FORNEBY and is the answer not in the manual?
Questions and answers