Table of Contents
Advertisement
Quick Links
Advertisement
Table of Contents

Subscribe to Our Youtube Channel
Related Manuals for Full Spectrum Laser MUSE TITAN V3


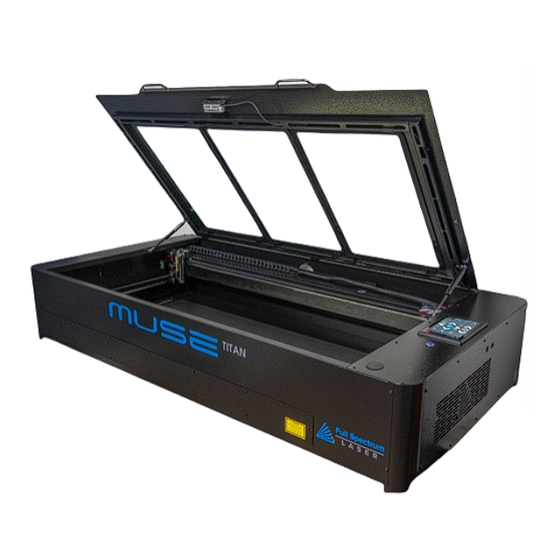
Summary of Contents for Full Spectrum Laser MUSE TITAN V3
-
Page 2: Safety Symbols
Safety Symbols: Safety Warnings: Red Icons indicate dangerous situations that could result in serious injury or death. ● This product is rated as a Class 4 machine, however the enclosure makes the overall rating of the machine Class 3R. ● Keep the enclosure closed during operation to avoid eye &... -
Page 3: Safety Stickers
Safety Stickers: Unboxing: 3. Remove the foam covering from the top and sides of the Muse Titan. 1. Open the crate by flattening the metal tabs on the crate. 4. Get a lifting buddy and move the Titan to your work area. Remember to lift with your knees. - Page 4 Diagrams: Honeycomb Trays Passthrough Cover Exhaust Flange Passthrough Cover Pause Button Water Reservoir Lid Handles Power On/Off Inlet Air Assist & Exhaust Water Inlet & Outlet Controls (For Optional Chiller) Touch Screen Rotary Port...
-
Page 5: Left Side
Diagrams: Laser Head Assembly: Left Side: Mirror 3 Mirror Adjustment Panel Z-belt Right Side: Air Assist Air Assist Remove Focus Lens Exhaust Ethernet Flange The Focus Lens is removed by gently pushing the back of the lens until a clicking sound is Port Wi-Fi heard. - Page 6 Setting Up Your Muse: 1. Remove the Zip ties. 5. Connect the other end to the exhaust fan. Get the second ducting and connect it to the other end of the exhaust fan before connecting it to external ventilation. 6. Use the provided funnel to fill the water reservoir with 1 liter of distilled water.
-
Page 7: Connecting To Internet
Connecting to Internet: Focusing: There are two ways to use the autofocus feature on your machine. The first method Connect Via Router (Recommended): involves pressing the autofocus button on the touchscreen. The second method requires accessing the autofocus icon located under the Jog Controls Tab in RE3. To establish a reliable link to RE3, it is recommended to connect the Fiber Galvo to the router. -
Page 8: Touchscreen Interface
Touchscreen Interface: Network ⇨ Wi-Fi Home Enables users to connect to a Wi-Fi network. The Home screen displays important information such as the device's IP address, the QR Code for RE3, and controls for the laser head. Mobile Version Job History A mobile version of the device is accessible by either scanning The Job History icon provides easy access to previous projects. - Page 9 RetinaEngraveV3 (RE3): RE3 can be accessed by entering your machines IP address into your web browser. When loaded RE3 will appear like so. Main Toolbar Workspace Tools Viewing Tools Drawing Tools Orientation Tools Grouping Tools Project List Project Information Gantry Coordinates Cursor Coordinates Rotary Switch Status Indicators...
- Page 10 Drawing Tools: Grouping Tools: 1. Select: Pointer Group: Group objects Subselect Merge: Union: Combine layers into a single compound layer. Lasso Difference: Combine non-overlapping layers into a Layer single compound layer. 2. Shape: Line. Intersection: Combine overlapping layers into a Rectangle single compound layer.
-
Page 11: Camera Functions
Camera Functions: Camera Capture: Camera Calibration: In order to capture the workspace, locate the camera capture tool in the Workspace Tools section. Upon selection, the machine's gantry will move along its axis, and once the Preparation: Remove the Honeycomb trays from the machine and place the calibration movement is complete, the captured workspace will be displayed. - Page 12 Full Spectrum AI: After taking the Screenshot, hold the Shift key and select a few spots on the present Entering RE3: objects, then hold the Shift and Alt keys to select background spots. Once completed, select the Find Objects icon. In order to use the AI, the machine must be connected to the internet.
- Page 13 Full Spectrum AI: Aligning objects: 2. The Advance Settings:(Sidebar) Vector and Raster objects can be selected and placed onto the center of each object Select the down arrow to open the Advanced settings. using the align option. Keep in mind that the AI will only place the object at the center, resizing must be done manually.
- Page 14 Full Spectrum AI: Background Removal: Text to Art Generation: Our AI can identify the subject of the image and remove any unwanted background. Our AI can generate raster images using a text prompt. Select the downward arrow to open the prompt window. Write your prompt and then select the OK icon.
- Page 15 Stopping your Laser: Once a project has started, it will run continuously until it is completed. In case of an emergency, there are several options available to stop the laser immediately: 4. E-Stop Button. Located in the lower left corner of the touch screen, pressing this button will cut power to the laser instantly.
-
Page 16: General Maintenance
General Maintenance: Project Procedure: Connect to Software Create or Import Design Adjust Object Properties By following our maintenance instructions, you can ensure your machine will function at peak performance for a long time. Please keep in mind that the following maintenance schedule can vary depending on machine usage. -
Page 17: Belt Replacement
Belt Replacement: Gantry Belt: Side Belts: 1. Power off the machine and allow at least one hour for capacitors to discharge. 1. Power off the machine and allow at least one hour for the capacitors to discharge. 2. Locate the belt retaining screws, located behind the laser head assembly. 2. -
Page 18: Mirror Alignment
Limit Sensors: Mirror Alignment: The Titan is equipped with Limit sensors in both the X and Y direction to prevent the The Titan is equipped with a laser that is initially aligned with the red diode, and the mirrors. gantry from trying to move past the workspace limit. However, it is important to regularly check the machine to ensure that the alignment remains accurate. -
Page 19: Troubleshooting
Troubleshooting: Q: What should I do if my laser isn't marking? Q: How can I solve issues with focusing my laser? A: Check if the laser is in its focal height. If the machine is off by even a few millimeters, A: The Muse Titan will automatically focus to your material by touching the material and it won't engrave.
Need help?
Do you have a question about the MUSE TITAN V3 and is the answer not in the manual?
Questions and answers