National Instruments SCXI-1127 Getting Started Manual
Hide thumbs
Also See for SCXI-1127:
- User manual (97 pages) ,
- Getting started manual (23 pages) ,
- Getting started manual (23 pages)
Table of Contents
Advertisement
Quick Links
NI Switches Getting Started Guide
For PXI and SCXI Switch Modules
Contents
™
This document explains how to install, configure, and set up National
Instruments PXI and SCXI switch modules. This document covers the
NI-DAQ 7.x driver software relative to NI switch modules. For a more
detailed explanation of NI-DAQ 7.x, refer to the DAQ Quick Start Guide
available on the NI-DAQ 7.x Device Documentation CD.
For more information about a specific switch module, such as features
and programming with NI-SWITCH, refer to the NI Switches Help
at Start»Programs»National Instruments»NI-SWITCH»
Documentation. Refer to the specifications document that ships
with your device for detailed specifications.
Conventions ............................................................................................ 1
Safety and Compliance ........................................................................... 2
Related Documentation........................................................................... 2
1. Verifying the System Requirements ................................................... 3
2. Unpacking ........................................................................................... 4
3. Verifying the Kit Contents .................................................................. 5
4. Installing the Software ........................................................................ 5
5. Installing the PXI Hardware ............................................................... 7
6. Installing the SCXI Hardware............................................................. 9
Procedure 2: Cable the Controller to the SCXI Switch ................... 13
Procedure 3: Controller in the Rightmost PXI Slot ......................... 17
7. Configuring the PXI Hardware in MAX............................................. 19
8. Configuring the SCXI Hardware in MAX .......................................... 20
9. Connecting Signals ............................................................................. 27
10. Programming the Switch Modules.................................................... 29
Technical Support Resources.................................................................. 30
Advertisement
Table of Contents

Related Manuals for National Instruments SCXI-1127


Summary of Contents for National Instruments SCXI-1127
-
Page 1: Table Of Contents
NI-DAQ 7.x Device Documentation CD. For more information about a specific switch module, such as features and programming with NI-SWITCH, refer to the NI Switches Help at Start»Programs»National Instruments»NI-SWITCH» Documentation. Refer to the specifications document that ships with your device for detailed specifications. -
Page 2: Conventions
Conventions The following conventions are used in this manual: » The » symbol leads you through nested menu items and dialog box options to a final action. The sequence File»Page Setup»Options directs you to pull down the File menu, select the Page Setup item, and select Options from the last dialog box. -
Page 3: Related Documentation
Related Documentation The following documents contain additional information about your switch module and the APIs used to program them. The documents are available in electronic form at Program Files»National Instruments» NI-SWITCH»Documentation or Program Files»National Instruments»NI-DAQ. • NI xxx-xxxx Specifications contains detailed specifications for your switch module. -
Page 4: Unpacking
♦ PXI switch modules require the following: • PXI chassis or PXI/SCXI combination chassis • 1/8 in. flathead screwdriver ♦ SCXI switch modules require the following: • Switch controller (NI 4021/4060/407x or E Series device) • Cable adapter (if cabling directly to a controller) •... -
Page 5: Verifying The Kit Contents
❑ Read Me First: Safety and Radio-Frequency Interference 4. Installing the Software National Instruments switch modules are packaged with NI-DAQ 7.x driver software which contains three drivers each with a corresponding API—NI-SWITCH, NI-DAQmx, and Traditional NI-DAQ. Each API has an extensive library of functions and VIs that you can call from your application software, such as LabVIEW or LabWindows/CVI, to program your NI switch module. - Page 6 Uninstall Earlier Versions of NI-DAQ If you are upgrading to NI-DAQ 7.x from a previous version, uninstall the earlier version of NI-DAQ now. Some NI-DAQ devices supported in 6.9.3 may no longer be supported. Before uninstalling NI-DAQ 6.9.3 or earlier, refer to the DAQ Quick Start Guide, available on the NI-DAQ 7.x Device Documentation CD, for devices no longer supported.
-
Page 7: Installing The Pxi Hardware
Tighten the captive screws at the top and bottom of the device front panel. Performance may suffer if both screws are not tightened properly. Verify that the PXI chassis fans are operable and free of dust and other contaminants restricting airflow. © National Instruments Corporation NI Switches Getting Started Guide... - Page 8 Before operating the device, cover all empty PXI slots using blank PXI filler panels. 10. Plug in and power on the PXI chassis. 1 PXI or PXI/SCXI Combination Chassis 3 Screws 2 PXI Switch Module 4 Injector/Ejector Handle Figure 1. Installing a PXI Switch Module NI Switches Getting Started Guide ni.com...
-
Page 9: Installing The Scxi Hardware
Note If you are using a PXI-1010 or PXI-1011 chassis and install the switch controller in the rightmost PXI slot, no cables are required between the controller and SCXI switch. © National Instruments Corporation NI Switches Getting Started Guide... - Page 10 SCXI-1191 SCXI-1192 The NI 4060 can control only the SCXI-1127/1128/1129/1160/1161/1163R/1190/1191/1192 switch modules configured under Traditional NI-DAQ Devices in MAX. For software support information, refer to Table 2. An E Series device can control these switches when cabled to another SCXI module in the same chassis. The cabled SCXI module can be an SCXI signal conditioning device or another SCXI switch module.
- Page 11 Procedure 3 same chassis? Do you have a PXI-1010 chassis? No (You have a PXI-1011) Refer to Procedure 4 Figure 3. SCXI Switch Module Installation Flowchart © National Instruments Corporation NI Switches Getting Started Guide...
-
Page 12: Procedure 1: Installing The Scxi Switch In An Existing System
Procedure 1: Installing the SCXI Switch in an Existing System If your SCXI system already has a controller installed, you can simply add additional SCXI switch modules in any available SCXI slots. Refer to Table 1 to determine if your controller supports your SCXI switch module. To install your SCXI switch, complete the following steps: Power off and unplug the SCXI chassis. -
Page 13: Procedure 2: Cable The Controller To The Scxi Switch
After you have prepared your chassis, complete the appropriate instructions in this section for your controller. Refer to Table 1 to determine if your controller supports and connects to your SCXI switch module. © National Instruments Corporation NI Switches Getting Started Guide... - Page 14 Cable the E Series Device to the Switch E Series devices can directly cable only to switches with 50-pin rear connectors. Refer to Table 1 to determine if your switch module has a 50-pin rear connector. To cable an E Series device to your SCXI switch, complete the following steps: Power off and unplug the SCXI chassis.
- Page 15 NI 4021/4060/407x. 1 SCXI Switch 4 Controller 2 SCXI-1000/1001 or PXI-1010 Chassis 5 SH9MD-AUX Cable 3 SCXI-1359 Cable Adapter Figure 7. Cabling an NI 4021/4060/407x to a 10-Pin Rear Connector Switch Module © National Instruments Corporation NI Switches Getting Started Guide...
- Page 16 SCXI Switch with 50-Pin Rear Connector Power off and unplug the SCXI chassis. Follow proper ESD precautions to ensure you are grounded before installing the hardware. Remove the filler panel in an unused SCXI slot. Touch any metal part of your chassis to discharge static electricity. Insert the switch module into the SCXI slot.
-
Page 17: Procedure 3: Controller In The Rightmost Pxi Slot
NATIONAL INSTRUMENTS INSTRUMENTS INSTRUMENTS INSTRUMENTS PXI-1011 NATIONAL NATIONAL NATIONAL NATIONAL INSTRUMENTS NATIONAL INSTRUMENTS INSTRUMENTS INSTRUMENTS INSTRUMENTS 1 PXI-1010 Chassis 3 Controller 2 PXI-1011 Chassis Figure 9. Controller in Rightmost PXI Slot © National Instruments Corporation NI Switches Getting Started Guide... -
Page 18: Procedure 4: Controller Not In Rightmost Pxi Slot Of Pxi-1011
Procedure 4: Controller Not in Rightmost PXI Slot of PXI-1011 If you do not install the SCXI controller in the rightmost PXI slot of the PXI-1011 chassis, you can control the SCXI switches using the SH9MD-AUX cable. Refer to Table 1 to determine if your controller supports and connects to your SCXI switch module. -
Page 19: Configuring The Pxi Hardware In Max
Figure 11. Configuring Switch Modules Under NI-DAQmx Devices in MAX The Terminal Block/Topology tab is selected by default. Select the terminal block connected to the switch module from the Terminal Block/Topology list box. © National Instruments Corporation NI Switches Getting Started Guide... -
Page 20: Configuring The Scxi Hardware In Max
Set a default topology from the Topology list box. Click the Channels tab. Designate source channels for the topology selected in the Terminal Block/Topology tab. You can set different source channels for each topology. 10. Designate reserved channels for routing. You can reserve different channels for routing in each topology. - Page 21 Figure 12. Configuring SCXI Switch Modules under NI-DAQmx Devices Select the controller cabled to the communicating SCXI module from Chassis Communicator. If MAX detects only one DAQ device, the device is chosen by default, and this option is disabled. © National Instruments Corporation NI Switches Getting Started Guide...
- Page 22 Select the module slot connected to the chassis communicator from Communicating SCXI Module Slot. Enter the chassis address setting in Chassis Address. Make sure the setting matches the address setting on the SCXI chassis shown in Figure 5. Select whether or not to auto-detect the installed SCXI modules. If you do not auto-detect modules, MAX disables the Communicating SCXI Module Slot.
- Page 23 Terminal Block/Topology list box. 13. Set a default topology from the Topology list box. The SCXI-1127/1128 can connect to the high-voltage analog bus (HVAB) during Note scanning. You can configure the switch to automatically connect to the HVAB during scanning by selecting an optional checkbox (not shown) in Figure 14.
- Page 24 18. Repeat steps 11 through 17 to configure additional SCXI switch modules. 19. If you need to change any chassis settings, click the Chassis tab. 20. Click OK to accept and save the settings for this chassis. Note You cannot save the chassis configuration until you finish entering module information.
- Page 25 Select the switch module that is cabled to the communication device and click Finish to accept the settings. If the chassis has only one module, NI-DAQ selects the module by default. Figure 16. Select the Cabled Switch Module © National Instruments Corporation NI Switches Getting Started Guide...
- Page 26 Select the chassis from Devices and Interfaces»Traditional NI-DAQ Devices. 10. Right-click a module slot and select Properties. Figure 17. Configuring Switch Modules under Traditional NI-DAQ Devices in MAX 11. The General tab is selected by default. Choose the controller connected to the module from the Connected to listbox. Select the checkbox if the DAQ device controls the chassis.
-
Page 27: Connecting Signals
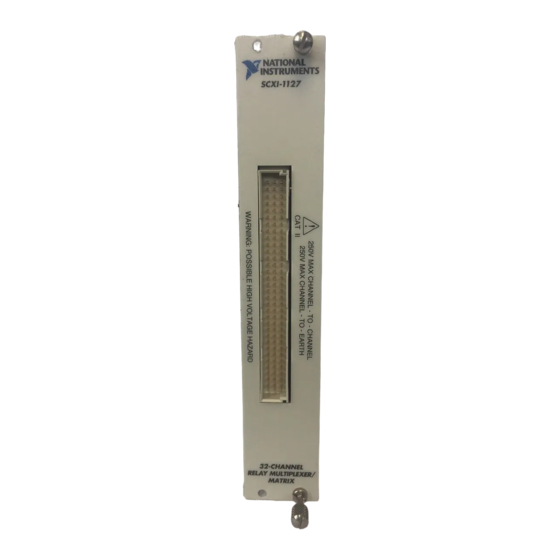
Connect the module front connector to its mating connector on the terminal block. Tighten the top and bottom thumbscrews on the back of the terminal block rear panel to hold it securely in place. © National Instruments Corporation NI Switches Getting Started Guide... - Page 28 SCXI-1127 (250 V, CAT II) in Slot 4 SCXI-1129 (150 V, CAT I) in Slot 3 Both modules share the HVAB and the SCXI-1127 must not exceed the rating of the SCXI-1129 (150 V, CAT I). NI Switches Getting Started Guide...
-
Page 29: Programming The Switch Modules
SCXI-1127 (250 V, CAT II) in Slot 4 SCXI-1129 (150 V, CAT I) in Slot 2 The SCXI-1127 does not share the HVAB with the SCXI-1129. Therefore, the SCXI-1127 can operate at the full rating (250 V, CAT II). Example 3 SCXI-1000 chassis... -
Page 30: Technical Support Resources
For example locations, refer to the DAQ Quick Start Guide. Technical Support Resources NI Web Support National Instruments Web support is your first stop for help in solving installation, configuration, and application problems and questions. Online problem-solving and diagnostic resources include frequently asked questions, knowledge bases, product-specific troubleshooting wizards, manuals, drivers, software updates, and more. - Page 31 National Instruments corporate headquarters is located at 11500 North Mopac Expressway, Austin, Texas, 78759-3504. National Instruments also has offices located around the world to help address your support needs. You can access our branch office Web sites from the Worldwide Offices section of .
- Page 32 CVI™, IVI™, LabVIEW™, Measurement Studio™, National Instruments™, NI™, ni.com™, NI-DAQ™, *323131C-01* and SCXI™ are trademarks of National Instruments Corporation. Product and company names mentioned herein are trademarks or trade names of their respective companies. For patents covering National Instruments products, refer to the appropriate location: Help»Patents in your software,...
Need help?
Do you have a question about the SCXI-1127 and is the answer not in the manual?
Questions and answers