Table of Contents
Advertisement
Quick Links
Redback® A 4469 Audio Switcher
Operating Manual
A 4469
Audio Switcher
Optional Accessories
A 4658 Power Injector (U/UTP Cat5)
A 4660 Emergency Paging Microphone Console (U/UTP Cat5)
A 4658 Power Injector
A 4660 Paging Console
User manual revision number: 1.4 30/08/2023
Distributed by Altronic Distributors Pty. Ltd.
Phone: 1300 780 999 Fax: 1300 790 999 Internet: www.altronics.com.au
IMPORTANT NOTE:
Please read these instructions carefully from front to back prior to installation.
They include important setup instructions.
Failure to follow these instructions may prevent the unit from working as designed.
www.redbackaudio.com.au
Redback® Proudly Made In Australia
1
Advertisement
Table of Contents

Related Manuals for Redback A 4469


Summary of Contents for Redback A 4469
- Page 1 Redback® A 4469 Audio Switcher Operating Manual A 4469 Audio Switcher Optional Accessories A 4658 Power Injector (U/UTP Cat5) A 4660 Emergency Paging Microphone Console (U/UTP Cat5) A 4658 Power Injector A 4660 Paging Console User manual revision number: 1.4 30/08/2023 Distributed by Altronic Distributors Pty.
- Page 2 100% developed, designed & assembled in Australia. Since 1976 we have been manufacturing Redback amplifiers in Perth, Western Australia. With over 40 years experience in the commercial audio industry, we offer consultants, installers and end users reliable products of high build quality with local product support.
-
Page 3: Table Of Contents
2.0 Features 3.0 Front panel guide 4.0 Rear panel connections 5.0 Connecting the A 4469 Audio Switcher to Amplifiers and Speakers Option 1 : Individual Zone Amplifiers using Microphone Level Signals Option 2 : Individual Zone Amplifiers using Line Level Signals Option 3 : One Zone Amplifier using Mic or Line Level Signals and individual speakers for each zone 6.0 A 4660 Paging Console Overview... -
Page 4: Overview
1.0 OVERVIEW The A 4469 Audio Switcher provides a Microphone level or Line level output which can be connected directly to the inputs of up to four amplifiers to provide up to four zones of audio. A BGM input on the rear of the A4489A directs background music to all zones until over-ridden by zone paging. -
Page 5: Front Panel Guide
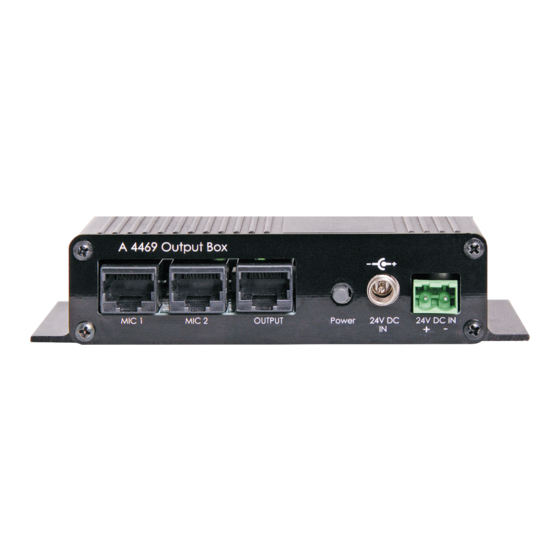
Redback® A 4469 Audio Switcher 3.0 FRONT PANEL GUIDE Figure 1 shows the layout of the A 4469 front panel. BGM In OUT 4 OUT 3 Mic Out 24V DC 24V DC IN MIC 1 MIC 2 OUTPUT Power Fig 1 RJ45 connector (Mic 1, Mic 2) For connection back to the A 4660 paging consoles. -
Page 6: Connecting The A 4469 Audio Switcher To Amplifiers And Speakers
The audio from the paging console/s is fed down the Cat5e/6 cable to the A 4469 audio switcher. Take the line level (1V balanced signal) from the “Line Out” terminals on the rear of the A 4469 and feed them back into the “Audio In”... -
Page 7: Option 3 : One Zone Amplifier Using Mic Or Line Level Signals And Individual Speakers For Each Zone
(1V balanced signal) from the “Line Out” terminals or the low level balanced signal from the “Mic Out” on the rear of the A 4469 and feed them into the audio inputs of the zone amplifer as shown in figure 5. (Note: The Zone Amplifier can be up to a maximum of 500 Watts). -
Page 8: A 4660 Paging Console Overview
Fig 6 There are two RJ45 ports on the back of the A 4469 either of which can be used to connect an A 4660 paging console. The maximum distance between the A 4469 and a paging console is 200m. -
Page 9: Connecting The Paging Console With A Power Injector
When connecting two paging consoles to the amplifier they must be cascaded and connected to only one of the two RJ45 ports on the rear of the A 4469, as shown in figure 8. Standard Cat5e/6 cabling is used and the maximum total cable run length to the second paging console is 200m. -
Page 10: A 4660 Home Screen
Redback® A 4469 Audio Switcher 7.0 A 4660 HOME SCREEN Figure 9 below outlines the main functions of the A 4660. Installer Label BGM will play from SD card Zone 1 Zone 2 Zone 3 Zone 4 Recall Page All Call... -
Page 11: A 4660 Settings
Redback® A 4469 Audio Switcher 8.0 A 4660 SETTINGS The settings menu can be accessed using the icon on the top left of the screen. Once in this menu the following screen will be displayed, which shows the various settings available. -
Page 12: Backlight Settings
Redback® A 4469 Audio Switcher 8.2 A 4660 Backlight Settings Press the “backlight” button to display the screen shown in figure 12. There are two levels of screen brightness which come into effect, when the screen hasn’t been touched for a period of time set by the user. -
Page 13: Microphone Settings
Redback® A 4469 Audio Switcher 8.6 A 4660 Microphone settings Press the “microphone” button to display the screen shown in figure 13. From this menu the chime options and action of the paging button are set. Chime through local speaker ->... -
Page 14: Understanding And Connecting The Bgm (Background Music)
9.1 BACKGROUND MUSIC (REAR OF A 4469) Firstly the background audio can be connected directly to the rear of the A 4469 either as a line level input, as illustrated in figure 4, or a speaker level input as illustrated in figure 5. -
Page 15: A 4660 Background Music Sources
Redback UTP solutions transmitter. Figure 15 illustrates the use of a mobile phone as the local BGM source. This is connected to the 3.5mm audio input of the Redback A 4944 and then fed through a Cat5e/6 cable to the A 4660 paging console. -
Page 16: Troubleshooting
No audio from zone terminals on Check wiring to “Audio In” terminals rear of A 4469 No Background music Check lead on BGM input on rear of A 4469 Check BGM volume Check BGM enabled on A 4660 No Pre or Post -announcement...
Need help?
Do you have a question about the A 4469 and is the answer not in the manual?
Questions and answers