Table of Contents
Advertisement
Quick Links
Advertisement
Table of Contents

Related Manuals for RetroSound MOTOR 1B


Summary of Contents for RetroSound MOTOR 1B
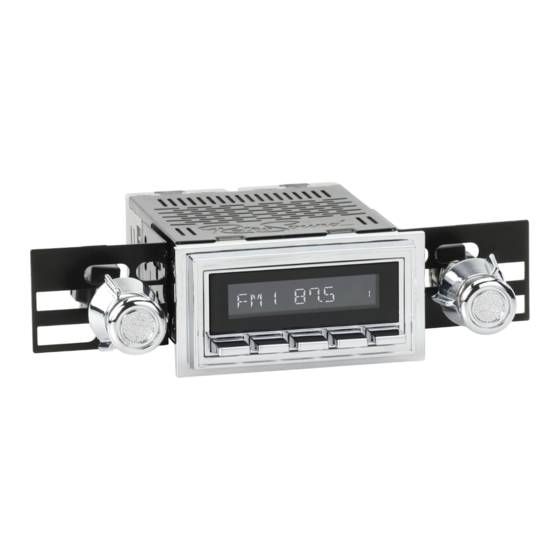
- Page 1 User Manual MODERN SOUND FOR YOUR CLASSIC...
- Page 2 TABLE OF CONTENTS General Features ......2 PRECAUTIONS ....... 3 Accessories ....... 4 Radio Operation Instructions ....5 System Settings ......7 Bluetooth® Device Instructions ..... 15 Troubleshooting ......16 Frequently Asked Questions ....17 Specifications ......19 Warranty ........20 Purchase Notes ......
-
Page 3: General Features
◄ Table of Contents General Features Model: Motor 1B • AM/FM tuner with 30 presets and RDS (Radio Data System) • Selectable international tuner frequencies • Built-in MOSFET amplifier: 18 watts RMS / 40 watts Max x4 channels • Patented InfiniMount Bracket System for maximum installation flexibility •... - Page 4 ◄ Table of Contents PRECAUTIONS PLEASE OBSERVE THESE PRECAUTIONS WHEN OPERATING THIS UNIT: This user’s manual does not cover the installation process. Please review the Installation and Assembly Manual included in your Radio Motor box carefully before attempting installation. Retro Manufacturing, LLC is not liable for any problems resulting from improper installation of the unit.
- Page 5 SHOP SPEAKERS Amps & Subs RetroSound® amplifiers and subwoofers are designed to work seamless- ly with RetroSound® radios to fill in the low frequencies usually missing from a classic vehicle’s sound system. SHOP AMPS & SUBS Speaker Pods RetroPod®...
- Page 6 2 Left-Rear Knob Right-Rear Knob 4 IMPORTANT: Control Setup & Reset By default, RetroSound® Radio Motors are configured to function with the standard Radio Faces listed above. Some Radio Faces, like the Redondo- RT, require a different control mode. If you have mistakenly changed your Radio Motor to use a Radio Face that you do not have, follow the steps below to reboot and change control modes.
- Page 7 Radio Operation Instructions Power On/Off Press the Left-Front Knob(1) to turn the unit on. RETROSOUND will appear on the screen. Press and hold the Left-Front Knob(1) to turn the unit off. GOODBYE will appear on the screen to confirm that it has turned off.
-
Page 8: System Settings
◄ Table of Contents System Settings System Settings The System Settings sub-menu enables access to the numerous addi- tional features of your RetroSound radio. Press and hold the Right-Front ® Knob(3) for three seconds to access the sub-menu. Then rotate the Right- Front Knob(3) to cycle through the available sub-menu options. - Page 9 ◄ Table of Contents System Settings screen, then press the Right-Front Knob(3) to select. To adjust the hours, rotate the Right-Front Knob(3) clockwise or counter-clockwise. Adjusting past 12 will change between AM and PM. Once the hour is set, press the Right-Front Knob(3) to select the minutes.
- Page 10 ◄ Table of Contents System Settings screen. Press and release the Right-Front Knob(3) to select the desired option. Once the desired setting is shown, let the unit time out to set. Dimmer High/Low This sub-menu sets the radio’s display brightness to high (DIMM HIGH), medium (DIMM MEDIUM), or low (DIMM LOW).
-
Page 11: Bluetooth ® On/Off
Right-Front Knob(3) for three seconds. Rotate the Right-Front Knob(3) until BT CONNEC/DISCON appears on the screen. To connect a device, press and release the Right-Front Knob(3) to select BT CONNEC, then search for “RETROSOUND” in your phone’s Bluetooth device list. Enter ®... - Page 12 ◄ Table of Contents System Settings Area USA/EUR/AUS/JAP/RUS This sub-menu allows you to set your area to receive the appropriate broadcasts for your region. The default setting is the United States (USA). To access the AREA sub-menu, press and hold the Right-Front Knob(3) for three seconds.
- Page 13 PANEL mode. Turn the ignition off and wait 30 seconds. Turn the ignition on; once the radio boots up and RETROSOUND scrolls across the screen, press and hold the radio’s power button for approximately 15 seconds to reboot the radio into SEL PANEL mode. See the list below for the appropriate power button for your radio type.
- Page 14 ◄ Table of Contents System Settings NOTE: If using one of the preset DSP settings, any manual adjustments to Mid, Bass, or Treble will not save when the radio is powered off. Bass This sub-menu adjusts the radio’s bass levels. To access the BASS sub-menu, press and release the Left-Front Knob(1) until BASS appears on the screen.
- Page 15 ◄ Table of Contents System Settings low frequencies resulting in enhanced bass tones. To access the XBAS sub-menu, press and release the Left-Front Knob(1) until XBAS appears on the screen. Rotate the Left-Front Knob(1) clock- wise or counter-clockwise to select the desired option. Once the desired setting is shown, let the unit time out to set.
-
Page 16: Bluetooth Controls
◄ Table of Contents Bluetooth® Device Instructions Bluetooth ® When using a Bluetooth device for the first time, you must enable Blue- ® tooth and pair the device with the unit (see page 10). Be sure your phone ® is conncected for both calls and audio and that your microphone is en- abled. -
Page 17: Troubleshooting
◄ Table of Contents Troubleshooting Problem Possible Cause Action to Solve Problem Constant +12V Check all connections for (yellow) wire not proper voltage with a volt connected or incor- meter. Voltage range: 12- rect voltage 15 volts +12V ignition/ac- Check +12V Radio will cessory (red) wire accessory (red) wire... -
Page 18: Frequently Asked Questions
No, you cannot. Your factory antenna is known as “semi-automatic.” It requires a switch to either extend or retract the antenna. You must retain this switch to control your antenna; the RetroSound radio’s power ® antenna wire is for more modern “fully-automatic” antennas not requiring a separate switch. - Page 19 Will cutting or bending the InfiniMount Brackets void the warranty or harm the unit? No. The RetroSound patented InfiniMount Bracket system has been ® designed specifically to be bent, cut and modified to simplify radio installation.
-
Page 20: Specifications
◄ Table of Contents Specifications Tuning Range (USA/EUR/AUS/JAP/RUS tuning) wih RDS ....87.5-107.9MHz Antenna Terminal ............External Antenna Connector Usable Sensitivity ..................12.5dBf Selectivity ..................75 dB @400kHz Signal to Noise Ratio ..........62dB (Stereo), 67dB (Mono) Harmonic Distortion @ 1 kHz ........0.8% (Stereo), 0.5% (Mono) Separation ..................32dB @1kHz Frequency Response .................30-16,000Hz Tuning Range (USA/EUR/AUS/JAP/RUS tuning) ...... -
Page 21: Warranty
ITEM ITEM WARRANTY WARRANTY Motor 1B One (1) Year During the "Parts" warranty period, there will be no charge for parts. You must mail in your unit during the warranty period at your expense. This warranty only applies to products purchased directly from Retro Manufacturing or an authorized dealer. - Page 22 ◄ Table of Contents Purchase Notes Record the place and date of purchase for future reference. Model No. Serial No. Purchase Date Purchased From Keep this information and your sales receipt in a safe place. www.retromanufacturing.com...
- Page 23 ◄ Table of Contents tech@retromanufacturing.com...
- Page 24 7470 Commercial Way | Henderson, NV 89011 help.retromanufacturing.com MODERN SOUND FOR YOUR CLASSIC RETROMANUFACTURING Published: 09/22/23 | ©2021 Retro Manufacturing, LLC www.retromanufacturing.co m...
Need help?
Do you have a question about the MOTOR 1B and is the answer not in the manual?
Questions and answers