Table of Contents
Advertisement
Advertisement
Table of Contents
Troubleshooting

Related Manuals for RetroSound Grand Prix


Summary of Contents for RetroSound Grand Prix
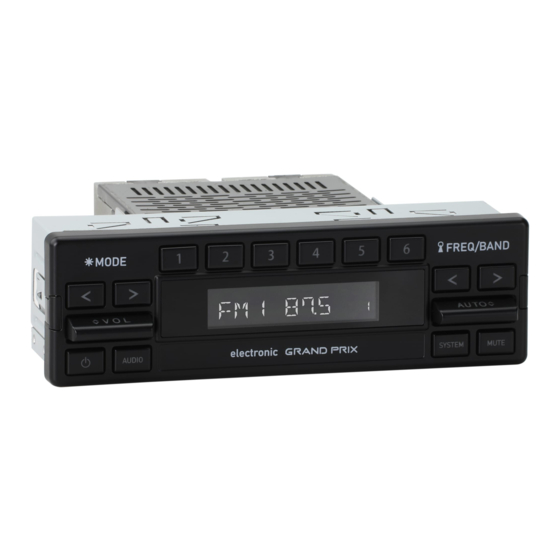
- Page 1 User Manual AVAILABLE WITH & MODERN SOUND FOR YOUR CLASSIC...
-
Page 2: Table Of Contents
TABLE OF CONTENTS General Features ........2 Precautions .........3 Accessories .........4 Radio Operation Instructions ......5 System Settings ........7 USB Device Operation Instructions ....16 Bluetooth® Device Operation Instructions .....17 HD Radio™ Instructions ......18 SiriusXM® Instructions ......19 SiriusXM® Troubleshooting ......23 DAB+ Information ........24 Troubleshooting ........25 Frequently Asked Questions ......26 Specifications ........28... -
Page 3: General Features
General Features General Features (available features vary by model) • AM/FM tuner with 30 presets and RDS (Radio Data System) • DAB+ tuner with 30 presets (available on export models) • HD Radio™ receiver (Motor 4HD Only) • Selectable international tuner frequencies •... -
Page 4: Precautions
PRECAUTIONS PLEASE OBSERVE THESE PRECAUTIONS WHEN OPERATING THIS UNIT: This user’s manual does not cover the installation process. Please review the Installation and Assembly Manual included in your Radio Motor box carefully before attempting installation. Retro Manufacturing, LLC is not liable for any problems resulting from improper installation of the unit. -
Page 5: Accessories
SHOP SPEAKERS Amps & Subs RetroSound® amplifiers and subwoofers are designed to work seamlessly with RetroSound® radios to fill in the low frequencies usually missing from a classic vehicle’s sound system. SHOP AMPS & SUBS Speaker Pods RetroPod®... -
Page 6: Radio Operation Instructions
SEL PANEL mode. Once SEL PANEL is displayed release the Power Button(1) and tap the Volume Paddle(6) up until GRAND PRIX is displayed on the screen. The display will flash GRAND PRIX 5 times and will turn off. Your Radio Motor is now configured to work with your selected Radio Face. - Page 7 Radio Operation Instructions Volume Tap the Volume Paddle(6) up or down to adjust the volume between 0-46 (minimum-maximum). Mode(available sources vary by model) Press the inner Left Arrow(8) to select from available listening sources: RADIO(AM/FM/HD), DAB, AUX 1, AUX 2, USB 1, USB 2, BT Audio, or SiriusXM®.
-
Page 8: System Settings
System Settings The System Settings sub-menu enables access to the numerous additional features of your RetroSound® radio. Press and hold the System Button(3) for three seconds to access the sub-menu. Then tap the Auto Paddle(7) up or down to cycle through the available sub-menu options. Once in a specific sub-menu, press and release the System Button(3) to change the options. - Page 9 System Settings Adjusting past 12 will change between AM and PM. Once the hour is set, press the System Button(3) to accept and move on to the minutes. Immediately tap the Auto Paddle(7) up or down to adjust the minutes. Once the desired time is shown let the unit time out to set.
- Page 10 System Settings Display Color (available on select models) This sub-menu changes the display color. The default setting is SCAN, which will cycle through all of the available colors. To access the display color sub-menu, press and hold the System Button(3) for three seconds.
- Page 11 System Settings Program Type (available when RDS is ON) This sub-menu allows you to select from 31 predefined program types (i.e. News, Info, Sports). Once set, you will be able to use PTY SEEK to find similar stations to your selected program type. To access the PTY sub-menu, press and hold the System Button(3) for three seconds.
- Page 12 BT CONNEC/DISCON appears on the screen. To connect a device, press and release the System Button(3) to select BT CONNEC, then search for “RETROSOUND” in your phone’s Bluetooth® device list. Enter password “0000” if prompted. To disconnect a device, press and release the System Button(3) to select BT DISCON, then let the unit time out to disconnect the current device.
- Page 13 System Settings VAL is shown) and press the System Button(3) to accept. Tap the Auto Paddle(7) up or down to adjust the level between 0-46. Once the desired setting is shown, let the unit time out to set. SEL Panel This sub-menu changes the operating mode for specific Radio Faces.
- Page 14 System Settings suitable for popular music. • ROCK: This setting accentuates treble frequencies and is suitable for rock music. To access the DSP sub-menu, press the Audio Button(2), DSP OFF will be displayed. Tap the Volume Paddle(6) up or down to select from the available presets.
- Page 15 System Settings Fader This sub-menu adjusts the radio’s fader from front to back. To access the FADER sub-menu, press and release the Audio Button(2) until FADER appears on the screen. Tap the Volume Paddle(6) up or down to select the desired level. Once the desired setting is shown, let the unit time out to set.
- Page 16 System Settings Bass Frequency This sub-menu adjusts the bass tones’ frequency crossover point be- tween 60Hz, 80Hz, 100Hz, or 200Hz. To access the BAS sub-menu, press and release the Audio Button(2)until BAS 80H appears on the screen. Tap the Volume Paddle(6) up or down to select the desired setting.
-
Page 17: Usb Device Operation Instructions
USB Device Operation USB Device Operation The Preset Buttons(5) will enable you to play/pause, listen to 10 seconds of each song (INTRO), randomly shuffle all songs (RDM), and navigate folders. USB Playback Right Arrows 9 5 Preset Buttons Play/Pause Intro Shuffle Pre Folder Next Folder... -
Page 18: Bluetooth® Device Operation Instructions
When using a Bluetooth® device for the first time, you must enable Bluetooth® and pair the device with the unit. With your radio on the unit is ready to pair, look for "RETROSOUND" in your Bluetooth® device list and enter "00000" if prompted for a password. (see page 11) Making a Call To make a call, dial the desired number on the paired cell phone. -
Page 19: Hd Radio™ Instructions
HD Radio™ Receiver Instructions (HD Radio Technology is available on the Motor 4HD only.) HD On/Off This sub-menu activates HD Radio™ technology which will automatically tune to an HD Radio station when available. The HD Radio option is set to "On" by default. To access the HD sub-menu, press and hold the System Button(3) for three seconds. -
Page 20: Siriusxm® Instructions
SiriusXM® Instructions SiriusXM® Satellite Radio (Motor 4HD only) A SiriusXM® Connect Vehicle Tuner, antenna, and SiriusXM® subscrip- tion are required to use the satellite radio functionality. For more informa- tion on SiriusXM®, please visit www.SiriusXM.com. Installation Check After installing your SiriusXM® Connect Vehicle Tuner and antenna, check that your installation was successful by tuning to the preview chan- nel. - Page 21 SiriusXM® Instructions SiriusXM® Tuning Tap the Auto Paddle(7) up or down to change channels. SiriusXM® Preset Bands You can store five SiriusXM® channels in three bands for a total of 15 presets. To cycle between the SiriusXM® bands, press the outer Right Arrow(9). Storing/Recalling SiriusXM®...
- Page 22 SiriusXM® Instructions Display Settings Each SiriusXM® channel will broadcast text information such as the chan- nel name, artist, song title, and content. To cycle through the display in- formation, press the outer Left Arrow(8) . Each time the button is pressed, the display will change as follows: Channel>Artist>Title>Info>Category>- Time>Station.
- Page 23 SiriusXM® Instructions To access the sub-menu system, press the inner Right Arrow(9) once. Tap the Auto Paddle(7) up or down until you see DIRECT on the screen. Press the System Button(3) to enter the first channel number. Tap the Auto Paddle(7) up or down to set the value of the first number, then press the System Button(3) to accept and move to the next number.
-
Page 24: Siriusxm® Troubleshooting
SiriusXM® Troubleshooting If your SiriusXM® Connect Vehicle Tuner does not appear to be functioning properly, and one of these advisory messages appears on the display, try some of these troubleshooting tips. CHK TNR (check tuner) This message indicates an issue with your SiriusXM® Connect Vehicle Tuner. •... -
Page 25: Dab+ Information
It has a DAB antenna output that plugs into the DAB input on the radio, as well as a standard antenna output for AM/FM stations. The DAB1 adapter can be used with all RetroSound DAB series radios or any after-market radio that has a DAB/DAB+ tuner. -
Page 26: Troubleshooting
Troubleshooting Problem Possible Cause Action to Solve Problem Constant +12V Check all connections for (yellow) wire not proper voltage with a volt connected or incor- meter. Voltage range: 12- rect voltage 15 volts +12V ignition/ac- Check +12V Radio will cessory (red) wire accessory (red) wire not turn on not connected or... -
Page 27: Frequently Asked Questions
I’m having problems getting the radio to turn on. RetroSound® radios require 12 volts to both power leads. The red lead (+12 volt accessory) goes to a switched power source, and the yellow to a constant +12 volt power source. Using a volt meter, check the voltage when the key is turned from “off”... - Page 28 Will cutting or bending the InfiniMount Brackets void the warranty or harm the unit? No. The RetroSound® patented InfiniMount Bracket system has been designed specifically to be bent, cut and modified to simplify radio installation. Modifying the radio’s brackets is actually encouraged to ensure proper fit.
-
Page 29: Specifications
Specifications Tuning Range (USA/EUR/AUS/JAP/RUS tuning) wih RDS ....87.5-107.9MHz Antenna Terminal ............External Antenna Connector Usable Sensitivity ..................12.5dBf Selectivity ..................75 dB @400kHz Signal to Noise Ratio ..........62dB (Stereo), 67dB (Mono) Harmonic Distortion @ 1 kHz ........0.8% (Stereo), 0.5% (Mono) Separation ..................32dB @1kHz Frequency Response .................30-16,000Hz Tuning Range (USA/EUR/AUS/JAP/RUS tuning) ...... -
Page 30: Warranty
Warranty Your unit comes with a manufacturer's warranty covering any defects in materials and workmanship. Retro Manufacturing, LLC (collectively referred to as "the warranter"), at its option, will either (a) repair your unit with new or refurbished parts or (b) replace it with a new or refurbished unit. -
Page 31: Declaration Of Conformity
Declaration of Conformity: Motor 1DAB, Motor 2DAB, Motor 6 Manufacturer: Retro Manufacturing, LLC 7470 Commercial Way Henderson, NV 89011 U.S.A. www.retromanufacturing.com For more information visit www.retromanufacturing.com/pages/declaration-of-conformity tech@retromanufacturing.com... - Page 32 7470 Commercial Way | Henderson, NV 89011 help.retromanufacturing.com MODERN SOUND FOR YOUR CLASSIC RETROMANUFACTURING Published: 02/15/22 | © 2022 Retro Manufacturing, LLC www.retromanufacturing.co m...
Need help?
Do you have a question about the Grand Prix and is the answer not in the manual?
Questions and answers