Table of Contents
Advertisement
Advertisement
Table of Contents

Related Manuals for RetroSound Retro Classic


Summary of Contents for RetroSound Retro Classic
- Page 1 USER’S MANUAL MOD E RN SOUN D FOR YOUR CLASSIC...
-
Page 2: Table Of Contents
TABLE OF CONTENTS WELCOME WHAT’S IN THE BOX PRECAUTIONS INSTALLATION INSTRUCTIONS WIRING DIAGRAM OPERATING YOUR RADIO SYSTEM SETTINGS TONE CONTROLS TROUBLESHOOTING FREQUENTLY ASKED QUESTIONS SPECIFICATIONS LIMITED WARRANTY REPLACEMENT PARTS Copyright 2015 Retro Manufacturing, LLC... -
Page 3: Welcome
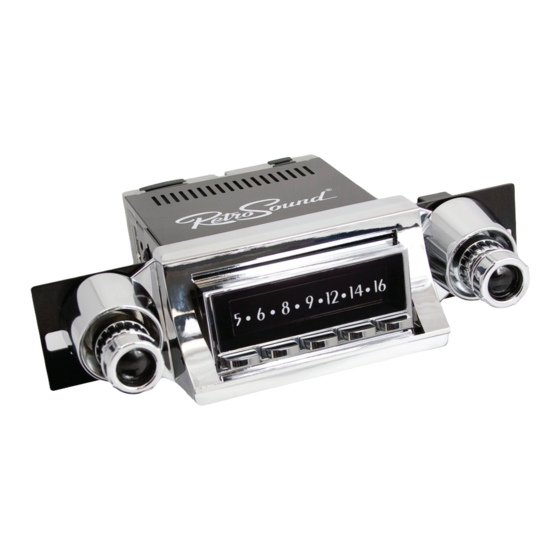
WELCOME Retro Classic combines classic styling with the advanced features you expect from a modern car stereo. General Features • AM/FM tuner with 30 presets (12 AM and 18 FM) • Selectable USA/EU/JAP/AUS/RUS tuner frequencies • Built-in amplifier (18 watts RMS/40 watts peak x 4 channels) •... -
Page 4: What's In The Box
WHAT’S IN THE BOX Wiring Power and Speaker Wiring Harnesses Main Wiring Harness (both plug into Main Wiring Harness) (plugs into back of radio) Hardware Metal Mounting Back Strap Plastic Washer Kit Shaft/Bracket and Hardware Mounting Hardware InfiniMount System InfiniMount Shafts InfiniMount Brackets Shaft Covers Copyright 2015 Retro Manufacturing, LLC... - Page 5 Your radio is supplied with a package of our vintage radio dial screen protectors. These may be placed on the display face of the radio to mimic a vintage radio dial, providing an added level of authenticity for your RetroSound radio. These screen protectors ®...
-
Page 6: Precautions
If you feel you can’t install this unit yourself, please take it to a local car audio professional. If you have questions about installing your radio, contact us at support@retrosound.com or call us at 702.483.2222. • Do not disassemble or modify the unit or attempt to repair the unit yourself. - Page 7 PRECAUTIONS • Refer wiring and installation to qualified service personnel. Installation of this unit requires special skills and experience. For maximum safety, have it installed by your dealer or qualified service professional. Retro Manufacturing is not liable for any problems resulting from installation of the unit. Please be sure to follow the instructions carefully before attempting installation.
- Page 8 PRECAUTIONS • Never splice into the power lead to supply other equipment with power. • After installation and wiring you should check the normal operation of other electrical equipment. • Make sure any leads do not interfere with driving or getting into and out of the vehicle. •...
-
Page 9: Installation Instructions
NOTE: Adjusting for a perfect fit into your dash is the most difficult portion of the installation. Patience and persistence are the keys. If you have problems, please contact us at support@retrosound.com or call us at 702-483-2222. The patented InfiniMount adjustable shaft system offers almost unlimited installation options to accommodate your needs. - Page 10 INSTALLATION INSTRUCTIONS STEP 2: MOUNT SHAFTS TO BRACKETS To match the InfiniMount shaft and bracket system to the proper shaft width of your vehicle’s dash, first measure the distance between your existing shaft holes from center to center. Mount a shaft to each bracket using the supplied shaft nuts and washers.
-
Page 11: Wiring Diagram
INSTALLATION INSTRUCTIONS STEP 3: COMPLETE WIRING CONNECTIONS Figure 4 - Wiring Diagram NOTE: Cutting the wiring harness, antenna lead or auxiliary cable will void the warranty of your radio. Copyright 2015 Retro Manufacturing, LLC... - Page 12 INSTALLATION INSTRUCTIONS NOTE: This unit requires +12V to both the red and yellow wires, otherwise it will not operate. If you have questions visit our website at www.retrosound.com or email us at support@retrosound.com. Locate the three wire harnesses: Main Wire Harness, Power Wire Harness and Speaker Wire Harness (see “What’s in the Box”...
- Page 13 Retro Classic is a universal radio solution designed to ® fit most classic vehicles. The display face of the Retro Classic measures 3.5 inches wide by 1.5 inches high, which will be smaller than the original radio opening in most vehicles. RetroSound manufactures ®...
- Page 14 INSTALLATION INSTRUCTIONS Figure 5 Figure 6 Bezel Faceplate STEP 5: INSTALL KNOBS Once your radio is installed, follow the steps below to ensure a proper knob fit. The included shaft covers may be used to cover up excess shaft metal during your installation. They can be cut to any length to conceal the shaft and make the install look more professional (see Figure 7).
-
Page 15: Operating Your Radio
OPERATING YOUR RADIO Front Panel Controls Figure 9 - Front Panel Controls 1. Front Left Knob 2. Rear Left Knob 3. AM/FM Pre-Sets 4. AM/FM Pre-Sets 5. AM/FM Pre-Sets 6. AM/FM Pre-Sets Figure 10 - Left Shaft with Knobs 7. AM/FM Pre-Sets 8. - Page 16 Press the left front knob (#1) to turn the unit on. will appear on the screen. RETROSOUND Press and hold the left front knob (#1) to turn the unit off. will appear on the screen to confirm that it has turned off.
-
Page 17: System Settings
Press the right front knob (#8) to activate the mute function. SYSTEM SETTINGS The System Settings sub-menu system enables access to the numerous additional features of your RetroSound Retro Classic ® radio. Press and hold the right front knob (#8) for three seconds to access the sub-menu system. - Page 18 OPERATING YOUR RADIO 2) A Store This sub-menu will automatically fill FM pre-sets on all three FM bands of six pre-sets each (eighteen total pre-sets) with the strongest stations. To activate this feature, press and hold the right front knob (#1) until appears on the screen, then press the A STORE left front knob to activate.
- Page 19 DIMM HIGH DIMM LOW 9) Area USA/EUR/AUS/JAP/RUS The RetroSound Retro Classic has the capability to receive radio ® broadcasts from around the world. This sub-menu allows you to adjust to broadcasts in your county. Factory default setting is United States ( ).
-
Page 20: Tone Controls
OPERATING YOUR RADIO TONE CONTROLS This sub-menu enables adjustments to bass and treble tone controls, balance and fader controls and the three pre-set equalizer options. To access the this sub-menu, press the left front knob (#1). Repeatedly press the left front knob to scroll through the available options. - Page 21 OPERATING YOUR RADIO 4) Balance This sub-menu ( ) allows adjustment of stereo sound to left or right. This may be helpful in compensating for the position of the driver in relation to the vehicle’s speakers. Adjustment range is from 0-12 between left and right speakers. 5) Fader This sub-menu ( ) allows you to adjust the sound between the...
-
Page 22: Troubleshooting
TROUBLESHOOTING Problem Possible Cause Action to Solve Problem Radio will not turn 12 volt Batt+ wire Check all connections for on (no lights, not connected proper voltage with a volt no sound) or incorrect voltage meter. Voltage range: 12-15 volts Check +12 volt +12 volt accessory wire not accessory wire... -
Page 23: Frequently Asked Questions
8 amps of continuous output. I’m having problems getting the radio to turn on. RetroSound radios require 12 volts to both power leads. The red ® lead (+12V accessory) goes to a switched power source, and the yellow to a constant 12 volt (+12V) power source. - Page 24 If you have questions about modifying the bracket system, contact us at support@retrosound.com or call us at 702.483.2222. How much should I tighten the shaft nuts when installing the brackets and mounting the radio to the dash? DO NOT OVERTIGHTEN the shaft nuts.
- Page 25 FREQUENTLY ASKED QUESTIONS I have your radio with an amp connected, but hear a whining/buzzing sound through the speakers when I step on the accelerator. If you have an external amplifier installed and experience a high- pitched noise that varies with the engine’s RPM, there are many possible solutions: •...
-
Page 26: Specifications
SPECIFICATIONS Tuning Range (US, EU, AU, JA, RU tuning capable) 87.5-107.9MHz Antenna Terminal External Antenna Connector Usable Sensitivity 12.5 dBf Selectivity 75 dB @ 400kHz Signal to Noise Ratio 62 dB (Stereo), 67 dB (Mono) Harmonic Distortion @ 1 kHz 0.8% (Stereo), 0.5% (Mono) Separation 32 dB @ 1kHz... -
Page 27: Limited Warranty
A purchase receipt or other proof of the original purchase date is required for warranty service. To handle a warranty issue, contact us at support@retrosound.com or 702.483.2222 for a Return Authorization number. All returns and warranty issues must be accompanied by a Return Authorization (RA) number. -
Page 28: Replacement Parts
REPLACEMENT PARTS If you need replacement parts, contact us at support@retrosound.com or call 702.483.2222 (See “What’s in the Box” on page 3 to confirm the part(s) needed). Please email support@retrosound.com for more information. NOTE: If you return a radio to us for credit, any missing parts will be debited. - Page 29 INSTALLATION NOTES Copyright 2015 Retro Manufacturing, LLC...
- Page 30 MODERN SOUND FOR YOUR CLASSIC Retro Manufacturing, LLC, 7390 Eastgate Road, Suite 140 Henderson, NV 89011 p) 702.483.2222 | f) 702.483.2229 | www.retrosound.com Copyright 2015 Retro Manufacturing, LLC...
Need help?
Do you have a question about the Retro Classic and is the answer not in the manual?
Questions and answers