
Subscribe to Our Youtube Channel
Related Manuals for RetroSound Motor 1A


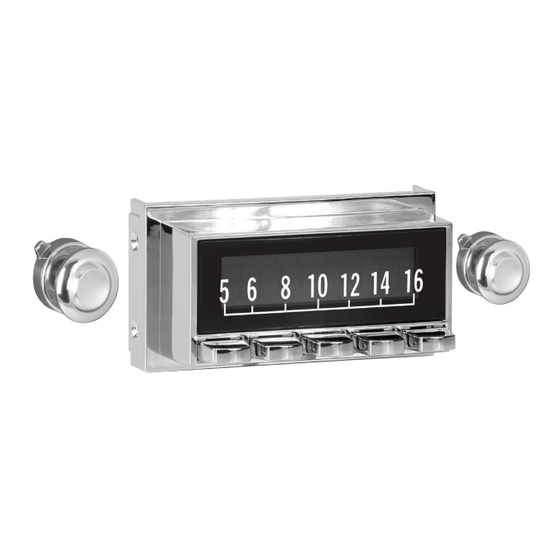
Summary of Contents for RetroSound Motor 1A
- Page 1 User’s Manual For Serial#’s MOT1AA-0820-00001 MOT1AA-0820-02010 MODERN SOUND FOR YOUR CLASSIC...
-
Page 2: Table Of Contents
TABLE OF CONTENTS General Features ........2 What’s In The Box ........3 Precautions .........5 Installation Instructions ......7 Attaching the Radio Face ......8 Attaching the InfiniMount Brackets ....9 Installing the Control Shafts ....10 Wiring the Radio ........12 Using a Bezel ........13 Using a Faceplate ........14 Attaching the Backstrap ......15 Operating the Radio .........17 System Settings ........19... -
Page 3: General Features
• OEM styling • InfiniMount bracket and control shaft system for maximum instal- lation flexibility • Compatible with all RetroSound® vehicle specific bezels, face- plates and knob kits • Rear auxiliary input • Separate power antenna and amplifier turn-on lead(s) -
Page 4: What's In The Box
Thank you for purchasing a RetroSound® radio. RetroSound® radios combine classic styling with the advanced features you expect from a modern car stereo. Your RetroSound® radio consists of two main parts: the Radio Face and the Radio Motor. NOTE: All hardware will not be required for every installation. Extra items are included to help you get the right fit for your vehicle. - Page 5 What’s in the box • Main Radio Motor Box SPEAKER OUTPUTS POWER OUTPUTS Radio Motor x(1) InfiniMount Screws x(10) Dual 10 mm Self Thread Tapping Bolt Screw x(1) x(1) Large Washer 6mm Nut x(8) x(4) Left InfiniMount Bracket x(1) Lock Self Washer Tapping...
-
Page 6: Precautions
PRECAUTIONS PLEASE OBSERVE THESE PRECAUTIONS WHEN INSTALLING AND USING THIS UNIT: This user’s manual does not cover all possible installation scenarios. Please be sure to follow the instructions carefully while attempting installation. If you feel you cannot install this unit yourself, consult with a local car audio professional. - Page 7 PRECAUTIONS • Never splice into the power lead to supply other equipment with power. • After installation and wiring, always check the normal operation of other electrical equipment. • Make sure that no wires interfere with driving or getting in and out of the vehicle.
-
Page 8: Installation Instructions
Installation Instructions Parts Needed Radio Face x(1) Radio Motor x(1) Small Screws x(4) Step #1 Connect ribbon cable to the Radio Face. Plug the ribbon cable from the Radio Motor(F) into the Radio Face(A). The ribbon cable is attached to the Radio Motor in the square opening on the front of the Radio Motor. -
Page 9: Attaching The Radio Face
Attaching the Radio Face Step #2 Attach the Radio Face. Before attaching the Radio Face ensure the RetroSound® logo on the Radio Motor is facing upwards. Attach the Radio Face to the Radio Motor with the four Small Screws(E). Special Instructions for... -
Page 10: Attaching The Infinimount Brackets
Attach both InfiniMount Brackets(M,N) to Radio Motor using the supplied InfiniMount Screws(K) (the brackets are marked with an “L” for left and an “R” for right). Make sure the RetroSound® logo on the Radio Motor is facing upwards. Before tightening the screws, you may also move the brackets forward, backward, up, or down as needed. -
Page 11: Installing The Control Shafts
Installing the Control Shafts Parts Needed Control Shafts x(2) Shaft Nuts x(4) Shaft Washers x(4) Step #4 Measure & Set Shaft Width Measure vehicle dash for proper width (shaft hole center to center) and offset of the shafts (some vehicle shaft locations may be offset from the radio display). - Page 12 Installing the Control Shafts Step #5 Set Control Shaft Depth Insert the Control Shafts into InfiniMount Brackets, add a Shaft Nut(C), and Shaft Washer(D) to each shaft. To start, bring the shafts forward until the brass portion is about a quarter-inch past the display face. Adjust the depth of the shafts as needed by moving the shaft nuts forward or backward.
-
Page 13: Wiring The Radio
Wiring the Radio Parts Needed POWER OUTPUTS SPEAKER OUTPUTS Speaker Harness x(1) Power Harness x(1) Refer to the wiring diagram included in your Radio Motor box or on our web- site. Main Wiring Harness x(1) Step #6 Connect the Wiring Harness Locate the three wiring harnesses: Main Wiring Harness(G), Speaker Harness(H), and Power Harness(I) from your Radio Motor box. -
Page 14: Using A Bezel
Using a Bezel Optional: Install the Bezel If you are using a Bezel, slide the Bezel over the Radio Face BEFORE inserting the assembled radio into the dash. To achieve a proper fit, you may need to use the Cupped Plastic Spacers(X) in front of the dash, before the final nuts and washers are applied. -
Page 15: Using A Faceplate
Using a Faceplate Optional: Install the Faceplate Optional Spacer If you are using a Faceplate, slide the radio into the opening from behind the dash BEFORE adding the Faceplate. To achieve a proper fit, you may need to use the Large Plastic Spacers(W). If using the spacers, place them on the shafts behind the dash. -
Page 16: Attaching The Backstrap
Attaching the Backstrap Parts Needed Q Lock Washer x(1) U Backstrap x(1) O Dual Thread Bolt P 10 mm Self Tapping S 7 mm NUT x(1) x(1) Screw x(1) Step #7 Attach the Backstrap Before attaching the backstrap, connect both the Speaker Harness(H) and Power Harness(I) to the female plug of the Main Wiring Harness(G). - Page 17 Completing the Installation Parts Needed Shaft Nuts x(2) Shaft Washers x(2) Step #8 Complete the Installation Bezel: Once the radio is supported from the rear and set into the dash with the Bezel installed, add a final Shaft Washer(D) and Shaft Nut(C) to each Control Shaft.
-
Page 18: Operating The Radio
Right-Front Knob 4 Power On/Off Press the Left-Front Knob(1) to turn the unit on. RETROSOUND will appear on the screen. Press and hold the Left-Front Knob(1) to turn the unit off. GOODBYE will appear on the screen to confirm that it has turned off. - Page 19 Operating the Radio Radio Tuning Rotate the Right-Front Knob(4) to tune to the next or previous AM/FM frequency. Note: When the radio is tuned to a strong FM station, the stereo indicator will appear in the upper right corner of the LCD (two oval circles). Radio Bands Rotate the Right-Rear Knob(5) counter-clockwise to toggle through the five radio bands (two AM and three FM).
-
Page 20: System Settings
System Settings The System Settings sub-menu system enables access to the numerous additional features of your RetroSound® radio. Press and hold the Right- Front Knob(4) for three seconds to access the sub-menu system. Then repeatedly press the Right-Front Knob(4) to cycle through the available sub-menu options. - Page 21 System Settings Clock 12/24 This sub-menu toggles the clock from a twelve hour clock to a twenty-four hour clock. The default setting is for a twelve hour clock CLK 12. To access the CLK 12/24 sub-menu, press and hold the Right-Front Knob(4) for three seconds.
- Page 22 System Settings Dimmer High/Low This sub-menu adjusts the radio’s display brightness between high (DIMM HIGH) and low (DIMM LOW). To access the DIMMER sub-menu, press and hold the Right-Front Knob(4) for three seconds. Repeatedly press the Right-Front Knob(4) until DIMMER appears on the screen. Rotate the Right-Front Knob(4) clockwise or counter-clockwise to select the desired option.
- Page 23 System Settings • ROCK This setting accentuates treble frequencies and is suitable for rock music. To access the DSP sub-menu, press the Left-Front Knob(1) once, DSP OFF will be displayed. Rotate the Left-Front Knob(1) clockwise or count- er-clockwise to select from the available pre-sets. Once the desired set- ting is shown, let the unit time out to set.
-
Page 24: Troubleshooting
Troubleshooting Problem Possible Cause Action to Solve Problem Constant +12V Check all connections for (yellow) wire not proper voltage with a volt connected or incor- meter. Voltage range: 12- rect voltage 15 volts +12V ignition/ac- Check +12V Radio will cessory (red) wire accessory (red) wire not turn on not connected or... -
Page 25: Frequently Asked Questions
I’m having problems getting the radio to turn on. RetroSound® radios require 12 volts to both power leads. The red lead (+12 volt accessory) goes to a switched power source, and the yellow to a constant +12 volt power source. Using a volt meter, check the voltage when the key is turned from “off”... - Page 26 Will cutting or bending the InfiniMount Brackets void the warranty or harm the unit? No. The RetroSound® patented InfiniMount Bracket system has been designed specifically to be bent, cut and modified to simplify radio installation. Modifying the radio’s brackets is actually encouraged to ensure proper fit.
-
Page 27: Specifications
Specifications Tuning Range (USA, EUR, AUS, JAP, RUS tuning capable) ..87.5-107.9MHz Antenna Terminal ............External Antenna Connector Usable Sensitivity ..................12.5dBf Selectivity ..................75 dB @400kHz Signal to Noise Ratio ..........62dB (Stereo), 67dB (Mono) Harmonic Distortion @ 1 kHz ........0.8% (Stereo), 0.5% (Mono) Separation ..................32dB @1kHz Frequency Response .................30-16,000Hz Tuning Range (USA, EUR, AUS, JAP, RUS tuning capable) .... -
Page 28: Warranty
ITEM ITEM WARRANTY WARRANTY Motor 1A Radio One (1) Year During the “Parts” warranty period, there will be no charge for parts. You must mail in your unit during the warranty period. This warranty only applies to products purchased and serviced in the United States or Puerto Rico. This warranty is extended only to the original purchaser of a new product which was not sold “as is.”... -
Page 29: Purchase Notes
Purchase Notes Record the place and date of purchase for future reference. Model No. Serial No. Purchase Date Purchased From Keep this information and your sales receipt in a safe place. 7470 Commercial Way, Henderson, NV 89011 Phone: 888.325.1555 • Fax: 702.483.2229 ©... - Page 30 7470 Commercial Way | Henderson, NV 89011 Phone: 888.325.1555 • Fax: 702.483.2229 MODERN SOUND FOR YOUR CLASSIC RETROMANUFACTURING www.retromanufacturing.co m...
Need help?
Do you have a question about the Motor 1A and is the answer not in the manual?
Questions and answers