
Related Manuals for Gintec G20M


Summary of Contents for Gintec G20M
- Page 1 G20M GINTEC G20M GNSS Receiver User Manual Copyright Guangzhou Geosurv Information Technology Co., Ltd *All right reserved...
-
Page 2: Table Of Contents
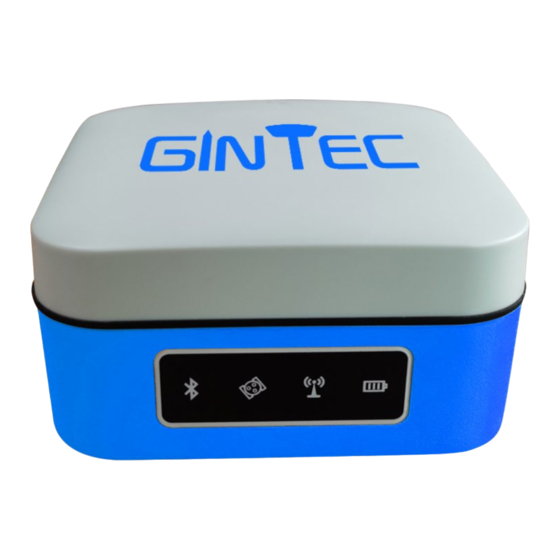
G20M Contents 1 Introduction ....................... 1 1.1 Company Introduction ..................1 1.2 Outstanding Features of G20M ................. 1 2 General Information ..................2 2.1 Outlook of G20M ....................2 2.2 Basic Operation ....................3 2.2.1 Turn on/off ....................3 2.2.2 Charging ....................3 3 Equipment List .................... - Page 3 G20M 6.3 Restore factory settings ................... 18 7 Technical Parameters ..................20...
-
Page 4: Introduction
Integrated with new calibration-free IMU module and based on 4th generation pole-tilt compensation tech, G20M enables points to be measured or staked out even if surveyors tilt the pole while walking. Surveyors could pay more attention to their job at hand and complete work faster. -
Page 5: General Information
Surveyors can charge G20M using portable phone battery anytime and anywhere. Long Life Battery With a built-in large- capacity lithium battery, G20M can last all day without stopping. Smart power button design can indicate battery level even in shutdown status. -
Page 6: Basic Operation
2.2.1 Turn on/off Turn on This is the very first step to use G20M. When the receiver has power, keep pressing power button for 3 seconds, then you will see the power button light up and hear beep. Turn off Keep pressing power button for 3 seconds, then you will hear beep voice and the device will be turned off. -
Page 7: Equipment List
3 Equipment Packing List... -
Page 8: Setting Up
4 Setting Up 4.1 Setting Up Base Station 4.1.1 Choose a suitable place A suitable place is essential for base station to better receive the satellites and transmit the UHF signals. A suitable position should comply with following conditions: (1) Choose a wide-open area in order to easy and better receive signal of satellites. Besides, make sure there is no covering like roof or heavy foliage. - Page 9 running through the centers of the two leveling screw being adjusted. Figure 4-1 b. Turn the leveling screw C to move the bubble to the center of the circular vial. Figure 4-2 (4) Precisely leveling by using the plate vial a.
-
Page 10: Measure Antenna Height
4.1.3 Measure antenna height The antenna height must be measured when we use G20M to collect static data or use it as base station. It’s the “a” show in below Figure 4-5, the height from ground measured point to phase center, only get this height can we know coordinate of the ground measured point. -
Page 11: Transmit Signal Through Network
Bluetooth as you prefer. Via Bluetooth Use controller to search the Bluetooth signal of G20M, once found, the Serial NO. of G20M will show on controller, then select it to finish connect. 4.2.2 Rover network mode Insert SIM card on rover, then select network mode on controller or via WEB UI function. -
Page 12: Static Surveying
2 points. Static surveying provides the highest accuracy achievable and requires the longest observation times, from less than an hour to five hours or longer. The static surveying function in G20M including outdoor surveying and indoor data post processing. -
Page 13: Outdoor Surveying
If there are too many points in one baseline network, you should connect these synchronous cycles together and form the asynchronous pattern. Asynchronous pattern can be connected via three ways as shown in Figure 4-10: (a) Point connecting. Point connecting network is defined as a figure by connecting two adjacent shapes by only one common point. - Page 14 Figure 4-11. Figure 4-11...
-
Page 15: Download Data
5 WEB UI Control 5.1 Connect and register WEB UI G20M can be a Hotspot. You can connect it with phone, controller, PC or other devices through its Wi-Fi. The default Wi-Fi name is device S/N number, no password needed. -
Page 16: Status
In “Status”, you can see current work status of receiver and some basic information. Including Device Info, Mode and GNSS Info. (As shown in Figure 5-1 5.3 Command In “Command” you can reboot/shutdown G20M, reset config (Reset factory settings), clean storage and Register code. Figure 5-2 5.4 Mode Config In “Mode Config”... - Page 17 Base Mode Rover Mode...
-
Page 18: Others Config
Static Mode Figure 5-3 5.5 Others Config In “Other Config”, you can config satellite systems and WIFI. Figure 5-4 5.6 File In “File”, you can delete or download data files. If you want to download static data, choose the correct file and find static file in ch01 then download. -
Page 19: Firmware
Figure 5-5 5.7 Firmware In “Firmware”, you can find the current G20M Version installed and upgrade firmware. Figure 5-6 6 Frequently Use Functions 6.1 Device registration The register code is 16 numbers and letters. For example: G20M034804060, A7EC-AC8B-B904-94F5 G20M034804060 is serial number A7EC-AC8B-B904-94F5 is register code, when you register, there are two ways: via WEB UI or via Controller. - Page 20 Figure 6-1 (2) Register via Controller Connect G20M with controller (via Wi-Fi or Bluetooth). Find SurPad software in controller interface, then click “SurPad”, it shows as Figure 6-2. Click “Device” you can see “Device Register”, click it, then you can see the page to input the code as Figure 6-3.
-
Page 21: Upgrade Firmware
6.2 Upgrade firmware You can upgrade firmware in WEB UI function. In “Firmware”, you can find “Upgrade”. Click it to select new version of firmware. After select the right version, click”Upload file” to finish upgrade. Figure 6-4 6.3 Restore factory settings In WEB UI, “Command”... - Page 22 7 Technical Parameters Channel GPS: L1,L2,L5 GLONASS: L1,L2 BDS: B1,B2,B3 Satellites Galileo: E1,E5A,E5B GNSS QZSS: L1,L2,L5 SBAS: L1 Cold start <40s Signal recapture <1s Horizontal: ±(2.5+1×10⁻⁶D)mm Static Accuracy Vertical: ±(5.0+1×10⁻⁶D)mm DGPS Accuracy Horizontal: 0.4m; Vertical: 0.8m Horizontal: ±(10+1×10⁻⁶D)mm RTK Accuracy Vertical: ±(15+1×10⁻⁶D)mm Time Accuracy 20ns...
- Page 23 Type-C Charge and Data Transmission INTERFACE Other Micro SIM Slot Button Power Button Operation 4 indicators: Satellites, Datalink, Bluetooth, Indicator Power Magnesium alloy main body, ABS/PC top Material cover Physical Dimension 100mm*100mm*61.5mm Weight 555g Work -20℃ ~ +60℃ Temperature Stock -40℃...
- Page 24 G20M Guangzhou Geosurv Information Technology Co., Ltd Add: 1101 E、F, #B, NO.9 CAI PIN RD, Science City, Huang Pu District, Guangzhou China Tel: +86 020 82514956 Fax: +86 020 82274707 Email:overseas@gintec.cn Website: www.gintec.cn...
Need help?
Do you have a question about the G20M and is the answer not in the manual?
Questions and answers
How to setup the gintec g20m in gsm mode