
Related Manuals for MIR Spirotel


Summary of Contents for MIR Spirotel
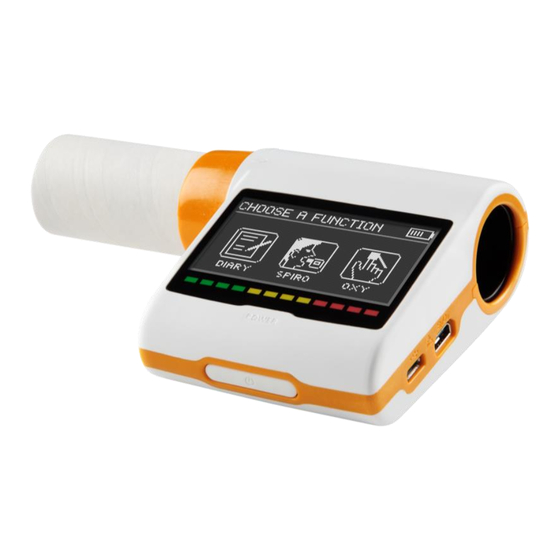
- Page 1 Spirotel ® Service Guide ® Spirotel Service guide Rev. 1.0 Date issued 01.07.2013 Date of approval 28.02.2014 Rev.1.0 Page 1 of 37...
- Page 2 1.2.5. Product evaluation 1.2.6. Additional Information 1.2.7. Installation 1.3. GENERAL 1.3.1. Technical Data 1.3.1.1. New spirotel unit 1.3.1.2. Battery charger 1.4. STANDARDS APPLIED HARDWARE DESCRIPTION ......................... 7 2.1. MAINBOARD MODULE 2.1.1. Charging controller for battery pack (IC7 LTC 4067) 2.1.2.
- Page 3 6.3. The battery pack is not working correctly 6.4. The Bluetooth printer does not print 6.5. The device does not measure spirometry at all 6.6. The device does not measure spirometry correctly 6.7. The device does not measure oximetry at all 6.8.
-
Page 4: Introductory Remarks
The spirometers from the product group MIR043 are marketed under the label new spirotel. This manual has been written for technicians involved in the service of the new spirotel. Service can be carried out by the service organization of the manufacturer or by any other technician authorized by MIR srl. -
Page 5: Additional Information
Product documentation 1.2.3. The documentation set for the new spirotel includes a User Manual. The User Manual is a recommended item for all service engineers. The user manual is available in the following languages: ... -
Page 6: Installation
the slow Vital Capacity test (VC/IVC) the Maximum Voluntary Ventilation test (MVV) New spirotel has been designed and manufactured to ensure the highest level of safety and the unit fully complies with the stringent international EN 60601-1 and EN 60601-1-2 standards. -
Page 7: Battery Charger
Japanese MHLW Ministerial Ordinance 169: 2004 2. HARDWARE DESCRIPTION Because of the modular design of the new spirotel, the description is on a block diagram level. 2.1. MAINBOARD MODULE The mainboard module translates the input signal from the turbine flowmeter into spirometry values and compares them with the predicted values calculated with the parameters age, sex, height, weight and ethnic group. -
Page 8: Room Temperature Sensor
The connector beside the USB ports is used to connect the oximetry sensor, where this function is enabled on the device. Many sensors can be used on new spirotel based on the type of test to be performed and on the patient characteristics. -
Page 9: Display Module
2.3. TURBINE FLOWMETER The sensor for measuring flow and volume is similar to the model already used in other spirometers produced by MIR (Series MIR 020 rev 5 Mod. Spirobank II, MIR024_REV2 Mod. Spirobank G USB). The turbine flowmeter consists of one mechanical and two electrical parts:... -
Page 10: Maintenance
For cleaning of the new spirotel and the accessories please see the User Manual. 3.2. TEST EQUIPMENT For the repair and maintenance procedures of the new spirotel the following test equipment and accessories are required: Complete set of precision engineering tools (including 2.5 mm allen key and cross-screwdriver) Calibration syringe (3L is recommended) Case opener Digital multimeter, at least 3½... -
Page 11: Software Version
Self test 3.3.1.1. Switch on the equipment. new spirotel will carry out the so-called self-test for approx 3 seconds. It is assumed that when the self-test is passed all functions of new spirotel are okay. Any severe malfunction (if any) will be reported on the display. -
Page 12: Opening The Device
Opening the device 4.2.1. To open new spirotel: 1. Switch off the device and make sure that the turbine housing is removed from the main body of the device. 2. Place the device on a flat surface with bottom part face-up 3. - Page 13 PCBs and components Removing and replacing the turbine sensor strip 4.3.1. Open new spirotel as described in 4.2.1. With the device face down, locate where the sensor strip is connected to the PCB. Using a screwdriver or case opener, carefully pry the clear plastic clip from the centre underneath.
-
Page 14: Touch Screen Calibration
Removing and replacing the display 4.3.2. Open new spirotel as described in Paragraph 4.2.1; once the PCB is separated from the sensor strip (as described in 4.3.1, and removed from the yellow casing, unclip the flat cable and remove the display. - Page 15 Removing and replacing the internal battery pack 4.3.4. Open new spirotel as described in Paragraph 4.2.1 up to point 3. Remove the battery pack, only after the device is switched off, by withdrawing the connector using a screwdriver or a tweezers.
- Page 16 Use only the battery charger supplied by MIR to recharge the battery pack. Recharging with an unsuitable charger in nonconforming conditions may cause the battery pack to overcharge or the charging current to be extremely high thus causing abnormal chemical reactions in the battery pack triggering acid leakage, overheating, smoke breakage an explosion and/or fire.
- Page 17 Turn on new spirotel and setup the device to perform a spirometry test (for example FVC). Hold the new spirotel with one hand and move it slowly sideways, having the air pass through the turbine. If the rotor spins properly the device will emit a series of acoustic signals “beeps”. The beeping frequency is a function of the air flow passing through the turbine.
- Page 18 To clean the reusable turbine, first remove it by pulling it gently from the new spirotel turning it anti-clockwise and pressing lightly. It can be helpful to push it gently from underneath with one finger from the bottom of the turbine to lift it out of its housing.
- Page 19 .tsk file and then click on Next. From the “Select file .tsk” search window select the firmware of your device; click on the new spirotel folder and then on the selected file to automatically launch the upgrading procedure of the internal software of the spirometer.
-
Page 20: Testing Procedures
Open the device as described in point 4.2.1 up to point 6. Beneath the Bluetooth module, the oximetery module is connected directly to the PCB. Remove the oximetry module by hand, gripping the sides and pulling directly away from the board. CAUTION The module is attached to the PCB so it must be removed gently. - Page 21 Spirotel ® Service Guide Table 1 TESTS ON PCB MIR043 WITH OXIMETER Test Procedure Test method Instrument Expected result Check that the oximetry module has been correctly The doubled sided adhesives must be applied between Blocking of oximetry module Visual...
- Page 22 Spirotel ® Service Guide CHECKS ON MAIN CASING OF THE ASSEMBLED DEVICE Table 2 Test Procedure Test method Instrument Expected results Check that the temperature corresponds to the BTPS* Temperature equal to thermometer Temperature Instrument Thermometer reading +/- 1 °C...
- Page 23 Launch the oximetry test on the MIR device (see User 1,033 3,09 2,98 3,20 Manual). 1,028 3,08 2,97 3,19 e) Read the value given by the new spirotel (it must be 1,023 3,07 2,96 3,18 1,018 3,06 2,95 3,17 between 83 and 87%).
- Page 24 Read the value given by the new spirotel (it must be between 93 and 97%). Read the heart beat rate on the new spirotel (it must be between 78 e 82). k) Enter the given values in the proper spaces on Annex 1 to this Manual.
- Page 25 Spirotel ® Service Guide Testing procedures for devices without oximeter 4.5.2. The following checks must be carried out on each device: Table 4 TESTS ON PCB MIR043 WITHOUT OXIMETER Test Procedure Test method Instrument Expected result Check correct procedure described in point 4.3.2...
-
Page 26: Spare Parts
The required data is mentioned in Appendix A. For the current parts list please refer to the spare parts price list which is published every year. MIR only supplies parts mentioned in Appendix A. Standard parts such as screws, nuts, cleaning agents and so on are not supplied by MIR, these parts must be purchased locally. -
Page 27: Troubleshooting
6. TROUBLESHOOTING Note Where not indicated, voltages are measured versus the ground (i.e. the negative pole of the battery pack). Where not indicated, voltages are measured while the unit is switched on. Where not indicated, the values to be measured can vary by about 2%. WARNING Be careful not to short-circuit any contacts while measuring voltages. - Page 28 – Open the new spirotel (see Paragraph 4.2.1) – Check that the two connector are fully connected to the PCB – Check that the flat connector is intact and not excessively bent. 6.3. The battery pack is not working correctly ...
- Page 29 Above displays a sample of the firmware version screen. 6.5. The device does not measure spirometry at all Check if any obstacle is blocking the free rotation of the turbine For information about maintenance cleaning please refer to paragraph 4.3.3 of this manual. ...
- Page 30 The signal measured with an oscilloscope must be a square wave with amplitude more than 2 V. 6.7. The device does not measure oximetry at all Check if the devices is provided with the oximetry function or not – Check the internal software version the correct version must be 1.8 or higher –...
- Page 31 Index of components To simplify component identification they are marked in the attached drawing of the components layout of the Printed Circuit Board (PCB) MIR 043. See Appendix C for more information on the component name and description. The revision of the PCB is indicated where highlighted in red below: Rev.1.0...
-
Page 32: Appendix A: Spare Parts List
APPENDIX A: SPARE PARTS LIST Code Pack Picture Group q.ty Description 970085 Battery Rechargeable battery pack 920685 Battery Battery charger 100 V – 240 V/50 – 60 Hz 001072 Board Main Motherboard 001080 Board Micro power oximeter board (OXY Module) 001073 Board Micro power GSM board (GSM Module) - Page 33 Case Turbine Support 300807 Case Sensor Port 300808 Case Turbine Support 910006 Case Reusable turbine for spirotel with cap 910302 Box of Consumable Disposable Bacterial/Viral filter, singularly packed 910300 Consumable Box of Disposable paper adult mouthpiece, external diameter: 30 910310...
- Page 34 Code Pack Picture Group q.ty Description 919007 Oximetry Sensor 10 pcs Adult disposable oximetry finger sensor, to be used with extension cable 919200_INV or 919210_INV 919006 Oximetry Sensor 10 pcs Neonate disposable oximetry finger sensor, to be used with extension cable 919200_INV or 919210_INV 919003 Oximetry Sensor 10 pcs...
-
Page 35: Appendix B: Service Info (Product Change Notes)
APPENDIX B: SERVICE INFO (Product Change Notes) General The technical information in the service manuals of MIR srl is up to date at the date of issue. Necessary additional information (of any kind) will be provided in the following way:... -
Page 36: Item Description
Integrato microprocessore AT32UC3A0512 ATMEL IC16 640825 Integrato S812C25AMCCFT2 regolatore 2.5V Seiko 001073 Micro Power GSM Board 001080 MIR Oximetry Module (for new spirotel with Oximetry) 450073 PCB MIR 043_rev2 Spirotel new 680519 Quarzo 7M12000137 12,00000MHz 3,2x2,5 680400 Quarzo SMD 32,768KHz Q13FC1353276800 Epson... - Page 37 712620_1_0603 Resistenza SMD 0603 0,1W 1% 39R R40, R41 R12, R14, R15, R18, R22, R23, R27, 712708_0603 Resistenza SMD 0603 0,1W 5% 100K R28, R47, R50, R59, R60, R63 712684_0603 Resistenza SMD 0603 0,1W 5% 10K R7, R39, R53, R54,R105,R106 712784_0603 Resistenza SMD 0603 0,1W 5% 10M 712686_0603...
Need help?
Do you have a question about the Spirotel and is the answer not in the manual?
Questions and answers