Advertisement
Quick Links
Fitting Instructions - Read instructions carefully before fitting and follow them for correct use
IN8377
Trade Van Racking - General Assembly and Installation
Attention:
For customers installing one of our vehicle-specific bronze, silver or
gold packages, please firstly consult instruction document IN8378
which showcases the recommended racking layout and indicates the
specific positioning of each unit size.
Once you have identified the layout, refer back to this manual for
instructions on assembling your racking system.
Customers installing universal or bespoke units do not need to
consult IN8378 and should proceed directly to this instruction for
assembly and installation instructions.
?
Customercare@van-guard.co.uk
UK +44 (0) 1392 368 351
This FITTING INSTRUCTION is the property of VAN GUARD ACCESSORIES LTD. and must not be used for
manufacturing purposes, copied nor communicated in any way to third parties without written
permission from VAN GUARD ACCESSORIES LTD.
IN8377_A
(CN:NR)
1
2
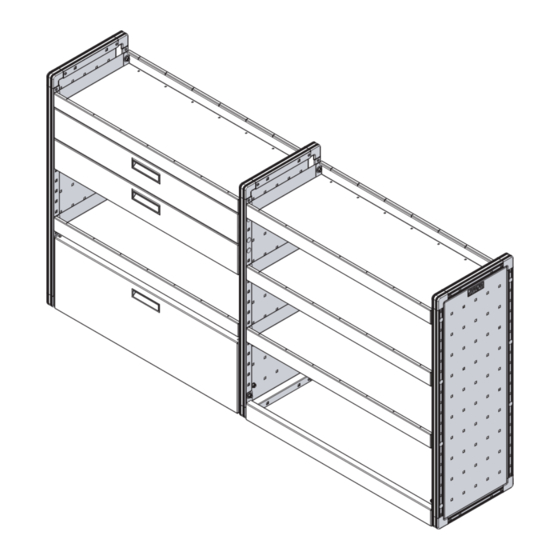
*Image for illustration purposes only. Trade Van Racking provides numerous configuration
options. This document offers an overview, with the flexibility to adjust the positioning of
items according to your preferences.
2
Van Guard Accessories Ltd
Fair Oak Close, Exeter Airport Business Park,
Exeter, Devon, EX5 2UL
www.van-guard.co.uk
IN8377 - 01 OF 12
Advertisement

Related Manuals for Van Guard IN8377


Summary of Contents for Van Guard IN8377
- Page 1 Van Guard Accessories Ltd This FITTING INSTRUCTION is the property of VAN GUARD ACCESSORIES LTD. and must not be used for Fair Oak Close, Exeter Airport Business Park, manufacturing purposes, copied nor communicated in any way to third parties without written Exeter, Devon, EX5 2UL permission from VAN GUARD ACCESSORIES LTD.
- Page 2 NOTICE LOADING/SECURING (C) Van Guard Accessories Ltd and/or its distributors does not accept liability for products which have not been fitted in C.05. Personal injury and damage to property can occur when cargo is not properly secured during various driving accordance with the fitting instructions provided.
- Page 3 DROP-DOWN DOORS KICK PLATES VEHICLE FIXING - FLOOR VEHICLE FIXING - SIDES SEE INSTRUCTION IN8259 SEE INSTRUCTION IN8421 PAGES 07 > 09 PAGES 10 > 12 (SUPPLIED WITH PRODUCT) (SUPPLIED WITH PRODUCT) (THIS DOCUMENT) (THIS DOCUMENT) IN8377 - 03 OF 12...
- Page 4 (one kit per shelf). This kit provides the fixings required to assemble the shelves to the side panels. Quantities shown below are to suit one shelf. FX4011 FX4040 FX4138 (M8 FLANGE NUT) (M8 WASHER) (M8X50 COACH BOLT) TOOLS REQUIRED 13MM IN8377 - 04 OF 12...
- Page 5 Drawers can be positioned anywhere on the unit and one are fully assembled. drawer requires the space of three side fixing holes as illustrated. You can install the drawer once the shelves are fully assembled. IN8377 - 05 OF 12...
- Page 6 Adjust the position of your shelves to suit your requirements and then secure the shelves to the side panels using M8x50 coach bolts, M8 washers, and M8 flange nuts. Tighten all fixings to 5Nm. Take care not to damage the unit by over tightening. IN8377 - 06 OF 12...
- Page 7 FX4002 FX4011 FX4040 FX4048 (M8 NYLOC NUT) (M8 FLANGE NUT) (M8 WASHER) (M8X50 COACH BOLT) FX4140 ME0918 ME2058 (M8X50 HEX BOLT) (SUITS STRAIGHT PANELS) (SUITS TAPERED PANELS) TOOLS REQUIRED 13MM DRILL (Ø8.5mm) TAPE MEASURE IN8377 - 07 OF 12...
- Page 8 Secure the floor brackets to the side panels using M8x50 coach bolts, are fixing a tapered side panel, use floor bracket ME2058. M8 washers and M8 flange nuts. Tighten all fixings to 5Nm. Take care not to damage the unit by over tightening. STRAIGHT TAPERED 2058 IN8377 - 08 OF 12...
- Page 9 (three positions for each bracket). Bolt down through the floor brackets using M8x50 hex bolts and M8 washers, secure under the vehicle using M8 washers and M8 nyloc nuts. Repeat process for each side panel. IN8377 - 09 OF 12...
- Page 10 FX4040 FX4048 (M8 FLANGE NUT) (M6 WASHER) (M6 FLANGE NUT) (M8 WASHER) (M8X50 COACH BOLT)) FX4061 FX4141 ME0919 ME0920 (M6X14 HEX BOLT) (M8X16 COACH BOLT) (SIDE BRACKET) (SIDE BRACKET EXTENSION) TOOLS REQUIRED 10MM 13MM DRILL IN8377 - 10 OF 12...
- Page 11 If required, an extension bracket can be used as shown. using M8x50 coach bolts, M8 washers and M8 flange nuts. If required, an extension bracket can be used as shown in step four. M8X16 COACH BOLT M8 WASHER M8 FLANGE NUT IN8377 - 11 OF 12...
- Page 12 M6 washers and M6 flange nuts. Repeat process for each side through the fixing bracket holes using a suitable drill bit for the fixing. panel. TAKE CARE NOT TO DRILL INTO THE OUTER SKIN OF THE VEHICLE BEHIND THE INNER SKIN IN8377 - 12 OF 12...
Need help?
Do you have a question about the IN8377 and is the answer not in the manual?
Questions and answers