Table of Contents
Advertisement
Quick Links
Technical Support and E-Warranty Certificate www.vevor.com/support
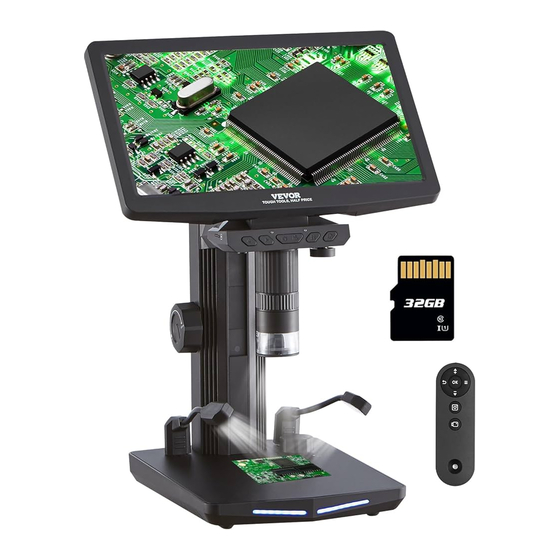
DIGITAL MICROSCOPE
MODEL:W10
We continue to be committed to provide you tools with competitive price.
"Save Half", "Half Price" or any other similar expressions used by us only represents
an estimate of savings you might benefit from buying certain tools with us compared to
the major top brands and does not necessarily mean to cover all categories of tools
offered by us. You are kindly reminded to verify carefully when you are placing an order
with us if you are actually saving half in comparison with the top major
brands.
Advertisement
Table of Contents

Related Manuals for VEVOR W10


Summary of Contents for VEVOR W10
- Page 1 Technical Support and E-Warranty Certificate www.vevor.com/support DIGITAL MICROSCOPE MODEL:W10 We continue to be committed to provide you tools with competitive price. "Save Half", "Half Price" or any other similar expressions used by us only represents an estimate of savings you might benefit from buying certain tools with us compared to the major top brands and does not necessarily mean to cover all categories of tools offered by us.
- Page 3 This is the original instruction, please read all manual instructions carefully before operating. VEVOR reserves a clear interpretation of our user manual. The appearance of the product shall be subject to the product you received. Please forgive us that we won't inform you again if...
-
Page 4: Digital Microscope
DIGITAL MICROSCOPE User Manual Model:W10 Thank you for purchasing this device. Please read this manual carefully before using it. -
Page 5: Product Overview
Product Overview 1. Thank you for purchasing the digital microscope device. Before using it, please read this user manual carefully. 2. This device complies with Part 15 of the FCC Rules. Operation is subject to the following two conditions: (1) This equipment will not cause harmful interference (2) This equiment must accept any interference received, including inter- ference that may cause unitended operation. -
Page 6: Important Notes
Important Notes 1. Please fully charge the product before first use. Please do not charge directly through the PC, but choose a 5V-2A adapter. 2. This product is not a biological microscope and is not suitable for cell biology research. 3. -
Page 7: Accessories And Tools
Accessories and tools Hex key x1 Screws x 4 Remote control x1 Data cable x1 HDMI cable x1 Micrometer Column x 1 Base x 1 Screen x1 Fill light x2 Calibration Ruler X1... -
Page 8: How To Assemble
How to assemble Microscope components Screen Column Card slot Lens light adjust- ment knob Height adjustment knob Fill light Fill light brightness adjustment knob Base Decorative light... - Page 9 How to assemble 1. Connect the both by the connectors as 2. Align the column with the groove and insert it. illustrated. groove 3. Insert four screws into the base to fix the 4. Insert the fill light into the USB port. column.
- Page 10 How to assemble 5.The Type-C on the top of the column is 6. Insert the latch at the back of the host into connected to the host as illustrated . the dovetail slot on the column. 8. Adjust the height of the host to a suitable 7.
-
Page 11: Function Introduction
Function Introduction Interface usage instructions Base power supply interface HDMI port Charging Camera Charging indicator Memory The red light is on under charging. The green light is on when fully charged. Please refer to page 22 for instructions on how to operate after connect- ing the device to the computer using Type-C. - Page 12 Function Introduction Button Functions 5 6 7...
- Page 13 Function Introduction Fill light adjustment Power button Video button knob Press and hold for 3 seconds to Start recording/End recording Left for bright switch on/off the device Right for dim Focus ring Reset button Menu button Magnification adjustment Reset to the original factory Open the menu/Exit the Microscope optical focus defaults.
-
Page 14: Remote Control
Remote Control OK button Move up/Zoom in/Page up Confirm selection/Play/Pause Back button Menu button Move down/Zoom out/ Page down Photo button Take a photo Video button Start recording/End recording zoom in Observation Mode zoom out page up Preview Mode page down Contains a Battery, Battery Model: CR2050 move up Menu... - Page 15 Function Introduction Supports connection to HDMI display HDMI output for larger view Connect the microscope to the screen via an HDMI cable, then turn on the device, and you can watch it simultaneously on the large screen.
- Page 16 Overall Parameters of Microscope Lens pixels 2 MP Magnification 1300X Focusing mode Manual Focusing Distance 0-40 mm Lens Video resolution 720/1080 2-48M Photo resolution Video format Photo format...
- Page 17 Overall Parameters of Microscope 10.1” IPS Screen size Screen Screen resolution 1024*600P Model 5V/2A Input voltage¤t Battery capacity 4000mAh lithium battery Other Working time 2.5hrs Charging time 2.5hrs Support expansion 0-64GB Only support high-speed TF capacity storage cardof class 10 or above, not including class 10...
- Page 18 Overall Parameters of Microscope Aluminum Alloy+ABS+PC Material Operating tempera- -10℃ ~55℃ ture -10℃ ~55℃ Camera temperature 8 high brightness LEDs Other Light source 2个LED fill light Windows 7and above Operating systems MacOS 11.0 and above Simplified Chinese/Traditional chinese/English/Français/ Deutsch Languages Español/Italiano/Português/ Japa- nese...
- Page 19 System Interface Guide Battery Level Date Startup Screen Sample Time 2022/01/07 17:45:16 Video 1080FHD resolution Video File Photo File Setting...
- Page 20 System Interface Guide Settings Interface Functions Photo Resolution Date/Time Video Resolution Line Support Exposure Light source Compensation frequency Date Tags Formatting Auto shutdown Default Settings Screen brightness Versions Language Settings 1. Setting: After powering on, the device defaults to the observation mode. Click “...
- Page 21 System Interface Guide Settings Interface Functions Photo Resolution Video Resolution Adjust the size of the output image Change the output video resolution, the resolution, the higher the resolution, the higher the resolution, the clearer the clearer the image, but the more memory it image, but the more memory it occupies.
- Page 22 System Interface Guide Settings Interface Functions Auto shutdown Screen brightness Set the automatic shutdown time for the Adjust the device screen brightness device, you can choose to automatically (10%-100%) according to the observation shut down or turn off the function after needs.
- Page 23 System Interface Guide If the device has sufficient battery power, you can use it directly. The following are the operating instructions without charging. If you want to use the device while charging, please refer to the settings on page 24. 1.
- Page 24 System Interface Guide 3. Video Playback: Click button to enter menu mode, click button to select “ ” “ ” , click button to enter the video browsing page, as shown in pictures (2). “ ” “ ” 4. When browsing page, click button 1-2 times to position it at the top left corner of “...
- Page 25 System Interface Guide 5. When viewing photos in full-screen mode click botton for page turning . “ “ ” ” 6. When video playback, click button to rewind, click button to fast forward, “ ” “ ” click button to pause/start. As shown : “...
- Page 26 Usage Instructions on computer Different systems require different software. Please choose and download the corresponding software based on your system. Download for Windows system (Supports Windows 7/8/9/10/11 or higher versions): ① When using Windows 7 and above,download the application“UniLab ” Download link :...
- Page 27 Usage Instructions on computer ② When using Windows 10 and higher versions, search for the software in the Microsoft Store“UniLab” or use the pre-installed software on your computer called“ Camera ” Software “unilab”page, as shown:...
- Page 28 Usage Instructions on computer Software “Camera”page, as shown: Note: To switch the camera, click button located at the top right corner of the screen. If the image still cannot be captured, please adjust the privacy settings of your camera.
- Page 29 Usage Instructions on computer For Apple systems (Supports macOS X 11.0 or higher versions): ③ Using the pre-installed software on your Apple computer called "Photo Booth" Software “Photo Booth”page, as shown:...
- Page 30 Usage Instructions on computer 1. Connect the Type-C cable that comes with the original packaging to USB port of the computer. 2. After powering on, click button to select as shown in pictures(1), click “ ” Camera button as shown in pictures (2), You can watch by opening the software on your “...
- Page 31 Usage Instructions on computer Camera Memory Charging Camera Mode Storage Mode...
- Page 32 Microscope Troubleshooting Problem description Causes Solutions ① The charging port is not securely plugged in. Device cannot be ① Re-plug the interface firmly. ② No power source is connected. charged. ② Connect the power supply. ③ Device malfunction. Re-plug the interface, replace the Loose connection, damaged data Device cannot connect data cable, or use a data cable...
-
Page 33: Operating Environment
Operating Environment Storage Environment Store in a cool, dry place away from direct sunlight for daily use Avoid storing the microscope in places where there is a risk of falling. Falling may cause deviation of the internal lenses or damage to other components, as well as other irreparable damage issues. - Page 34 Address: Baoshanqu Shuangchenglu 803long 11hao 1602A-1609shi Shanghai Imported to AUS: SIHAO PTY LTD, 1 ROKEVA STREETEASTWOOD NSW 2122 Australia Imported to USA: Sanven Technology Ltd., Suite 250, 9166 Anaheim Place, Rancho Cucamonga, CA 91730...
- Page 36 Technical Support and E-Warranty Certificate www.vevor.com/support...
Need help?
Do you have a question about the W10 and is the answer not in the manual?
Questions and answers