Table of Contents
Advertisement
Available languages
Available languages
Advertisement
Table of Contents

Related Manuals for Signature SFMP70


Summary of Contents for Signature SFMP70
- Page 1 MANUEL D’UTILISATEUR - FR FOUR ÉLECTRIQUE INTÉGRÉ S F M P 7 0...
-
Page 2: Table Of Contents
TABLE DES MATIÈRES CONSIGNES DE SÉCURITÉ IMPORTANTES DESCRIPTION GÉNÉRALE DESCRIPTION DU PRODUIT INSTRUCTIONS D'OPÉRATION ACCESSOIRES AVERTISSEMENT SUR LE PLACEMENT DES ÉTAGÈRES REMPLACEMENT DES AMPOULES FIXATION DU FOUR DANS L'ARMOIRE OUVERTURES DE VENTILATION CONNEXION DU FOUR INSTALLATION RETIRER LA PORTE DU FOUR (EN OPTION) NETTOYAGE ET ENTRETIEN SPÉCIFICATIONS TECHNIQUES... -
Page 3: Consignes De Sécurité Importantes
RECONNAISSANCE Merci d'avoir acheté notre produit. Nous espérons que vous apprécierez l'utilisation des nombreuses fonctionnalités et avantages qu'il offre. Avant d'utiliser ce produit, veuillez étudier attentivement l'intégralité de ce manuel d'instructions. Conservez ce manuel dans un endroit sûr pour référence future. Assurez-vous que les autres personnes utilisant le produit connaissent également ces instructions. - Page 4 éléments chauffants. Les enfants de moins de 8 ans doivent être tenus à l’écart, sauf s’ils sont surveillés en permanence. • Si la surface est fissurée, éteignez l'appareil pour éviter tout risque de choc électrique. • Cet appareil peut être utilisé par des enfants âgés d'au moins 8 ans et par des personnes ayant des capacités physiques, sensorielles ou mentales réduites ou dénuées d’expérience ou de connaissance, s'ils (si elles)
- Page 5 être remplacé par le fabricant, son agent de service ou des personnes de qualification similaire pour éviter tout risque. • Ne pas utiliser de produits d'entretien abrasifs ou de grattoirs métalliques durs pour nettoyer la porte en verre du four, ce qui pourrait érafler la surface et entraîner l’éclatement du verre.
-
Page 6: Description Générale
• En ce qui concerne les informations détaillées sur la façon d’installer l’appareil, sur comment l'appareil doit être fixé sur son support et sur la connexion électrique, référez-vous aux paragraphes ci-après de la notice. 2. DESCRIPTION GÉNÉRALE CONSEILS DE SÉCURITÉ •... -
Page 7: Description Du Produit
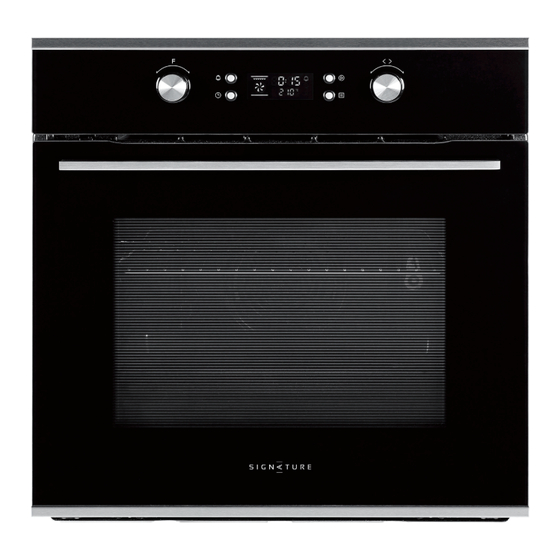
3. DESCRIPTION DU PRODUIT Bouton Remind Bouton Start (Rappel) (Démarrage) Bouton Time (Temps) Bouton Stop (Arrêt) Symbole Description de la fonction Lampe : Le processus de cuisson peut être observé dans des conditions éclairées. Sauf fonction ECO et pyrolyse. Décongélation : La circulation d'air à température ambiante permet une décongélation plus rapide des aliments congelés (sans utilisation de chaleur). -
Page 8: Instructions D'opération
4. INSTRUCTIONS D'OPÉRATION 1. Réglage de l’horloge Après avoir branché l'appareil sur le secteur, les symboles « 0:00 » seront visibles sur l'écran. a. Appuyez sur « », les chiffres des heures clignotent. b. Tournez « K2 » pour ajuster les chiffres des heures, (le temps doit être compris entre 0--23). - Page 9 b. En état de rappel, si l'horloge a été réglée, appuyez sur le bouton « » pour voir l'heure actuelle. 5. Fonction sécurité d’enfants Verrouillage : appuyez simultanément sur « » et « » pendant 3 secondes, il y aura un long «...
- Page 10 OBSERVATION : a. Si la porte du four n'est pas fermée, l'appui sur le bouton de démarrage n'est pas valable. La LED affiche « door » et « PyR ». b. Lorsque la température centrale du four est supérieure à 320°C, il n'est pas possible d'appuyer sur le bouton de démarrage.
-
Page 11: Accessoires
5. ACCESSOIRES Étagère en fil métallique : Pour le grill, les plats, le moule à gâteau avec des articles pour rôtir et cuire. Support coulissant : Pour la cuisson d'aliments de plus grande taille, ces rails de support d'étagères sur les côtés droit et gauche du four peuvent être retirés, les plats et les plateaux peuvent être posés sur la sole du four, en utilisant les fonctions comme Cuisson par rayonnement, Double cuisson,... -
Page 12: Avertissement Sur Le Placement Des Étagères
6. AVERTISSEMENT SUR LE PLACEMENT DES ÉTAGÈRES Pour que les étagères du four fonctionnent en toute sécurité, il est impératif de placer correctement les étagères entre les rails latéraux. Les étagères et le plateau ne peuvent être utilisés qu'entre la première et la cinquième couche. Les étagères doivent être utilisées dans le bon sens, ce qui permet d'éviter que les aliments chauds ne glissent lors du retrait de l'étagère ou du plateau. -
Page 13: Ouvertures De Ventilation
9. OUVERTURES DE VENTILATION Lorsque la cuisson est terminée ou en état de pause ou d'attente, si la température centrale du four est supérieure à 75 degrés, le ventilateur de refroidissement continue de fonctionner pendant 15 minutes. Ou lorsque la température centrale du four devient inférieure à... -
Page 14: Retirer La Porte Du Four (En Option)
12. RETIRER LA PORTE DU FOUR (EN OPTION) La porte amovible permet un accès complet à tout l'intérieur du four pour un entretien plus facile et plus rapide. Pour retirer la porte, ouvrez la porte jusqu'à l'angle maximum. Tirez ensuite la boucle de la charnière de la porte vers l'arrière. -
Page 15: Nettoyage Et Entretien
Vente, avant de vous déplacer à votre magasin BUT, appelez le 09 78 97 97 97 , Du lundi au samedi de 08h00 à 20h00 (Prix d'un appel local). 14. SPÉCIFICATIONS TECHNIQUES Modèle: SFMP70 Tension évaluée: 220-240V~ 50Hz-60Hz Fréquence évaluée: Puissance électrique:... - Page 17 BUILT-IN ELECTRIC OVEN S F M P 7 0...
- Page 18 CONTENTS IMPORTANT SAFETY INSTRUCTIONS GENERAL DESCRIPTION PRODUCT DESCRIPTION OPERATION INSTRUCTIONS ACCESSORIES -11- SHELF PLACEMENT WARNING -12- BULB REPLACEMENT -12- SECURING THE OVEN TO THE CABINET -12- VENTILATING OPENINGS -13- CONNECTION OF THE OVEN -13- INSTALLATION -13- REMOVING THE DOOR FROM OVEN (OPTIONAL) -14- CLEANING AND MAINTENANCE -15-...
- Page 19 ACKNOWLEDGMENT Thank you for purchasing our product. We hope you enjoy using the many features and benefits it provides. Before using this product please study this entire Instruction Manual carefully. Keep this manual in a safe place for future reference. Ensure that other people using the product are familiar with these instructions as well.
- Page 20 of experience and knowledge if they have been given supervision or instruction concerning use of the appliance in a safe way and understand the hazards involved. Children shall not play with the appliance. Cleaning and user maintenance shall not be made by children without supervision. During use, the appliance becomes very hot.
- Page 21 During pyrolytic cleaning, accessible parts may become hotter than normal. Young children should be kept away. During pyrolytic cleaning, the probe is to be removed. A steam cleaner is not to be used. The appliances are not intended to be operated by means of an external timer or separate remote- control system.
- Page 22 2. GENERAL DESCRIPTION SAFETY HINTS Do not use the oven unless you are wearing something on your feet. Do not touch the oven with wet or damp hands or feet. For oven: Oven door should not be opened often during the cooking period. The appliance must be installed by an authorized technician and put into use.
- Page 23 3. PRODUCT DESCRIPTION Symbol Function description Lamp: The cooking process can be observed under illuminated conditions. Except ECO and pyrolytic function. Defrost: The circulation of air at room temperature enables quicker thawing of frozen food (without the use of any heat). Double grill with fan: The radiant heating element and top heating element are working with fan.
- Page 24 4. OPERATION INSTRUCTIONS 1. Clock Setting After connecting the unit to the power, the symbols "0 00"will be visible on the display. a. Press " ", the hour figures flashes. b. Rotate "K2" to adjust the hour figures, (time should be within 0--23) . c.
- Page 25 b. In reminding state, if the clock was set, press " " button to see the current time. 5. Child lock Function To Lock : press " "and " " simultaneously for 3 seconds, there will be a long "beeping "sound and the " "...
- Page 26 NOTE: a. When the oven door was not closed, pressing start button will be invalid. The LED will display "door "and "PyR ". b. When the oven's center temperature is highter than 320 C, pressing start button will be invalid. The LED will display "CooL "and "PyR ". When the oven's center temperature is lower than 200°C, press cancel button once , it will pause;...
- Page 27 5. ACCESSORIES Wire shelf : For grill, dishes, cake pan with items for roasting and grilling. Slider bracket : For cooking larger size food, these shelf support rails on the right and left sides of the oven can be removed, dishes and tray can be put on the oven floor, using functions as Radiant grilling, Double grilling, Double grill with fan.
- Page 28 6. SHELF PLACEMENT WARNING: To ensure the oven shelves operate safely, correct placement of the shelves between the side rail is imperative. Shelves and the pan only can be used between the first and fifth layers. The shelves should be used with the right direction, it will ensure that during careful removal of the shelf or tray, hot food items should not slide out.
- Page 29 9. VENTILATING OPENINGS When cooking is finished or in pause state or in waiting state, if the oven's center temperature is over 75 degree, the cooling fan will continue working for 15 minutes. Or when the oven's center temperature becomes lower than 75 degree, the cooling fan will stop in advance.
- Page 30 12. REMOVING THE DOOR FROM OVEN (OPTIONAL) Removable door allows full access to entire interior of the oven for easier and quicker maintenance. 1. To remove the door, open the door to the maximum angle. Then pull the buckle at the door hinge backward.
- Page 31 To contact our After- Sales Service, before going to your BUT store, call 09 78 97 97 97, From Monday to Saturday from 8:00 am to 8:00 pm (local call price). 14. TECHNICAL SPECIFICATION Model: SFMP70 Rated Voltage: 220-240V~ 50Hz-60Hz Rated Frequency: Electric Power: 3.2 kW...
- Page 32 BUT INTERNATIONAL 1 Avenue Spinoza 77184 Emerainville, France PN:16171100A39657...
Need help?
Do you have a question about the SFMP70 and is the answer not in the manual?
Questions and answers