
Related Manuals for Signature SFMP65X


Summary of Contents for Signature SFMP65X
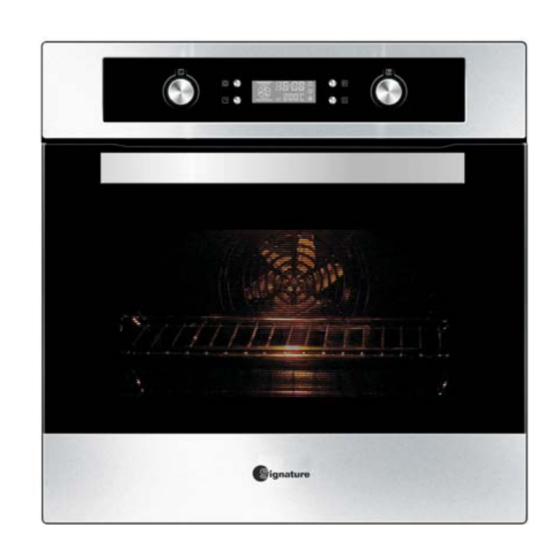
- Page 1 SFMP X Four Encastrable Built In electric oven INSTRUCTIONS INSTRUCTIONS FOR USE...
- Page 2 TABLE DES MATIERES 1.CONSIGNES DE SECURITE IMPORTANTES - 3 - 2.DECLARATION DE CONFORMITE - 5 - 3.DESCRIPTION DE L APPAREIL - 5 - 4.INSTALLATION DU FOUR DANS L UNITE DE CUISINE - 7 - 5.DIAGRAMME D INSTALLATION - 8 - 6.UTILISATION DE l APPAREIL - 9 - 7.NETTOYAGE ET MAINTENANCE...
- Page 3 CET APPAREIL EST DESTINE A UN USAGE DOMESTIQUE UNIQUEMENT! Veuillez lire attentivement toutes les instructions avant la première utilisation et conservez-les pour une référence ultérieure. CONSIGNES DE SECURITE IMPORTANTES Avant l utilisation, vérifiez que la tension du réseau correspond bien à celle indiquée sur la plaque signalétique de l appareil assurez vous également que votre installation électrique est suffisante pour alimenter l appareil de cette puissance Vérifiez que l appareil et ses éléments ne soient pas abîmés.
- Page 4 1 7. Ne pas ouvrir fréquemment la porte du four lors de l utilisation en particulier lors des cuissons sensibles Lorsque vous ouvrez la porte du four faites attention à la vapeur qui peut sortir en particulier si le four est utilisé à de hautes températures, il peut y avoir un risque d accident.
- Page 5 DECLARATION DE CONFORMITE Quand vous avez défait le four, assurez-vous qu il n a subit aucun dommage Si vous avez des problèmes, ne l utilisez pas et contactez une personne diplômée Gardez les matériaux d emballage comme les sacs plastiques, polystyrène, ou les clous à...
- Page 6 Rôtissage double avec ventilateur: L élément de chauffe du haut, l élément de rôtissage et le ventilateur fonctionnent en même temps. La température est comprise entre 180 C et 240 C. La température par défaut est de 210 C. Convection Un élément autour du ventilateur fournit une source supplémentaire de chaleur pour une cuisson de style convection.
- Page 7 INSTRUCTIONS D INSTALLATION INSTALLATION DU FOUR DANS L UNITE DE CUISINE Installez le four dans l espace prévu dans votre unité de cuisine il peut être installé en dessous d un plan de travail ou dans une armoire verticale Fixez le four dans l emplacement prévu en le vissant à...
- Page 8 DIAGRAMME D INSTALLATION Pour permettre une installation et une ventilation adéquate, les mesures et les distances devront être respectées lors de la fixation du four. Remarque: L interrupteur d alimentation ou la prise n est pas inclus dans le cabinet. La prise est la responsabilité...
- Page 9 UTILISATION DE l APPAREIL 1. Réglage de l heure: Après le branchement de l appareil, l écran lumineux affiche 00:00 Appuyez sur pour faire clignoter les quatre chiffres Tournez pour régler l heure. Les heures peuvent être réglées entre 0 et 23.) 3)Appuyez sur les minutes clignotent.
- Page 10 Pour régler ce mode: 1)Pressez le bouton réglage rappel Tournez le bouton pour régler la période de l heure du rappel entre Appuyez le bouton de rappel encore une fois 4)Tournez pour régler la période de la minute du rappel (entre 0 et 9). 5)Appuyez sur pour confirmer le réglage.
- Page 11 10. Remarque La lampe du four s allumera pour toutes les fonctions sauf pour la fonction pyrolytique). Si le programme de cuisson a été réglé mais que le bouton " " ' n est pas pressé dans les minutes l heure s affichera à nouveau ou retournera en état attente. Le réglage ne sera alors pas validé...
- Page 12 SPECIFICATIONS TECHNIQUES Modèle SFMP Alimentation électrique 220-240V~/50-60Hz Puissance max 3200W Capacité Le fabriquant et le revendeur ne peuvent pas être tenus responsable de tout accident ou dommage causé par une utilisation impropre de l appareil, ou si les instructions données dans le présent manuel n ont pas été...
-
Page 13: Table Of Contents
CONTENT 1.Warning - 3 - 2.Safety hints - 4 - - 4 - 3.Fitting the oven into the kitchen unit 4.Operation instructions - 6 - 5.Accessories - 8 - 6.Installation - 9 - 7.Cleaning and maintenance - 10 - 8.Product description - 10 - 9.Correct disposal of this product - 10 -... -
Page 14: Warning
ACKNOWLEDGMENT Thank you for purchasing our product We hope you enjoy using the many features and benefits it provides Before using this product please study this entire Instruction Manual carefully Keep this manual in a safe place for future reference Ensure that other people using the product are familiar with these instructions as well. -
Page 15: Safety Hints
SAFETY HINTS Do not use the oven unless you are wearing something on your feet Do not touch the oven with wet or damp hands or feet. For oven Oven door should not be opened often during the cooking period The appliance must be installed by an authorized technician and put into use The producer is not responsible for any damage that might be caused by defective placement and installation by unauthorized personnel. - Page 16 PANNEAU DE COMMANDE Reminder button Start button Time button Stop button Symbol Function description Oven Lamp: which enables the user to observe the progress of cooking without opening the door. Deforst: The circulation of air at room temperature enables quicker thawing of frozen food, without the use of any heat It s a gentle but quick way to speed up the ).
-
Page 17: Operation Instructions
OPERATION INSTRUCTIONS 1. Clock Setting After connectiong the unit to the power, the symbols 00:00 will be visible on the display. 1> Press " ", the hour figures will flash. 2> Rotate " K2" to adjust the hour figures, (Time should be within 0--23). 3>... - Page 18 6. Reminder Function: The oven has 9 hours reminder, this function will help to remind you to start cooking in a certain time from1 minute to 9 hours. Only when oven in standby mode, the reminder can be set. Follow below to set the reminder: 1>...
- Page 19 D)When the pyrolytic function finished working and oven center temperature is lower than 300 C. LED display will go off. E)Before activating the pyrolytic cleaning function, remove any excessive spillage and make sure that oven is empty. Do not leave anything inside it(e.g. pans, baking tray, dripping pan, slider bracket etc.) as this could heavily damage them.
-
Page 20: Installation
SECURING THE OVEN TO THE CABINET Fit oven into the cabinet recess Open the oven door 3. Secure the oven to the kitchen cabint with two distance holders A which fit the holes in the oven frame and fit " " the two wood screws B "... -
Page 21: Cleaning And Maintenance
CLEANING AND MAINTENANCE For the sake of a good appearance and reliability keep the unit clean The modern design of the unit facilitates maintenance to a minimum The parts of the unit which come into contact with food have to be cleaned regularly. - Page 22 BUT international avenue Spinoza 77184 Emerainville France P/N:291800200193...
Need help?
Do you have a question about the SFMP65X and is the answer not in the manual?
Questions and answers