Table of Contents
Advertisement
Quick Links
Advertisement
Table of Contents

Subscribe to Our Youtube Channel
Related Manuals for Bosch HGW3FS 50Z Series


Summary of Contents for Bosch HGW3FS 50Z Series
- Page 1 Free standing cooker HGW3FS.50Z [en] Instruction manual Free standing cooker...
-
Page 3: Table Of Contents
Baking out the oven ......16 www.bosch-home.com and in the online shop www.bosch-eshop.com Cleaning the burner caps and cups . -
Page 4: Intended Use
Intended use Prolonged intensive use of the appliance may 8Intended use call for additional ventilation, for example opening of a window, or more effective R ead these instructions carefully. Only then ventilation, for example increasing the level of I n t e n d e d u s e will you be able to operate your appliance mechanical ventilation where present. -
Page 5: Important Safety Information
Important safety information Never place flammable objects on the (Important safety ■ burners or store them in the cooking information compartment. Never open the appliance door if there is smoke inside. Switch off the appliance. Pull out the mains plug or switch Warning –... - Page 6 Important safety information Caution: Glass lids may shatter when Warning – Risk of scalding! ■ heated. Turn off all the burners before The accessible parts become hot during ■ shutting the lid. Wait until the oven has operation. Never touch the hot parts. Keep cooled down before closing the glass children at a safe distance.
-
Page 7: Installation And Connection
Installation and connection Positioning and levelling 5Installation and connection Positioning the appliance D o not install the appliance behind a decorative door When installing the appliance, make sure that there is I n s t a l l a t i o n a n d c o n n e c t i o n or the door of a kitchen unit, as this may cause the enough space in the final installation location to pull the appliance to overheat. -
Page 8: Gas Connection
Installation and connection Gas connection Checking for leaks After connecting the gas line, check the connections for Installation must only be performed by an approved leaks using soapy water. expert or a licensed after-sales service engineer in accordance with the instructions specified under "Gas Initial use connection and conversion to a different gas type". -
Page 9: Appliance Categories
Installation and connection The mains power cable must be at least type Important information for the installer ■ H05 V V-F 3G 1 mm². This appliance may only be installed by a registered LP Gas installer registered with the Liquefied Petroleum Gas Association of Southern Africa. -
Page 10: Causes Of Damage
Causes of damage Moisture in the cooking compartment: Over an ]Causes of damage ■ extended period of time, moisture in the cooking compartment may lead to corrosion. Allow the cooking compartment to dry after use. Do not keep H ob C a u s e s o f d a m a g e moist food in the closed cooking compartment for Caution! -
Page 11: Environmental Protection
Environmental protection Open the appliance door as infrequently as possible 7Environmental protection ■ when the appliance is in use. Y our new appliance is particularly energy-efficient. E n v i r o n m e n t a l p r o t e c t i o n Here you can find tips on how to save even more energy when using the appliance, and how to dispose of your appliance properly. -
Page 12: Getting To Know Your Appliance
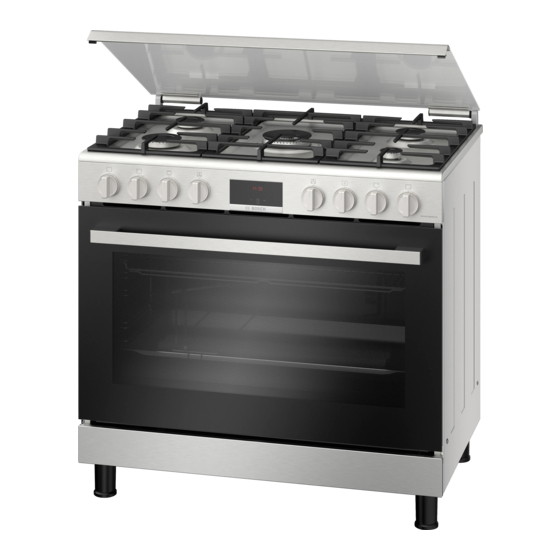
Getting to know your appliance *Getting to know your Here you can see an overview of the hob. Details may appliance vary depending on the appliance model. I n this section, we will explain the indicators and G e t t i n g t o k n o w y o u r a p p l i a n c e controls. -
Page 13: Control Panel
Getting to know your appliance Control panel You can set your appliance's various functions on the control panel. Below, you will see an overview of the control panel and the layout of the controls. Oven Explanation Here you can see an overview of the oven. Details may Selector for the gas burners vary depending on the appliance model. -
Page 14: The Cooking Compartment
Accessories Function selector _Accessories Switch the oven light, the fan and the rotary spit on and off using this selector. Y our appliance is accompanied by a range of A c c e s s o r i e s Position Meaning accessories. -
Page 15: Inserting Accessories
Accessories Inserting accessories Optional accessories The cooking compartment has five shelf positions. The You can buy optional accessories from our after-sales shelf positions are counted from the bottom up. service, from specialist retailers or online. You will find a comprehensive range of products for your appliance in In some appliances, the highest shelf position is our brochures and online. -
Page 16: Before Using For The First Time
Before using for the first time Cleaning the burner caps and cups KBefore using for the first time I n this section, you can find out what you must do B e f o r e u s i n g f o r t h e f i r s t t i m e before using your oven or hob to prepare food for the first time. -
Page 17: Cooking Pans
Cooking pans ÅCooking pans C o o k i n g p a n s Burner Power Minimum Maximum [kW] cookware cookware diameter diameter High output 3 kW 24 cm 28 cm burner Wok burner 4 kW 24 cm 28 cm Standard 1.75 kW 18 cm 24 cm... -
Page 18: Operating The Appliance
Operating the appliance If the gas burner does not ignite 1Operating the appliance In the event of a power failure or damp ignition plugs, light the gas burner with a gas lighter or a match. Y ou have already learnt about the controls and how Switching off the gas burner O p e r a t i n g t h e a p p l i a n c e they work. -
Page 19: Oven
Operating the appliance Vitamins and minerals in the food can easily be lost. Table – Cooking You should therefore use as little water as possible Select the right pot size for each burner. The diameter when cooking, so that the food retains its vitamins and of the pot or pan base should be the same size as the minerals. -
Page 20: Rotisserie Spit
Operating the appliance Operating the grill Inserting the rotary spit Keep the appliance door closed while you are Note: Warning – Risk of burns! using the grill function. Never touch the hot surfaces of the cooking compartment or the heating elements. Keep children at Open the top cover of the appliance. -
Page 21: Time-Setting Options
Time-setting options Switching on the rotary spit OTime-setting options When using the rotisserie spit, heat the oven Note: using the heating mode. Insert the rotisserie spit Y our appliance has different time-setting options. before setting the heating mode. T i m e - s e t t i n g o p t i o n s Time-setting option Use Turn the control knob for the oven to the position. -
Page 22: Setting The Time
Childproof lock Setting the time AChildproof lock Once the appliance has been connected to the mains or following a power failure, the clock will flash on the Y our appliance is equipped with a childproof lock so display. Set the time. C h i l d p r o o f l o c k that children cannot switch it on accidentally or change any settings. -
Page 23: Cleaning
Cleaning DCleaning Zone Cleaning agent Upper glass cover* Glass cleaner: Clean with a soft cloth. (depending on appli- W ith good care and cleaning, your appliance will retain You can remove the upper glass cover for ance model) C l e a n i n g its appearance and remain fully functioning for a long cleaning. - Page 24 Cleaning Zone Cleaning agent Zone Cleaning agent Glass hob* Care: Protective/care products for glass Accessories Hot soapy water: Cleaning: Cleaning agents for glass. Soak and then clean with a dish cloth or a (depending on appli- Follow the cleaning instructions on the packag- brush.
-
Page 25: Cleaning Self-Cleaning Surfaces In The Cooking Compartment
Appliance door Cleaning self-cleaning surfaces in the qAppliance door cooking compartment The back wall of the cooking compartment is coated W ith good care and cleaning, your appliance will retain with a highly porous ceramic layer. This coating A p p l i a n c e d o o r its appearance and remain fully functional for a long absorbs and breaks down splashes produced during time to come. -
Page 26: Removing And Refitting The Door Panels
Appliance door Removing and refitting the door panels Attaching the door Reattach the oven door by following the same steps in The glass panels can be removed from the oven door reverse order. to allow more thorough cleaning. When attaching the oven door, ensure that both Removing hinges are inserted straight into the opening (Fig. -
Page 27: Rails
Rails Installing the frames pRails Insert the two hooks carefully into the upper holes. (Figure A-B) W ith good care and cleaning, your appliance will retain R a i l s its appearance and remain fully functional for a long time to come. -
Page 28: Trouble Shooting
Trouble shooting 3Trouble shooting The door panel This is a nor- No intervention needed; this has steams up when mal occur- no effect on performance. the oven heats rence caused I f a fault occurs, there is often a simple explanation. due to the T r o u b l e s h o o t i n g Before calling the after-sales service, please refer to the... -
Page 29: Replacing The Bulb In The Oven Ceiling Light
Customer service Replacing the bulb in the oven ceiling light 4Customer service If the bulb in the oven light fails, it must be replaced. Heat-resistant, 25 watt spare bulbs can be obtained O ur after-sales service is there for you if your appliance from our after-sales service or a specialist retailer. -
Page 30: Tested For You In Our Cooking Studio
Tested for you in our cooking studio Cakes and pastries JTested for you in our cooking studio Cake tins When you are baking in the cake tin, insert the wire rack at the level indicated and place the cake tin on the wire H ere, you can find a selection of dishes and the ideal rack. - Page 31 Tested for you in our cooking studio Cakes in tins Accessories/cookware Shelf posi- Type of Tempera- Cooking time tion heating ture in °C in mins Sponge cake Round Bundt pan, deep 170* 50–60 Sponge cake Round Bundt pan, deep 170* 50–60 6-egg fatless sponge cake Springform cake tin (dia.
-
Page 32: Baking Tips
Tested for you in our cooking studio Baking tips You wish to bake according to your own rec- Use similar items in the baking tables as a guide. ipe. How to tell whether sponge cake is baked Approx. 10 minutes before the end of the baking time stated in the recipe, insert a cocktail stick into through: the cake at its deepest point. -
Page 33: Tips For Roasting And Grilling
Tested for you in our cooking studio Tips for roasting and grilling The table does not contain information for the Select the next lowest weight from the instructions and extend the time. weight of the joint. How to tell when the roast is ready. Use a meat thermometer (available from specialist shops) or carry out a “spoon test”. -
Page 34: Acrylamide In Foodstuffs
Tested for you in our cooking studio Acrylamide in foodstuffs crisps, chips, toast, rolls, bread, baked goods made from shortcrust pastry (biscuits, gingerbread, cookies). Acrylamide is mainly produced in grain and potato products heated at high temperatures, such as potato Recommendations for baking, roasting and grilling with low acrylamide values General Keep cooking times to a minimum. - Page 36 *9001594467* 9001594467 00101301...
Need help?
Do you have a question about the HGW3FS 50Z Series and is the answer not in the manual?
Questions and answers