Table of Contents
Advertisement
Quick Links
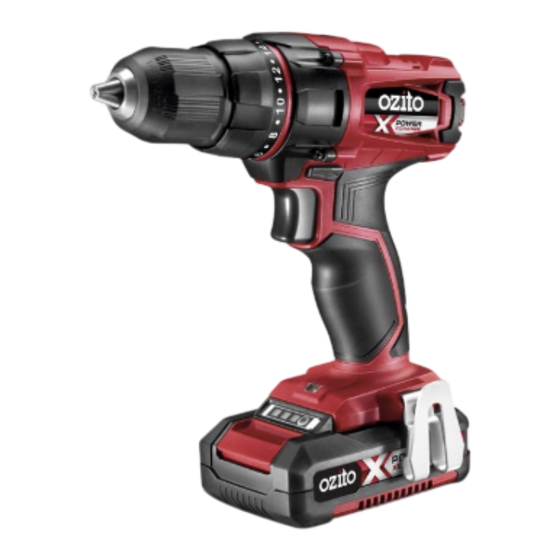
COMPACT DRILL
DRIVER KIT
INSTRUCTION MANUAL
SPECIFICATIONS
Input:
18V
Chuck Size:
13mm Single Sleeve
No Load Speed:
0-350 / 0-1,250/min
Torque Setting:
18
Max. Torque:
40Nm
Battery:
18V 2Ah Li-Ion
Charge Time:
40min
Weight:
1.1kg
ozito.com.au
WHAT'S IN THE BOX
Compact Drill Driver
2.0Ah Battery Pack
Fast Charger
PXDDK-200
Advertisement
Table of Contents

Subscribe to Our Youtube Channel
Summary of Contents for Ozito POWER XCHANGE PXDDK-200
- Page 1 COMPACT DRILL DRIVER KIT INSTRUCTION MANUAL 2.0Ah Battery Pack SPECIFICATIONS Input: Chuck Size: 13mm Single Sleeve No Load Speed: 0-350 / 0-1,250/min Torque Setting: Max. Torque: 40Nm Battery: 18V 2Ah Li-Ion Charge Time: 40min Weight: 1.1kg Fast Charger ozito.com.au PXDDK-200...
-
Page 2: Know Your Product
GREEN (Illuminated) Battery is fully charged BOTH(Illuminated) Battery pack is too hot or too cold (charging will begin This tool is compatible with all battery and chargers from the Ozito automatically when battery reaches correct charging Power X Change Range. temperature). -
Page 3: Battery Installation
2. BATTERY INSTALLATION Installing the Battery Pack Charging your lithium ion battery - Eco Charger 1 Connect the charger into a mains power outlet. 1 Slide the battery into the drill base until it clicks into place. 2 The charger LED will flash green showing power is being supplied to the charger. -
Page 4: Operation
OPERATION 3. KEYLESS CHUCK 4. CONTROLS Forward/ Reverse Lever WARNING: ENSURE THE TOOL IS TURNED OFF & 1 For forward rotation, push the fwd/rev lever towards the left side of the drill. For DISCONNECTED FROM THE POWER SUPPLY BEFORE reverse rotation push fwd/rev lever to the right. PERFORMING ANY OF THE FOLLOWING TASKS. -
Page 5: Helpful Tips
6. HELPFUL TIPS 5. DRILLING Before starting to drill, perform a few simple checks. Drilling to a Preset Depth 1 Depress and release the variable 2 Check the forward/reverse lever A simple way of achieving a hole at a desired depth is to use masking tape. speed trigger to ensure it is not is on desired setting. -
Page 6: Maintenance
Blow out the ventilation slots with compressed air periodically . Ensure the battery is properly charged. It will take 4-5 charging cycles before the battery Note: Ozito Industries will not be responsible for any damage or injuries caused by reaches optimum charge and run time. -
Page 7: Spare Parts
This charger is not intended for any uses other than charging rechargeable batteries. Any other use may result in risk of fire, electric shock or electrocution. visit www.ozito.com.au or contact Ozito Customer Do not place any object on top of the charger or place the charger on a soft surface that may result in excessive internal heat. -
Page 8: Electrical Safety
The power supply for this products charger should be protected by a residual current device (rated at 30mA Note: The supply of 230V and 240V on Ozito tools are interchangeable for Australia and New Zealand. or less). A residual current device reduces the risk of electric shock. -
Page 9: Warranty
• Failure to perform maintenance as set out within the instruction manual. • If the tool is disassembled or tampered with in any way. OZITO Australia/New Zealand (Head Office) 1-23 Letcon Drive, Bangholme, Victoria, Australia 3175. 0316...


Need help?
Do you have a question about the POWER XCHANGE PXDDK-200 and is the answer not in the manual?
Questions and answers