Advertisement
Quick Links
DEAR CUSTOMER,
Congratulations on your purchase of this SVLK - certified Chaise !
To assemble this furniture, you need a 16mm ( 5/8") wrench,
a screwdriver and a hammer
Please unpack the carton and check that you have all
component listed.
HARDWARE LIST
8x Dowels
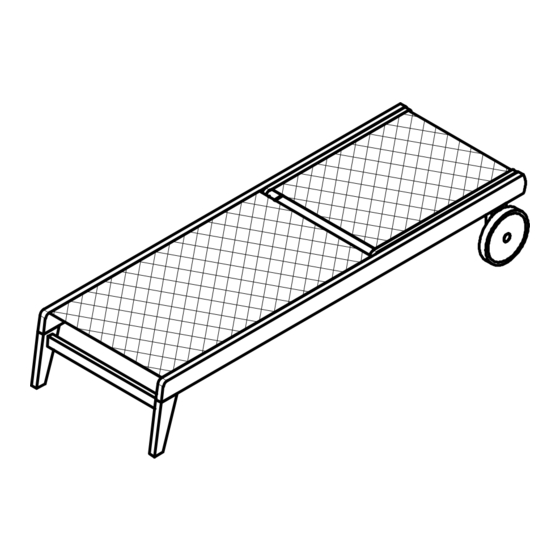
STEP 1/7
Lay Chaise Frame component on level
and smooth surface, as shown.
STEP 3/7
Lift the rear side, then align and insert
Rear Leg component, as shown. Use
the color-coded sticker to guide you. Then,
insert wooden dowels into the holes by using
a hammer until the dowel is completely flushed
inside the holes.
ASSEMBLY INSTRUCTIONS
4x Stainless Steel
3
Screws #8 x
"
4
1x Rear Leg
2x Wheels
STEP 2/7
Lift the front side, then align and insert Front Leg component,
as shown. Use the color-coded sticker to guide you. Then,
insert wooden dowels into the holes by using a hammer until
the dowel is completely flushed inside the holes.
STEP 4/7
Align the SS Plate with pre-drilled holes underneath
front leg part, then screw and tighten Screws to further
strengthen this area.
[MAMG][8080][PBAY SLING CHAISE]
Manufactured for Rooms to Go
[SKU:70680802]
PART LIST
1x Chaise Frame
1x Front Leg
Advertisement

Related Manuals for ROOMS TO GO 70680802


Summary of Contents for ROOMS TO GO 70680802
- Page 1 ASSEMBLY INSTRUCTIONS [MAMG][8080][PBAY SLING CHAISE] Manufactured for Rooms to Go [SKU:70680802] DEAR CUSTOMER, Congratulations on your purchase of this SVLK - certified Chaise ! To assemble this furniture, you need a 16mm ( 5/8") wrench, a screwdriver and a hammer Please unpack the carton and check that you have all component listed.
- Page 2 ASSEMBLY INSTRUCTIONS [MAMG][8080][PBAY SLING CHAISE] Manufactured for Rooms to Go [SKU:70680802] STEP 5/7 Unpack the Wheels and unscrew all hardware from the metal threaded pin, but leave the bigger washer on, as shown. STEP 6/7 DETAIL 'X' Insert the Wheel from outside of the Rear Leg with the bigger washer in between them. Then, insert the smaller washer from the inner side and tighten the nut with a wrench, as shown.
Need help?
Do you have a question about the 70680802 and is the answer not in the manual?
Questions and answers