Table of Contents
Advertisement
Quick Links
Service and Troubleshooting
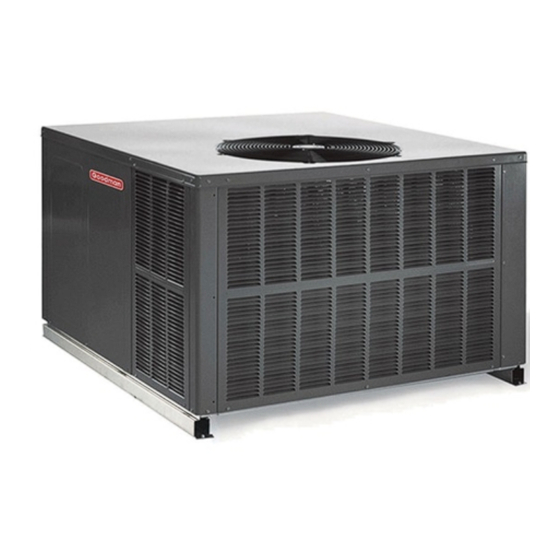
GPCM3 Cooling/*PHM3 Heat Pump & *PHM5 15.2 SEER(2) Heat
Pump Multi Position Package Unit with R-410A
Pride and workmanship go into every product to provide
our customers with quality products. It is possible, however,
that during its lifetime a product may require service.
Products should be serviced only by a qualified service
technician who is familiar with the safety procedures
required in the repair and who is equipped with the proper
tools, parts, testing instruments and the appropriate service
manual. REVIEW ALL SERVICE INFORMATION IN THE
APPROPRIATE SERVICE MANUAL BEFORE
BEGINNING REPAIRS.
ONLY PERSONNEL THAT HAVE BEEN TRAINED TO INSTALL,
ADJUST, SERVICE, MAINTENANCE OR REPAIR
(HEREINAFTER, "SERVICE") THE EQUIPMENT SPECIFIED IN
THIS MANUAL SHOULD SERVICE THE EQUIPMENT.
THIS EQUIPMENT IS NOT INTENDED FOR USE BY
PERSONS (INCLUDING CHILDREN) WITH REDUCED
PHYSICAL, SENSORY OR MENTAL CAPABILITIES, OR LACK
OF EXPERIENCE AND KNOWLEDGE, UNLESS THEY HAVE
BEEN GIVEN SUPERVISION OR INSTRUCTION CONCERNING
USE OF THE APPLIANCE BY A PERSON RESPONSIBLE FOR
THEIR SAFETY.
CHILDREN SHOULD BE SUPERVISED TO ENSURE THAT
THEY DO NOT PLAY WITH THE EQUIPMENT.
THE MANUFACTURER WILL NOT BE RESPONSIBLE FOR
ANY INJURY OR PROPERTY DAMAGE ARISING FROM
IMPROPER SUPERVISION, SERVICE OR SERVICE
PROCEDURES. IF YOU SERVICE THIS UNIT, YOU ASSUME
RESPONSIBILITY FOR ANY INJURY OR PROPERTY
DAMAGE WHICH MAY RESULT. IN ADDITION, IN
JURISDICTIONS THAT REQUIRE ONE OR MORE LICENSES
TO SERVICE THE EQUIPMENT SPECIFIED IN THIS
MANUAL, ONLY LICENSED PERSONNEL SHOULD SERVICE
THE EQUIPMENT. IMPROPER SUPERVISION, INSTALLATION,
ADJUSTMENT, SERVICING, MAINTENANCE OR REPAIR OF
THE EQUIPMENT SPECIFIED IN THIS MANUAL, OR
ATTEMPTING TO INSTALL, ADJUST, SERVICE OR REPAIR
THE EQUIPMENT SPECIFIED IN THIS MANUAL WITHOUT
PROPER SUPERVISION OR TRAINING MAY RESULT IN
PRODUCT DAMAGE, PROPERTY DAMAGE, PERSONAL
INJURY OR DEATH.
Brand
is a registered trademark of Maytag Corporation or its related companies and is used under license. All rights reserved.
®
WARNING
©2019-2023 Daikin Comfort Technologies Manufacturing, L.P.
TABLE OF CONTENTS
IMPORTANT INFORMATION ............................................ 2
PRODUCT IDENTIFICATION ........................................... 3
SYSTEM OPERATION ...................................................... 7
SCHEDULED MAINTENANCE ....................................... 10
SERVICING ..................................................................... 11
CHECKING VOLTAGE ............................................... 11
CHECKING WIRING ................................................... 11
CHECKING THERMOSTAT AND WIRING ................. 11
CONTROL CIRCUIT .................................................... 12
CHECKING CONTACTOR AND/OR RELAYS ............ 13
CHECKING CONTACTOR CONTACTS ...................... 13
CHECKING LOW PRESSURE CONTROL ................. 13
CHECKING HIGH PRESSURE CONTROL ................ 13
CHECKING INTERNAL OVERLOAD ......................... 14
CHECKING CAPACITOR ............................................ 14
TESTING START REPLAY KITS ................................. 14
TESTING CONTACTS RESISTANCE ......................... 15
TESTING CONTACTS VOLTAGE ............................... 15
CAPACITANCE CHECK (MFD) ................................... 15
(PSC MOTORS) .......................................................... 15
CHECKING EEM MOTORS ....................................... 16
CHECKING ECM MOTORS ........................................ 16
CHECKING ECM MOTOR WINDINGS ....................... 17
CHECKING COMPRESSOR ....................................... 17
RESISTANCE TEST .................................................... 17
GROUND TEST .......................................................... 18
UNLOADER TEST PROCEDURE ............................. 19
OPERATION TEST...................................................... 19
LOCKED ROTOR TEST ............................................. 19
TESTING CRANKCASE HEATER .............................. 20
TESTING DEFROST CONTROL ................................ 21
DO NOT BYPASS SAFETY DEVICES
RS6300013r7
March 2023
Advertisement
Table of Contents

Related Manuals for Amana GPCM3 Series


Summary of Contents for Amana GPCM3 Series
-
Page 1: Table Of Contents
Service and Troubleshooting GPCM3 Cooling/*PHM3 Heat Pump & *PHM5 15.2 SEER(2) Heat Pump Multi Position Package Unit with R-410A Pride and workmanship go into every product to provide TABLE OF CONTENTS our customers with quality products. It is possible, however, that during its lifetime a product may require service. -
Page 2: Important Information
IMPORTANT INFORMATION SAFE REFRIGERANT HANDLING TESTING DEFROST THERMOSTAT ......21 While these items will not cover every conceivable CHECKING HEATER LIMIT CONTROL(S) ....21 situation, they should serve as a useful guide. CHECKING HEATER ELEMENTS ......21 REFRIGERATION REPAIR PRACTICE ...... 22 STANDING PRESSURE TEST (RECOMMENDED WARNING BEFORE SYSTEM EVACUATION) ...... -
Page 3: Product Identification
PRODUCT IDENTIFICATION NOMENCLATURE The model number is used for positive identification of component parts used in manufacturing. Please use this number when requesting service or parts information. Nomenclature Brand Minor Revision Goodman® brand Product Category Major Revision Packaged Unit Unit Type Electrical Air Conditioner 208/230 V, 1 Phase, 60 Hz... - Page 4 The model number is used for positive identification of component parts used in manufacturing. Please use this number when requesting service or parts information. Brand Minor Revision A - Amana® Brand Major Revision Product Category Electrical P - Packaged Unit...
- Page 5 Goodman® Brand Package Cooling 14 SEER R410A Multiposition cooling units. Initial GPC14[24-60]M41AA release of sinlge phase models. Amana® Brand Package Cooling 14 SEER R410A Multiposition cooling units. Release of APC14[24-60]M41AB models with access box removed. Goodman® Brand Package Cooling 14 SEER R410A Multiposition cooling units. Release GPC14[24-60]M41AB of models with access box removed.
- Page 6 Single Phase Multiposition Heat Pump Model # Description Amana® Brand Package Heat Pump up to 16 SEER R410A Multiposition heating/ APH16[24-48]M41AA cooling units. Initial release of single phase models. Goodman® Brand Package Heat Pump up to 16 SEER R410A Multiposition heating/ GPH16[24-48]M41AA cooling units.
-
Page 7: System Operation
SYSTEM OPERATION Cooling Cycle Cooling Only Models Cooling When the contacts of the room thermostat close, making terminals R to Y and R to G, the low voltage circuit to the contactor is completed starting the compressor and outdoor The refrigerant used in the system is R-410A. It is a clear, fan motor. - Page 8 SYSTEM OPERATION A/GPHM3 EEM Equipped Models Only: With the thermostat set to the emergency heat position and a call for 2nd stage heat, R to W1 will be energized. This will energize the electric heat contactor(s)/sequencer(s) Single-Stage Heat Pump Units and the EEM motor.
- Page 9 SYSTEM OPERATION Typical Heat Pump System in Cooling Reversing Valve (Energized) Indoor Outdoor Coil Coil Accumulator Typical Heat Pump System in Heating Reversing Valve (De-Energized) Indoor Outdoor Coil Coil Accumulator...
-
Page 10: Scheduled Maintenance
TEST EQUIPMENT SCHEDULED MAINTENANCE Proper test equipment for accurate diagnosis is as Package gas units require regularly scheduled essential as regular hand tools. maintenance to preserve high performance standards, prolong the service life of the equipment, and lessen the The following is a must for every service technician and chances of costly failure. -
Page 11: Servicing
SERVICING 1. Check wiring visually for signs of overheating, damaged insulation and loose connections. Checking Voltage 2. Use an ohmmeter to check continuity of any suspected open wires. 3. If any wires must be replaced, replace with WARNING comparable gauge and insulation thickness. Checking Thermostat and Wiring High Voltage! Disconnect all power before servicing or... -
Page 12: Checking Transformer And Control Circuit
SERVICING Indoor Blower Motor With power ON: *PHM5[24-48]41 Thermostat Wiring WARNING Terminal Thermostat R (24V) Line voltage now present. Green G (fan) Orange O (Rev. Valve) 1. Use a voltmeter to verify 24 volts present at thermostat wires C and R. White W1 (Heat, Aux Heat Stage 1)* 2. -
Page 13: Checking Contactor And/Or Relays
SERVICING WARNING Line voltage now present. WARNING Line voltage now present. 2. Using a voltmeter, check voltage across secondary voltage side of transformer (R to C). 3. No voltage indicates faulty transformer, bad wiring, or bad splices. 4. Check transformer primary voltage at incoming line voltage connections and/or splices. -
Page 14: Checking Internal Overload
SERVICING Capacitor, Start Scroll Compressor Models pressures develop, the contacts of the control open, Hard start components are not required on Scroll breaking the control circuit before the compressor motor compressor equipped units due to a non-replaceable check overloads. This control is automatically reset. valve located in the discharge line of the compressor. -
Page 15: Testing Contacts Resistance
SERVICING 3. Remove wires from capacitor 4. Use multi-meter check micro-farads (MFD) of the capacitor. 5. Place leads from C – HERM 6. Place leads from C – FAN 7. Compare to capacitor rating label. If the reading is within the tolerance listed on rating label the capacitor is good. -
Page 16: Checking Eem Motors
SERVICING air flow. Because of the sophisticated electronics within the ECM motor, some technicians are intimated by the ECM motor; however, these fears are unfounded. GE/ Checking EEM Motors Regal Beloit offers two ECM motor testers, and with a VOM The EEM Motor is a one piece, fully encapsulated, 3 phase meter, one can easily perform basic troubleshooting on brushless DC (single phase AC input) motor with ball... -
Page 17: Checking Ecm Motor Windings
SERVICING 3-pin motor connector OUT - OUT + 16-pin ADJUST +/- connector G (FAN) Y/Y2 5-pin connector COOL EM Ht/W2 24 Vac (R) DELAY Checking Compressor HEAT COMMON2 WARNING BK/PWM (SPEED) W/W1 Hermetic compressor electrical terminal venting can COMMON1 O (REV VALVE) be dangerous. -
Page 18: Ground Test
SERVICING With the terminal protective cover in place, it is acceptable to replace the fuse or reset the circuit breaker ONE TIME breaking the common circuit within the compressor on ONLY to see if it was just a nuisance opening. If it opens single phase units. -
Page 19: Unloader Test Procedure
SERVICING 1. Remove unit wiring from disconnect switch and wire a test cord to the disconnect switch. Unloader Test Procedure NOTE: The wire size of the test cord must equal the If it is suspected that the unloader is not working, the line wire size and the fuse must be of the proper size and type. -
Page 20: Testing Crankcase Heater
SERVICING 2. If voltage is present, loosen the nut on the top of the coil. Remove the coil, there should be slight resistance. Testing crankcase heater 3. If the slight resistance is felt, remove the coil. As you NOTE: Not all compressors use crankcase heaters. remove the coil listen carefully, an audible click should be detected. -
Page 21: Testing Defrost Control
SERVICING 3. Set thermostat to call for heating. System should go into defrost within 21 seconds. 4. Immediately remove jumper from test pins. 5. Using VOM check for voltage across terminals “C & O”. Meter should read 24 volts. 6. Using VOM check for voltage across fan terminals DF1 and DF2 on the board. -
Page 22: Refrigeration Repair Practice
SERVICING Brazing Materials Copper to Copper Joints - Sil-Fos used without flux (alloy of 15% silver, 80% copper, and 5% phosphorous). Recommended heat 1400°F. WARNING Copper to Steel Joints - Silver Solder used without a flux (alloy of 30% silver, 38% copper, 32% zinc). High Voltage! Disconnect all power before servicing or Recommended heat - 1200°F. -
Page 23: System Evacuation
SERVICING 1. Connect the vacuum pump, micron gauge, and vacuum rated hoses to both service valves. Evacuation must use both service valves to eliminate system mechanical seals. System Evacuation 2. Evacuate the system to less than 500 microns. Condensing unit liquid and suction valves are closed to 3. -
Page 24: Checking Compressor Efficiency
SERVICING If the test shows: Below normal high side pressure. Above normal low side pressure. CAUTION Low temperature difference across coil. Low amp draw at compressor. Only use refrigerant certified to AHRI standards. Used refrigerant may cause compressor damage. Goodman is not responsible for damage or the need for repairs resulting And the charge is correct. - Page 25 SERVICING Pressure vs. Temperature Chart R-410A °F °F °F °F °F °F PSIG PSIG PSIG PSIG PSIG PSIG -37.7 37.8 74.3 100.2 120.7 137.6 114.0 216.0 318.0 420.0 522.0 -34.7 116.0 38.7 218.0 74.9 320.0 100.7 422.0 121.0 524.0 137.9 -32.0 118.0 39.5...
- Page 26 SERVICING REQUIRED LIQUID LINE TEMPERATURE LIQUID PRESSURE REQUIRED SUBCOOLING TEMPERATURE (°F) AT SERVICE VALVE (PSIG)
-
Page 27: Overfeeding
SERVICING 1. Run system at least 15 -20 minutes to allow pressure to stabilize. Overfeeding 2. Install a low side pressure gauge on the suction line access fitting. Overfeeding by the expansion valve results in high suction 3. Temporarily install thermometer on suction (large) pressure, cold suction line, and possible liquid slugging of line near compressor with adequate contact and the compressor. -
Page 28: Heat Pump - Heating Cycle
SERVICING Heat Pump - Heating Cycle The proper method of charging a heat pump in the heat mode is by weighing the charge according to the total 4. The difference between the thermometer reading and charge listed on the rating plate. pressure to temperature conversion is the amount of subcooling. -
Page 29: Checking Restricted Liquid Line
SERVICING 3. Stop the system and check the time it takes for the high and low pressure gauge readings to equalize. If it takes more than seven (7) minutes to equalize, the restriction device is inoperative. Replace, install a liquid line drier, evacuate and recharge. -
Page 30: Reversing Valve Replacement
SERVICING rag around the reversing valve will eliminate conduction of heat to the valve body when brazing the line connection. NOTE: The Flushing Method using R-11 refrigerant The use of a wet rag sometimes can be a nuisance. There is no longer approved by Goodman® Manufacturing are commercial grades of heat absorbing paste that may Company, L.P. - Page 31 SERVICING Adjusting Airflow EEM Motor The blower motor speed for the EEM motor is controlled by three 24V low voltage leads: green, yellow, and white. The green lead sets the speed for fan-only mode. The yellow lead sets the speed for cooling and heat pump heating mode (if applicable).
- Page 32 SERVICING GPCM3[24-60]41** BLOWER PERFORMANCE Horizontal Flow Motor Compressor E.S.P. (In. of H Model Volts stage Single stage Watts 1133 1081 1026 T2/T3 Single stage Watts 1230 1190 1140 1095 1040 T4/T5 Single stage Watts Single stage Watts 1271 1222 1176 1129 1081 1026...
- Page 33 SERVICING GPCM3[24-60]41** BLOWER PERFORMANCE Down flow Motor Compressor E.S.P. (In. of H Model Volts stage Single stage Watts 1065 1016 T2/T3 Single stage Watts 1156 1119 1072 1029 T4/T5 Single stage Watts Single stage Watts 1195 1148 1106 1061 1016 T2/T3 Single stage Watts...
- Page 34 SERVICING *PHM3[24-60]41** BLOWER PERFORMANCE Horizontal Flow Motor Compressor E.S.P. (In. of H Model Volts stage Single stage Watts 1114 1068 1017 T2/T3 Single stage Watts 1371 1316 1281 1240 1186 1133 1072 1000 T4/T5 Single stage Watts Single stage Watts 1347 1295 1243...
- Page 35 SERVICING *PHM3[24-60]41** BLOWER PERFORMANCE Down flow Motor Compressor E.S.P. (In. of H Model Volts stage Single stage Watts 1085 1019 T2/T3 Single stage Watts 1355 1300 1254 1201 1147 1084 1007 T4/T5 Single stage Watts Single stage Watts 1302 1257 1198 1148 1089...
- Page 36 SERVICING APHM5 Blower Performance Data APHM52441 APHM53041 Cooling / Adjust Electric Adjust Cooling / Adjust Electric Adjust CFM* CFM* CFM* CFM* HP Speed Heat HP Speed Heat Minus Minus Minus Minus Normal Normal Normal Normal Plus Plus Plus Plus Minus Minus Minus Minus...
- Page 37 SERVICING GPHM5[24-48]41** BLOWER PERFORMANCE Horizontal Flow E.S.P. (In. of H Motor Compressor Model Volts stage Low stage Watts 1151 1099 1047 T2/T3 High stage Watts 1347 1315 1256 1194 1152 1096 1051 T4/T5 High stage Watts Low stage Watts 1321 1276 1232 1170...
- Page 38 SERVICING GPHM5[24-48]41** BLOWER PERFORMANCE Down flow E.S.P. (In. of H Motor Compresso Model Volts r stage Low stage Watts 1082 1033 T2/T3 High stage Watts 1266 1236 1181 1122 1083 1030 T4/T5 High stage Watts Low stage Watts 1242 1200 1158 1100 1049...
- Page 39 SERVICING APHM56041 APHM56041 Horizontal Flow Downflow External External Static Speed Speed Static Pressure SCFM SCFM Pressure (ESP), in (ESP), in w.c. w.c. 1372 0.20 1372 0.20 1259 0.23 1259 0.23 1133 0.25 1133 0.25 1016 0.27 1016 0.27 2176 0.69 2176 0.69 2080...
- Page 40 SERVICING 5 Ton Heat Pump Standard Static Drive Model: APHM56041 Horizontal Flow Downflow External External Speed Static Speed Static SCFM SCFM Pressure Pressure (ESP), in w.c. (ESP), in w.c. 1372 0.20 1380 0.20 1259 0.23 1262 0.23 1133 0.25 1132 0.25 1006 0.27...
- Page 41 SERVICING APPENDIX A BLOWER PERFORMANCE TABLES – HEAT PUMP 5 TON HEAT PUMP Standard Static Drive Model: GPHM56041 Horizontal Flow Down Flow External External Speed Static Speed Static SCFM SCFM Pressure Pressure (ESP), in w.c. (ESP), in w.c. 1372 0.20 1380 0.20 1262...
- Page 42 TROUBLESHOOTING POSSIBLE CAUSE REMEDY SYMPTOM High head - low suction a. Restriction in liquid line or a. Remove or replace with proper size TXV. TXV not functioning High head - high or normal suction a. In Cooling: Dirty condenser coil a.
-
Page 43: Troubleshooting
Troubleshooting AC- Cooling Cooling 24 volts at 24v between between R 208/240v at 208/240v at Check disconnect circuit transfomer Y & C at & C at L1 & L2 to transformer breaker fuses secondary? thermostat? thermostat? contactor? primary? Check wiring between contactor and transformer Replace transformer Check low voltage fuse... - Page 44 Troubleshooting AC -Heating (Electric Heat) No Heat 24v between 24v between 24 volts at 208/240v at 208/240v at Check circuit breaker C & W at R & C at transfomer transformer L1 & L2 at disconnect fuses thermostat? thermostat? secondary? primary? contactor? Check wiring between contactor...
- Page 45 Troubleshooting Heat Pump - Cooling (1 Stage) Cooling 24 volts at 24v between between R 208/240v at 208/240v at Check disconnect circuit transfomer Y & C at & C at L1 & L2 to transformer breaker fuses secondary? thermostat? contactor? thermostat? primary? Check wiring between contactor...
- Page 46 Troubleshooting Heat Pump - Cooling (1 Stage) Are refrigerant Check for Check for pressures and leak in Verify refrigerant charge restriction in superheat/subcooling refrigerant system correct? system Pressure test, evacuate and Clear restriction recharge system Pressure test, evacuate and Repair Leak recharge system Heat pump cooling mode operation...
- Page 47 Troubleshooting Heat Pump - Cooling (2 Stage) Cooling 24 volts at between R 208/240v at 208/240v at between Y1 Check disconnect circuit transfomer & C at L1 & L2 to & C at transformer breaker fuses secondary? thermostat? contactor? thermostat? primary? Check wiring between contactor and transformer...
- Page 48 Troubleshooting Heat Pump - Cooling (2 Stage) Is there 24v Check thermostat & wiring between C & Y2 at thermostat? Is there 24v at Check thermostat & wiring compressor contactor relay coil? Are relay contacts closed? Replace relay Should read 0v at pins 2 &...
- Page 49 Troubleshooting Heat Pump - Heating (1 Stage) No Heat 24v between 24 volts at between R 208/240v at 208/240v at Check disconnect circuit Y & C at transfomer & C at L1 & L2 to transformer breaker fuses thermostat? secondary? thermostat? contactor? primary?
- Page 50 Troubleshooting Heat Pump - Heating (2 Stage) No Heat 24 volts at between Y between R 208/240v at 208/240v at Check disconnect circuit transfomer & C at & C at L1 & L2 to transformer breaker fuses secondary? thermostat? thermostat? contactor? primary? Check wiring between contactor...
- Page 51 Troubleshooting Heat Pump - Heating (2 Stage) Is there 24v at Check thermostat & wiring compressor relay coil? Are relay contacts closed? Replace relay Should read 0v at pins 2 & 4 Is there 18-28vdc Replace unloader plug at compressor unloader plug harness? Does compressor...
-
Page 52: Wiring Diagrams
WIRING DIAGRAMS PACKAGE SYSTEM WIRING DIAGRAM - 1 STAGE ELECTRIC HEAT TYPICAL HP ROOM THERMOSTAT SEE NOTE 1 #18 GAUGE 7 WIRE PACKAGE UNIT REQUIRED FOR LOW VOLTAGE HEAT PUMPS JUNCTION BOX YELLOW GREEN ORANGE WHITE BLUE OUTDOOR THERMOSTAT CLOSE ON TEMPERATURE FALL PACKAGE SYSTEM WIRING DIAGRAM - 2 STAGE ELECTRIC HEAT ABOVE 10 KW TYPICAL HP... - Page 53 WIRING DIAGRAMS PACKAGE SYSTEM WIRING DIAGRAM - HEAT PUMPS ONLY! TWO-STAGE ELECTRIC HEAT ABOVE 10 kW TYPICAL H/P ROOM THERMOSTAT #18 GAUGE 8 WIRE PACKAGE HEAT PUMP YELLOW GREEN OUTDOOR THERMOSTAT #2 (IF USED, SEE NOTE 1) ORANGE WHITE BROWN BLUE OUTDOOR THERMOSTAT #1 LOW VOLTAGE...
- Page 54 WIRING DIAGRAMS HTR2 HTR1 HTR1 TL L1 L2 ONE (1) ELEMENT ROWS TWO (2) ELEMENT ROWS 5 KW 10 KW HTR1 HTR1 TL HTR2 HTR2 HTR3 HTR3 TL HTR4 L2 L1 L2 THREE (3) ELEMENT ROWS FOUR (4) ELEMENT ROWS L1 L2 15 KW 20 KW...
- Page 55 WIRING DIAGRAMS TO CONTROL BOX 208 / 240 / 1 / 60 SEE NOTES 1 & 2 TO ELECTRIC HEAT PU/BK-3 BK-3 BK-3 WIRING CODE COLOR CODE NOTES: FACTORY WIRING 1. FOR APC & GPC UNITS: A = L1 / B = L2 BK --------------- BLACK FOR APH &...
- Page 56 WIRING DIAGRAMS Economizer 24VAC/DC ROOM THERMOSTAT Wiring is subject to change. Always refer to the wiring diagram on the unit for the most up-to-date wiring.
- Page 57 WIRING DIAGRAMS GPCM3[24-60]M41A* PLM-P NOTE 3 SEE NOTE 1 208-230/1/60 PLF-P SEE NOTE 7 RCCF LVJB SEE NOTE 4 LVTB THERMOSTAT NOTE 5 CONTROL PLF-C COMP SUPPLY VOLTAGE 208-230/1/60 SEE NOTE 1 CH & CHS OPTIONAL @ L1,L2, SEE NOTE 6 SEE NOTE 6 PLM-B L G N...
- Page 58 WIRING DIAGRAMS A/GPHM3[24-48]M41A* COMP SEE NOTE 6 NOTES 7 AND 8 SEE NOTE 1 NOTE 3 PLF-P 208/230/1/60 PLM-P LVDR 0-RV C-RV HVDR SEE NOTE 4 RCCF LVJB LVTB THERMOSTAT SEE NOTE 5 PLF-C CONTROL PLF-H SUPPLY VOLTAGE 208-230/1/60 SEE NOTE 2 SEE NOTE 1 PLM-B COMP...
- Page 59 WIRING DIAGRAMS A/GPHM3[60]M41A* COMP SEE NOTE 6 SEE NOTE 1 NOTE 3 GR BK PU PLF-P 208/230/1/60 PLM-P LVDR 0-RV C-RV HVDR SEE NOTE 7 CONTROL NOTE 4 RCCF LVJB THERMOSTAT LVTB SEE NOTE 5 PLF-C PLF-H SUPPLY VOLTAGE 208-230/1/60 L G N PLM-B SEE NOTE 2...
- Page 60 WIRING DIAGRAMS APHM5[24-48]M41A* THERMOSTATS HUMIDISTAT E\W1 2 Y / OUTDOOR HEATPUMP C ON DENSER HEATER 24 VAC PLEASEREFER TO MANUAL FO R PROPER DIP SWITCH (CFM) CONFIGURATION. F 3A Wiring is subject to change. Always refer to the wiring diagram on the unit for the most up-to-date wiring.
- Page 61 WIRING DIAGRAMS A/GPHM5[60]M41 Wiring is subject to change. Always refer to the wiring diagram on the unit for the most up-to-date wiring.
- Page 62 WIRING DIAGRAMS GPHM5[24-48]M41A* COMP SEE NOTE 6 SEE NOTE 1 NOTE 3 GR BK PU PLF-P 208/230/1/60 PLM-P LVDR 0-RV C-RV HVDR SEE NOTE 7 CONTROL NOTE 4 RCCF LVJB THERMOSTAT LVTB SEE NOTE 5 PLF-C PLF-H SUPPLY VOLTAGE 208-230/1/60 C L G N PLM-B SEE NOTE 2...
Need help?
Do you have a question about the GPCM3 Series and is the answer not in the manual?
Questions and answers