Advertisement
Quick Links
Assembly Instructions
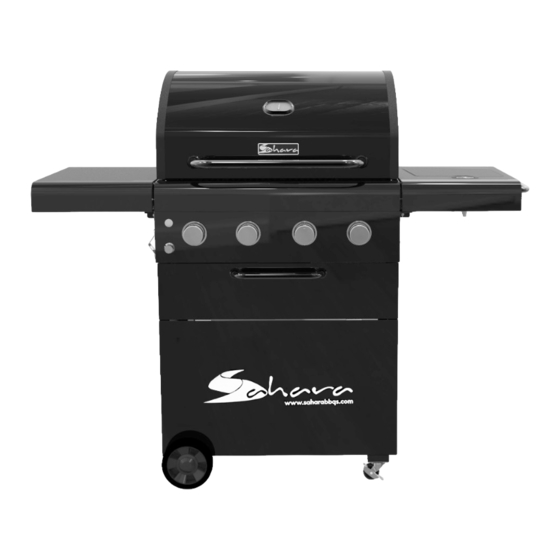
Photograph is not to scale. Specifications may differ slightly from the images shown.
Product Features
Ignition Type: LED Electronic Ignition (main burners), Piezo Ignition (side burner)
Grill Type: Sahara™ Grill Insert System
Side Burner: Yes
High Setting Burner: Yes
Warming Rack Type: Extendable
Drinks Holder: Yes
Pull Out Drawer: Yes
Rotisserie Compatible: Yes
Manufactured by
Universal Innovations
A4
5 0 Performer Barbecue
617A-2021
Advertisement

Related Manuals for Universal Innovations Sahara A4 50 Performer


Summary of Contents for Universal Innovations Sahara A4 50 Performer
- Page 1 Ignition Type: LED Electronic Ignition (main burners), Piezo Ignition (side burner) Grill Type: Sahara™ Grill Insert System Side Burner: Yes High Setting Burner: Yes Warming Rack Type: Extendable Drinks Holder: Yes Pull Out Drawer: Yes Rotisserie Compatible: Yes Manufactured by Universal Innovations 617A-2021...
-
Page 2: Parts Supplied
Parts Supplied Description Illustration Description Illustration Vaporising Base Bars Left + Right Cooking Side Wall Grill Cabinet Warming Brace Plate Rack Cabinet Condiment Front Panel Rack Axle Grease Tray Assembly Castor Grease Cup Assembly Bracket Cylinder Grease Supports Sink + Hood Grease Assembly Cup Cap... -
Page 3: Tools Required For Assembly
• Remove all transit packaged parts from the inside of the grill body before assembling. Technical Data CE Approval: 2797/21 0359DL05646 Main Burner Heat Input: 3.9kW (main burner) x 3 =11.7kW Global Headquarters Universal Innovations Searing Burner Heat Input: 4.8kW Kilcoole Industrial Estate Kilcoole Co. Wicklow Side Burner Heat Input: 3.1kW... -
Page 4: Assembly Step
Assembly Step 1 Left + Right Side Wall Base M6x12 Bolt (Ref A) Fit left and right side walls to base as shown below using 8 of the M6x12 bolts (Ref A). Fit left and right side walls to base as shown below using 8 of the M6x12 bolts (Ref A). Finger-tighten only at this stage. - Page 5 Assembly Step 2 Cabinet Brace Plate M6x12 Bolt (Ref A) Fit the two cabinet brace plates to the base and side wall assembly using 8 of the M6x12 bolts (Ref A) as shown below. Finger-tighten only at this stage. M6x12 Bolts (Ref A)
- Page 6 Assembly Step 3 Cabinet Front Panel M6x12 Bolt (Ref A) Note: Flip cabinet assembly over so that the left side wall is on the ground. Fit cabinet front panel to base and side wall assembly as shown below using 6 of the M6x12 bolts (Ref A). Finger-tighten only at this stage.
- Page 7 Assembly Step 4 Secure chain to cabinet front panel using the pre-fitted M6x12 bolt and washer. Tighten all bolts at this stage.
- Page 8 Assembly Step 5 Axle Assembly Castor Assembly M6x12 Bolt (Ref A) Turn the barbecue cabinet over and fit axle assembly and two castor assemblies to the barbecue cabinet base using 16 of the M6x12 bolts (Ref A). Note: Axle side with cut-out goes to back side of cabinet.
- Page 9 Assembly Step 6 Cylinder Supports M6x12 Bolt (Ref A) Turn the barbecue cabinet over and fit the two cylinder supports using 5 of the M6x12 bolts (Ref A). Note: Once barbecue is assembled and rolled into position, press castor levers down to lock castors in place.
- Page 10 Assembly Step 7 M6x12 Bolt (Ref A) Sink + Hood Assembly Position sink + hood assembly onto cabinet. Open hood and use 4 M6x12 bolts (Ref A) to secure sink + hood assembly into position. Be sure that the edges of the sink and hood assembly are even with the edges of the barbecue cabinet before tightening bolts.
- Page 11 Assembly Step 8 Note: The Left Side Shelf is equipped with an extension table as shown in the figure to the left. Grasp the front of the shelf and pull the table forward. Push in to close. M6x12 Bolt (Ref A) Left Side Shelf Side Shelf Wood Insert side shelf wood into the left side shelf as shown below.
- Page 12 Assembly Step 9 Note: The Right Side Shelf is equipped with a side burner as shown in the figure to the left. Use the burner for heating sauces or liquids in a small pan, or for M6 x 12 Bolt Right Side Shelf various other food preparations.
- Page 13 Assembly Step 10 Cooking Grill Warming Rack Condiment Rack Vaporising Bars (x4) 1. Fit vaporising bars (x4) into position as shown. 2. Fit cooking grill into position as shown. 3. Fit warming rack into position as shown. Note: As a convenience feature, there is a bottle opener on the left side of the barbecue sink + hood assembly.
- Page 14 Assembly Step 11 Grease Tray Grease Cup Bracket Grease Cup Grease Cup Cap Attach grease cup bracket and grease cup cap to grease tray using the pre-fi tted Wing Bolt and then slide grease cup into the grease cup bracket. Slide grease tray into the back of the barbecue as shown below.
- Page 15 Assembly Step 12 Battery Box 1. Place 4 x AA batteries into the battery box. 2. Connect the wire from the battery box to the wire hanging from the sink. 3. Place the battery box onto the wall of the sink, away from the grease tray. Use the location label to position the battery box correctly.
- Page 16 Assembly Step 13 IMPORTANT: If your barbecue has been pre-assembled, please check the hose connection to ensure it is tight. Gas Hose and Regulator Screw the hose connection onto the bottom of the barbecue as shown and then gently pinch with the 22mm head of the 19-22mm spanner to secure.
Need help?
Do you have a question about the Sahara A4 50 Performer and is the answer not in the manual?
Questions and answers