Table of Contents
Advertisement
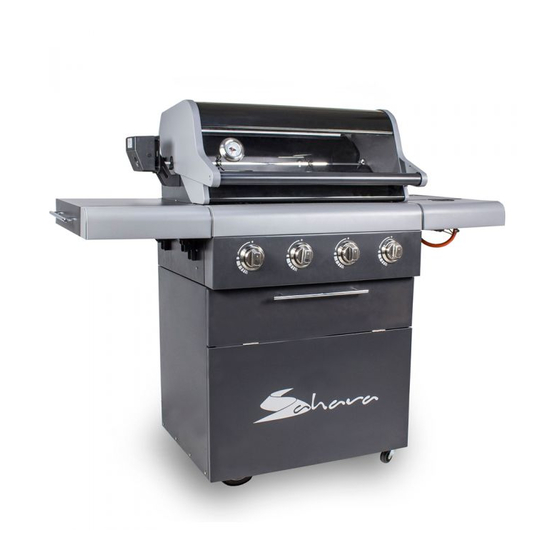
Photograph is not to scale. Specification
subject to change without prior notice.
WARNING
FOR YOUR SAFETY
IF YOU SMELL GAS:
1. Shut off gas to the appliance.
2. Extinguish any open flame.
3. Open barbecue lid or hood.
4. If odour continues, discontinue use and
contact your local dealer.
Manufactured by
Universal Innovations
www.uigroup.ie
X4
• For outdoor use only.
• Read instructions before using the appliance. Failure to follow instructions could result in
death, serious bodily injury, and/or property loss.
• Warning: accessible parts may be very hot. Keep young children away.
• Do not move the appliance during use.
• Turn off the gas supply at the gas bottle after use.
• Any modification of the appliance, misuse, or failure to follow the instructions may be
dangerous and will invalidate your warranty. This does not affect your statutory rights.
• Retain these instructions for future reference.
• Leak test your barbecue annually. Check the hose connections are tight and leak test each
time you reconnect the gas bottle
FOR YOUR SAFETY
1. Do not store or use petrol or other flammable vapours or
liquids in the vicinity of this or any other appliance.
2. A gas bottle not connected for use shall not be stored in the
vicinity of this or any other appliance.
5 0 Barbecue
Advertisement
Table of Contents

Subscribe to Our Youtube Channel
Related Manuals for Universal Innovations Sahara X450


Summary of Contents for Universal Innovations Sahara X450
- Page 1 3. Open barbecue lid or hood. 2. A gas bottle not connected for use shall not be stored in the 4. If odour continues, discontinue use and vicinity of this or any other appliance. contact your local dealer. Manufactured by Universal Innovations www.uigroup.ie...
-
Page 2: Table Of Contents
Parts Supplied Description Illustration Description Illustration Hose Large Wheel Assembly Castor Left Side Wheel Shelf Right Side Cabinet Shelf Base Vaporising Cabinet Bars Base Plate Cooking Cylinder Grill Rack Warming Left + Right Rack Side Wall Rotisserie Cabinet Motor Front Panel Bracket Rotisserie Cabinet... - Page 3 Parts Supplied Fixings Supplied Description Illustration Description Illustration Rotisserie M6x12 Rotating Bolt Sleeve M6x16 Grease Tray Bolt M6 Washer M4x10 Bolt Tools Required For Assembly • Allen Key (supplied) • Adjustable Spanner Before You Start • Check the contents of the box and make sure you have all the parts and fittings listed. If not, contact our Helpline on 00 353 1 2873797 and we will be able to help you.
-
Page 4: Large Wheel
Assembly Step 1 Large Wheel Cabinet Base M6x12 Bolt (Ref A) Castor Wheel Fit large wheels to the cabinet base using the prefitted washers and R-clips. Fit castor wheels to the cabinet base using 6 M6x12 bolts (Ref A). NOTE: Order of fixings on large wheels M6x12 Bolts (Ref A) M6x12 Bolts (Ref A) - Page 5 Assembly Step 2 Left + Right Side Wall M6x12 Bolt (Ref A) Fit left and right side walls using 4 M6x12 bolts (Ref A) along the bottom of each wall. Note: make sure large wheels are on the left hand side. M6x12 Bolts (Ref A)
- Page 6 Assembly Step 3 Cabinet Brace Plate Cabinet Front Panel M6x12 Bolt (Ref A) 1. Fix cabinet front panel at the six points as shown below using 6 M6x12 bolts (Ref A). Note: an extra person will be needed to hold the door in position while tightening fixings. 2.
-
Page 7: Cabinet Base 1
Assembly Step 4 Cabinet Base Plate Cylinder Rack M6x12 Bolt (Ref A) M6x16 Bolt (Ref B) M6 Washer (Ref C) Turn barbecue cabinet base over (large wheels on left hand side). Position cabinet base plate and cylinder rack as shown. Note: place cabinet base plate first. Use 4 M6x16 bolts (Ref B) and 4 M6 Washers (Ref C) to secure cylinder rack and one side of cabinet base plate. -
Page 8: Heat Shield
Assembly Step 5 Heat Shield M6x12 Bolt (Ref A) Fix heat shield using 4 M6x12 bolts (Ref A). -
Page 9: Rear Cros Bar
Assembly Step 6 Front Cross Bar M4x10 Bolt (Ref D) M6x12 Bolt (Ref A) Rear Cross Bar Fit front cross bar and rear cross bar using 8 M4x10 bolts (Ref D). Make sure front cross bar (with magnet) is placed at front of barbecue. Secure chain to front access panel with 1 M6x12 bolt (Ref A). -
Page 10: Sink + Hood Assembly 1
Assembly Step 7 Sink + Hood Assembly M6x12 Bolt (Ref A) Hose Assembly Lie Sink + Hood Assembly on its back. Screw Hose Assembly onto gas pipe and pinch tight with spanner provided. Position sink + hood assembly onto cabinet. Open hood and use 4 M6x12 bolts (Ref A) to secure sink + hood assembly into position. -
Page 11: Left Side
Assembly Step 8 Right Side Shelf Left Side Shelf Use pre-fitted R-clip and pin to secure left and right side shelves. The long bar is used to secure the side shelf in the upright position. Note: Right side shelf includes side burner. Long bar R-clip and pin... -
Page 12: Vaporising
Assembly Step 9 Warming Rack Cooking Grills (x4) Vaporising Bars (x4) 1. Fit vaporising bars (x4) into position as shown. 2. Fit cooking grills (x4) into position as shown. 3. Fit warming rack into position as shown. -
Page 13: Rotisserie Motor
Assembly Step 10 Rotisserie Motor Bracket Rotisserie Handle Bracket Rotisserie Motor 1. Fit Rotisserie Motor Bracket to sink panel as shown using the 2 prefitted screws and nuts. 2. Fit Rotisserie Handle Bracket to sink panel as shown using the 2 prefitted screws and nuts. 3. -
Page 14: Rotisserie Bar
Assembly Step 11 Rotisserie Bar Rotisserie Skewers (x2) Rotisserie Handle Rotisserie Rotating Sleeve Assemble Rotisserie as shown below. Insert pointed end into Rotisserie Motor and rest Rotisserie Rotating Sleeve on Rotisserie Handle Bracket. Note: When using Rotisserie, remove the warming rack. - Page 15 Assembly Step 12 Connect side burner gas hose to t-connector as shown (through hole). Secure with jubilee clip. Note: Heat end of hose in warm water before connecting for easy fitting.
- Page 16 Assembly Step 13 Grease Tray Line grease tray with sand and insert as shown. Maximum bottle size 580mm 315mm Load gas cylinder through back of the barbecue. Connect regulator to cylinder as per regulator instructions. Perform leak test (see page 17). Use cabinet front panel for easy access to gas hose and regulator.
- Page 17 BEFORE USING YOUR BARBECUE Leak Testing • IMPORTANT – PERFORM LEAK TEST BEFORE USE • NEVER use an open flame to test for leaks at anytime, DO NOT IGNITE The BARBECUE DURING THE LEAK TESTING. • To be performed in a well ventilated area. •...
-
Page 18: Rotisserie
USING YOUR BARBECUE Connecting to the Cylinder • Confirm all barbecue control knobs are in the off position. • Connect the regulator to the gas bottle according to your regulator and bottle dealer’s instructions. Before Cooking • Before proceeding, make certain that you understand the WARNINGS section of this manual. •... - Page 19 End of Cooking Session After each cooking session, turn the barbecue burners to the ‘high’ position and burn for 5 minutes. This procedure will burn off cooking residue, thus making cleaning easier. Do not use any abrasive materials. Turning Off Your Barbecue When you have finished using your barbecue, turn all control valves fully clockwise to the ‘Off’...
- Page 20 Warnings • This product is for OUTDOOR USE ONLY. • Important – Ensure the barbecue is positioned on flat level ground to aid with fat/grease run off. • Important – LEAK TEST THE BARBECUE WHEN FULLY ASSEMBLED BEFORE FIRST USE. In addition, always leak test the unit –...
- Page 21 Main burner 1.0mm, side burner 0.84mm Gas/Pressure: Butane-28mbar/Propane-37mbar Gas Consumption: 1458 grams per hour Gas Category: Total Heat Input: 20.25kW Specifications are subject to change without prior notice. This barbecue is manufactured by: Universal Innovations, Kilcoole Industrial Estate, Kilcoole, Co. Wicklow, Ireland.
- Page 22 BARBECUE GUARANTEE This barbecue is made by Universal Innovations. It is made to an exacting quality standard and is covered by the following guarantee. The product has a 10 year limited warranty, regarding proper use. Sink + Hood: 10 years (no rust through/burn through/excludes fading/colour change)
Need help?
Do you have a question about the Sahara X450 and is the answer not in the manual?
Questions and answers