Advertisement
Table of Contents
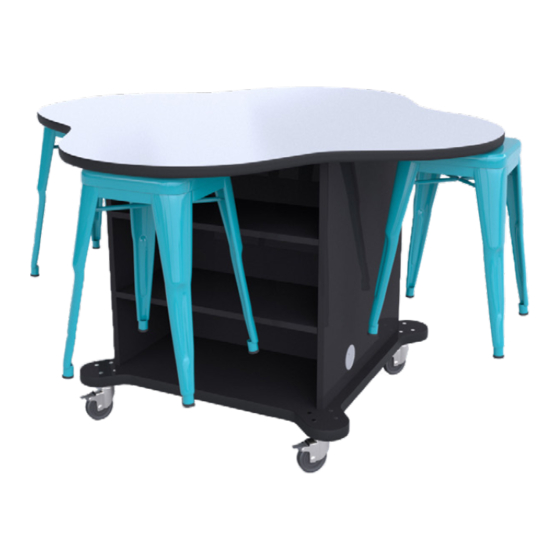
Creation Cube
Assembly Instructions
Hardware Kit
•
4-35mm Silver Bolts
•
16 Black K-Lock Nuts
•
16-40mm Nickel or Black Bolts
•
4 Casters
•
16 Shelf Pins - 4 for each shelf
•
4 Backpack Hooks
*May contain extra screws
Tools Needed
•
7/16 Socket Wrench
•
5/32 Hex bit
•
(Optional) Drill
Instructions
1. Utilizing the help of a partner, carefully invert the Creation Cube cabinet where you can easily access
the four outer corners of the cabinet for caster assembly as shown below. Align the holes on the plate
of the caster to the pre-drilled holes in the base of the corner. Insert the provided 40mm nickel or
black bolts through the caster plate and base. Using the provided black lock-nuts, hand tighten onto
each of the bolts to hold them in place. Once all four are hand tightened, use a 7/16 socket wrench to
tighten them the rest of the way. Use caution to not over-tighten, causing damage to the laminate.
Repeat for each caster.
1
2. The Creation Cube ships with both backpack hooks and shelves per
side. This allows the teacher to set their cabinets up to their preference.
If backpack hooks are preferred, now is a good time to install those (2
per side) while the cabinet is flipped upside down. There are pre-drilled
pilot holes for the backpack hooks (As shown right).
3. Carefully flip the table base back over. Place the tabletop on top of
the base, aligning the 4 bolt inserts to the four holes in the base. Be very careful to align the holes
properly. If they don't align properly, try turning the top 180 degrees for re-alignment.
Hardware Kit
2
For assembly assistance call 1-800-255-9189
Black or
Nickel 40mm
Bolts
3
Silver 35mm
VS
Bolts
4
Advertisement
Table of Contents

Related Manuals for cef Creation Cube


Summary of Contents for cef Creation Cube
- Page 1 Hardware Kit Instructions 1. Utilizing the help of a partner, carefully invert the Creation Cube cabinet where you can easily access the four outer corners of the cabinet for caster assembly as shown below. Align the holes on the plate of the caster to the pre-drilled holes in the base of the corner.
- Page 2 For assembly assistance call 1-800-255-9189 Creation Cube Assembly Instructions 4. From the inside of the table base, secure the table top to the base with the 4-35mm silver bolts using a 5/32 hex bit CAUTION: DO NOT use 40mm nickel or black bolts as they are too long and will drill through the top.
Need help?
Do you have a question about the Creation Cube and is the answer not in the manual?
Questions and answers