Table of Contents
Advertisement
Quick Links
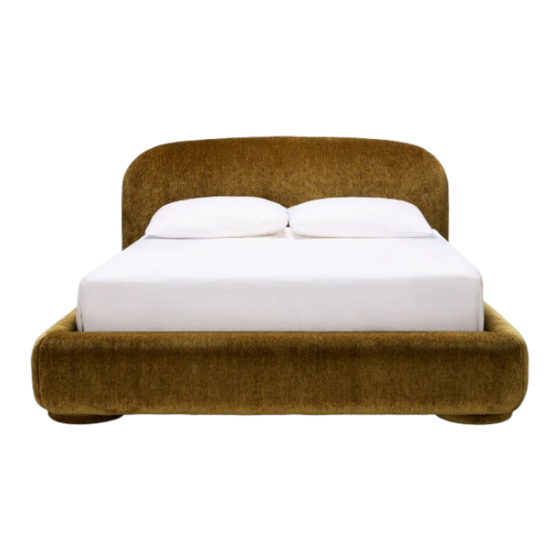
LULL QUEEN BED
ASSEMBLY INSTRUCTIONS
Thank you for purchasing the Sarah Ellison Lull Queen Bed. This document
lists the contents included in your delivery. Please take the time to identify
the hardware, as well as the individual components of this product. As you
unpack and prepare for assembly, place the contents on a carpeted or
padded area to protect them from damage.
HARDWARE
Part A
Part B
x36 Bolts
x36 Spring
M8x35mm
Washers
TOOLS REQUIRED
Screwdriver
Allen key (provided)
PEOPLE REQUIRED FOR
ASSEMBLY
A minimum of two people are
required to assemble this product
ESTIMATED TIME OF ASSEMBLY
2 hours
CUSTOMER SERVICE
For Australian customer service contact : info@sarahellison.com.au
For any international customer service inquires please contact the retailer of purchase
Part C
Part D
x36 Flat
x1 Allen Key
Washers
page 1 | 8
Part E
Part F
x48 Screws
x4 Corner
M4x30mm
Brackets
8
2
5
6
5
4
Part G
x3 Lock
Washer
1
7
6
3
sarahellison.com.au
Advertisement
Table of Contents

Related Manuals for SARAH ELLISON LULL


Summary of Contents for SARAH ELLISON LULL
- Page 1 LULL QUEEN BED ASSEMBLY INSTRUCTIONS Thank you for purchasing the Sarah Ellison Lull Queen Bed. This document lists the contents included in your delivery. Please take the time to identify the hardware, as well as the individual components of this product. As you unpack and prepare for assembly, place the contents on a carpeted or padded area to protect them from damage.
- Page 2 STEP 1 Lay the two side rails and base rail into a U shape on a clean, flat surface. The edges with piping should be facing the ground. Using 4xPart A, 4xPart B, 4xPart C and the supplied Allen key, fix the three rails together at the brackets by tightening the bolts by only 80%.
- Page 3 STEP 3 Attach the four feet to the main bed assembly by fixing the corner brackets through the holes in the rails and headboard. Use 4xPart A, 4xPart B, 4xPart C and the supplied Allen key per leg, and tighten the bolts by only 80%.
- Page 4 STEP 5 Attach the centre support rail to the main bed frame using 4xPart A, 4xPart B, 4xPart C and the supplied Allen key. Part C Part B Part D Part A STEP 6 Unroll the bed slats onto the bed frame, stretching them from end to end.
- Page 5 STEP 7 The assembly is now complete and product is ready for use. page 5 | 8 sarahellison.com.au...
- Page 6 With a little care you can prolong the life of your furniture. The following information is only intended as a general guideline. Please follow the instructions to ensure maximum longevity of your Sarah Ellison furniture. • Vacuum textiles regularly with an upholstery attachment to remove dust and dirt.
- Page 7 This page has intentionally been left blank. page 7 | 8 sarahellison.com.au...
- Page 8 sarahellison.com.au page 8 | 8...
Need help?
Do you have a question about the LULL and is the answer not in the manual?
Questions and answers