Advertisement
Available languages
Available languages
Montage-Kurzanleitung HCA e2 / Installation Quick Start Guide HCA e2
1)
Siehe Hinweise / See notes
Montage des Wärmeleiters /
Mounting of the heat conductor
Verrasten der Plombe /
Latching of the seal
Standard Displaydurchlauf / Standard display loop
1.
2.
3.
4.
5.
Hinweise / Notes
1)
Achtung!
Nach Befestigung des Wärmeleiters sind die überstehenden Schweißbolzen immer abzulängen, so dass diese nicht in das Gerät
hineinragen und zu Beschädigungen führen. Auch bereits vorhandene Schweißbolzen sind immer entsprechend zu kürzen!
Attention!
After mounting the heat conductor the overhanging welding studs are always to be cut to length, so that they do not protrude into the
device and cause damage. Even existing welding studs always must be shortened accordingly!
Page 1 of 4
Article no.: 5081200000
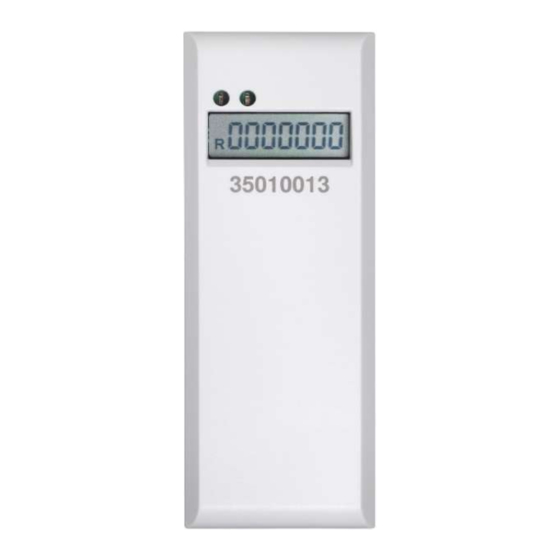
Displayanzeige vor Montage /
Display before mounting
Aktueller Verbrauch / Current consumption
1.
Stichtag / Billing date
2.
Verbrauch zum letzten Stichtag / Billing date value
3.
Prüfziffer Stichtagswert / Checksum billing date value
4.
5. Segmenttest / Segment test
2023_08_28
Aufsetzen des Heizkostenverteilers /
Put on the heat cost allocator
Plombe verrastet / Seal latched
Subject to technical change! Errors excepted.
DE EN FR ES
Displayanzeige nach Aufsetzen des
Heizkostenverteilers (ca. 3 s) /
Display after put on the heat cost
allocator (about 3 s)
Advertisement
Table of Contents

Related Manuals for engelmann HCA e2


Summary of Contents for engelmann HCA e2
- Page 1 DE EN FR ES Montage-Kurzanleitung HCA e2 / Installation Quick Start Guide HCA e2 Siehe Hinweise / See notes Montage des Wärmeleiters / Displayanzeige vor Montage / Aufsetzen des Heizkostenverteilers / Mounting of the heat conductor Display before mounting Put on the heat cost allocator...
- Page 2 Scellé de sécurité Affichage après le montage enclenché (env. 3 s) Affichage standard du HCA e2 après le montage 1. Valeur actuelle 2. Date de référence (AN = annuelle ; MON = mensuelle) 3. Valeur jour de référence 4. Somme de contrôle 5.
- Page 3 DE EN FR ES Guía rápida de montaje HCA e2 Véanse las notas Montaje de la placa conductora Visualización en pantalla Instalación del repartidor de costes de calefacción antes del montaje Fijación del precinto de seguridad Precinto de seguridad fijo Visualización en pantalla tras la...
- Page 4 DE EN FR ES Page 4 of 4 Article no.: 5081200000 2023_08_28 Subject to technical change! Errors excepted.
Need help?
Do you have a question about the HCA e2 and is the answer not in the manual?
Questions and answers