Aube Technologies TH104 - Programmable Thermostat Manual
- Installation instructions & owner's manual (5 pages) ,
- User manual (4 pages)
Advertisement
PRODUCT OVERVIEW


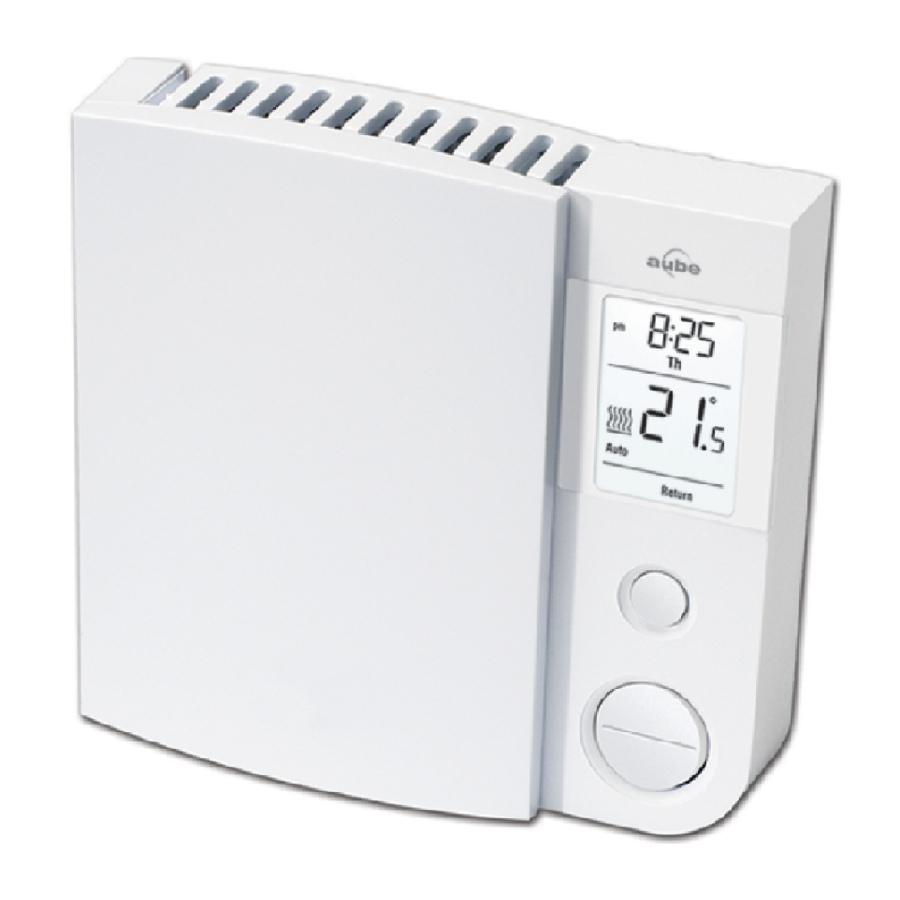
Description
The TH104 thermostat can be used to control an electric heating system such as a baseboard heater, a radiant floor, a radiant ceiling, a convector or a fan-forced heater.
The thermostat cannot be used with the following:
- a resistive load under 2 A
- a resistive load over 14.6 A
- systems driven by a contactor or a relay (inductive load)
- central heating systems
SUPPLIED PARTS
- One (1) thermostat
- Two (2) 6-32 mounting screws
- Two (2) solderless connectors
Installation
TURN OFF POWER TO THE HEATING SYSTEM AT THE MAIN POWER PANEL TO AVOID ELECTRICAL SHOCK.
- All cables and connections must comply with local electrical codes.
- This thermostat has tinned copper wires for line and load connections. Special CO/ALR solderless connectors must be used if these wires will be connected to aluminium conductors.
- Install the thermostat onto an electrical box.
- Install the thermostat about 5 feet high, on an inside wall facing the heater.
- Avoid locations where there are air drafts (such as the top of a staircase or an air outlet), dead air spots (such as behind a door), or direct sunlight.
- Do not install the thermostat on a wall that conceals chimney or stove pipes.
- The thermostat wires are not polarized; either wire can be connected to the load or to the power supply.
- Connect the thermostat
Connect the thermostat wires to the power and to the load using solderless connectors for copper wires.

- Mount the thermostat
Push the excess wires back inside the electrical box.
![]()
Secure the thermostat to the electrical box using the provided screws.
Insert the screws through either the right or left pair of mounting holes on the thermostat. - Complete the installation
NOTE: If there is a protective film or sticker on the thermostat's screen, peel it off.
Apply power to the heating system. Verify the installation by checking that the heater can be turned On and Off by raising and lowering the setpoint using the Up and Down buttons.
![]()
Keep the thermostat's air vents clean and free from obstructions.


Temperature Display and Setting
The thermostat normally displays the room (measured) temperature.
- To view the set temperature (setpoint), press the Up or Down button once.
- To change the setpoint, press the Up or Down button until the desired setpoint is displayed.
Configuration
The factory settings are inside the shaded cells of the following table.
| Temperature display | °C | °F |
| Time display | 24 h | 12 h |
| Temperature control | Proportional (15-second cycles) | Conventional (± 0.5°C deadband) |

The clock loses its setting whenever you change the thermostat's configuration.
Temperature display
To change the temperature display between °C and °F:
- Open the thermostat's door.
- Press and hold the Day button.
- Insert a pointed object (e.g., paperclip) in the reset opening. Remove it when the thermostat's screen becomes blank.
- Wait one second and release the Day button.
Time display
To switch between the 12-hour format and the 24-hour format:
- Open the thermostat's door.
- Press and hold the Hour button.
- Insert a pointed object (e.g., paperclip) in the reset opening. Remove it when the thermostat's screen becomes blank.
- Wait one second and release the Hour button.
Control type
- Use proportional control (default setting) in most cases as it provides better temperature control.
- Use conventional control if you have a fan-forced heater.
Fan is displayed when conventional control is selected. To switch between the two types of control:
- Open the thermostat's door.
- Press and hold the Min button.
- Insert a pointed object (e.g., paperclip) in the reset opening. Remove it when the thermostat's screen becomes blank.
- Wait one second and release the Min button.
Clock and Day Setting
The clock must be set when Time flashes on the screen.

- Open the thermostat's door.
- Press the Day button to set the day.
- Use the Hour and Min buttons to set the clock.
- Press the
![]() button to exit.
button to exit.
 button to exit.
Modes of Operation
The thermostat has three modes of operation:
Automatic mode
To use the Automatic mode, press the Mode button until Auto is selected (outlined) on the screen. The current period number will appear.

In this mode, the thermostat automatically adjust its temperature setpoint according to the period of the day (wake up, leave for work, return home and sleep).
You can program up to 4 periods in a day. You can set 2 different programs: one for the weekdays (Monday to Friday) and another one for the weekend (Saturday and Sunday).
The thermostat is preprogrammed with the following schedule:
| Period | Monday to Friday | Saturday & Sunday | |||
| Start Time | Temperature | Start Time | Temperature | ||
| 1 | Wake | 6:00 | 21°C (70°F) | 6:00 | 21°C (70°F) |
| 2 | Leave | 8:00 | 16°C (62°F) | -- | -- |
| 3 | Return | 18:00 | 21°C (70°F) | -- | -- |
| 4 | Sleep | 22:00 | 16°C (62°F) | 22:00 | 16°C (62°F) |
To temporarily override the current setpoint, set the desired temperature using the Up or Down button. The new setpoint will be used until the beginning of the next period.
To modify the schedule:
- Press the Mode button until Auto is selected.
- Press Pgm.
Each time you press the Pgm button, the thermostat displays one of the periods of the schedule in the following order (from left to right):
| Weekdays | Weekend | ||||||
| MO TU WE TH FR | SA SU | ||||||
| 1 | 2 | 3 | 4 | 1 | 2 | 3 | 4 |
- Set the start time for the displayed period using the Hour and Min buttons. NOTE: To deactivate the period, press the Mode button. Instead of displaying the start time of the period, the thermostat will display --:--. During operation, the thermostat will skip over that period.
- Set the temperature for the period using the Up or Down button.
- Repeat steps 2 to 4 for remaining periods.
- Press the
![]() button to return the thermostat to normal operation.
button to return the thermostat to normal operation.
Manual mode
To use this mode, press the Mode button until Man is selected (outlined) on the screen. Set the desired temperature using the Up or Down button.

In this mode, any modification to the temperature setpoint must be done manually.
Economy mode
To use the economy mode, press the Mode button until Econo is selected (outlined) on the screen. This mode is ideal for weekend residences as it can be used as follows: The temperature is kept at an economy level during most of your absence and is raised to a comfortable level by your usual arrival time. If you do not show up, the temperature returns to the economy level until next weekend.

The economy mode has two periods which should be set as follows:
| Period | Temperature Setting | Start Time Setting |
| 1 | Set to a comfortable level. | Set the day and time that you want the temperature to start rising so that a comfortable level is attained by the time you arrive. |
| 2 | Set to an economy level. | Set the day and time that you want the temperature to start dropping to an economy level if you do not show up. |
The economy mode should be used as follows:
- Place the thermostat in economy mode during your absence.
- When you arrive, place the thermostat in automatic mode or in manual mode before the temperature drops back to the economy level.
- When you leave, switch the thermostat back to economy mode.
To program the two periods of the economy mode:
- Press the Mode button until Econo is selected.
- Press the Pgm button. The first period is displayed.
- Set the start day for the displayed period using the Day button.
- Set the start time using the Hour and Min buttons.
- Set the temperature for the period using the Up or Down button.
- Press the Pgm button to select the next program (2).
- Repeat steps 2 to 4 to set the day, time and temperature.
- Press the
![]() button to return the thermostat to normal operation.
button to return the thermostat to normal operation.
 button to return the thermostat to normal operation.
Thermostat Reset
When the thermostat is reset, all parameters (clock, configuration and schedules) return to their default settings.
- Open the thermostat's door.
- Press and hold the Pgm button.
- Insert a pointed object (e.g., paperclip) in the reset opening. Remove it when the thermostat's screen becomes blank.
- Wait one second and release the Pgm button.
Power Outage
During a power outage, the thermostat display remains lit for approximately the next 15 minutes during which the LP (low power) indicator appears. The settings are stored in memory. However, if the power failure exceeds 5 hours, only the thermostat's clock must be re-adjusted. When power returns, the thermostat returns to the mode of operation preceding the power outage.
Troubleshooting
| PROBLEM | SOLUTIONS |
| Thermostat's housing is hot. | This is normal. When the thermostat is running at full capacity, its housing can reach 40°C (104°F). |
| Wrong temperature is displayed. | Correct if any the following conditions applies:
|
| Wrong time is displayed. | The thermostat was without power for more than 5 hours. |
| Temperature does not change according to the programmed schedule. |
|
| LP reappears on the screen and disappears after a few minutes. | The thermal protection device on the heater has temporarily opened. This can happen if the heater is obstructed by furniture or curtain and has overheated, or if the heater's thermal protection device is too sensitive. |
| Display looks faded when heating is activated. | The load of the heating system is probably less than the required minimum. This thermostat cannot be used for loads below that rating. |
Specifications
Supply: 120/240 VAC, 60 Hz
Power consumption (off): 860 mW
Minimum load: 2 A (resistive only)
500 W @ 240 VAC
250 W @ 120 VAC
Maximum load: 14.6 A (resistive only)
3500 W @ 240 VAC
1750 W @ 120 VAC
Display range: 0°C to 70°C (32°F to 99°F)
Setpoint range: 5°C to 27°C (40°F to 80°F)
Resolution: 1°C (1°F)
Storage temperature: -20°C to 50°C (-4°F to 120°F)
Dimensions: 120 x 115 x 26 mm (4.8 x 4.5 x 1 inches)
Approval: CSA / UL

Documents / ResourcesDownload manual
Here you can download full pdf version of manual, it may contain additional safety instructions, warranty information, FCC rules, etc.
Download Aube Technologies TH104 - Programmable Thermostat Manual
Advertisement


Need help?
Do you have a question about the TH104 and is the answer not in the manual?
Questions and answers