Chapters
Table of Contents

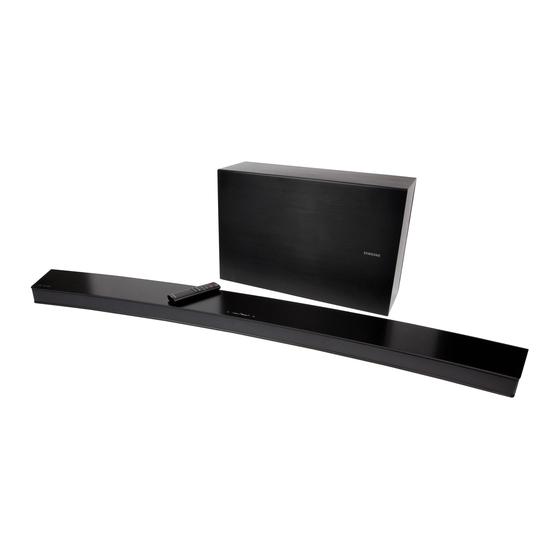
Related Manuals for Samsung HW-J7500R


Summary of Contents for Samsung HW-J7500R
- Page 1 HW-J7500R HW-J7501R User manual Imagine the possibilities Thank you for purchasing this Samsung product. To receive more complete service, please register your product at www.samsung.com/register...
-
Page 2: Safety Information
GETTING STARTED SAFETY INFORMATION SAFETY WARNINGS TO REDUCE THE RISK OF ELECTRIC SHOCK, DO NOT REMOVE THE COVER (OR BACK). NO USER-SERVICEABLE PARTS ARE INSIDE. REFER SERVICING TO QUALIFIED SERVICE PERSONNEL. This symbol indicates that high voltage is present inside. It is dangerous to make any kind CAUTION of contact with any internal part of this product. - Page 3 GETTING STARTED LICENSES Important Safety Instructions Read these operating instructions carefully before using the unit. Follow all the safety instructions listed below. Keep these operating instructions handy for future reference. Read these instructions. Manufactured under license from Dolby Laboratories. Keep these Instructions. Dolby, Dolby Audio and the double-D symbol are trademarks of Dolby Laboratories.
- Page 4 GETTING STARTED PRECAUTIONS 2.7 inch 3.9 inch 3.9 inch 3.9 inch Ensure that the AC power supply in your house complies with the power requirements listed on the identification sticker located on the back of your product. Install your product horizontally, on a suitable base (furniture), with enough space around it for ventilation (3~4 inches).
-
Page 5: Table Of Contents
GETTING STARTED CONTENTS 24 FUNCTIONS Safety Information What’s Included Input Mode Bluetooth DESCRIPTIONS Using the Multiroom App Top / Front Panel Using the Network Standby On Rear / Bottom Panel Function Remote Control Software Update 11 INSTALLATION 32 TROUBLESHOOTING Installing the Soundbar Troubleshooting Installing the Wall Mount 33 APPENDIX... -
Page 6: What's Included
GETTING STARTED WHAT’S INCLUDED BEFORE READING THE USER’S MANUAL Note the following terms before reading the user manual. + Icons used in this manual Icon Term Definition Caution Indicates a situation where a function does not operate or settings may be canceled. Note Indicates tips or instructions on the page that help you operate a function. -
Page 7: Descriptions
DESCRIPTIONS DESCRIPTIONS TOP / FRONT PANEL VOL. - / + (Power) Button Controls the volume level. The numeric value of the volume level Turns the power on and off. appears in the front panel display. (Source) Button Display Selects the D.IN, AUX, HDMI, BT, or TV input. Displays the current mode. -
Page 8: Rear / Bottom Panel
(Power Supply In) Press this button to Press the button to connect To upgrade the product's connect your Soundbar to the Soundbar to a Samsung software through the Connect the DC power your network using Wi-Fi HUB (purchased separately) USB Port. -
Page 9: Remote Control
(Default : Auto Power Link OFF, ON - ANYNET+ / OFF - POWER LINK or OFF - ANYNET+ / ON - POWER LINK). The Anynet+ function lets you control the Soundbar with the remote from an Anynet+ compatible Samsung TV. The Soundbar must be connected to the TV via an HDMI cable. - Page 10 DESCRIPTIONS Power Turns the Soundbar on and off. Volume Adjusts the volume level of the unit. Play / Pause Press the p button to pause a file temporarily. Press the p button again to play the selected file. Skip Back If there is more than one file on the device you are playing, and you press the [ button, the previous file is selected.
-
Page 11: Installation
INSTALLATION INSTALLATION INSTALLING THE SOUNDBAR INSTALLING THE WALL MOUNT + Installation Precautions ● Install on a vertical wall only. ● For the installation, avoid a location with high temperature or humidity, or a wall that cannot sustain the weight of the set. - Page 12 INSTALLATION 1. Place the Soundbar as shown in the illustration, ensuring that none of the buttons touch the surface it is lying on. 2. If the Holder-Foot (3 EA) and Holder-Support (2 EA) are attached, remove them. Holder-Foot Holder-Support 3. Fix Holder-Screw 1 (4 EA) and Holder-Screw 2 (for main unit fixing) (4 EA) into the holes of the Soundbar tightly as shown in the illustration.
- Page 13 INSTALLATION Wall 4. Insert the Wall-Mount Screws into the 3 holes one by one to fix the Wall-Mount Bracket on the wall. ● Recommended screw : M5 5. Mount the Soundbar on the Wall-Mount Bracket in order of the following illustration (1 2).
- Page 14 INSTALLATION 6. Fix the Holder-Fix Mount (for wall-mount fixing) to join the Wall-Mount Bracket with the Soundbar. ● Wall-Mount Screws are not provided. ● Since different types of wall-mount screws are required depending on your wall, you should check your wall before installation and purchase the appropriate wall-mount screws to use.
-
Page 15: Placing The Soundbar On A Tv Stand
INSTALLATION PLACING THE SOUNDBAR ON A TV STAND Place the Soundbar on a TV stand. Check for the supplied accessories shown below. Holder-Foot : 3EA Holder-Screw 2 : 3EA 1. Place the Soundbar as shown in the illustration, ensuring that none of the buttons touch the surface it is lying on. - Page 16 INSTALLATION 3. Remove Holder-Support (2 EA) from the Soundbar as shown in the illustration. 4. Align the Soundbar’s center with the center of the base of the TV, and then carefully push it onto the stand as far as it will go, as shown in the illustration. Be careful not to unbalance the TV. ●...
-
Page 17: Installing The Soundbar As A Free-Standing Unit
INSTALLATION INSTALLING THE SOUNDBAR AS A FREE-STANDING UNIT 1. Center the Soundbar on the flat area in front of the TV. ASSEMBLING THE CLAMP-WIRE Clamp-Wire Attach the clamp-wire to the unit as shown, and then run the cables through the clamp-wire to keep them neat. -
Page 18: Connections
CONNECTIONS CONNECTIONS ● Do not connect the power cord of this product or your TV to a wall outlet until all connections between components are complete. ● Before moving or installing this product, be sure to turn off the power and disconnect the power cord. CONNECTING THE SUBWOOFER CONNECTING TO THE SUBWOOFER AUTOMATICALLY The Subwoofer's linking ID is preset at the factory and the main unit and subwoofer should link (connect wirelessly) - Page 19 CONNECTIONS ● Before moving or installing the product, be sure to turn off the power and disconnect the power cord. ● If the main unit is powered off,the wireless subwoofer will in standy mode and the STANDBY LED on the front will blink Red directly.
-
Page 20: Connecting To A Tv
CONNECTIONS CONNECTING TO A TV ● Important: Before you begin, put the battery into the remote. See page 10 for instructions. CONNECTING TO A TV USING AN HDMI (DIGITAL) CABLE HDMI Cable HDMI IN HDMI OUT (TV-ARC) 1. Connect an HDMI cable from the HDMI OUT (TV-ARC) jack on the back of the product to the HDMI IN jack on your TV. -
Page 21: Tv Soundconnect
3. Press the Anynet+ button on the remote control to toggle the Auto Power Link function on and off. ● Depending on the connected device, Auto Power Link may not function. TV SOUNDCONNECT You can enjoy TV sound through your Soundbar when it is connected to a Samsung TV that supports the TV SoundConnect function. Connect 1. -
Page 22: Connecting To External Devices
CONNECTIONS ● The TV SoundConnect (SoundShare) function is supported by some Samsung TVs released from 2012 on. Check whether your TV supports the TV SoundConnect (SoundShare) function before you begin. (For further information, refer to the TV’s user manual.). ● If your Samsung TV was released before 2014, check the SoundShare setting menu. -
Page 23: Optical Or Analog Audio Cable
CONNECTIONS OPTICAL OR ANALOG AUDIO CABLE This unit comes equipped with one digital optical in jack and one analog audio (AUX) in jack, giving you two ways to connect it to external devices. Audio Cable (not supplied) AUX OUT AUX IN Optical Cable (not supplied) BD / DVD player /... -
Page 24: Functions
FUNCTIONS FUNCTIONS INPUT MODE button on the main unit’s top panel or the SOURCE button on the remote control to select the mode Press the you want. Input mode Display Optical Digital input D.IN ARC (HDMI OUT) input AUX input HDMI HDMI input BLUETOOTH mode... -
Page 25: Bluetooth
• The device name can only be displayed in English. An underline " _ " will be displayed if the name is not in English. • If the Bluetooth device has failed to pair with the Soundbar, delete the previous "[Samsung] HW-Jxxxx" found by the Bluetooth device and have it search for the Soundbar again. - Page 26 ● You cannot connect the Soundbar to a Bluetooth device that supports only the HF (Hands Free) function. ● Once you have paired the Soundbar to a Bluetooth device, selecting "[Samsung] HW-Jxxxx" from the device's scanned devices list will automatically change the Soundbar to BT mode.
-
Page 27: Using The Multiroom App
To use the Soundbar with the Samsung Multiroom App, you must download and then install the Samsung Multiroom App on your smart device. You can download the app from Google Play or the App Store. With the Samsung Multiroom App installed, you can play music on your Soundbar that is stored on your smart device, located on other connected devices, provided by other content providers, or streamed from Internet radio stations. - Page 28 To launch the Samsung Multiroom app, tap the Multiroom app icon on your smart device. CONNECTING THE SOUNDBAR TO YOUR NETWORK On your smart device, select the Samsung Multiroom app. Follow the directions on your smart device’s screen. You can use the following music sources with the Samsung Multiroom app.
-
Page 29: Using The Network Standby On Function
Soundbar via Bluetooth or Wi-Fi. If you turn the Soundbar on via a Bluetooth connection, its input mode is set to BT automatically. To turn the Soundbar on via Wi-Fi, you must have the Samsung Multiroom App installed on your smart device. -
Page 30: Software Update
+ Updating Procedure 1. Follow the steps below to download the product software: Go to the Samsung website at (samsung.com/sec) search for the model name - select the customer support option (the option name is subject to change) 2. Save the downloaded software to a USB stick and select "Extract to the folder name" to unzip the folder. - Page 31 FUNCTIONS + If UPDATE was not displayed 1. Turn off the Soundbar, connect the USB storage device that contains update files to the Soundbar’s USB port. 2. Disconnect the power cord, reconnect it, and then turn on the Soundbar. ● Insert a USB device containing the firmware update into the USB port on the main unit. ●...
-
Page 32: Troubleshooting
The TV SoundConnect (TV pairing) failed. • Does your TV support TV SoundConnect? ¼ TV SoundConnect is supported by some Samsung TVs released from 2012 on. Check your TV to see if it supports TV SoundConnect. • Is your TV firmware the latest version? ¼... -
Page 33: Appendix
Design, specifications and App screen are subject to change without prior notice. Nominal specification Samsung Electronics Co., Ltd reserves the right to change the specifications without notice. Weight and dimensions are approximate. For more information about the power supply and power consumption, refer to the label attached to the product. - Page 34 All warranty repairs must be performed by a SECA Authorized Service Center. (The name and address of the location nearest you can be obtained by calling toll free: 1- 800- SAMSUNG) LABOR PARTS...
- Page 35 TEL: 1-800-SAMSUNG (1-800-726-7864) www.samsung.com/ca/support © 2016 Samsung Electronics Co., Ltd. All rights reserved. Contact SAMSUNG WORLD WIDE If you have any questions or comments relating to Samsung products, please contact the SAMSUNG customer care center. Country Contact Center Web Site ` North America www.samsung.com/ca/support (English)
- Page 36 HW-J7500R HW-J7501R Manuel d'utilisation Imaginez les possibilités Merci d’avoir choisi un appareil Samsung. Pour recevoir une assistance plus complète, veuillez enregistrer votre produit sur www.samsung.com/register...
- Page 37 DÉMARRAGE démarrage INFORMATIONS RELATIVES À LA SÉCURITÉ AVERTISSEMENTS POUR ÉVITER LES RISQUES DE CHOC ÉLECTRIQUE, NE DÉMONTEZ PAS LE CAPOT. L’APPAREIL NE CONTIENT PAS DE PIÈCES RÉPARABLES PAR L’UTILISATEUR. S’ADRESSER À UN SERVICE APRÈS-VENTE QUALIFIÉ. Ce symbole signale la présence d’une tension dangereuse à...
- Page 38 DÉMARRAGE LICENCE Consignes de sécurité importantes Lisez attentivement ces consignes avant d'utiliser l'appareil. Veillez à respecter toutes les consignes répertoriées ci-après. Conservez ces instructions à portée de main pour vous y référer ultérieurement. 1) Lisez attentivement ces consignes. Manufactured under license from Dolby Laboratories. 2) Conservez-les précieusement.
- Page 39 DÉMARRAGE PRÉCAUTIONS 2.7 inch 3.9 inch 3.9 inch 3.9 inch Assurez-vous que l'alimentation c.a. de votre domicile satisfait aux normes inscrites sur l'étiquette d'identification située à l'arrière du produit. Installez votre produit horizontalement, sur un socle approprié (meuble), en laissant un espace suffisant pour la ventilation sur le pourtour 3~4 po.
- Page 40 DÉMARRAGE SOMMAIRE DÉMARRAGE 24 FONCTIONS Informations relatives à la sécurité Mode entrée Contenu Bluetooth Utilisation de l'application Multiroom DESCRIPTIONS Utilisation de la fonction Network Standby On Sur la face Avant/Du Haut Mise à jour du logiciel Face arrière/Inférieure Télécommande 32 DÉPANNAGE 11 INSTALLATION Dépannage Installation du Soundbar...
-
Page 41: Démarrage
DÉMARRAGE CONTENU AVANT DE LIRE LE MANUEL D'UTILISATION Lisez attentivement la signification des termes suivants avant de commencer la lecture du manuel d'utilisation. + Icônes utilisées dans le présent manuel Icône Terme Définition Indique qu'une fonction ne fonctionne pas ou que des paramètres peuvent être Mise en garde annulés. -
Page 42: Descriptions
DESCRIPTIONS descriptions SUR LA FACE AVANT/DU HAUT VOL. - / + Touche (Alimentation) Permet de régler le volume. Permet d'allumer/d'éteindre La valeur numérique du volume sonore l'ensemble Soundbar. s’affiche sur le panneau avant. Touche (Source) Écran d’affichage Sélection des entrées D.IN, AUX, HDMI, BT, TV. Affichent le mode actuel. -
Page 43: Face Arrière/Inférieure
Pour mettre à jour le pour brancher votre pour connecter le logiciel du produit par Branchez la prise Soundbar à votre réseau à Soundbar à un Samsung le port USB. d’adaptateur d’alimentation l’aide de la configuration HUB (vendu séparément) c.c. à la source Wi-Fi. -
Page 44: Télécommande
Appuyez de nouveau sur cette touche pour restaurer le volume initial. Répéter La fonction Répéter est uniquement disponible lors de la lecture de musique à partir de morceaux sur téléphone ou DMS avec l'application Samsung Multiroom. OFF - REPEAT : Annule la lecture à répétition. - Page 45 DESCRIPTIONS Alimentation Permet d'allumer/d'éteindre l'ensemble Soundbar. Volume Pour régler le volume de l’unité. Lecture/Pause Appuyez de nouveau sur la touche p pour interrompre temporairement la lecture du fichier temporaire. Appuyez sur la touche p pour lire le fichier sélectionné. Saut vers l’arrière Lorsqu’un lecteur utilisé...
-
Page 46: Installation
INSTALLATION Installation INSTALLATION DU SOUNDBAR INSTALLATION DE LA FIXATION MURALE + Précautions d’installation ● Ne procédez pas à l'installation sur un autre emplacement qu’un mur vertical. ● Pour l’installation, évitez les températures extrêmes et l’humidité ou encore un mur pas assez solide pour supporter le poids de l’appareil. - Page 47 INSTALLATION 1. Placez le Soundbar de la façon illustrée, en vous assurant qu’aucune des touches n’entre en contact avec la surface sur laquelle il repose. 2. Si le Pied de support (3 de chaque) et la Monture du Support (2 de chaque) sont attachés, séparez-les. Pied de support Monture du Support 3.
- Page 48 INSTALLATION 4. Insérez une par une les Vis de fixation murale dans les 3 trous pour fixer le Support de fixation murale au mur. ● Vis recommandée : M5 5. Montez le Soundbar sur le Support de fixation murale dans l'ordre indiqué sur l'illustration suivante (1 2).
- Page 49 INSTALLATION 6. Ajustez la Monture de fixation (pour la fixation du montage mural) pour assembler le Support de fixation murale et le Soundbar. ● Les Vis de fixation murale ne sont pas fournies. ● Selon votre mur, différents types de vis de fixation murale peuvent être nécessaires. Inspectez votre mur avant toute installation et achetez les vis de fixation murale appropriées.
-
Page 50: Placement Du Soundbar Sur Un Support De Téléviseur
INSTALLATION PLACEMENT DU SOUNDBAR SUR UN SUPPORT DE TÉLÉVISEUR Placez le Soundbar sur un support de téléviseur. Vérifiez que vous disposez bien des accessoires ci-dessous. Pied de support : 3 de chaque Vis De Support 2 : 3 de chaque 1. - Page 51 INSTALLATION 3. Retirez la Monture Du Support (2 de chaque) du Soundbar comme l’indique l’illustration. 4. Alignez le centre du Soundbar avec le centre du socle du téléviseur, et poussez-le doucement aussi loin que possible dans le socle comme l’indique l’illustration. Veillez à ne pas faire vaciller le téléviseur. ●...
-
Page 52: Installation Du Soundbar Comme Unité Autonome
INSTALLATION INSTALLATION DU SOUNDBAR COMME UNITÉ AUTONOME 1. Centrez le Soundbar sur la surface plane à l’avant du téléviseur. ASSEMBLAGE DU FIL DE SERRAGE Fil de serrage Fixez le fil de serrage sur l’unité de la façon illustrée, puis acheminez les câbles par le fil de serrage pour les ranger proprement. -
Page 53: Branchements
BRANCHEMENTS branchements ● On ne doit pas brancher le cordon d'alimentation de ce produit ou de votre téléviseur dans une prise murale à moins que toutes les connexions ne soient réalisées. ● Avant de déplacer ou installer ce produit, assurez-vous de couper l'alimentation et de débrancher le cordon d’alimentation. - Page 54 BRANCHEMENTS ● Avant de déplacer ou installer le produit, assurez-vous de couper l'alimentation et de débrancher le cordon d’alimentation. ● Si l'unité principale est hors tension, le caisson de basses sans fil sera en mode veille et le voyant DEL STANDBY sur la face avant clignote directement au rouge.
-
Page 55: Connexion À Un Téléviseur
BRANCHEMENTS CONNEXION À UN TÉLÉVISEUR ● Important : avant de commencer, placez la pile dans la télécommande. Voir la page 10 pour les instructions. CONNEXIONS À L’AIDE D’UN CÂBLE TV HDMI (NUMÉRIQUE) Câble HDMI HDMI IN HDMI OUT (TV-ARC) 1. Branchez un câble HDMI de la prise HDMI OUT (TV-ARC) située à l’arrière du produit à la prise HDMI IN de votre téléviseur. -
Page 56: Tv Soundconnect
● Selon le périphérique branché, la fonctionne Auto Power Link pourrait ne pas fonctionner. TV SOUNDCONNECT Vous pouvez restituer le son du téléviseur par votre Soundbar branché à un téléviseur Samsung qui prend en charge la fonction de connexion TV Sound. -
Page 57: Connexion À Des Appareils Externes
BRANCHEMENTS ● La fonction TV SoundConnect (SoundShare) est prise en charge par certains téléviseurs Samsung mis en marché à partir de 2012. Vérifiez si le téléviseur prend en charge la fonction TV SoundConnect (Sound Share) avant de commencer. (Pour de plus amples renseignements, consultez le guide de l’utilisateur du téléviseur.) -
Page 58: Câble Audio Optique Ou Analogique
BRANCHEMENTS CÂBLE AUDIO OPTIQUE OU ANALOGIQUE Cet appareil est équipé d'un connecteur d'entrée optique numérique et d'un connecteur d'entrée audio analogique (AUX), vous offrant ainsi deux méthodes de connexion à des appareils externes. Câble Audio (non fourni) AUX OUT AUX IN Câble Optique (non fourni) Lecteur BD/... -
Page 59: Fonctions
FONCTIONS fonctions MODE ENTRÉE sur la face supérieure de l’unité principale ou la touche SOURCE de la télécommande Appuyez sur la touche pour sélectionner le mode que vous voulez. Mode d'entrée Écran d’affichage Entrée Optique D.IN Entrée ARC (HDMI OUT) Entrée AUX HDMI Entrée HDMI... -
Page 60: Bluetooth
• Si l'appariement du périphérique Bluetooth avec le système Soundbar a échoué, supprimez l'appareil "[Samsung] HW-Jxxxx" précédent qui a été trouvé par le périphérique Bluetooth et, à partir de ce dernier, relancez la recherche du système Soundbar. - Page 61 ● Vous ne pouvez pas brancher le Soundbar à un dispositif Bluetooth qui prend seulement en charge la fonction HF (Hands Free). ● Une fois l'appariement du Soundbar avec un périphérique Bluetooth réalisé, la sélection de "[Samsung] HW-Jxxxx" dans la liste des périphériques numérisés de l'appareil fera automatiquement passer le Soundbar en mode BT.
-
Page 62: Utilisation De L'application Multiroom
UTILISATION DE L'APPLICATION MULTIROOM L'application Samsung Multiroom vous permet de connecter le Soundbar à un appareil intelligent, à votre réseau et à Internet. Lorsque le Soundbar est relié à un appareil intelligent sur lequel l'application Multiroom est installée, vous pouvez également connecter sans fil le Soundbar et plusieurs appareils Samsung Multiroom et lire du contenu audio par leur intermédiaire. - Page 63 FONCTIONS + Lancement de l'application Samsung Multiroom Pour lancer l'application Samsung Multiroom, appuyez sur l'icône de l'application Multiroom de votre appareil intelligent. CONNEXION DU SOUNDBAR À VOTRE RÉSEAU Sur votre appareil intelligent, sélectionnez l’application Samsung Multiroom. Suivez les directives apparaissant à l’écran de l’appareil intelligent.
-
Page 64: Utilisation De La Fonction Network Standby On
Soundbar par Bluetooth ou Wi-Fi. Si le Soundbar a été mis hors fonction par l’entremise d’une connexion Bluetooth, son mode d’entrée se met automatiquement à BT. Pour activer le Soundbar via Wi-Fi, l'application Samsung Multiroom doit être installée sur votre appareil intelligent. 1. Branchez l’appareil intelligent à votre Soundbar. -
Page 65: Mise À Jour Du Logiciel
+ Procédure de mise à jour 1. Suivez les étapes ci-dessous pour télécharger le logiciel du produit : Allez sur le site Web de Samsung (samsung.com/sec), recherchez le nom du modèle, puis sélectionnez l'option de soutien client (le nom de l'option peut changer). - Page 66 FONCTIONS + Si la UPDATE ne s'affiche pas 1. Éteignez le Soundbar, branchez le périphérique de stockage USB qui contient les fichiers de mise à jour au port USB du Soundbar. 2. Débranchez le cordon d’alimentation, reconnectez-le puis mettez l’appareil sous tension. ●...
-
Page 67: Dépannage
L’appariement TV SoundConnect (téléviseur) n’a pas été réussi. • Votre téléviseur prend-il en charge TV SoundConnect? ¼ La fonction TV SoundConnect est prise en charge par certains téléviseurs Samsung mis en marché après 2012. Assurez-vous que votre téléviseur prend la fonction TV SoundConnect en charge. -
Page 68: Annexe
La conception, les spécifications techniques et l’écran Application sont susceptibles d'être modifiés sans préavis. Caractéristiques nominales Samsung Electronics Co., Ltd se réserve le droit de modifier les caractéristiques sans préavis. Le poids et les dimensions sont approximatifs. Pour obtenir de l'information sur la source d'alimentation et la consommation électrique, veuillez vous reporter à... - Page 69 GARANTIE LIMITÉE À L’ACHETEUR INITIAL Samsung Electronics Canada Inc. (SECA) garantit ce produit contre tout défaut de fabrication. SECA garantit aussi que si cet appareil ne fonctionne pas convenablement durant la période de garantie SECA se réservera le droit de réparer ou de remplacer l’appareil défectueux.
- Page 70 TEL: 1-800-SAMSUNG (1-800-726-7864) www.samsung.com/ca_fr/support © 2016 Samsung Electronics Co., Ltd. Tous droits réservés. Comment contacter Samsung dans le monde Si vous avez des suggestions ou des questions concernant les produits Samsung, veuillez contacter le Service Consommateurs Samsung. Country Contact Center ...
Need help?
Do you have a question about the HW-J7500R and is the answer not in the manual?
Questions and answers