Toshiba RD-XS55 Quick Reference
Hdd/dvd video recorder
Hide thumbs
Also See for RD-XS55:
- Owner's manual (199 pages) ,
- Owner's manual (56 pages) ,
- Specification (2 pages)
Table of Contents
Advertisement
Quick Links
Download this manual
See also:
Owner's Manual
This booklet is to help you start up your recorder and experience a basic operation.
To learn about the recorder and obtain its full performance, refer to the Owner's Manual.
(
xx
is reference page in the INSTALLATION GUIDE, and
I
IMPORTANT: Before starting your hook-up and installation of your DVD recorder,
please review the safety instructions on
Notes on HDD
This unit contains a hard disc drive (HDD). A HDD is subject to shock, shakes, and environmental changes such as
temperature, which can damage data stored on the disc. Observe the following instructions.
Do not shock or shake the unit (especially during operation).
Do not use the unit on a shaky or unstable surface.
Do not place the unit on a location where it is not horizontal.
Do not cover the ventilation holes for the cooling fan.
Do not use in a location where the temperature rises or changes rapidly.
Do not disconnect the power plug from a wall outlet while the unit is turned on.
Do not disconnect the power plug from a wall outlet or break power supply to the unit. Before disconnecting the power plug,
be sure to press the power button and make sure the unit ends the finishing process and the power turns off completely. If the
power plug is disconnected or power supply is disrupted while the unit is recording, all recorded content will be erased.
Toshiba is not liable for any damage or loss of recorded data caused by shock, shakes, misoperation or malfunction.
P000458250
H
PM0026073010
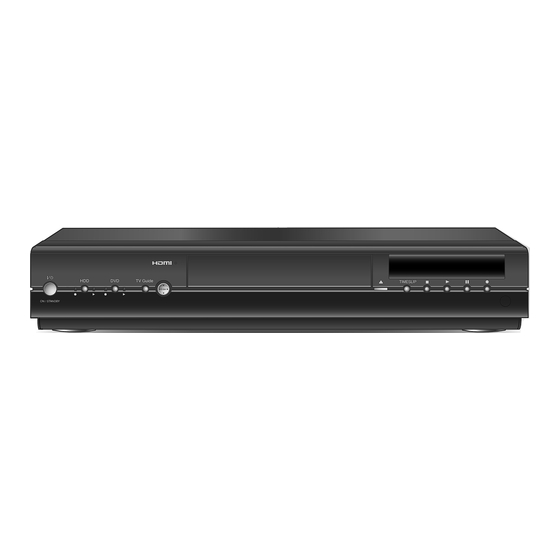
HDD/DVD VIDEO RECORDER
RD-XS55KU
Quick Reference
xx
in the OPERATIONS GUIDE.)
O
I
-
I
in the "INSTALLATION GUIDE".
2
9
Advertisement
Table of Contents

Related Manuals for Toshiba RD-XS55


Summary of Contents for Toshiba RD-XS55
-
Page 1: Quick Reference
Toshiba is not liable for any damage or loss of recorded data caused by shock, shakes, misoperation or malfunction. P000458250 PM0026073010 in the OPERATIONS GUIDE.) - Page 2 Make sure the following accessories are supplied. Supplied accessories Remote control ... 1 Batteries (AAA) ... 2 Coaxial cable ... 1 Video/audio cable ... 1 G-LINK ® cable ... 1 LAN cable ... 1 Power cord ... 1 OWNER’S MANUAL (INSTALLATION GUIDE) ... 1 OWNER’S MANUAL (OPERATIONS GUIDE) ...
- Page 3 Refer to the owner’s manual of each connected equipment as well. Place close to the signal sensor of the set top box. ® G-LINK (supplied) To wall outlet Power cord (supplied) LAN(10/100) (See Video/audio cable (supplied) Select one of these connections. Set top box Cable box COMPONENT...
-
Page 4: On/Standby Indicator
TV Guide On Screen does not work with satellite programming. Toshiba does not provide the TV Guide On Screen Instead, the data is provided by a third party, which is responsible for the accuracy and availability of the data. Additionally, occasional... -
Page 5: Cable Service
TV Guide On Screen ® Setup Setup selection Reminder Your DVD Recorder is equipped with the TV Guide On Screen™ Interactive Program Guide, which provides program listings, one-touch recording, and more –– all subscription FREE! Please follow the on-screen setup instructions to enable your TV Guide On Screen system now. -
Page 6: Antenna Connection
STEP 2: Configuring for Cable Cable testing in progress... please do not press any keys on any remote control. Now testing code 036 (Toshiba)... Press Enter to continue. STEP 2: Configuring for Cable The TV Guide On Screen system needs to locate the correct code for yourcable box brand in order to work properly. - Page 7 INCOMPLETE, you will not be able to use the feature until you complete that portion of TV Guide On Screen system setup. ZIP code - 46001 (USA) Cable Box on input “TUNER” Ch. 3 Cable Box selected: code 036 (Toshiba) Are the above settings correct? Yes, end setup No, repeat setup process Using your DVD Recorder remote, move up or down to highlight your answer.
-
Page 8: Loading A Disc
DVD-RAM DVD-R Yes (on compatible device) Yes (on most DVD players) DVD-RAM Note on DVD-R/RW recording • When recording directly on a DVD-R/RW, or when DVD-R recording contents which will be copied to a DVD-R/ RW later, make the settings. -
Page 9: Recording Mode
Selecting a channel Press INPUT SELECT to select the input to which the cable box is connected (2ch/3ch/4ch/Line1, page 5, 6). Press CH/Page or the number buttons. If you did not connect a cable box: Press CH/Page or the number buttons. Recording a current program Press HDD or DVD to select a media to record on. -
Page 10: Press Enter
Recording from a connected VCR Press INPUT SELECT repeatedly so that “L-1,” “L-2,” or “L-3” appears on the front panel display, corresponding to the input in which the device is connected. Each time you press the button, the indicator changes. L-1: To record pictures from equipment connected to the INPUT1 jacks on the rear panel. - Page 11 Erasing content On CONTENT MENU, select an unnecessary title (chapter). Press QUICK MENU. A Quick Menu appears. e.g. CONTENT 1 / 2 Title List MENU Quick Menu HDD : Title information 2004/06/08 07 : 00 Create thumbnail am TV : 4 High speed dubbing (0:53:45) Rate conversion dubbing...
-
Page 12: Using The Tv Guide On Screen
Using the TV Guide On Screen As you have done TV Guide On Screen the following services of TV Guide. • LISTINGS: Check out up to 8 days on on-screen listings • RECORDINGS: Keep track of everything you record • SEARCH: Sort by keyword, movies, sports, HDTV, and more •... - Page 13 LISTINGS Whenever you enter the TV Guide mode, you will first see this service. Pressing Info opens a Help screen. Operate following the guidance. • Selecting a program • Selecting a channel • Setting a program to remind or record •...
- Page 14 Program recording with TV Guide On Screen Press TV Guide. e.g. CONTENT Title List MENU News 3:19 RECORDINGS Press Menu now for Listings Options Move to highlight any show Press Enter to tune to current show in glid Press Menu for more current show options Welcome TODAY News...
- Page 15 Getting more information on a TV program Press TV Guide. e.g. CONTENT 1 / 2 Title List MENU News 8:03 RECORDINGS Press Menu now for Listings Options Move to highlight any show Press Enter to tune to current show in glid Press Menu for more current show options TODAY 3:00AM...
- Page 16 Using EASY NAVI Open “EASY NAVI Main Menu”, a main gate to the functions of this recorder. From this menu, you can access the desired functions. TV Viewing Play Contents TV Guide On Screen ® DV Recording Delete Title Finalize (R/RW) Format (RAM/RW) Press EASY NAVI.
Need help?
Do you have a question about the RD-XS55 and is the answer not in the manual?
Questions and answers