Table of Contents
Advertisement
Quick Links
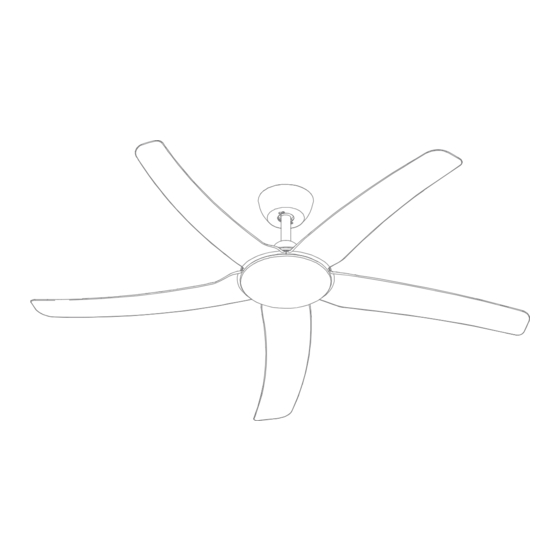
HOVER-56
Thank you for purchasing your new HOVER-56 ceiling fan, Please take the time to read and understand the instruction sheet below.
Failure to do so may void warranty. The fan is suitable for installation indoors and indoor coastal areas, including a pergola or outside
in a sheltered area protected from wind and rain.
Specifications
Input Voltage:
240V
Tropically Rated: Yes
Due to product improvements, these specifications may vary from time to time, please refer to Online data sheet for latest specifications
HOVER-56
• After installation, electricians must tick off all items on the quick checklist and fill out their details towards the back of this Installation and
User Manual.
• Isolation switch and wall plate required. To suit the location and décor, these parts must be supplied by the installing electrician.
Warranty Procedure*
• For online warranty bookings visit: www.domuslighting.com.au/warranty
• For technical advice call: (02) 9554 9600 (Monday to Friday from 9am to 5pm EST)
• *Warranty only available within Australia
POWER OUTLETS OR FIXED WIRING MUST BE INSTALLED BY A LICENSED ELECTRICIAN
To protect your customer's WARRANTY please READ PAGE 2 of this booklet prior to the installation of this product.
Power:
26W
Blade pitch:
14.5º
29-31 Richland St. Kingsgrove. Sydney NSW 2208 Australia
Phone: 02 9554 9600 | Fax: 02 9554 9433
enquiries@domuslighting.com.au | www.domuslighting.com.au
Type of motor:
DC
Airflow:
14,968m
HOVER-56-LIGHT
Installation Manual
Date: November 18, 2022 10:25 am
Fan Weight:
/h
3
5Kg
1
Advertisement
Table of Contents

Related Manuals for Domus HOVER-56


Summary of Contents for Domus HOVER-56
- Page 1 Date: November 18, 2022 10:25 am Thank you for purchasing your new HOVER-56 ceiling fan, Please take the time to read and understand the instruction sheet below. Failure to do so may void warranty. The fan is suitable for installation indoors and indoor coastal areas, including a pergola or outside in a sheltered area protected from wind and rain.
- Page 2 DO NOT USE SOLID-STATE WALL CONTROLLERS. Neither leading nor lagging edge controllers will give satisfactory performance. Wall controls must only be types approved for use by Domus Lighting. b. The fan, light and bracket must be earthed.
- Page 3 FROM THE CEILING ONCE INSTALLED UNLESS INSTRUCTED TO DO SO. 1. Do not attempt to operate the fan or light (if fitted) with any wall control that is not approved by Domus Lighting for use with its fans DO NOT use solid state controllers. The use of unapproved controllers may void your warranty.
- Page 4 Installation Manual Date: November 18, 2022 10:25 am HOVER-56 Assembly Please refer to page 6 for mounting to the ceiling POWER OUTLETS OR FIXED WIRING MUST BE INSTALLED BY A LICENSED ELECTRICIAN To protect your customer’s WARRANTY please READ PAGE 2 of this booklet prior to the installation of this product.
- Page 5 Installation Manual Date: November 18, 2022 10:25 am HOVER-56-LIGHT Assembly Please refer to page 6 for mounting to the ceiling POWER OUTLETS OR FIXED WIRING MUST BE INSTALLED BY A LICENSED ELECTRICIAN To protect your customer’s WARRANTY please READ PAGE 2 of this booklet prior to the installation of this product.
-
Page 6: Ceiling Mount
Installation Manual Date: November 18, 2022 10:25 am Ceiling Mount Fig. 1 Fig. 2 Ø25mm Ø1-1/8” Fig. 3 Timber Hanger Noggin bracket Screw Fig. 4 Fig. 5 Please note the shape of receiver may vary. The one shown is No Light model POWER OUTLETS OR FIXED WIRING MUST BE INSTALLED BY A LICENSED ELECTRICIAN To protect your customer’s WARRANTY please READ PAGE 2 of this booklet prior to the installation of this product. - Page 7 • Use REVERSE anytime to change direction. Depending on speed it may take a little while for the fan to stop and change direction. • *Only applies to fans fitted with light. Not all fans can be fitted with a light. • *Please note the CCT function ONLY work with compatible Domus Lighting ceiling fans equipped with Colour Changing Technology (CCT) LED lights.
- Page 8 Installation Manual Date: November 18, 2022 10:25 am Control Module And Handset Programming Explanation *HANDSET PROGRAMMING ONLY NEEDED WHEN GETTING NEW HANDSET MAKE SURE THE ISOLATION SWITCH IS ON OR REMOTE CONTROL WILL NOT WORK Handset Battery Installation/Replacement Open the battery compartment by pushing the cover away from you. UNWRAP THE PLASTIC FROM AROUND NEW BATTERIES (if wrapped).
-
Page 9: Advance Features
Installation Manual Date: November 18, 2022 10:25 am Advance Features POWER-ON-LIGHT (POL) Selection (Fans fitted with light only) When POL is ON the light will turn on when power is applied to the receiver (via an external switch or after a power failure). This allows the fan light to be turned on/off by the wall switch. - Page 10 Installation Manual Date: November 18, 2022 10:25 am Attaching an extension rod and removing fan Fig. 1 ≥2.1m AU/NZ Fig. 2 Please note the shape of receiver may vary. The one shown is No Light model. Fig. 3 Fig. 4 Fig.
- Page 11 Installation Manual Date: November 18, 2022 10:25 am Attaching an extension rod and removing fan Fig. 6 Fig. 7 Fig. 8 Please note the shape of receiver may vary. The one shown is No Light model. Fig. 9 POWER OUTLETS OR FIXED WIRING MUST BE INSTALLED BY A LICENSED ELECTRICIAN To protect your customer’s WARRANTY please READ PAGE 2 of this booklet prior to the installation of this product.
-
Page 12: Replacing The Led Light
Installation Manual Date: November 18, 2022 10:25 am Replacing the LED light Fig. 1 Fig. 2 Fig. 2 Fig. 3 Fig. 4 POWER OUTLETS OR FIXED WIRING MUST BE INSTALLED BY A LICENSED ELECTRICIAN To protect your customer’s WARRANTY please READ PAGE 2 of this booklet prior to the installation of this product. -
Page 13: Trobleshooting
Installation Manual Date: November 18, 2022 10:25 am Trobleshooting Fan will not start • Check 240Volts is available at terminal block. • Check wire connections in the wall switch and terminal blocks, ensure all wires are making proper contact. • Check isolation switch is “on”. Fan is not responding to the remote control •... -
Page 14: General Maintenance
Installation Manual Date: November 18, 2022 10:25 am General Maintenance Changing Remote Batteries: - Batteries used in Handsets will weaken over time and should be replaced every 6 months. Batteries removed from the handset should be disposed of properly and kept out of reach of children. * Before maintenance ensure fan is switched off at the isolation switch or circuit breaker * Cleaning the Motor Housings: - Motor housings should be cleaned every 3 to 4 months to avoid build up of dust. - Page 15 Installation Manual Date: November 18, 2022 10:25 am Summer/Winter Modes FORWARD (Summer) Mode Ceiling fans are an environmentally smart choice to assist with cooling and warming your home. In FORWARD (Summer) mode your ceiling fan will spin to push air down the centre of the fan producing a cooling breeze. The direction the fan will spin in FORWARD (Summer) when viewed from underneath will be anti-clockwise.
- Page 16 Electricians make sure everything on this checklist is ticked off before you leave the installation site. If you have trouble installing our product please refer to the trouble shooting section on page 13 first then phone Domus Lighting on (02) 9554 9600 (open 9am to 5pm EST on Monday to Friday).
-
Page 17: Customer Details
Installation Manual Date: November 18, 2022 10:25 am Proof of installation Fill out the details below and keep this manual. You will need to present your product information, installing electricians license number and proof of purchase for warranty claims. Customer Details Customer Name: _______________________________________________________________________ Installation Site Address: ___________________________________________________________________ Installing Electrician Details... -
Page 18: Warranty Terms And Conditions
Please note carefully - If the product is found to be free of defects or the product is not functioning properly as a result of faulty installation or lack of maintenance then Domus Lighting Pty Ltd or its service agent reserve the right to charge a service fee to rectify the reported problem.
Need help?
Do you have a question about the HOVER-56 and is the answer not in the manual?
Questions and answers