
Related Manuals for Hisense DHGA8013L


Summary of Contents for Hisense DHGA8013L
- Page 1 USER’S OPERATION MANUAL Before operating this unit, please read this manual thoroughly, and retain for future reference. English...
- Page 2 The following symbols are used throughout the manual and they have the following meanings: Information, advice, tip, or recommendation Warning – general danger Warning – danger of electric shock Warning – danger of hot surface Warning – danger of fire It is important that you carefully read the instructions.
-
Page 3: Table Of Contents
TABLE OF CONTENTS SAFETY PRECAUTIONS INTRODUCTION 12 DESCRIPTION OF THE DRYER 13 Technical information 14 Control unit PREPARING 16 INSTALLATION AND CONNECTION 16 Selecting the room THE DRYER 19 Adjusting the dryer feet BEFORE FIRST 20 Draining the condensate 21 Connecting to the power mains 22 Moving and transport after installation 23 Ionizer system 24 BEFORE USING THE APPLIANCE FOR THE FIRST TIME... -
Page 4: Safety Precautions
Keep the instruction manual handy, near the dryer. Instructions for use are available through Hisense customer service centers. Your dryer is intended solely for household use. If the... - Page 5 Follow the instructions for correct installation of the Hisense dryer and connection to the power mains (see chapter »INSTALLATION AND CONNECTION«). All and any repairs or maintenance tasks on the dryer should only be done by trained experts. Unprofessional repair may result in an accident or major malfunction.
- Page 6 In case of incorrect dryer connection, incorrect use, or servicing by an unauthorized person, the user shall bear the cost of any damage as such damage shall not be covered by warranty. Always use the ducts or hoses supplied with the dryer. Install the dryer in a room with adequate ventilation and a temperature between 10°C and 25°C.
- Page 7 The appliance may not be in contact with a wall or adjacent furniture. After installation, let the dryer rest still for 24 hours before using it. If the dryer has to be laid down on one of the sides during transport or servicing, place it with its left side, viewing from the appliance front, downwards.
- Page 8 Before moving the dryer or before storing it in a non-heated room during the winter, the condensate tank has to be emptied. Clean the dryer filters after each drying cycle. If you have removed the filters, replace them before the next drying cycle.
- Page 9 The dryer is not intended for use by persons (including children) with physical or mental impairments, or persons with lacking experience and knowledge. These persons should be instructed about the use of the dryer by a person responsible for their safety. The warranty does not cover consumables, minor deviations in colour, increased noise that results from appliance age and which does not affect the functionality of...
- Page 10 The dryer is made in compliance with all relevant safety standards. This dryer may be used by children aged 8 years and above and by persons with reduced physical, sensory or mental capabilities or lack of experience and knowledge, but only if they are supervised during the use of the appliance, if they have been provided relevant instructions regarding safe use of the dryer, and if they understand the hazards...
- Page 11 SAFETY Only use the dryer to dry laundry that was washed with water. Do not dry any laundry that was washed or cleaned with flammable cleaners or substances (such as gasoline, trichloroethylene etc.) as this may result in an explosion. If you have cleaned your clothes with industrial cleaners or chemical substances, do not dry them in the dryer.
-
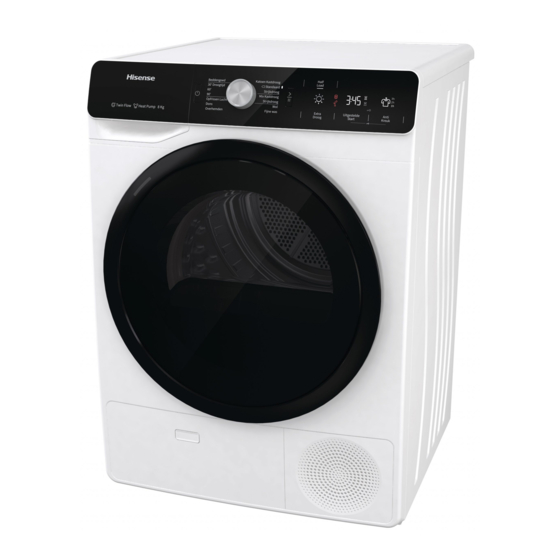
Page 12: Description Of The Dryer
DESCRIPTION OF THE DRYER FRONT Condensate tank On/off button Programme selector knob Start/pause button Control unit Door Net filter Air vent Heat pump filter 10 Rating plate BACK Power cord Condensate discharge hose Adjustable feet... -
Page 13: Technical Information
TECHNICAL INFORMATION (DEPENDING ON THE MODEL) Rating plate with basic information about the dryer is fitted on the front wall of the dryer door opening (see chapter »DESCRIPTION OF THE DRYER«). Width 600 mm Height 850 mm Dryer depth (a) 625 mm Depth with door closed 653 mm... -
Page 14: Control Unit
CONTROL UNIT ON/OFF BUTTON PROGRAMME START/PAUSE BUTTON Switching the dryer on and SELECTOR KNOB Use this button to start or off. 2a The light next to the stop the programme. selected drying programme Button lighting upon power on. is lit. Upon start-up or during pause, the button light will flash;... - Page 15 EXTRA DRY START DELAY CHILD LOCK symbol Lighting of the symbol Option to set a start delay lighting when the function is selected Press the positions 8+10 and hold them for 3 seconds. HALF LOAD ANTI CREASE Lighting of the symbol and anti-crease time.
-
Page 16: Installation And Connection
INSTALLATION AND CONNECTION Remove all packaging. When removing the packaging, make sure not to damage the dryer with a sharp object. SELECTING THE ROOM 10 cm 5 cm 10 cm The dryer may not be in contact with a wall or adjacent furniture. For optimum dryer operation, we recommend observing the clearance from the walls as indicated in the figure. - Page 17 DRYER PLACEMENT If you also have a Hisense dryer of corresponding (same) dimensions, it can be placed on top of the Hisense washing machine; in this case, vacuum feet must be used. Alternatively, the dryer can be placed next to the washing machine (figures 1 and 3).
- Page 18 Do not place the dryer behind lockable or sliding door, or door with a hinge on the opposite side of the dryer door hinge. Install the dryer in such way that the door can always be freely opened. Do not place the dryer on a carpet with long fibres as this may impede air circulation. 90°...
-
Page 19: Adjusting The Dryer Feet
ADJUSTING THE DRYER FEET Level the dryer in longitudinal and traverse direction by rotating the adjustable feet which allow levelling by +/- 1 cm. Use a spirit level and spanner No. 22. Floor on which the dryer is placed must have a concrete base. It should be clean and dry; otherwise, the dryer may slide. -
Page 20: Draining The Condensate
DRAINING THE CONDENSATE The moisture from the laundry is extracted in the condenser unit and accumulated in the condensate tank. During the drying process, an indicator light (symbol (7) is lit on the display unit) warns when the condensate tank is full and needs to be emptied. To avoid emptying the condensate tank, run the condensate discharge hose located at the back of the appliance directly into a drain. -
Page 21: Connecting To The Power Mains
CONNECTING TO THE POWER MAINS After installation, the dryer should stand still for two hours before it is connected to the power mains; this allows the dryer to stabilize. Connect the dryer to a grounded power outlet. After installation, the wall outlet should be freely accessible. -
Page 22: Moving And Transport After Installation
MOVING AND TRANSPORT AFTER INSTALLATION After every drying cycle, a small amount of condensed water will remain in the dryer. Switch on the dryer and choose one of the programmes, then let the appliance operate for approximately half a minute. This will pump out the remaining water and prevent damage to the dryer during transport. If the dryer cannot be transported in the upright position, tilt it to the left side. -
Page 23: Ionizer System
IONIZER SYSTEM Drying by addition of ions during the drying programme ensures that the clothes are soft and supple, and free from static charge. After the drying programme, the clothes are immediately ready for use, as they mostly do not require ironing. -
Page 24: Before Using The Appliance For The First Time
BEFORE USING THE APPLIANCE FOR THE FIRST TIME Make sure the dryer is disconnected from the power mains; then, open the door by pulling the left side of the door towards you (figures 1 and 2). Before using the dryer for the first time, clean the dryer drum using a soft damp cotton cloth and water (figure 3). -
Page 25: Drying Process, Step By Step
DRYING PROCESS, STEP BY STEP (1 - 6) STEP 1: HEED THE LABELS ON THE LAUNDRY Normal wash; Max. Max. Max. Max. Hand wash Do not Delicates laundry washing washing washing washing only wash temp. temp. temp. temp. 95°C 60°C 40°C 30°C Bleaching... -
Page 26: Step 2: Preparing For The Laundry Drying Process
STEP 2: PREPARING FOR THE LAUNDRY DRYING PROCESS Sort the laundry by type and thickness of the fabric (see PROGRAMME TABLE). Close the buttons and zips, tie any ribbons, and turn the pockets inside out. Place very sensitive clothes in a special-purpose laundry bag. (The special-purpose laundry bag is available as an optional accessory.) Drying laundry made of particularly delicate fabrics that may be deformed is not recommended. - Page 27 DRYING IN A BASKET (DEPENDING ON THE MODEL) Before the first drying cycle, remove the basket and all packaging from the drum. Laundry may only be dried in the basket when using the timed drying programme. (The basket is available for purchase as an optional accessory at the service centre.) Open the dryer door and insert the laundry.
- Page 28 SWITCHING ON THE DRYER Connect the dryer to the power mains by plugging in the power cord. Press the (1) ON/OFF button to switch on the dryer (figure 1). With some models, the dryer drum is lit as well (figure 2). (The light in the dryer drum is not suitable for any other use.) The light in the dryer drum may only be replaced by the manufacturer, a service technician or an authorized person.
- Page 29 LOADING THE DRYER Open the dryer door by pulling the left side of the door towards you (figure 1). Insert the laundry into the drum (after making sure the drum is empty) (figure 2). Close the dryer door (figure 3). Do not insert laundry into the dryer if it has not been wrung or spun (recommended minimum spinning cycle: 800 rpm).
-
Page 30: Step 3: Choosing The Drying Programme
STEP 3: CHOOSING THE DRYING PROGRAMME Choose the programme by rotating the programme selector knob (2) to the left or to the right (depending on the type of laundry and the desired level of dryness). See PROGRAMME TABLE. When you select the drying programme, the light (2a) next to the selected drying programme lights The programme selector knob (2) will not rotate automatically during operation. - Page 31 PROGRAMME TABLE Programme Max. Programme description Dryness levels load Cotton Storage 8 kg Use this programme for thicker non-sensitive cotton (Cupboard dry) laundry. After drying, it will be dry and ready to be stored in the cupboard. Standard* 8 kg Use this programme for thicker non-sensitive cotton laundry of approximately the same thickness.
- Page 32 Programme Max. Programme description Dryness levels load Bedding 5 kg Use this programme for larger items. When the programme is complete, they will be dry. Adjusted drum rotation prevents the laundry from tangling. * Testing programme according to EN 61121 If your laundry is not dried to the desired dryness level, use extra functions or use a more suitable programme.
-
Page 33: Step 4: Selecting Extra Functions
STEP 4: SELECTING EXTRA FUNCTIONS Activate/deactivate the function by pressing the desired position (before pressing the (3) START/ PAUSE button). Adjust the settings by pressing the relevant function button (before pressing the (3) START/PAUSE button). Functions that can be changed or adjusted with the selected drying programme are partly lit (dimmed). - Page 34 START DELAY Desired time when the drying programme should start can be set in advance, which allows more flexibility. Press the position (8) START DELAY to choose from 0 to 6 in 30-minute steps, and from 6 to 24 hours in 1-hour steps (8a) of start delay; when you press the (3) START/PAUSE button, the selected time is displayed.
- Page 35 ANTI CREASE If you do not intend or cannot remove the laundry from the dryer immediately after the completion of the drying programme, we recommend using the (10) ANTI CREASE function which has to be selected before the start of the drying process. Press on the position (10) ANTI CREASE to choose between 1h, 2h, and 3h (10a) or deactivating this function.
- Page 36 CHILD LOCK To activate or deactivate the child lock, press the positions (8) START DELAY and (10) ANTI CREASE simultaneously and hold them for at least 3 seconds until the symbol (9) lights up or goes off, respectively. If the child lock is activated, programme or additional functions cannot be changed.
- Page 37 EXTRA FUNCTION TABLE Programme Cotton Storage • • • • (Cupboard dry) Standard* • • • • Iron • • • • (Moist for ironing) Mix (Mixed laundry/Synthetics) Storage • • • Iron • • • Wool Delicates • • •...
-
Page 38: Step 5: Starting The Drying Programme
STEP 5: STARTING THE DRYING PROGRAMME Press the button (3) START/PAUSE. STEP 6: END OF THE DRYING PROGRAMME At the end of the drying programme, »End« will appear on the display unit , the two red indicator lights will light up, and the (3) START/PAUSE button light and ANTI CREASE (10a) time indicator, if activated or selected, will flash. -
Page 39: Interruptions And Changing The Programme
INTERRUPTIONS AND CHANGING THE PROGRAMME INTERRUPTIONS Interrupting the programme process Press the (3) START/PAUSE button to pause/resume a programme. To stop and cancel the drying programme, press the (3) START/PAUSE button and hold it for 3 seconds. The selected programme will stop, and the dryer will start to cool down. Cooling down time depends on the selected programme. - Page 40 ADDING LAUNDRY AFTER THE START OF THE PROGRAM Open the dryer door and press the (3) START/PAUSE button. Insert the laundry and press the button (3) START/PAUSE. When loading the laundry, make sure you do not burn yourself when you open the dryer door.
-
Page 41: Maintenance & Cleaning
MAINTENANCE & CLEANING Before cleaning, make sure to switch off the dryer and disconnect it from the power mains (unplug the power cord from the outlet). The dryer is fitted with a filtering system consisting of several filters that prevent any impurities from entering the heat exchanger system. -
Page 42: Cleaning The Net Filter In The Door
CLEANING THE NET FILTER IN THE DOOR Clean the net filter after each drying cycle. Open the filter housing. Pull out the net filter. Gently scrape the filter to remove the lint, i.e. the lining of fibres and threads, with your hand or with a cloth. -
Page 43: Cleaning The Heat Pump Filter
CLEANING THE HEAT PUMP FILTER During cleaning, some water may be spilled. It is therefore recommended to place an absorbent cloth on the floor. Open the outer cover. Hold the levers on the inside cover and rotate them upwards. Remove the inside cover. -
Page 44: Cleaning Of The Heat Exchanger
CLEANING OF THE HEAT EXCHANGER Do not touch the inner metal parts of the heat exchanger with bare hands. Danger of injury on sharp parts. Use appropriate protection gloves when cleaning the heat exchanger. Incorrect cleaning of the metal fins of the heat exchanger can permanently damage the tumble dryer. -
Page 45: Emptying The Condensate Tank
EMPTYING THE CONDENSATE TANK Empty the condensate tank after each drying cycle. If the condensate tank is full, the drying programme will be paused automatically. Symbol (7) will light up on the display unit, indicating that the condensate tank should be emptied. -
Page 46: Cleaning The Dryer
CLEANING THE DRYER Always disconnect the dryer from the power mains before cleaning. Clean the dryer exterior using a soft damp cotton cloth. Do not use any solvents or cleaning agents that could damage the dryer (please observe the recommendations and warnings provided by the manufacturers of the cleaning agents). Wipe all parts of the dryer with a soft cloth until dry. -
Page 47: Troubleshooting
TROUBLESHOOTING WHAT TO DO ...? Disturbances from the environment (e.g. the power grid) may result in various error reports (see TROUBLESHOOTING TABLE). In such case: • Switch off the dryer and wait at least one minute. • Switch on the dryer and repeat the drying programme. •... -
Page 48: Troubleshooting Table
TROUBLESHOOTING TABLE Problem/error Cause What to do? The machine will not • The main switch is not • Check whether the main switch is on. start. switched on. • There is no voltage in the • Check the fuse. power outlet. •... - Page 49 Problem/error Cause What to do? Laundry not dried • Filters are not clean. • Clean the filters (see chapter or drying takes too »CLEANING AND MAINTENANCE«). long • Dryer is placed in a closed • Make sure there is adequate supply of room;...
- Page 50 Problem/error Indication on the display unit What to do? and description of error System overheating Clean the filter. See chapter »CLEANING AND MAINTENANCE/Cleaning the net filter in the door« or call a service technician. E6, E7, E8 Control unit failure Disconnect the tumble dryer from the power supply.
-
Page 51: Servicing
In such cases, the costs of repair shall be charged to the user. TYPE: SP15/XXX MODEL: XXXXXX/X Art.No.: XXXXXX Ser.No.: XXXXXXXX IPX4 220-240 V ~ XX Hz XX A X kg Pmax.: XXXX W RXXXX/XXX kg Additional information, equipment and accessories for maintenance can be obtained through Hisense customer service centers. -
Page 52: Tips For Drying And Economic Use Your Dryer
TIPS FOR DRYING AND ECONOMIC USE YOUR DRYER The most economical way of drying is to dry the recommended amount of laundry in each batch (see PROGRAMME TABLE). Drying laundry made of particularly delicate fabrics that may be deformed is not recommended. Use of conditioner in the washing cycle is not necessary as the laundry is soft and smooth after drying in the dryer. -
Page 53: Disposal
DISPOSAL Packaging is made of environmentally friendly materials that can be recycled, disposed of, or destroyed without any hazard to the environment. To this end, packaging materials are labelled appropriately. The symbol on the product or its packaging indicates that the product should not be treated as normal household waste. -
Page 54: Typical Consumption Table
TYPICAL CONSUMPTION TABLE The table lists the values for drying time and power consumption for drying of a test batch of laundry with various spinning rpm in the washing machine. SPK A A+++ Programme 8 kg Cotton Standard Total 1000 1,42 Partial 1400... - Page 55 LOW STANDBY MODE If you do not run a programme or do anything else after switching on the dryer, the dryer will switch off automatically after 5 minutes to save energy. Indicator light on the (3) START/PAUSE button will flash. The display will be reactivated if you rotate the programme selector knob or press the (1) ON/ OFF button or open the dryer door.
- Page 57 PRODUCT FICHE according to EU-Regulation No. 392/2012 Legend Model XXXXXX Condenser tumble dryer YES=YES; NO=NO Vented tumble dryer YES=YES; NO=NO Automatic tumble dryer YES=YES; NO=NO »EU Ecolabel award« Regulation (EC) No 66/2010 YES=YES; NO=NO Energy consumption of the standard cotton programme at full X,XX load (E ) [kWh]...
- Page 60 SP15 L1 ADVANCED HP ND A+++ en (09-21)
Need help?
Do you have a question about the DHGA8013L and is the answer not in the manual?
Questions and answers