Willow WS90DFBL Instruction Manual

Willow WS90DFBL Instruction Manual

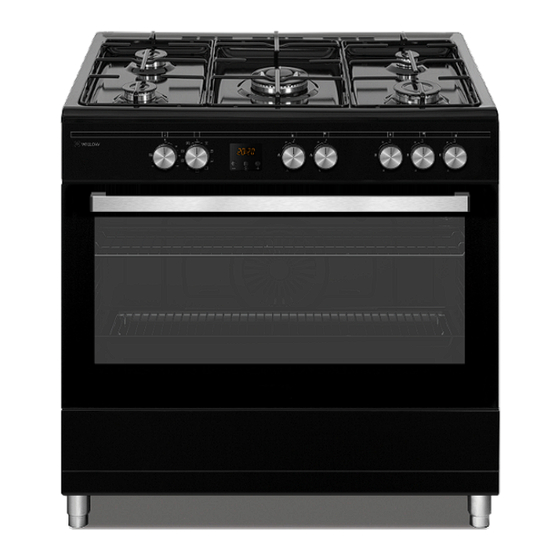
90cm dual fuel range cooker

Advertisement

Instruction manual
90cm Dual Fuel
Range Cooker
WS90DFBL
WS90DFSS

Advertisement

Table of Contents
loading
Need help?

Need help?

Do you have a question about the WS90DFBL and is the answer not in the manual?

Questions and answers

Subscribe to Our Youtube Channel

Summary of Contents for Willow WS90DFBL

  • Page 1 Instruction manual 90cm Dual Fuel Range Cooker WS90DFBL WS90DFSS...
  • Page 2: Table Of Contents

    Contents Safety Warnings ..........................4 Unpacking ............................. 7 Product Overview ......................... 8 The Hob ..................................8 Control Panel ................................8 Timer/Programmer Display...........................9 Oven ................................... 10 Setting the Clock ........................11 Before Using the Hob ......................... 12 Lighting the Hob ......................... 12 Flame Failure Safety Feature ..................... 13 If the Burner Does Not Light ......................
  • Page 3 Hints and Tips ..........................29 Removing the Door Glass ......................30 Replacing the Oven Lamps ......................30 Installation ..........................31 Adjusting the Feet ........................32 Moving the Cooker ........................32 Stability Chain ..........................32 Ventilation Requirements ......................33 Gas Installation ........................... 33 Installation and Service Regulations ..................
  • Page 4: Safety Warnings

    Safety Warnings IMPORTANT SAFETY INSTRUCTIONS READ CAREFULLY AND KEEP FOR FUTURE REFERENCE • This appliance must be installed by a qualified Gas Safe registered engineer. The manufacturer is not responsible for any damage caused by incorrect installation. • Check whether there is any damage to the appliance after you have unpacked it.
  • Page 5 • Prolonged intensive use of the appliance may call for additional ventilation, for example opening of a window, or more effective ventilation, for example increasing the level of mechanical ventilation where present. • This appliance can be used by children aged from 8 years and above and persons with reduced physical, sensory or mental capabilities or lack of experience and knowledge if they have been given supervision or instruction concerning use of the appliance in a safe way and...
  • Page 6 • Take care when handling parts with glass, knocks, chips, heavy handling and dropping could cause the glass to shatter. • The glass doors use toughened glass and are designed to break into many ‘nugget’ size pieces if it breaks. These pieces will still have sharp edges, please handle broken glass with care.
  • Page 7: Unpacking

    Thank you on the purchase of your new Dual Fuel Range Cooker. You must read this manual in order to fully understand how to operate it correctly. This unit MUST be installed by a competent and registered engineer (Gas Safe in the UK). Please allow the installer to view the installation section of this manual.
  • Page 8: Product Overview

    Product Overview The Hob Standard Burner (75 mm) Multi Ring Burner (middle 60mm, outer 130mm) Small Burner (55 mm) Large Burner (100 mm) Control Panel Oven Thermostat indicator Oven Temperature Control Oven Programme Control 3 button Digital Timer Front left Hob Control Back Left Hob Control Middle Multi Ring Hob Control Back Right Hob Control...
  • Page 9: Timer/Programmer Display

    Timer/Programmer Display Auto Cook Symbol + Button Manual Cook Symbol Option Button Time Display - Button Timer Symbol...
  • Page 10: Oven

    Oven Control Panel Hob Controls Wire grill tray Deep Grill Tray ** Oven Door Oven Handle Lower Cabinet Door Plastic Legs Oven Lamp Grill ** Not included with this model NOTE: your model may have a different number of shelves to illistration. The inside surface of storage compartment may be hot during use.
  • Page 11: Setting The Clock

    Setting the Clock Your cooker has a 24 hour digital clock that must be set before you can use the left bottom oven. When you switch your cooker on for the first time the number in the display will be flashing. Press the Option button.
  • Page 12: Before Using The Hob

    Before Using the Hob Before using your new hob, please: • Read this manual fully taking special note of the ‘Safety Warnings’ section. • Make sure the cooker is connected to the mains supply so that the ignition circuit will work. This appliance is for cooking purposes only.
  • Page 13: Flame Failure Safety Feature

    Flame Failure Safety Feature The flame supervision device (FSD) probe cuts off the gas supply to the burner within one minute if the flame is extinguished. Gas will flow out of the burner until the FSD cools down and activates, so you may notice the smell of gas, this is normal.
  • Page 14: Cookware Guidelines

    Cookware Guidelines To get the best out of your hob, follow these simple suggestions: • Use saucepans with thick flat bottoms. Food in a saucepan with an uneven bottom will take longer to cook. • Do not use large saucepans or frying pans that overlap the edges of your hob as this can deflect heat onto your worktop and damage the surface, and may also cause a hazard.
  • Page 15: Using The Oven

    Using the Oven First Time Use of the Oven Ensure that nothing has been left in the oven and that the room is well ventilated. Remove any insert cards or plastic bags. Before connecting the power, use a damp cloth to carefully wipe the inner cavity wall and housing. Clean all the detachable parts in hot, soapy water before using.
  • Page 16: Replacing The Anti-Tilting Oven Shelf

    Function Description Grill The oven's light will turn on. This function is great for browning and fast finishing of meals. Grill with Fan The oven’s light will turn on and the top grill will switch on. This function will turn element grill full on whilst the fan circulates the heat.
  • Page 17: Preheating

    Preheating When you need to preheat the oven, we recommend you do so for 10 minutes. For recipes needing high temperatures, e.g. bread, pastries, scones, soufflés etc., best results are achieved if the oven is preheated first. For best results when cooking frozen or cooked chilled ready meals always preheat the oven first, unless the cooking instructions advise you otherwise.
  • Page 18: Cooking With The Grill

    Cooking with the Grill Before using the grill for the first time, switch the grill on for 15 ~ 20 minutes. Ensure that the room is well ventilated as there may be a little smoke and odour upon initial start up (for about 10 mins). This is normal. It is due to the protective substance on the heating elements which protects the cooker from the effects of corrosion during shipping from the factory.
  • Page 19: Grill Shelf Positions

    Grill Shelf Positions On the wall of the inner cavity there are 2 different shelf guide slots in the grill. You can place the shelf at different heights to Guide 2 achieve the best cooking performance Guide 1 depending on the heat of the heating elements and the size of food (make sure that there is a minimum distance of 30 mm between the top of the food and...
  • Page 20: Setting A Timer

    Setting a Timer You can use the Timer/Programmer to set a timer. This will count down from your desired time then sound a buzzer when the time has elapsed. Press the OPTION button once. The timer icon ( ) will start to flash in the display. Now you need to set the time for the timer.
  • Page 21: Setting A Cooking Timer

    Setting a Cooking Timer A cooking timer allows you to set a timer that will switch off the left bottom oven when the timer expires. For example you can switch the bottom left oven to a set temperature and then set the cooking timer for 30 mins. The oven will switch off after 30 mins.
  • Page 22: Setting A Cooking Timer With A Finish Time

    Setting a Cooking Timer with a Finish Time A cooking timer with a finish time allows you to set cooking duration and a finish time. For example you can switch the bottom left oven to a set temperature and then set the cooking duration for 30 mins and set the finish time for 18:30.
  • Page 23 The display will now show the current time plus the cooking time. In this example the current time was 18:00 and the cooking time is 30 mins so the time displayed is 18:30. To adjust the finish time (in this example to 20:00) press the + and - buttons.
  • Page 24: Cleaning And Maintenance

    Cleaning and Maintenance Steam Cleaners must not be used to clean this product. To avoid shock hazard, always disconnect the appliance from the electrical supply. Cooking Part Cleaning Important Trivets/pan supports, • Hot soapy water and nylon scourer. • Always allow hob parts to cool burner caps and enamel completely before cleaning them.
  • Page 25: Burner Parts And Pan Supports

    Burner Parts and Pan Supports You can remove and clean these parts with hot soapy water or non-abrasive detergents. Clean spills regularly before they become burnt on. Do not wash these parts in a dishwasher. After cleaning, check that the burner rings and burner caps are dry before replacing correctly. It is very important to check that the burner rings and burner caps have been correctly positioned.
  • Page 26: Cleaning Instructions

    Cleaning Instructions Before you start cleaning your cooker, please: • Read the cleaning instructions and the ‘Safety Warnings’ sections. • Turn the cooker off at the mains socket. • Allow the cooker to completely cool down before cleaning. • Do not use a steam cleaner. •...
  • Page 27: Cleaning The Inside Of Your Cooker

    Cleaning the Inside of Your Cooker • Do not use abrasive cleaners, cloths or pads to clean the enamel. • Clean the enamel on the inside of the cooker when it has cooled down, using household detergents or an ammonia-based cleaner. You may use an ‘off the shelf’ oven cleaner, if you carefully follow the manufacturers’ instructions.
  • Page 28: Hints And Tips

    Hints and Tips Problem Possible Solutions My burner does not • Check the electricity is switched on. light • Check the gas supply valve is turned on and the gas supply to the house is working. You should hear the gas when you turn a burner on. •...
  • Page 29: Removing The Door Glass

    Removing the Door Glass The glass can be removed from the Grill door for cleaning. • Ensure the door glass has cooled down. • Take care when handling parts with glass, knocks, chips, heavy handling and dropping could cause the glass to shatter. Open the door slightly.
  • Page 30: Installation

    Installation • The cooker must be installed by a competent and Gas Safe Registered Engineer (in the UK) and in compliance with local safety and building regulation safety standards. • The cooker may be located in a kitchen, a kitchen/diner or bed-sitting room in accordance with the latest editions of BS6172, BS5440-2 and BS6891, but not in a room containing a bath or shower.
  • Page 31: Adjusting The Feet

    Adjusting the Feet Using the fitted adjustable feet is MANDATORY. For safety reasons and to ensure adequate ventilation, the cooker chassis MUST NOT sit directly on the floor, a plinth, or other support surface. Your appliance must be level before use. The cooker has 4 levelling feet which can be adjusted by hand.
  • Page 32: Ventilation Requirements

    Ventilation Requirements This appliance is not connected to a combustion products evacuation device. It should be installed and connected in accordance with current installation regulations. Particular attention should be given to the relevant requirements regarding ventilation. The appliance should be installed in a room or space with an air supply in accordance with the latest edition of BS5440-2.
  • Page 33: Gas Connection

    Gas Connection • Only a suitably qualified and Gas Safe Registered Engineer may convert the appliance to a different gas type. • When using Butane (G30) gas a supply pressure of 28 -30 mbar is required. • When using Propane (G31) gas a supply pressure of 37 mbar is required. •...
  • Page 34: Replacement Of Burner Injectors

    Replacement of Burner Injectors Only a suitably qualified and Gas Safe Registered Engineer may change the Hob Injectors. It is illegal to attempt to change the Hob Injectors yourself. Select the injectors to be replaced according to the “Injector Size Table”. To Replace the Hob Injectors •...
  • Page 35: Injector Size Table

    Injector Size Table Natural Gas Burner Injector Values According To The Gas Type. G 30/31 G 20 Destination: GB Gas Category II 2H3+ 28-30/37 mBar 20 mBar Injector 0.850 1.150 Gas Flow Large Burner (Fast) x1 211.00 gr/h 211.00 lt/h (15°C and 1013mbar) Power 2.90...
  • Page 36: Electrical Connection

    Electrical Connection The following installation procedure must be carried out by a competent person. If in doubt consult a qualified electrician. The electrical installation must comply with the IEE Regulations, Building & local By-Laws. The cooker must be connected to the mains supply via a full disconnection switch, with a contact separation of at least 3mm in all poles, correctly fused with a capacity appropriate to that shown on the cooker Rating Plate and incorporated in the fixed wiring in accordance with the latest wiring regulations.
  • Page 37: Energy Saving Tips

    Energy Saving Tips Main Oven • Cook the meals together, if possible. • Keep the pre-heating time short. • Do not elongate cooking time. • Do not forget to turn off the oven at the end of cooking. • Do not open the oven door during cooking. •...
  • Page 38: Product Fiche And Specifications

    Comply with Energy Label Directive Eu 2010/30/EU - Regulation No 65/2014 of ovens according to EN 60350-1 or EN 15181 Comply with EU directive 2009/125/EC - regulation No 66/2014 according to EN 60350-1 or EN 15181 Brand WILLOW Model WS90DFBL / WS90DFSS Free Standing Type of oven Built-in Mass of the appliance(M)(Net weight)kg 59,4...
  • Page 39 Number of Cooking Zones (Hob) Heating Zone(s) - Auxiliary x2 Heating Technology Energy Efficiency Heating Zone(s) - Semi-Rapid x2 Heating Technology Energy Efficiency Heating Zone(s) - Rapid x2 Heating Technology Energy Efficiency 55.5% Heating Zone(s) - Multi Ring x1 Heating Technology Energy Efficiency 55.1% Energy Efficiency of Hob...
  • Page 40 Troubleshooting section of these instructions. Thank you for choosing Willow. Your new product is guaranteed against faults and breakdowns for 24 months. If you still require further assistance, call one of our experts on 01759 487837.
  • Page 41 Declaration of conformance to Disposal product standards This appliance/fitting is marked according to the European directive This appliance conforms to all relavant standards 2012/19/EU on Waste Electrical applicable to domestic appliances sold in the UK and Electronic Equipment (WEEE). By ensuring this product is disposed of correctly, you will help prevent potential negative consequences for the environment and human health, which could otherwise be...
  • Page 42 Contact: Helpline: 01759 487837 www.willowappliances.co.uk...

This manual is also suitable for:

Ws90dfss

Table of Contents

Save PDF