Advertisement
- 1 Package contents
- 2 Hardware Setup
- 3 Using your PC
- 4 Setting up your PC
- 5 Using the touch screen (on selected models only)
- 6 Gestures for the touch screen panel
- 7 Working with Windows
- 8 Start menu
- 9 Windows apps
- 10 Task view
- 11 Snap feature
- 12 Action Center
- 13 Other keyboard shortcuts
- 14 Connecting to wireless networks
- 15 Connecting to wired networks
- 16 Turning your PC off
- 17 Putting your ASUS All-in-One PC to sleep
- 18 Recovering your system
- 19 Recovering your system
- 20 Safety information
- 21 Documents / Resources
Package contents

NOTE:
- If any of the items are damaged or missing, contact your retailer.
- The keyboard, mouse, and power supply illustrations are for reference only. Actual product specifications may vary with territories.
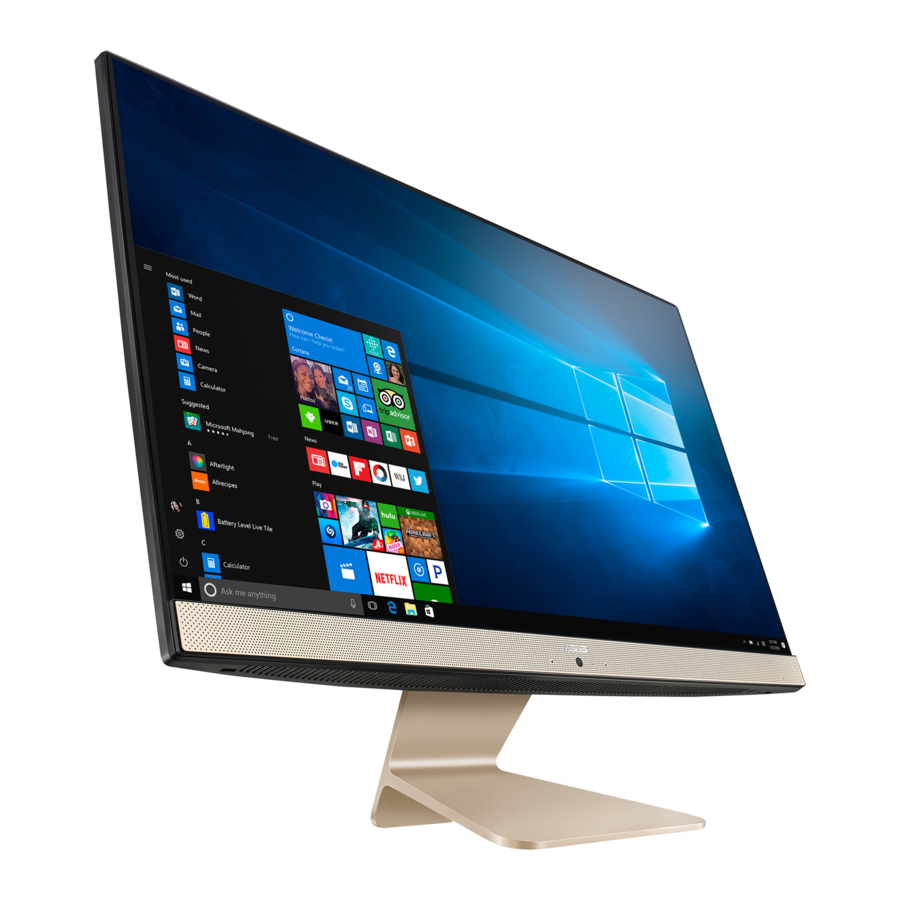
Hardware Setup
Getting to know your PC
Front view

- LCD display panel
The LCD display panel provides excellent viewing features for photos, videos, and other multimedia files.
On selected models, multi-touch is supported. You can operate your ASUS All-in-One PC using touch gestures. - Power indicator
This LED power indicator lights up when the ASUS All-in-One PC is turned on. - Microphone
This built-in microphone can be used for video conferencing, voice narration, audio recording, and multimedia applications. - Camera
The built-in camera allows you to take pictures or record videos using your ASUS All-in-One PC. - Camera indicator
The camera indicator lights up when the built-in camera is in use.
Bottom view

- Audio speakers
The built-in audio speaker allows you to hear audio straight from the ASUS All-in-One PC. Audio features are softwarecontrolled. - Mode button
Touch to switch the display signal source. When switched to HDMI-in, the ASUS All-in-One PC can be used as a standard desktop LCD monitor. - Kensington® security slot
![]()
The Kensington® security slot allows you to secure your ASUS All-in-One PC using Kensington® compatible security products. - USB 2.0 port
![]()
This USB (Universal Serial Bus) port is compatible with USB 2.0 or USB 1.1 devices such as keyboards, pointing devices, flash disk drives, external HDDs, speakers, cameras and printers. - Headphone/Headset/Microphone jack
![]()
This port allows you to connect amplified speakers or headphones. You can also use this port to connect your headset or an external microphone.


Rear view

- Power button
Press this button to turn on your ASUS All-in-One PC. - HDMI input port
This port is for a HDMI (High-Definition Multimedia Interface) connector and is HDCP compliant for HD DVD, Blu-ray, and other protected content playback. - USB 3.1 Gen1 port
![]()
This USB 3.1 Gen1 (Universal Serial Bus) port provides a transfer rate of up to 5 Gbit/s and is backward compatible to USB 2.0. - HDMI output port
![]()
This port allows you to connect your ASUS All-inOne PC to another HDMI-compatible device for file sharing or extending your display monitor. - LAN port
![]()
This 8-pin RJ-45 LAN port supports a standard Ethernet cable for connection to a local network. - Power input
![]()
The bundled power adapter converts AC power to DC power for use with this jack. Power supplied through this jack supplies power to the ASUS All-in-One PC. To prevent damage to the ASUS All-in-One PC, always use the bundled power adapter.


The power adapter may become warm or hot when in use. Do not cover the adapter and keep it away from your body.
Using your PC
Positioning your PC

- Place your ASUS All-in-One PC on a flat surface such as a table or desk.
- Tilt the display to an angle between -5° to 20°.

- Use both hands when setting up your ASUS All-in-One PC.
- Avoid adjusting the display to an angle beyond the recommended values or you may risk damaging the ASUS All-in-One PC.
Setting up your PC
Connecting the wireless keyboard and mouse
- Install batteries into the wireless keyboard and mouse.

- Connect the wireless dongle for keyboard and mouse to a USB port to automatically pair both devices to your ASUS All-in-One PC.

- You can begin using the wireless keyboard and mouse.


NOTE: Reconnect the wireless keyboard and mouse with the wireless dongle if they lose connection. Avoid using either devices alongside other wireless devices. Position the mouse and keyboard at least 20 cm away from other wireless hardware to avoid interference.
Connecting a wired keyboard and mouse
Connect the keyboard and the mouse to the USB ports on the rear panel.

NOTE: The illustrations above are for reference only. Actual hardware and specifications of the optional wired or wireless keyboard and mouse may vary.
Powering on the system
- Connect the AC power cord to the AC/DC adapter.
- Connect the DC power connector into your ASUS All-in-One PC's power (DC) input.
- Plug the AC power adapter into a 100V~240V power source.
- Press the power button.


NOTE: For details on turning off your ASUS All-in-One PC, refer to the section Turning your ASUS All-in-One PC off in Working with Windows® 10.
Using the touch screen (on selected models only)
The touch screen panel of your ASUS All-in-One PC provides excellent viewing features for photos, videos, and other multimedia files on your ASUS All-in-One PC. It also supports the 10-point multi-touch feature that facilitates smoother and more accurate touch gestures allowing you to operate your ASUS All-in-One PC faster and easier.
")
Do not use sharp objects such as scissors or ballpoint pens on the touch screen to prevent dents and scratches which may cause the touchscreen to become unresponsive.
Gestures for the touch screen panel
Gestures allow you to launch programs and access the settings of your ASUS All-in-One PC. Refer to the following illustrations when using hand gestures on your touch screen panel.
NOTE: The following screenshots are for reference only. The touch screen panel's appearance may vary depending on model.
Using touch screen panel gestures on Windows® 10
The gestures allow you to launch programs and access the settings of your ASUS All-in-One PC. The functions can be activated by using the hand gestures on your ASUS All-in-One PC's touch screen panel.
Left edge swipe

Swipe from the left edge of the screen to launch Task view.
Right edge swipe

Swipe from the right edge of the screen to launch Action Center.
Tap/Double-tap

- Tap an app to select it.
- Double-tap an app to launch it.
Press and hold

Press and hold to open the right-click menu.
Zoom in

Spread apart your two fingers on the touch screen panel.
Zoom out

Bring together your two fingers on the touch screen panel.
Finger slide

Slide your finger to scroll up and down and slide your finger to pan the screen left or right.
Drag

- Drag to create a selection box around multiple items.
- Drag and drop an item to move it to a new location.
Working with Windows
Starting for the first time
When you start your ASUS All-in-One PC for the first time, a series of screens appear to guide you in configuring your Windows® 10 operating system.
To start your ASUS All-in-One PC for the first time:
- Press the power button on your ASUS All-in-One PC. Wait for a few minutes until the setup screen appears.
- From the setup screen, pick your region and a language to use on your ASUS All-in-One PC.
- Carefully read the License Terms. Select I accept.
- Follow the onscreen instructions to configure the following basic items:
- Personalize
- Get online
- Settings
- Your account
- After configuring the basic items, Windows® 10 proceeds to install your apps and preferred settings. Ensure that your ASUS All-inOne PC is kept powered on during the setup process.
- Once the setup process is complete, the Desktop appears.
NOTE: The screenshots in this chapter are for reference only.
Start menu
The Start menu is the main gateway to your ASUS All-in-One PC's programs, Windows® apps, folders, and settings.

You can use the Start menu to do these common activities:
- Start programs or Windows® apps
- Open commonly used programs or Windows® apps
- Adjust ASUS All-in-One PC settings
- Get help with the Windows operating system
- Turn off your ASUS All-in-One PC
- Log off from Windows or switch to a different user account
Launching the Start menu
 | Tap the Start button  in the lower-left corner of your desktop. in the lower-left corner of your desktop. |
 | Position your mouse pointer over the Start button in the lower-left corner of your desktop then click it. |
 | Press the Windows logo key  on your keyboard. on your keyboard. |
Opening programs from the Start menu
One of the most common uses of the Start menu is opening programs installed on your ASUS All-in-One PC.
 | Tap the program to launch it. |
 | Position your mouse pointer over the program then click to launch it. |
 | Use the arrow keys to browse through the programs. Press  to launch it. to launch it. |
NOTE: Select All apps at the bottom of the left pane to display a full list of programs and folders on your ASUS All-in-One PC in alphabetical order.
Windows® apps
These are apps pinned on the right pane of the Start menu and displayed in tiled-format for easy access.
NOTE: Some Windows® apps require signing in to your Microsoft account before they are fully launched.

Working with Windows® apps
Use your ASUS All-in-One PC's touch screen, mouse, or keyboard to launch, customize, and close apps.
Launching Windows® apps from the Start menu
 | Tap the app to launch it. |
 | Position your mouse pointer over the app then click to launch it. |
 | Use the arrow keys to browse through the apps. Press  to launch an app. to launch an app. |
Customizing Windows® apps
You can move, resize, unpin, or pin apps to the taskbar from the Start menu using the following steps:
Moving apps
 | Press and hold the app, then drag and drop it to a new location. |
 | Position your mouse pointer over the app, then drag and drop the app to a new location. |
Resizing apps
 | Press and hold the app, then tap  and select an app tile size. and select an app tile size. |
 | Position your mouse pointer over the app and rightclick it, then click Resize and select an app tile size. |
 | Use the arrow keys to navigate to the app. Press  , then select Resize and select an app tile size. , then select Resize and select an app tile size. |
Unpinning apps
 | Press and hold the app, then tap the  icon. icon. |
 | Position your mouse pointer over the app and rightclick it, then click Unpin from Start. |
 | Use the arrow keys to navigate to the app. Press  , then select Unpin from Start. , then select Unpin from Start. |
Pinning apps to the taskbar
 | Press and hold the app, then tap Pin to taskbar. |
 | Position your mouse pointer over the app and rightclick it, then click Pin to taskbar. |
 | Use the arrow keys to navigate to the app. Press  , then select Pin to taskbar. , then select Pin to taskbar. |
Pinning more apps to the Start menu
 | From All apps, press and hold the app you want to add to the Start menu, then tap Pin to Start. |
 | From All apps, position your mouse pointer over the app you want to add to the Start menu and right-click it, then click Pin to Start. |
 | From All apps, press  on the app that you want to add to the Start menu, then select Pin to Start. on the app that you want to add to the Start menu, then select Pin to Start. |
Task view
Quickly switch between opened apps and programs using the task view feature, you can also use task view to switch between desktops.

Launching task view
 | Tap the  icon on the taskbar or swipe form the left edge of the screen. icon on the taskbar or swipe form the left edge of the screen. |
 | Position your mouse pointer over the icon on the taskbar and click it. |
 | Press  + + on your keyboard. on your keyboard. |
Snap feature
The Snap feature displays apps side-by-side, allowing you to work or switch between apps.

Snap hotspots
You can drag and drop apps to these hotspots to snap them into place.

Using Snap
- Launch the app you wish to snap.
- Drag the title bar of your app and drop the app to the edge of the screen to snap.
- Launch another app and repeat the above steps to snap another app.
![]()
or
![]()


- Launch the app you wish to snap.
- Press and hold the
![]() key, then use the arrow keys to snap the app.
key, then use the arrow keys to snap the app. - Launch another app and repeat the above steps to snap another app.
![]()
 key, then use the arrow keys to snap the app.
Action Center
Action Center consolidates notifications from apps and presents a single place where you can interact with them. It also has a really useful Quick Actions section at the bottom.

Launching Action Center
 | Click the  icon on the taskbar or swipe from the right edge of the screen. icon on the taskbar or swipe from the right edge of the screen. |
 | Position your mouse pointer over the icon on the taskbar and click it. |
 | Press  + + on your keyboard. on your keyboard. |
Other keyboard shortcuts
Using the keyboard, you can also use the following shortcuts to help you launch applications and navigate Windows® 10.

Launches Start menu

Launches Action Center

Launches the desktop

Launches the File Explorer

Opens the Share panel

Launches Settings

Launches Connect panel

Activates the Lock screen

Minimizes all currently active windows

Launches Search

Launches Project panel

Opens the Run window

Opens Ease of Access Center

Opens the context menu of the Start button

Launches the magnifier icon and zooms in your screen

Zooms out your screen

Opens Narrator Settings
Connecting to wireless networks
Wi-Fi
Access emails, surf the Internet, and share applications via social networking sites using your ASUS All-in-One PC's Wi-Fi connection.
Connecting Wi-Fi
Connect your ASUS All-in-One PC to a Wi-Fi network by using the following steps:
- Select the
![]() icon from the taskbar.
icon from the taskbar. - Select the
![]() icon to enable Wi-Fi.
icon to enable Wi-Fi. - Select an access point from the list of available Wi- Fi connections.
- Select Connect to start the network connection.
 icon from the taskbar.
 icon to enable Wi-Fi.
NOTE: You may be prompted to enter a security key to activate the Wi-Fi connection.
Bluetooth
Use Bluetooth to facilitate wireless data transfers with other Bluetoothenabled devices.
Pairing with other Bluetooth-enabled devices
You need to pair your ASUS All-in-One PC with other Bluetooth-enabled devices to enable data transfers. Connect your devices by using the following steps:
- Launch Settings from the Start menu.
- Select Devices, then select Bluetooth to search for Bluetooth-enabled devices.
- Select a device from the list. Compare the passcode on your ASUS All-in-One PC with the passcode sent to your chosen device. If they are the same, select Yes to successfully pair your ASUS All-in-One PC with the device.
![]()
or
![]()


NOTE: For some Bluetooth-enabled devices, you may be prompted to key in the passcode of your ASUS All-inOne PC.
Connecting to wired networks
You can also connect to wired networks, such as local area networks and broadband Internet connection, using your ASUS All-in-One PC's LAN port.
NOTE: Contact your Internet Service Provider (ISP) for details or your network administrator for assistance in setting up your Internet connection.
To configure your settings, refer to the following procedures.
Ensure that a network cable is connected between your ASUS All-in-One PC's LAN port and a local area network before performing the following actions.
Configuring a dynamic IP/PPPoE network connection
- Launch Settings.
- Select Network & Internet.
- Select Ethernet > Network and Sharing Center.
- Select your LAN then select Properties.
- Select Internet Protocol Version 4(TCP/IPv4) then select Properties.
- Select Obtain an IP address automatically then select OK.
![]()
or
![]()
NOTE: Proceed to the next steps if you are using PPPoE connection. - Return to the Network and Sharing Center window then select Set up a new connection or network.
- Select Connect to the Internet then select Next.
- Select Broadband (PPPoE).
- Type your User name, Password, and Connection name then select Connect.
- Select Close to finish the configuration.
- Select
![]() on the taskbar then select the connection you just created.
on the taskbar then select the connection you just created. - Type your user name and password then select Connect to start connecting to the Internet.


Configuring a static IP network connection
- Repeat steps 1 to 5 under Configuring a dynamic IP/PPPoE network connection.
- Select Use the following IP address.
- Type the IP address, Subnet mask and Default gateway from your service provider.
- If needed, you can also type the preferred DNS server address and alternate DNS server address then select OK.
![]()
or
![]()


Turning your PC off
You can turn off your ASUS All-in-One PC by doing either of the following procedures:
- Launch the Start menu, then select > Shut down to do a normal shutdown. > Shut down.
- From the log-in screen, select
![]()
or
![]()
- Press
![]() +
+![]() to launch Shut Down Windows. Select Shut Down from the dropdown list then select OK.
to launch Shut Down Windows. Select Shut Down from the dropdown list then select OK. - If your ASUS All-in-One PC is unresponsive, press and hold the power button for at least four (4) seconds until your ASUS All-in-One PC turns off.
![]()


 +
+ to launch Shut Down Windows. Select Shut Down from the dropdown list then select OK.
Putting your ASUS All-in-One PC to sleep
To put your ASUS All-in-One PC to Sleep mode:
- Launch the Start menu, then
![]() select > Sleep to put your ASUS All-in-One PC to sleep.
select > Sleep to put your ASUS All-in-One PC to sleep. - From the log-in screen, select
![]() > Sleep.
> Sleep.
![]()
or
![]()
 select > Sleep to put your ASUS All-in-One PC to sleep.
 > Sleep.

Press  +
+ to launch Shut Down Windows. Select Sleep from the drop-down list then select OK.

NOTE: You can also put your ASUS All-in-One PC to Sleep mode by pressing the power button once.
Recovering your system
Entering the BIOS Setup
BIOS (Basic Input and Output System) stores system hardware settings that are needed for system startup in the ASUS All-in-One PC.
In normal circumstances, the default BIOS settings apply to most conditions to ensure optimal performance. Do not change the default BIOS settings except in the following circumstances:
- An error message appears on the screen during the system bootup and requests you to run the BIOS Setup.
- You have installed a new system component that requires further BIOS settings or update.
Inappropriate BIOS settings may result to instability or boot failure. We strongly recommend that you change the BIOS settings only with the help of a trained service personnel.
Quickly enter the BIOS
To access the BIOS:
- When your ASUS All-in-One PC is off, press the power button for at least four (4) seconds to access the BIOS directly.
- Press the power button to turn on your ASUS All-in-One PC then press <F2> or <Del> during POST.
NOTE: POST (Power-On Self-Test) is a series of software controlled diagnostic tests that run when you turn on your ASUS All-in-One PC.
Recovering your system
Using recovery options on your ASUS All-in-One PC allows you to restore the system to its original state or simply refresh its settings to help improve performance.
- Backup all your data files before doing any recovery option on your ASUS All-in-One PC.
- Note down important customized settings such as network settings, user names, and passwords to avoid data loss.
- Ensure that your ASUS All-in-One PC is plugged in to a power source before resetting your system.
Windows® 10 allows you to do any of the following recovery options:
- Keep my files - This option allows you refresh your ASUS All-inOne PC without affecting personal files (photos, music, videos, documents).
Using this option, you can restore your ASUS All-in-One PC to its default settings and delete other installed apps. - Remove everything - This option resets your ASUS All-in-One PC to its factory settings. You must backup your data before doing this option.
- Go back to an earlier build - This option allows you to go back to an earlier build. Use this option if this build is not working for you.
- Advanced startup - Using this option allows you to perform other advanced recovery options on your ASUS All-in-One PC such as:
- Using a USB drive, network connection or Windows recovery DVD to startup your ASUS All-in-One PC.
- Using Troubleshoot to enable any of these advanced recovery options: System Restore, System Image Recovery, Startup Repair, Command Prompt, UEFI Firmware Settings, and Startup Settings.
Performing a recovery option
Refer to the following steps if you want to access and use any of the available recovery options for your ASUS All-in-One PC.
- Launch Settings and select Update and security.

- Under the Update and security option, select Recovery then select the recovery option you would like to perform.


Safety information
Your All-in-One ASUS All-in-One PC is designed and tested to meet the latest standards of safety for information technology equipment. However, to ensure your safety, it is important that you read the following safety instructions.
Setting up your system
- Read and follow all instructions in the documentation before you operate your system.
- Do not use this product near water or a heated source such as a radiator.
- Be cautious while moving the system to prevent injuries.
- Set up the system on a stable surface.
- Openings on the chassis are for ventilation. Do not block or cover these openings. Ensure that you leave plenty of space around the system for ventilation. Never insert objects of any kind into the ventilation openings.
- Use this product in environments with ambient temperatures between 0˚C and 40˚C.
- If you use an extension cord, ensure that the total ampere rating of the devices plugged into the extension cord does not exceed its ampere rating.
Care during use
- Do not walk on the power cord or allow anything to rest on it.
- Do not spill water or any other liquids on your system.
- When the system is turned off, a small amount of electrical current still remains in the product. Always unplug all power, modem, and network cables from the power outlets before cleaning the system.
- The touch screen requires periodic cleaning to perform at optimal touch sensitivity. Keep the screen clean from foreign objects or excessive dust accumulation. To clean the screen:
- Turn off the system and disconnect the power cord from the wall.
- Spray a small amount of household glass cleaner on the supplied cleaning cloth and gently wipe the surface of the screen.
- Do not spray the cleaner directly on the screen.
- Do not use an abrasive cleaner or a coarse cloth when cleaning the screen.
- If you encounter the following technical problems with the product, unplug the power cord and contact a qualified service technician or your retailer.
- The power cord or plug is damaged.
- Liquid has been spilled into the system.
- The system does not function properly even if you follow the operating instructions.
- The system was dropped or the cabinet is damaged.
- The system performance changes.
Sound Pressure Warning
Excessive sound pressure from earphones or headphones can cause hearing loss or permanent damage to hearing. Increasing the volume and equalizer beyond default levels increases the output voltage and sound pressure produced by the earphones or headphones.
Adapter
- Adapter specifications
Input voltage: 100–240Vac
Input frequency: 50–60Hz
Rating output voltage: 19Vdc - It is recommended that the power socket is in close proximity to the ASUS All-in-One PC.
DC Fan Warning
Please note that the DC fan is a moving part and can cause harm when used improperly. Keep away from the fan when using the product.
Documents / ResourcesDownload manual
Here you can download full pdf version of manual, it may contain additional safety instructions, warranty information, FCC rules, etc.
Advertisement


Need help?
Do you have a question about the V241F and is the answer not in the manual?
Questions and answers